Baking soda and vinegar can help remove light surface rust from sturdy metal items, but they are not the right fix for deep corrosion or delicate finishes. The safest results come from short contact time, gentle scrubbing, thorough rinsing, and immediate drying.
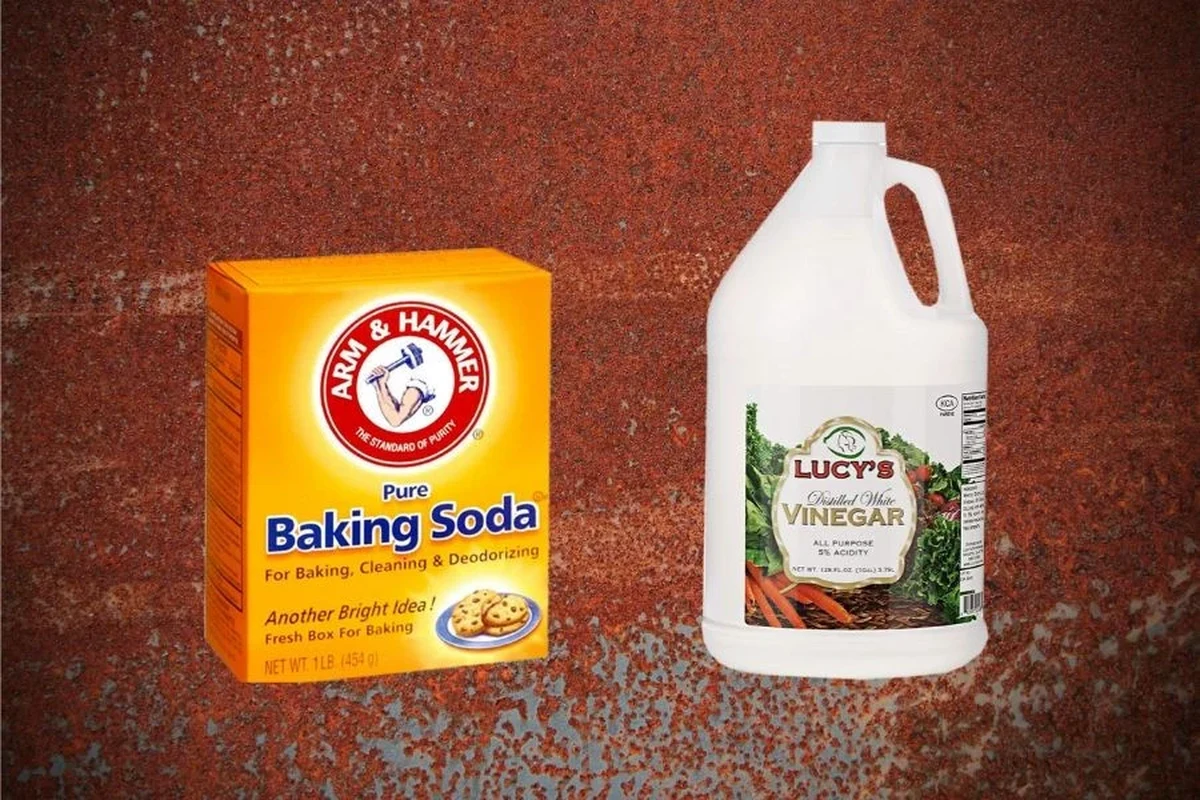
Rust removal with baking soda and vinegar is a simple home-cleaning method that can help with light surface rust on some metal items. It is not a cure-all, but when used carefully it can loosen oxidation, reduce stains, and make small tools or cookware look cleaner again.
- Best use: Light rust on durable tools, pans, grates, and hardware.
- Main limit: Deep pitting, coatings, and delicate metals need extra caution.
- Most important step: Dry the item fully to prevent flash rust.
- Surface care: Test first on cast iron, aluminum, chrome, and painted finishes.
- Practical rule: Use gentle scrubbing and repeat the process instead of forcing it.
What “Rust Removal Baking Soda Vinegar” Can and Cannot Do
This DIY method is best for thin rust on the surface, especially when the rust has not eaten deeply into the metal. It works well as a first pass for kitchen tools, baking trays, grates, and small hardware that only look dull or spotted.
For a broader look at how the two ingredients interact, see our baking soda and vinegar reaction explained simply guide. That reaction is useful to understand, but cleaning power depends on the surface, the rust level, and how long the mixture stays in contact.
Why this DIY method is popular for light surface rust
People like this method because the ingredients are inexpensive, easy to find, and familiar in the kitchen. Baking soda gives gentle scrubbing power, while vinegar helps soften the rusty layer so it lifts more easily.
It also feels practical for baking tools, since many home bakers already keep both ingredients on hand. That makes it a convenient first step before moving to stronger cleaners.
When rust is only on the surface, the goal is usually to remove the orange-brown film without damaging the base metal. If the metal is already rough, flaking, or deeply pitted, this method may improve appearance but not fully restore the item.
When baking soda and vinegar are not the right fix
If rust has spread through the metal, the item may be beyond simple cleaning. Deep pitting, holes, soft spots, or crumbling edges usually mean the corrosion has gone too far for a household paste to solve.
This method is also not ideal for every finish. Painted surfaces, plated coatings, and delicate metals can react badly to acid or abrasion, so test first or use a different cleaner.
Safety notes for metal, coatings, and household surfaces
Always check the material before you start. Vinegar is acidic, and while that helps loosen rust, it can dull some finishes or weaken protective coatings if left too long.
Important
Do not mix this cleaning project with bleach or other household chemicals. Use gloves if your skin is sensitive, work in a ventilated area, and keep the solution away from food-prep surfaces until everything is fully rinsed and dry.
How Baking Soda and Vinegar Work on Rust Stains
Rust is iron oxide, which forms when iron or steel reacts with oxygen and moisture. The cleaning method works by using vinegar to loosen the oxidized layer and baking soda to provide mild abrasion during scrubbing.
The role of baking soda as a mild abrasive and deodorizer
Baking soda is useful because its fine texture can help lift loose rust without being as harsh as steel wool. It also helps neutralize odors, which is handy when cleaning older tools or damp storage items.
In kitchen cleaning, that gentle action is one reason baking soda shows up in many maintenance jobs, from pans to ovens. If you want a related example, our baking soda vinegar cleaning ovens article explains how the same ingredients are often used for baked-on residue.
The role of vinegar as an acid for loosening oxidation
White vinegar contains acetic acid, which can help break down the bond between rust and the metal surface. That is why the rusted area often looks softer or easier to scrub after a short soak.
It is important not to assume more acid always means better results. Too much vinegar exposure can be hard on certain metals and finishes, especially if the item is left wet afterward.
What happens when the two are combined and why timing matters
When baking soda and vinegar meet, they fizz. That fizz is noticeable, but it does not mean the mixture is automatically stronger for rust removal.
In many cases, the best approach is to use vinegar first to loosen the rust, then baking soda as the scrubbing step. Timing matters because the acid needs contact time, while the baking soda is most helpful when the surface is ready to be worked gently.
The fizz from baking soda and vinegar is a gas-producing reaction, but the cleaning result comes mainly from the acid, the abrasion, and the scrubbing action together.
Best Surfaces and Tools for the DIY Rust Removal Method
This method is most useful on sturdy items that can handle a little scrubbing and rinsing. Think of surfaces where a small amount of wear is acceptable if it helps remove light rust.
Common items that respond well: pans, tools, grates, and hardware
Many people use this method on baking trays, sheet pans, grill grates, hand tools, hinges, screws, and other hardware. These items often show surface rust first, especially if they were stored in a humid place.
If the item is part of your baking setup, it is worth cleaning it carefully before rust spreads. A rusty pan can still be functional in some cases, but the finish and performance may keep changing if the metal is not dried and protected afterward.
- Low-cost ingredients
- Good for light surface rust
- Easy to use on small items
- Not strong enough for deep corrosion
- Can damage delicate finishes
- Requires careful drying
Materials to avoid or test first: aluminum, cast iron seasoning, chrome, and painted finishes
Aluminum can discolor or dull when exposed to acids. Cast iron is especially important because vinegar can strip seasoning if it sits too long, which means the pan may need re-seasoning after cleaning.
Chrome and painted finishes should be tested in a hidden spot first. If the coating changes color, clouds, or softens, stop and choose a gentler method.
Useful supplies: soft cloths, non-scratch pads, toothbrushes, gloves, and rinse water
A soft cloth handles light residue, while a non-scratch pad helps on tougher spots without gouging the metal. An old toothbrush is useful for seams, corners, and screw heads where rust likes to hide.
Keep rinse water close so you can stop the acid action once the rust loosens. That small habit often makes the difference between a clean result and a dull, overworked surface.
- Confirm the item is safe to clean with vinegar
- Remove grease, dust, and loose rust first
- Wear gloves if needed
- Set out rinse water and a dry towel
Step-by-Step Rust Removal Baking Soda Vinegar Process
For beginners, the safest approach is to start small and check results often. That keeps you from over-soaking the item or scrubbing harder than the surface can handle.
Prep work: cleaning off grease, dust, and loose rust
Wash the item first if it has oil, food residue, or dust. Rust removal works better on a clean surface because grease can block the vinegar from reaching the oxidized layer.
Use a dry cloth or soft brush to remove loose flakes. If rust is already lifting, do not force it off with sharp tools, since that can scratch the base metal.
Mixing options: paste, soak, or layered application
You can use a baking soda paste for spot treatment, a vinegar soak for removable small items, or a layered method for awkward shapes. The best choice depends on the size of the rusted area and whether the item can safely sit in liquid.
A simple paste usually works best for controlled cleaning. A soak can help with screws, tools, and other removable pieces, but it should be monitored so the metal does not stay wet longer than needed.
Cover the rusted area with white vinegar, or spread a thick baking soda paste over the spot if you need more control.
Allow time for the rust to loosen, then check the surface. Short, repeated sessions are usually safer than one long soak.
Use a cloth, toothbrush, or non-scratch pad to lift the softened rust without digging into the metal.
Wash away the residue, then dry the item completely to reduce flash rust.
Scrubbing technique for light, medium, and stubborn rust spots
For light rust, a soft cloth with baking soda paste may be enough. For medium rust, use a toothbrush or non-scratch pad and work in small circles, checking the metal often.
For stubborn spots, repeat the process instead of pressing harder. Extra force often removes finish before it removes rust, which creates a bigger repair job later.
Rinsing, drying, and immediate post-cleaning care
Rinse thoroughly after scrubbing so no vinegar or gritty residue remains. Then dry the item completely with a towel and, if needed, air-dry it in a warm, low-humidity spot.
This drying step matters because bare metal can start oxidizing again quickly. A clean-looking surface can develop new orange specks if moisture is left behind.
Measurement, Contact Time, and Realistic Results
There is no single exact ratio that works for every item, but a small amount of vinegar or a thick baking soda paste is usually enough for spot cleaning. The right amount depends on rust size, item shape, and how delicate the finish is.
Practical ratios for small stains versus larger rusted areas
For a small stain, start with enough baking soda and a few drops of vinegar to make a spreadable paste. For a larger area, use just enough vinegar to wet the rust without soaking the whole item unnecessarily.
If the item is removable and sturdy, a shallow soak can be useful. If it has joints, coatings, or mixed materials, spot treatment is safer.
How long to let the solution sit before scrubbing
Short contact times are usually best for delicate items. Check after a few minutes, then repeat if needed rather than leaving vinegar on for a long period.
For tougher rust, you may need several rounds. The goal is to loosen oxidation gradually, not to strip the metal aggressively.
What “successful” rust removal looks like versus deep pitting
Success often means the orange-brown layer is gone, the surface feels smoother, and the item looks cleaner overall. Some dark marks may remain if the rust has stained the metal.
Deep pitting is different. If you can feel rough craters or see missing metal, cleaning may improve appearance but not fully restore the surface.
Example scenarios: kitchen tools, baking trays, and bathroom fixtures
On kitchen tools, this method can often clear light rust from handles, edges, or screws. On baking trays, it may improve the surface enough for continued use, though the finish may still look worn.
Bathroom fixtures are trickier because many are plated or coated. If the fixture is chrome or decorative, test first and avoid long vinegar contact.
The rust looks lighter, but the item still feels rough or stained.
That usually means the rust has gone deeper than the surface layer. Repeat a gentle treatment, then decide whether the remaining damage is cosmetic or structural.
Common Mistakes That Make Rust Worse
Most problems come from trying to rush the process. Rust removal is usually safer when it is slow, controlled, and followed by immediate drying.
Overusing vinegar on delicate metals
Vinegar is useful, but too much of it can strip protective finishes or dull certain metals. If the item looks cloudy, discolored, or soft after cleaning, the acid may have been too strong for the surface.
Skipping the drying step and causing new rust to form
Moisture is one of the main reasons rust returns. Even if the rust is removed successfully, leaving the item damp can trigger flash rust within a short time.
Using too much force and scratching the surface
Scratching can make the item look worse and create tiny grooves where moisture collects. Gentle pressure is usually enough once the rust has been loosened.
Assuming the method works the same on every type of corrosion
Not all corrosion is the same. Rust on steel behaves differently from discoloration on aluminum, plating wear on chrome, or seasoning loss on cast iron.
If you are cleaning baking pans or cookware, finish by rinsing, drying, and inspecting the surface before using it with food again. When in doubt, follow the manufacturer’s care instructions for the exact material.
How to Protect the Surface After Rust Removal
Rust removal is only half the job. The surface needs protection afterward so moisture does not start the oxidation process again.
Drying methods that reduce flash rust
Use a towel first, then let the item air-dry completely. For tools or grates, placing them in a dry, warm area can help remove hidden moisture from seams and corners.
Seasoning, oiling, or sealing options by material type
Cast iron usually needs a new layer of seasoning after acid exposure. Other bare metals may benefit from a very light coat of food-safe oil or an appropriate protective finish, depending on how the item is used.
For kitchen equipment, always choose a protection method that matches the material and the manufacturer’s guidance. A coating that works on a tool may not be right for a pan used with food.
Storage habits that help prevent rust from returning
Store metal items in a dry place and avoid sealing them away while they are still damp. Humid cabinets, wet sinks, and closed containers can all encourage rust to come back.
Routine maintenance for baking tools and kitchen equipment
For baking trays, pans, and metal tools, regular washing and full drying help more than occasional heavy cleaning. If you want to understand related kitchen maintenance habits, our apple cider vinegar and baking soda benefits and uses article shows how people often apply these ingredients in other cleaning and care routines.
A quick inspection after each use can catch early rust before it spreads. That is especially helpful for items stored in busy kitchens where moisture, heat, and frequent handling are part of everyday use.
When to Use a Different Rust Treatment or Replace the Item
Sometimes the safest answer is not more scrubbing. If the item is badly damaged, a stronger rust remover, a restoration method, or a replacement may be the better choice.
Signs the rust is too deep for home cleaning
If the metal is flaking, bent, brittle, or full of deep holes, home cleaning will not restore its strength. The same is true when rust keeps returning immediately after drying and treatment.
Situations that call for commercial removers or restoration methods
Large tools, antique hardware, and heavily corroded cookware may need a purpose-made rust remover or professional restoration. Those options can be stronger than vinegar and baking soda, so read the label carefully and follow safety instructions.
Cost-versus-value decision guide for keeping, repairing, or replacing
For a low-cost baking tray or common hand tool, replacement may be easier once rust is deep. For a higher-value item, a careful restoration attempt may be worth the extra time.
Think about the item’s function, safety, and sentimental value. If the rust affects food contact, stability, or structural strength, replacement is often the more practical choice.
Final recap: choosing the safest and most effective rust removal approach
Rust removal baking soda vinegar works best on light surface rust, sturdy materials, and small projects where gentle cleaning is enough. It is a useful first step, but it should be matched to the right surface and followed by careful drying and protection.
For baking tools and kitchen equipment, the safest path is simple: test first, scrub lightly, rinse well, and dry completely. If the rust is deep or the finish is delicate, switch methods early instead of making the damage worse.
Use baking soda and vinegar for light rust on durable items, but avoid relying on it for deep corrosion or delicate finishes. The best result comes from short contact time, gentle scrubbing, and immediate drying.
Frequently Asked Questions
It can help remove light surface rust from some metals. Deep rust or pitting usually needs a stronger method or replacement.
A short soak can help on sturdy removable items, but it is not right for every surface. Test first and avoid long exposure on delicate metals or coatings.
Use caution because vinegar can strip seasoning if left on too long. If you clean cast iron this way, dry it fully and re-season it afterward.
Short contact times are safer, often just a few minutes before checking the result. Repeat as needed instead of leaving the surface wet for a long time.
Rinse the item well, dry it completely, and add protection if the material needs it. This helps prevent flash rust from forming again.
If the metal is pitted, flaking, brittle, or full of holes, the damage is likely too deep for simple DIY cleaning. In that case, consider a commercial remover, restoration, or replacement.
