
How to Use a Banneton for Better Bread Shape and Cleaner Proofing

If you’ve ever shaped a loaf beautifully, only to have it spread on the counter before baking, a banneton can be a small game-changer. This simple proofing basket helps dough hold its shape during the final rise, while also encouraging a more attractive crust pattern.
In bread baking, the banneton is not magic. It’s a tool that works with good shaping, proper flouring, and the right proofing time. Used well, it gives your dough support at the exact moment it needs it most: after bulk fermentation, during the final proof, when the gluten is relaxed and the loaf is most vulnerable to slumping.
A banneton is also called a proofing basket or brotform. It’s usually made from woven rattan or a similar natural material, and it’s designed to cradle shaped dough until baking. One useful way to think about it: the basket is there to protect the loaf’s structure, not to create structure by itself.
A proofing basket, also called a banneton or brotform, is a container that supports dough during its final rise. That support matters because it can help a shaped loaf keep its form long enough to bake with better height and a cleaner finish. If you want a deeper look at basket types and handling, King Arthur Baking’s guide on bannetons, brotforms, and proofing baskets is a useful reference point.
What a Banneton Does in Bread Baking
A banneton does three jobs well:
-
Supports the loaf during final proofing.
Dough naturally relaxes after shaping. The basket helps prevent sideways spread. -
Encourages surface texture.
The spiral or lined pattern can leave a rustic finish on the crust. -
Makes handling easier before baking.
Instead of lifting a soft loaf from a flat bowl, you can invert it cleanly onto parchment or into a Dutch oven.
That last point matters more than many beginners expect. A dough that looks fine on the counter can still collapse if it’s moved too roughly at the wrong stage. The banneton gives you a more controlled transfer.
Before You Start: Tools, Materials, and Choosing the Right Basket
You do not need a huge setup to use a banneton well, but a few basics make the process smoother.
What to have on hand
- Banneton or proofing basket
- Rice flour, all-purpose flour, or a blend
- Dough scraper
- Clean towel or liner, if using one
- Parchment paper, if you bake on a stone or in a Dutch oven
- A proofed, shaped dough ready for its final rise
Choosing size and shape
The two biggest decisions are shape and capacity.
- Round banneton: best for boules, the round country-style loaf
- Oval banneton: best for bâtards, longer loaves with a tapered or batard shape
That shape pairing is worth respecting. If you put a round boule into an oval basket, it may still proof, but the loaf will tend to spread into the basket’s shape rather than its own ideal form.
As for size, choose a basket that fits the dough without crowding it. A basket that is too small can compress the loaf and make it harder to release. A basket that is too large can let the dough spread too much, especially if the dough is soft or high hydration.
A simple sizing guide:
- Small banneton: for smaller loaves, roughly 500 to 750 g dough
- Medium banneton: for standard home loaves, roughly 750 g to 1 kg dough
- Large banneton: for larger loaves, roughly 1 to 1.5 kg dough
For most beginners, the safest choice is a basket that matches the dough weight and loaf style rather than one that feels oversized. If you’re making a round boule, choose a round basket; if you’re making a bâtard, choose an oval one. When in doubt, a slightly snug but not cramped fit is better than a basket that leaves the dough too much room to spread.
Lined vs. bare banneton
A bare banneton gives you the classic basket pattern and is often favored once you’re comfortable with flouring technique.
A lined banneton is more forgiving. The cloth can reduce sticking and make release easier, especially for softer doughs or newer bakers.
Trade-off in plain terms:
- Bare basket: more texture, a more rustic look, slightly more skill required
- Lined basket: easier release, less pattern transfer, often friendlier for beginners
How to Prepare a Banneton Before First Use
Some bannetons arrive ready to use; others need a quick prep before their first loaf. The exact care instructions can vary by manufacturer, but a conservative approach is to make sure the basket is clean, dry, and lightly flour-coated before it ever touches dough. Some bannetons do not need washing before first use, so if the basket looks clean and the maker’s instructions don’t call for washing, you can usually skip that step.
Here’s a simple first-use routine:
- Remove packaging, tags, or labels.
- Check that the basket is clean and fully dry.
- Lightly mist the inside only if the basket seems dusty or needs a little help holding flour.
- Dust the interior with rice flour.
- Work the flour into the grooves or weave.
- Let it dry completely.
- Tap out the excess flour before proofing dough.
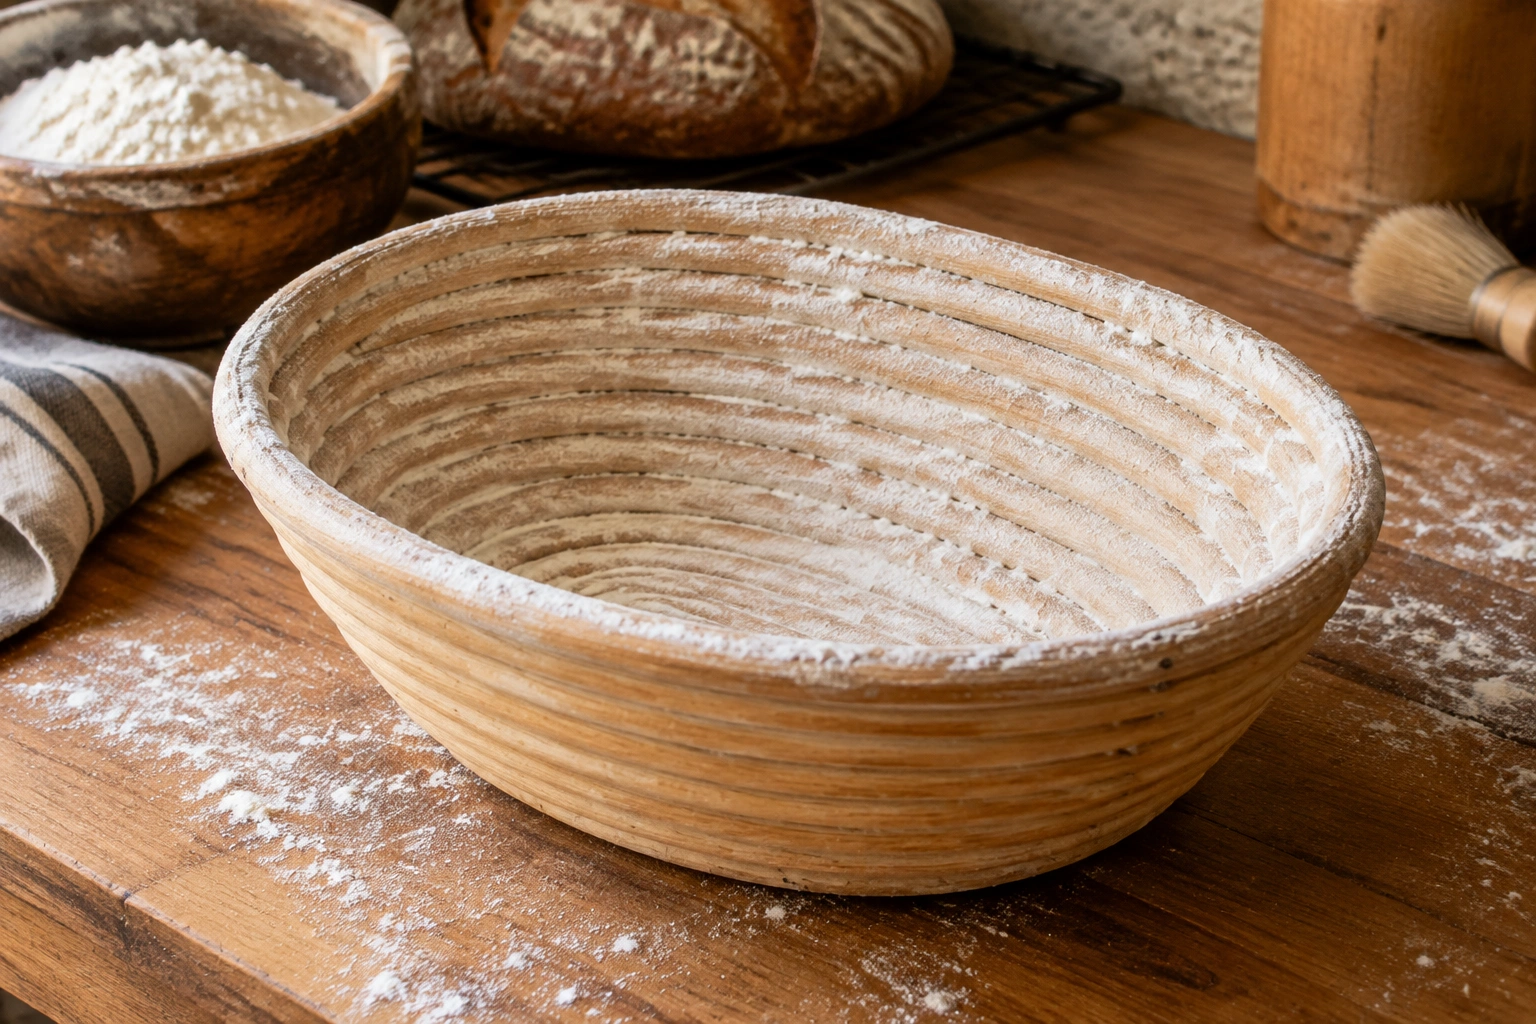
The goal is not to cake the basket in flour. You want a thin, even barrier that helps the dough release without leaving thick, dusty patches on the loaf.
The Best Flour for a Banneton: Rice Flour vs. Wheat Flour
This is one of the most practical decisions you’ll make.
Rice flour
Rice flour is often preferred because it resists absorption and tends to create a better nonstick barrier. That makes it especially useful for soft doughs, wetter doughs, and first-time banneton users.
Wheat flour or all-purpose flour
Wheat flour is common and easy to reach for, but it can absorb moisture from the dough and become pasty. That’s where sticking problems often begin.
A useful compromise
Many bakers use a blend, especially for repeated use. A rice-flour-heavy dusting is usually the safer choice if your main concern is release. If you want the basket pattern but also want less risk, dusting with rice flour gives you a practical margin of error.
In practice, use just enough flour to coat the basket in a thin, visible film. A light dusting is enough; you do not need to bury the basket in flour. Too much flour can leave a thick white coating on the loaf and dull the crust’s appearance.
How to Shape Dough for the Banneton
A banneton works best when the dough is already shaped well. The basket supports the loaf, but it cannot fix weak shaping.
Shape with the final loaf in mind
- Shape a boule for a round banneton
- Shape a bâtard for an oval banneton
The shaping step should create enough surface tension for the dough to hold together during the final proof. That means the outer skin should feel taut, not torn or overly slack.
If the dough has no tension, the banneton will only reveal the problem later. The loaf may spread sideways, lose height, or bake with a flatter profile.
A practical shaping check
After shaping, the dough should hold its shape when moved. It does not need to be stiff, but it should feel organized and supported rather than loose and saggy.
If your dough tears during shaping, pause and let it rest briefly before tightening it again. Rushing this stage often creates a loaf that looks fine in the basket but weakens in the oven.
How to Place Dough into the Banneton Correctly
This is the moment where many beginner mistakes happen, but the process is simple once you know the logic.
Step-by-step workflow
- Dust the banneton lightly and evenly.
- If using a liner, dust the liner too.
- Lift the shaped dough gently with a dough scraper or by hand.
- Place the dough into the basket seam-side up for the final proof in most bread workflows.
- Settle it in without pressing the gas out of the dough.
- If needed, pinch the seam closed lightly so the dough holds together.
Why seam-side up? Because when you later invert the basket, the seam becomes the bottom of the loaf during baking. That gives you a cleaner, more controlled surface for scoring and oven spring.
If your dough is very slack, a liner can make the transfer easier. If you’re using a bare basket, be especially careful not to drag the dough across the floured surface, which can deform the skin.
A useful rule
The dough should sit in the basket, not be forced into it. If you have to press hard to make it fit, the basket is probably too small, or the dough needs a more careful pre-shape.
How Long to Proof Dough in a Banneton
There isn’t one universal timer that fits every dough, because fermentation speed depends on dough temperature, hydration, yeast activity, flour type, and room conditions.
Room-temperature proofing
Room-temperature proofing is faster and can be convenient if you want to bake the same day. For many home bakes, that means roughly 1 to 3 hours, but the dough should be judged by its condition rather than the clock alone. The trade-off is that the dough can move from underproofed to overproofed more quickly, so you need to watch it closely.
Cold proofing
Cold proofing in the refrigerator slows fermentation and gives you more scheduling flexibility. For many loaves, that can mean an overnight rest of about 8 to 16 hours, though some doughs can go longer depending on the formula. It also tends to make the dough firmer, which can make scoring and transfer easier. That’s why many bakers like an overnight cold proof in a banneton.
Which should you choose?
- Room temperature if you want speed and can monitor the dough closely
- Cold proof if you want scheduling flexibility and a dough that handles more cleanly
Cold proofing is often preferred if you bake in a Dutch oven and want a loaf that may be easier to slash and move. Room-temperature proofing can work beautifully too, but it asks for more attention.
How to Tell When the Dough Is Ready to Bake
This is where time matters less than appearance and feel.
A properly proofed loaf in a banneton usually looks slightly expanded, airy, and relaxed without turning fragile. The dough should not look tight and dense, but it also should not appear collapsed or overly puffy.
Readiness cues
- The dough has risen visibly, often by about a third to nearly doubled depending on the dough and proofing method
- The surface looks smooth and slightly domed
- A gentle shake of the basket makes the dough wobble slightly, but it still holds together
- The dough feels lighter and more aerated than when it first went into the basket
- If you touch it lightly, the surface should feel soft and airy rather than tight and rubbery
Signs of underproofing
- Very tight surface
- Strong spring-back when gently touched
- Dense loaf after baking
- Limited oven spring because the dough was still too tense
Signs of overproofing
- Dough looks fragile or overly inflated
- It may spread when unmolded
- The surface can feel weak or overly gassy
- The loaf may collapse or bake flatter than expected
A useful decision rule: if the dough feels like it still has strong resistance, it probably needs more time. If it feels delicate and overly soft, it may be past its best baking point. If the poke test is hard to trust, the wobble test and the overall rise are often more useful for banneton proofing.
How to Turn the Dough Out of the Banneton Cleanly
A clean release is the payoff for good prep, good flouring, and proper proofing.
Step-by-step release
- Place parchment paper or your baking surface nearby.
- Put your hand or a peel over the banneton.
- Invert the basket in one confident motion.
- Let gravity do most of the work.
- Lift the basket straight up.
- If the dough hesitates, give the basket a gentle shake rather than yanking.
If the loaf sticks, do not rip it free. That can deflate the dough or tear the skin. Instead, pause and gently coax it loose by shifting the basket slightly.
If the dough is only slightly stuck, try one small tap, a light side-to-side shake, or a gentle lift-and-settle motion while the basket is still inverted. If needed, you can peel back a tiny edge of the basket or liner to free a stuck spot, but do it slowly so you don’t tear the loaf or flatten it.
This is where rice flour earns its keep. A well-dusted basket usually releases more cleanly, especially after a cold proof.
How to Score and Bake After Removing the Dough
Once the loaf is out, work efficiently but calmly.
- Move it to the baking vessel or parchment
- Score the top with a sharp blade or lame
- Bake promptly while the dough still has good tension

Scoring gives the loaf a controlled place to expand. Without it, the dough may burst unpredictably at the weakest point.
If you’re baking in a Dutch oven, handle the hot vessel carefully and use heat protection. The banneton’s job is finished once the loaf is transferred; now the oven has to do the rest.
Common Mistakes That Cause Sticking, Tearing, or Collapse
Most banneton problems come from a handful of preventable errors.
1. Underflouring the basket
This is the most common sticking issue. If the dough touches bare fibers or weave, it can cling hard enough to tear.
2. Using the wrong flour
All-purpose flour alone often works less reliably than rice flour, especially for wetter doughs.
3. Using a banneton that is not fully dry
Moisture encourages sticking and can also create storage problems later. A damp basket is not ready for dough or for the cupboard.
4. Poor shaping
A weakly shaped loaf spreads, even if the basket is perfect.
5. Overproofing
A dough that has gone too far can lose strength and collapse when unmolded.
6. Forcing the release
A rough unmolding can undo all the careful work you did earlier.
Troubleshooting Banneton Problems
If the dough sticks
- Check whether the basket was dusted evenly
- Use more rice flour next time
- Reduce handling after shaping
- Make sure the basket is completely dry
If the loaf spreads too much
- Shape with more surface tension
- Choose the correct basket size
- Consider a cold proof for a firmer dough
- Make sure the dough is not overproofed
If the crust is heavily dusted with flour
- Use less flour in the basket
- Tap out the excess before adding dough
- Consider a finer, more even dusting method
If the basket is too small
Switching to a larger banneton is often the simplest fix. A cramped loaf has less room to relax and expand, which can make the final shape awkward even when fermentation is correct.
How to Clean, Dry, and Store a Banneton
Good care keeps the basket usable and food-safe.
Cleaning
After use, let the basket dry first, then brush out loose flour and dried bits of dough with a dry pastry brush or stiff clean brush. For cane baskets, that dry-brush routine is usually enough. If a spot is stubborn, wipe it very lightly with a barely damp cloth and then dry it immediately. Avoid soaking the basket, scrubbing it hard, or using soap unless the manufacturer specifically says it’s safe.
Drying
Dry the banneton thoroughly before storing it. That step matters because trapped moisture can lead to odor or mold.
Storage
Store it in a well-ventilated place, ideally where air can circulate around it. Do not stack damp baskets tightly together, seal them in a closed container while wet, or put them away before they are fully dry.
A dry basket is a reliable basket. If it still feels cool or damp to the touch, give it more time before putting it away.
Practical Examples: How Bakers Use a Banneton
For sourdough boule
A round banneton is the natural match. Shape the dough into a tight boule, dust the basket with rice flour, and proof seam-side up. This is the classic use case for a rustic country loaf.
For batard-style loaves
An oval banneton suits longer loaves. The shape encourages the dough to rise in length rather than spread into a round footprint.
For high-hydration dough
Use a linen liner if you’re worried about sticking, or dust the bare basket generously with rice flour. Softer doughs benefit from the extra support.
For overnight cold proofing
A banneton is especially useful because the chilled dough is easier to score and transfer. That firmer texture can make the release feel much less stressful.
Can you use a banneton for non-sourdough bread?
Yes. A banneton is not just for sourdough. It can also be useful for yeasted artisan breads, enriched doughs that are shaped free-form, and other loaves that benefit from support during the final proof. The main question is whether the dough needs structural help before baking. If it does, a banneton can often help.
When a Banneton Is Helpful — and When It’s Optional
A banneton is most useful when you want shape, structure, and cleaner handling during final proofing. It is especially helpful for sourdough and other artisan-style loaves that need to hold form before baking.
If you’re baking a pan loaf, a sandwich loaf, or dough that is meant to be placed directly into a loaf tin, a banneton may not be necessary. But for free-form loaves, it earns its place quickly.
Final Takeaway
Using a banneton well comes down to a few habits: choose the right shape, dust it properly, shape the dough with tension, proof until it looks ready rather than simply waiting by the clock, and unmold it with confidence. Once those pieces line up, the basket stops feeling mysterious and starts behaving like what it is — a very practical tool for better bread.
If you’re building your bread toolkit, a banneton pairs naturally with a bench scraper for shaping and transfer. You can read more about that in our guide to using a bench scraper for baking without the mess and our step-by-step post on cutting dough cleanly and evenly.