
How to Make Sandwich Bread That’s Soft, Sliceable, and Reliable

If you’ve ever wanted a loaf that slices cleanly for toast, lunch sandwiches, and simple buttered bread, learning how to make sandwich bread is one of the most useful baking skills you can build. A good sandwich loaf is soft without being flimsy, sturdy enough to hold fillings, and tender enough that the crumb doesn’t fight you when you cut it.
I’m Ethan Baker, and in my experience, the best sandwich bread is less about fancy technique and more about getting a few fundamentals right: the dough texture, the rise, the pan size, and the bake. Once those pieces click, the process becomes repeatable.
What Sandwich Bread Is and What Makes It Soft
Sandwich bread is a pan-baked yeast bread designed for even slices and a fine, tender crumb. Compared with crusty artisan loaves, it usually has a softer crust and a more even interior. That’s exactly what makes it useful for everyday sandwiches: it bends a little, slices neatly, and doesn’t shred when you spread butter or stack fillings.
The softness usually comes from three things working together:
- An enriched dough, often with milk, butter, or a little sugar
- Good gluten development, so the loaf rises evenly
- Proper baking and cooling, so the crumb sets instead of turning gummy
If you want a loaf that feels closer to classic grocery-store sandwich bread, use milk and butter. If you want a leaner loaf with a slightly firmer bite, a water-based dough works too, but the crumb will usually be a bit less tender.
Ingredients for Soft Sandwich Bread
Here is a reliable baseline recipe for one standard 9 x 5-inch sandwich loaf:
- 3 cups all-purpose flour (about 360 g), plus a little more as needed
- 2 1/4 teaspoons instant yeast or active dry yeast
- 1 1/4 teaspoons fine salt
- 2 tablespoons sugar
- 2 tablespoons unsalted butter, softened or melted and cooled
- 1 cup warm milk or a mix of milk and water, warm but not hot
A simple sandwich loaf does not need a long ingredient list. What matters is what each ingredient does.
Flour
Flour builds the structure of the loaf. All-purpose flour usually gives a softer, lighter crumb, while bread flour brings more strength and a little more chew. If you want a very tender family-style loaf, all-purpose flour is usually the easier starting point. If your kitchen is humid or you prefer more structure for thicker slices, bread flour can be helpful.
Yeast
Yeast is the engine that lifts the dough. Instant yeast is the most convenient choice because it can be mixed directly with the dry ingredients in many recipes. Active dry yeast also works well, but some bakers like to bloom it first in warm liquid with sugar to make sure it is active.
Liquid
Most sandwich bread recipes use water, milk, or a mix of both. Milk tends to make the loaf softer and richer. Water makes a cleaner, leaner bread. The liquid should feel warm, not hot, so it helps the yeast without scalding it.
Fat
Butter, oil, or another fat tenderizes the crumb and softens the crust. Butter adds flavor and a classic sandwich-bread richness. Oil can make the loaf especially soft and keep it feeling fresh a bit longer.
Sweetener
Sugar, honey, or another sweetener does more than add flavor. It helps the bread brown and supports a softer, more familiar sandwich-bread style. You do not need a very sweet dough; even a modest amount changes the texture.
Salt
Salt keeps the bread from tasting flat and helps regulate yeast activity. Without it, the loaf can rise too fast and taste dull.
Best Flour, Yeast, and Pan Choices
Here’s a quick decision table to help you choose the version that fits your goal.
| Choice | Best for | Trade-off |
|---|---|---|
| All-purpose flour | Softer, lighter sandwich bread | Slightly less structure than bread flour |
| Bread flour | Taller loaf, more chew, stronger gluten | A firmer crumb |
| Instant yeast | Fast, simple mixing | Less visual proof of activity than blooming yeast |
| Active dry yeast | Familiar, easy to verify by blooming | Adds a short activation step |
| 9 x 5-inch loaf pan | Standard sandwich loaf height and shape | Can look wide if the dough is small |
| 8.5 x 4.5-inch loaf pan | Taller, narrower loaf | Can overflow if the dough is too large |
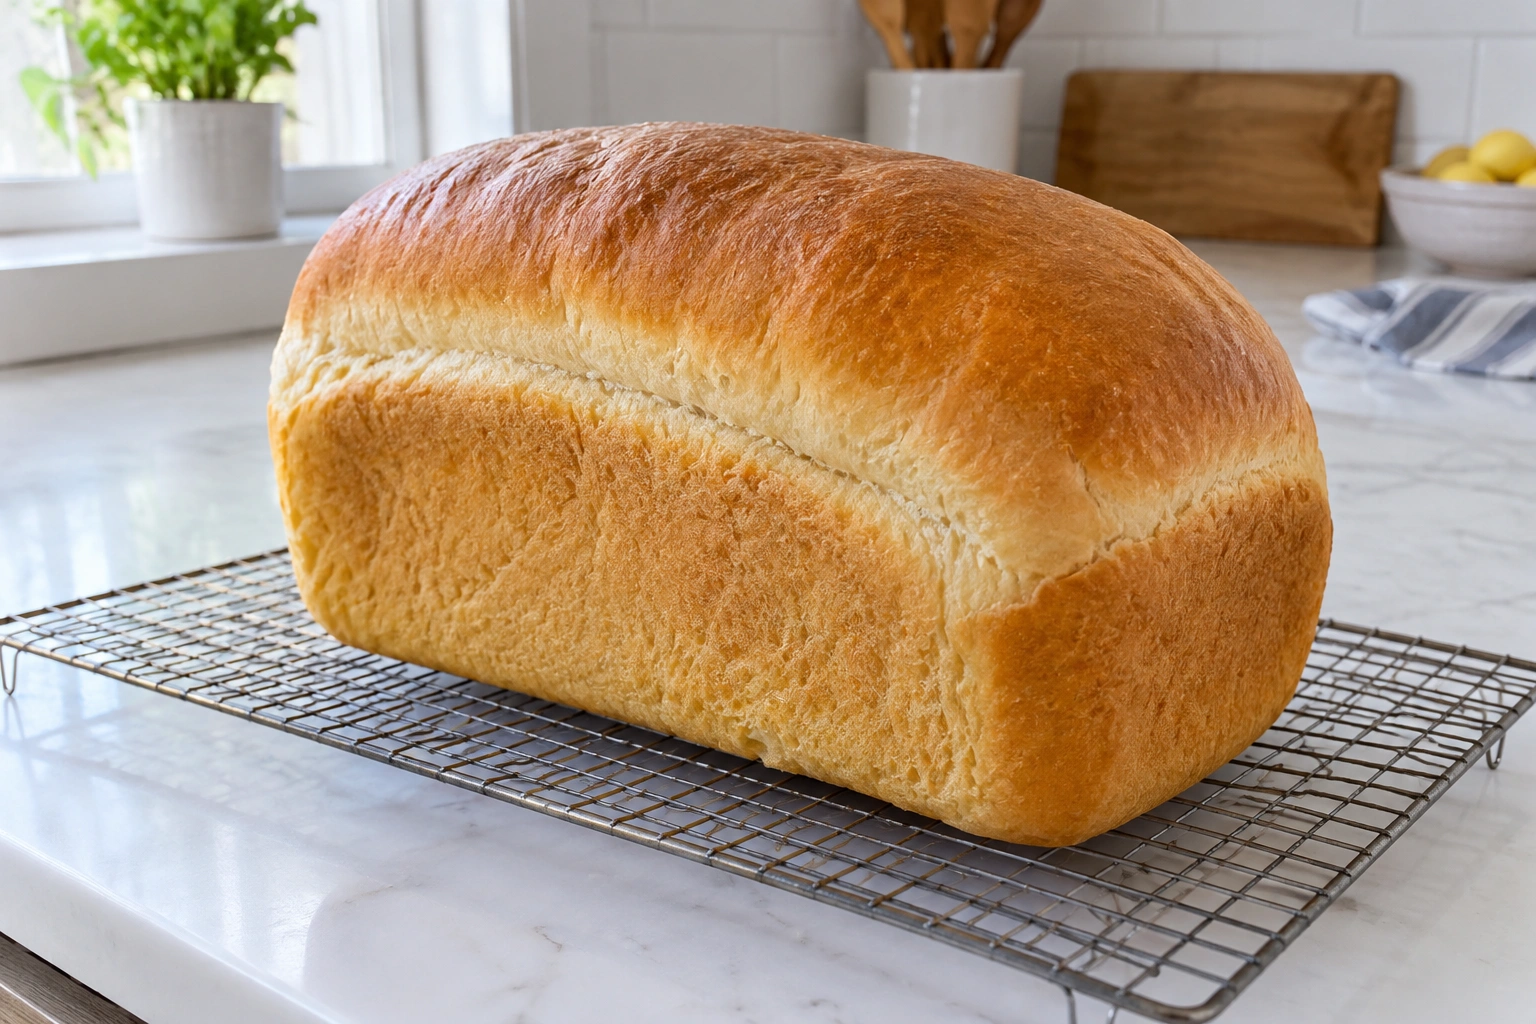
For most home bakers, a standard 9 x 5-inch loaf pan is the safest starting point for a classic sandwich loaf. If you use a smaller pan, the bread may rise higher and bake more slowly in the center. If the pan is too large, the loaf can spread and bake up short.
Tools and Equipment You’ll Need
You do not need a bakery setup to make good sandwich bread. These basics cover the job:
- Large mixing bowl
- Measuring cups and spoons, or a kitchen scale if you use one
- Loaf pan
- Clean kitchen towel or plastic wrap
- Wire rack
- Dough scraper or sturdy spatula
- Optional stand mixer with dough hook
A stand mixer saves effort, but hand kneading works perfectly well.
How to Make Sandwich Bread Step by Step
This method is built for a soft, dependable loaf.
1. Mix the dough
In a large bowl, combine the flour, yeast, salt, and sugar. Add the warm milk and the softened butter. Stir with a spoon or spatula until a shaggy dough forms and no dry flour remains.
If you are using active dry yeast, you can bloom it first in the warm milk with the sugar for a few minutes until it looks foamy, then continue with the recipe. If you are using instant yeast, you can mix it directly with the dry ingredients.
At this stage, the dough should look rough and slightly sticky, not smooth.
2. Knead until the dough becomes smooth
Knead by hand or with a mixer until the dough looks smoother and feels elastic. The goal is a soft dough that is tacky but not wet. If it clings heavily to your hands or the bowl, add flour a tablespoon at a time only after the dough has had a chance to knead for a minute or two. Stop adding flour when the dough feels soft, slightly springy, and only lightly sticky.
A good sandwich-bread dough should feel supple and elastic, not stiff and dry. If it feels tight, it likely has too much flour. If it smears like batter, it needs more kneading and possibly a small flour adjustment.
3. Let the dough rise
Place the dough in a lightly greased bowl, cover it, and let it rise until it has visibly expanded. Many sandwich bread recipes aim for roughly a doubled volume, but I prefer to think in visual terms: the dough should look puffy, lighter, and clearly fuller than when you started.
4. Shape the loaf
Gently deflate the dough and shape it into a log that fits your pan. The goal is not to crush all the gas out; it is to create surface tension so the loaf rises upward instead of spreading sideways.
A simple shaping approach works well: flatten the dough into a rough rectangle, fold the sides in slightly, then roll it into a tight log. Pinch the seam closed and place it seam-side down in the pan.
5. Proof the shaped loaf
Cover the pan and let the dough rise again until it looks puffy and has risen noticeably above the rim of the pan. This second rise matters a lot for texture. Underproofed bread tends to burst unevenly and bake up dense. Overproofed bread can collapse or bake with a weak structure.
6. Bake
Bake the loaf in a preheated 350°F oven until the crust is golden brown and the center is set. For a standard 9 x 5-inch loaf, that usually takes about 30 to 35 minutes, though pan size and dough amount can change the bake time. A smaller pan or a taller loaf may need a few extra minutes, while a larger pan or a smaller dough amount may finish sooner.
If the top is browning too quickly, you can loosely tent it with foil near the end of baking. That helps the loaf finish without over-darkening the crust.
How to Knead and Test the Dough
The easiest mistake to make is stopping too soon. Bread dough often looks “almost there” before it is actually ready.
What properly kneaded dough looks like
After kneading, the dough should be:
- Smooth rather than ragged
- Elastic when stretched
- Slightly tacky, but not gluey
- Able to hold its shape in a loose ball
The windowpane test
Stretch a small piece of dough between your fingers. If it can stretch thin enough that light passes through without tearing right away, the gluten is developed enough for a soft loaf. If it tears immediately, keep kneading.
For sandwich bread, you do not need perfect artisan-level gluten development, but you do need enough structure to support a fine, even crumb.
How to Tell When the Dough Has Proofed Enough
Proofing is one of the most important judgment calls in bread baking.
First rise
The dough is ready when it has become noticeably larger and looks airy. Use the finger-poke test: gently press a floured fingertip into the dough about 1/2 inch. If the indentation springs back slowly and leaves a slight mark, the dough is ready or nearly ready. If it springs back immediately, it needs more time. If the indentation stays deep and the dough feels fragile, it may be overproofed.
Final rise
For the shaped loaf, look for dough that has risen close to or just above the rim of the pan, depending on the recipe and pan size. Use the same gentle poke test: the dough should feel light and airy, and the indentation should spring back slowly rather than snapping shut. A loaf that is barely risen will bake dense. A loaf that rises too far and becomes fragile may collapse in the oven.
A useful practical cue: the dough should look full and relaxed, not tight and strained.

Baking Time, Temperature, and Doneness Cues
For a standard sandwich loaf, 350°F is a reliable baking temperature. Time alone is not enough, though, because pan size and dough amount can shift the bake.
Look for:
- A golden-brown crust
- A loaf that feels set and light when lifted
- An internal temperature of about 195°F
That temperature matters because bread can look finished on the outside while still being underbaked in the center. If you slice too soon, the crumb may seem gummy even if the loaf looks good.
Cooling, Slicing, and Storing Sandwich Bread
This is where a lot of bakers get impatient, and I understand why. The bread smells fantastic. But slicing too early can compress the crumb and make it seem underbaked.
Let the loaf cool in the pan for about 10 to 15 minutes, then turn it out onto a wire rack and let it cool completely before slicing.
Why cooling matters
As bread cools, the crumb sets. Steam escapes. The structure firms up. If you cut while the loaf is still hot, the slices can compress and feel sticky.
Storage
Once completely cool, store sandwich bread at room temperature in a bread bag, wrapped container, or airtight bag for up to 3 days for the best texture. If your kitchen is warm or humid, it may stale faster.
For longer storage, freeze the loaf or individual slices tightly wrapped and sealed in a freezer bag for up to 3 months. Slices are especially convenient because you can thaw only what you need.
How to thaw or refresh
- For slices: Toast straight from frozen or let them thaw at room temperature for about 15 to 30 minutes.
- For a whole loaf: Thaw it, still wrapped, at room temperature for several hours or overnight.
- To refresh: Warm slices in a toaster or a low oven for a few minutes if you want the bread to taste freshly baked without drying it out.
Common Mistakes That Make Sandwich Bread Dense or Dry
A dense or dry loaf usually comes from one of a few predictable problems.
Too much flour
This is the classic beginner issue. If the dough feels stiff, the loaf will usually bake up dry and heavy. Add flour gradually and stop when the dough is soft and workable.
Underkneading
If the gluten never develops, the bread cannot trap gas well. The result is often a short loaf with a tight crumb.
Underproofing
A loaf that goes into the oven too soon may spring unevenly and stay dense in the center.
Overproofing
Too much rise can weaken the dough structure. The loaf may deflate, bake with a coarse crumb, or collapse slightly after baking.
Overbaking
Even a well-made dough can turn dry if left in the oven too long. Use the internal temperature as your anchor instead of relying on color alone.
Troubleshooting Sandwich Bread Problems
Here is how I would diagnose the most common issues.
The dough is too sticky
This can happen if the flour is absorbing liquid slowly or if the dough needs more kneading. Let it rest for a few minutes, then reassess before adding more flour. A slightly tacky dough is normal; a wet, unmanageable one is not.
The loaf is dense
Check three points: kneading, proofing, and flour amount. Dense bread often means the dough was too stiff, underkneaded, or underproofed.
The loaf collapsed
This usually means the dough overproofed or was shaped too loosely. If the dough rises too far before baking, it may not have enough strength left to hold the oven spring.
The crumb is gummy
Most often, the loaf was sliced too early or removed before it was fully baked. Make sure the internal temperature reaches about 195°F and cool the bread completely before cutting.
Easy Variations and Make-Ahead Options
Milk-based versus water-based dough
Milk gives a softer, richer loaf. Water makes a simpler, leaner bread. If you want the most classic sandwich texture, milk and butter are worth using.
All-purpose flour versus bread flour
Use all-purpose flour if your priority is softness. Use bread flour if you want a little more chew and a stronger slice. Neither is “wrong”; they simply produce different textures.
Same-day versus overnight
Same-day bread is convenient, especially if you want fresh loaves without planning ahead. Overnight refrigeration gives you more scheduling flexibility and can make it easier to bake the next day. If you refrigerate the dough, let it warm enough to rise properly before baking.
Whole wheat adaptation
Whole wheat flour adds flavor and fiber, but it usually makes the crumb denser. If you want a softer loaf, replace only part of the white flour at first rather than all of it.
Frequently Asked Questions About Homemade Sandwich Bread
Can I make sandwich bread by hand?
Yes. Hand kneading works very well. It usually just takes a little longer and asks you to pay closer attention to dough texture.
Do I need a stand mixer?
No. A mixer is convenient, but it is not required. A bowl, your hands, and a little patience are enough.
Should sandwich bread dough double in size?
That is a useful benchmark, but not the only one. More important is that the dough looks puffy, lighter, and clearly expanded rather than flat and tight.
What size loaf pan should I use?
A standard 9 x 5-inch loaf pan is the most practical choice for a classic sandwich loaf. It gives the dough room to rise into the familiar shape most home bakers want.
How do I keep the bread soft after baking?
Cool it fully, then store it properly at room temperature for short-term use or freeze it for longer storage. Slicing before the loaf cools completely is one of the fastest ways to lose that soft texture.
Why is my sandwich bread not fluffy?
The usual reasons are too much flour, underkneading, underproofing, or baking too long. In other words, the loaf likely didn’t get enough structure, enough rise, or enough moisture retention.
Can I use active dry yeast instead of instant yeast?
Yes. Just allow for activation if your method calls for it. Blooming the yeast in warm liquid with sugar for a few minutes is a simple way to check that it is alive and active.
When to Consult a Master Baker
If you are consistently getting uneven loaves, collapsing tops, or bread that bakes dense even after careful adjustments, it may be time to look at the process more deeply. A master baker can help you evaluate dough hydration, shaping pressure, fermentation timing, and flour choice in a way that is hard to troubleshoot from a recipe alone.
For most home bakers, though, sandwich bread improves quickly once you learn to trust the dough instead of the clock. That is the real turning point.