
How to Make Challah Bread at Home: A Clear, Reliable Guide for Soft, Shiny Loaves

Challah is one of those breads that looks impressive but rewards patient, methodical baking. If you’ve ever wanted a loaf with a glossy crust, a tender crumb, and a braid that actually holds its shape, learning how to make challah is a great place to build skill.
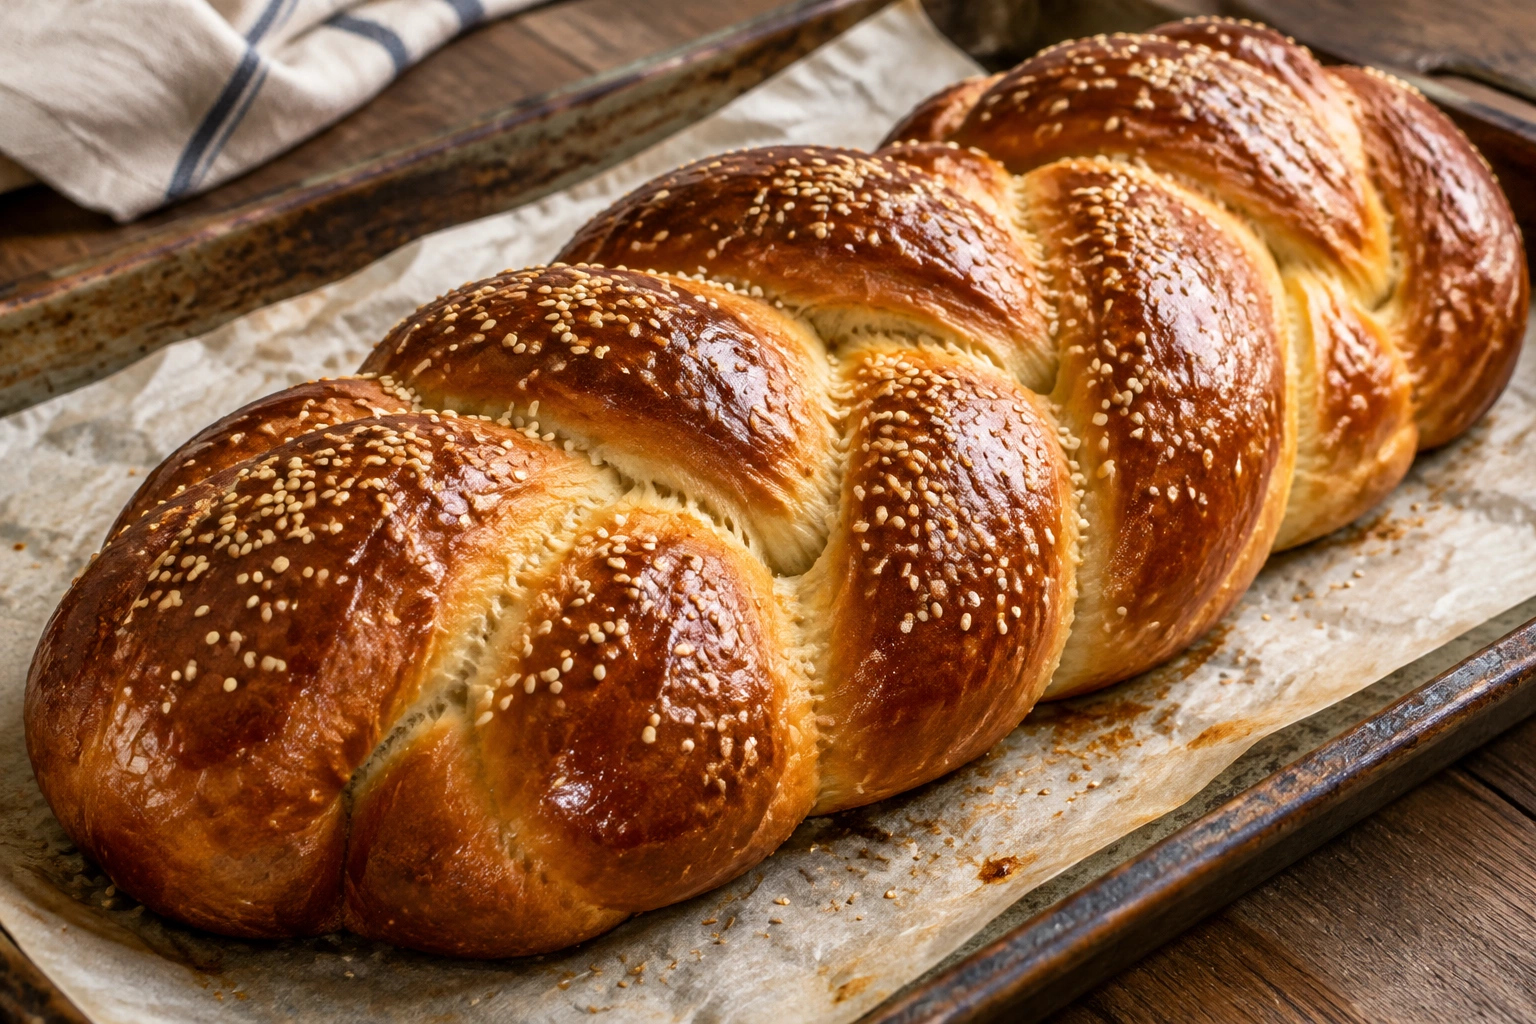
What makes challah special is its enriched dough. Eggs, sugar, and oil make the dough softer and richer than lean bread dough, but they also change how it behaves. It can feel a little slower to rise, slightly stickier to handle, and more forgiving in flavor than a crusty baguette-style dough. Once you understand those trade-offs, challah becomes much less mysterious.
What Challah Is and Why the Dough Behaves Differently
Challah is a braided yeast bread made from an enriched dough. “Enriched” simply means the dough contains ingredients that tenderize and flavor the bread, especially eggs, sugar, and oil.
That enrichment changes three things right away:
- The dough feels softer and less elastic at first. Eggs and oil coat the flour proteins, so the dough may need a little more kneading to build structure.
- Rising can take longer. Sugar and fat can slow fermentation compared with a lean dough.
- The crumb bakes up tender rather than chewy. That’s part of challah’s appeal.
If you’re used to plain sandwich bread, challah will feel richer and more luxurious. If you’re used to brioche, challah is usually a little less buttery and often a touch less rich, though both are enriched breads. The result is a loaf that slices beautifully, toasts well, and looks especially good on a table.
Ingredients and Tools You’ll Need
Here’s the basic framework for a home-baked challah:
- Flour
- Yeast
- Warm water
- Eggs
- Sugar or honey
- Oil
- Salt
- Egg wash for the finish
You’ll also want a few tools:
- Large mixing bowl
- Measuring cups and spoons or a kitchen scale
- Dough scraper, if you have one
- Baking sheet or sheet pan
- Parchment paper
- Pastry brush
- Wire rack
- Instant-read thermometer
A thermometer is worth having here. Challah can look finished before the center is fully baked, and a quick temperature check gives you a much better read than color alone.
Choosing the Right Flour and Yeast
Before you mix, decide which flour and yeast make sense for your kitchen and your goals.
| Choice | Best for | Trade-off |
|---|---|---|
| Bread flour | More structure, a slightly chewier crumb, stronger braid support | A little less soft than all-purpose flour |
| All-purpose flour | Softer crumb, easier everyday baking | Slightly less chew and structure |
| Instant yeast | Convenience and faster mixing | Less need for proofing, but you need to measure carefully |
| Active dry yeast | Using what you already have on hand | May need a little more time and a brief bloom in warm liquid |
| Braided loaf | Classic look, easy slicing | Slightly more shaping work |
| Round challah | Special-occasion presentation | Less familiar if you’re new to shaping |
If this is your first challah, all-purpose flour and instant yeast are the most practical choices. All-purpose flour is a little more forgiving and gives you a softer crumb, while instant yeast keeps the process simple. If you want a loaf with a bit more structure and braid definition, bread flour is a good next step. For yeast, instant is easiest for a first-time baker; active dry yeast still works well if you give it a little more time.
For a deeper dough-making reference, you may also like our guide on how to make bread dough from scratch for beginners.
Step 1: Mix the Dough
Begin by combining the warm liquid, yeast, sugar, eggs, oil, and salt, then add the flour gradually until a shaggy dough forms.
A helpful liquid temperature is lukewarm, around 100°F to 110°F. That range is warm enough to wake up the yeast without risking damage from overly hot water. Add the flour a little at a time so you can stop when the dough becomes soft, cohesive, and only slightly sticky.
At the end of mixing, the dough should look rough but together. It should not be dry and crumbly, and it should not be a batter. If it seems too dry, add a small splash of water and mix again. If it feels very sticky, let it rest for a minute before adding more flour; enriched dough often tightens up as it sits.
If you are using active dry yeast, it may help to dissolve it in the warm liquid first.
Step 2: Knead Until Smooth and Elastic
Kneading is where challah starts to become bread instead of just a mixed dough.
You can knead by hand or in a mixer with a dough hook. Either way, the goal is the same: develop enough gluten to trap gas during proofing and baking. Because challah is enriched, it can take a bit longer to feel smooth than a lean dough.
Look for these signs:
- The dough becomes smoother and more cohesive
- It feels soft and slightly tacky, not wet and sticky
- It stretches without tearing immediately
- It springs back when pressed gently
If the dough tears easily, it likely needs more kneading. If it clings to your hands in a thick, messy way, it probably needs a little more mixing time before you add more flour. A small amount of tackiness is normal and useful; it helps the loaf stay tender.
Think of this stage as building the loaf’s framework. Under-kneading is one of the fastest ways to end up with a dense challah.
Step 3: Let the Dough Rise
Place the dough in a lightly oiled bowl, cover it, and let it rise until it has roughly doubled in size.
That “roughly” matters. Dough rises at different speeds depending on room temperature, yeast strength, and how enriched the dough is. A warm kitchen can move quickly; a cool kitchen may take much longer. The clock is only a guide.
Use visual cues instead:
- The dough looks puffy and expanded
- It holds a gentle indentation when pressed
- It no longer feels tight and dense
If the dough rises too fast, it may be warmer than ideal. If it barely moves after a long stretch, the yeast may be sluggish, the kitchen may be cold, or the dough may simply need more time.
Step 4: Divide and Shape the Dough
Once the dough has risen, gently deflate it and divide it into even pieces.
Uniform portions matter because uneven strands bake unevenly. One thick strand can stay underdone while a thin one overbrowns. If you want a neat braid, try to keep the pieces as similar in weight as possible.
For a simple loaf, shape each piece into a smooth ball first, then roll it into a rope. That brief pre-shape helps the dough relax and makes the final ropes more even.
A practical shaping tip: if a rope keeps shrinking back, let it rest for a few minutes before rolling again. That short pause lets the gluten relax and makes braiding easier.
Step 5: How to Braid Challah
For a first loaf, the 3-strand braid is the best place to begin. It’s simple, attractive, and forgiving.
Simple 3-strand braid
- Roll the dough into three ropes of similar length.
- Place them side by side and pinch the top ends together.
- Cross the right strand over the center.
- Cross the left strand over the new center.
- Repeat the pattern down the loaf.
- Pinch the ends together and tuck them underneath.

Keep the braid snug, but not tight. If you pull too hard, the dough can split during proofing. If the braid is too loose, it may spread out and lose definition.
Optional 6-strand braid
If you already feel comfortable with shaping, a 6-strand braid gives you a more decorative loaf. The New York Times method for a 6-braid challah uses six strands arranged in a row, parallel to one another, with the tops pinched together before braiding. It’s beautiful, but it takes more coordination and a little more practice than a 3-strand loaf.
If your goal is a first successful challah, choose the 3-strand braid. If your goal is presentation and you’ve braided before, the 6-strand version is worth trying.
Step 6: Shape a Round Challah If You Want a Special-Occasion Loaf
A round challah is a nice option when you want something a little more festive than the standard loaf.
The shaping is different, but not difficult. Chabad’s round-roll method rolls each portion into a rope, coils it into a spiral, and tucks the end underneath so it won’t unravel. That same idea can be scaled into a larger round loaf.
Choose a round challah when you want:
- A more celebratory presentation
- A loaf that looks especially good in the center of a table
- A shape that feels a bit different from the everyday braid
Choose a braided loaf when you want the easiest slicing and the most familiar look. For many home bakers, the braided version is the better first bake, and the round shape becomes a fun next step.
Step 7: Proof the Shaped Loaf
After shaping, let the loaf rise again until it looks puffy and lighter in the pan or on the baking sheet.
This second rise is where many challahs go wrong. Underproofed dough bakes up dense and may split in odd places. Overproofed dough can collapse, look slack, and lose its shape in the oven.
A properly proofed challah usually:
- Looks visibly fuller
- Has expanded noticeably, often by about 50% to nearly doubled
- Feels airy when gently touched
- Springs back slowly, not instantly
If you press a finger lightly into the dough and the indentation fills in very quickly, it likely needs more time. If the indentation stays almost completely in place and the dough seems fragile, it may be overproofed. The best cue is a slow spring-back: the dough should rebound a little, but not snap back right away.
Step 8: Apply Egg Wash and Add Toppings
Before baking, brush the loaf with egg wash for shine and color.
The Kitchn recommends brushing challah with a mixture of 1 large egg white and 1 tablespoon water before baking. That gives the loaf a glossy finish and helps it brown evenly. Brush carefully into the creases of the braid so you don’t leave pale patches.
Toppings are optional, but they add flavor and texture. ThermoWorks notes that challah is traditionally sprinkled with sesame or poppy seeds before baking. You may also see crystal sugar or herbs used on top.
Here’s how to think about the finish:
- Sesame seeds: nutty flavor, classic look
- Poppy seeds: more traditional for some bakers, subtle flavor
- Plain: clean, shiny crust that shows off the braid
If you use a topping, apply it right after the egg wash so it adheres well.
Step 9: Bake Until Deep Golden and Fully Cooked
Bake the challah until it is deeply browned and fully set in the center.
The Kitchn recommends baking at a moderate oven temperature, rotating the baking sheet halfway through, and checking for an internal temperature of at least 190°F. That threshold is a useful guide for many standard loaves, but larger or denser challahs may need a little more time and may benefit from a slightly higher internal temperature before you pull them from the oven.
That temperature cue is useful because challah can brown beautifully before the middle is done. A loaf that looks finished but is still underbaked may seem gummy when sliced. If you have a thermometer, use it. If you don’t, look for a deep golden crust and a loaf that sounds hollow when tapped on the bottom.
If the top browns too quickly, loosely tent it with foil for the last portion of baking.
Step 10: Cool Before Slicing
Once the loaf comes out of the oven, move it to a wire rack and let it cool before slicing.
The Kitchn recommends cooling until just barely warm, at least 45 minutes. That rest matters more than many bakers expect. Freshly baked bread is still setting inside, and cutting too soon can make the crumb seem gummy or compressed.
If you’re serving challah for dinner, bake it early enough that you’re not tempted to cut it straight from the oven. The texture improves noticeably with a proper cool-down.
Common Mistakes and How to Fix Them
Dense challah
Usually caused by under-kneading, underproofing, or too much flour. Fix it by kneading until the dough is smooth and elastic, and by waiting for clear proofing cues instead of relying only on the clock.
Dry crumb
Often the result of too much flour or overbaking. The dough should be soft and slightly tacky before the first rise. During baking, check doneness with temperature rather than guessing.
Weak braid
This usually means the strands were too loose or uneven. Roll the ropes more evenly and pinch the ends securely before proofing.
Split loaf
A loaf can split when it is braided too tightly or proofed unevenly. Leave a little flexibility in the braid so the dough can expand.
Uneven browning
This can happen if the egg wash is patchy or the pan isn’t rotated. Brush carefully into the braid and turn the baking sheet halfway through.
Make-Ahead, Storage, and Freezing Tips
Challah is convenient for planning ahead, which is one reason it works so well for busy home bakers.
You can make the dough ahead, shape it, and refrigerate it before the final proof. That’s a good make-ahead option if you want to bake later in the day or the next morning. In the fridge, shaped challah dough can usually hold for several hours and sometimes overnight, but timing depends on your dough and refrigerator temperature. When you’re ready to bake, let it finish its final proof at room temperature until it looks puffy and passes the gentle spring-back test.
For storage, keep fully cooled challah wrapped well at room temperature for short-term use. If you want to keep it longer, freeze it. Baked challah freezes well either whole or sliced, but slices are often more convenient because you can thaw only what you need. If you prefer the freshest texture after freezing, freeze the loaf whole; if convenience matters most, freeze it sliced. Wrap tightly to protect the crumb from freezer burn, then thaw at room temperature.
If you plan to toast slices later, freezing sliced challah is especially practical. You can also freeze unbaked shaped dough, but baked challah is usually the easier option for most home bakers.
Practical Example: A First-Time 3-Strand Challah Bake
Say you’re baking challah for the first time on a Saturday afternoon. You choose all-purpose flour because you want a softer crumb, and instant yeast because you want the simplest process.
You mix the dough until it forms a shaggy mass, then knead until it becomes smooth and slightly tacky. After the first rise, it looks puffy and doubled, so you divide it into three even pieces and roll them into ropes. The braid starts loose, so you pause for a minute when one rope keeps shrinking back, then finish the loaf.
After the second rise, the dough looks airy and springy. You brush it with egg white and water, sprinkle sesame seeds on top, and bake until the crust is deep golden. A thermometer shows the center is at least 190°F, so you let it cool on a rack for 45 minutes before slicing.
That’s the whole process in real life: mix, knead, rise, shape, proof, glaze, bake, cool. Once you’ve done it once, the steps feel much less intimidating.
Final Thoughts
Learning how to make challah is really about learning to read enriched dough. Once you understand how eggs, sugar, and oil change the texture and timing, the process becomes much easier to manage. The braid is the visual reward, but the real success is a loaf that feels soft, tastes rich, and slices cleanly after cooling.
If you want to keep building your bread skills, you may also enjoy our guide to making baguettes at home for a lean-dough contrast with a very different shaping and baking style.
FAQ
How long should challah dough rise?
It depends on room temperature, yeast strength, and the richness of the dough. In general, look for the dough to roughly double during the first rise and to look puffy and airy after shaping.
How do you know when challah is done?
The loaf should be deeply golden, feel set, and register at least 190°F in the center for a standard loaf. If the crust browns too fast, tent it with foil and keep baking until the middle is done.
Can you refrigerate challah dough overnight?
Yes, shaped dough can be refrigerated before the final proof. When you’re ready to bake, let it finish proofing at room temperature until it looks puffy and springs back slowly when touched.