
How to Shape a Boule for Better Oven Spring and a Cleaner Round Loaf

A boule looks simple: a round loaf with a rustic crust and a confident shape. But anyone who has tried to shape one knows that “round” is doing a lot of work. The difference between a loaf that holds its form and one that spreads into a pancake usually comes down to how well you build surface tension during shaping.
In practical terms, shaping a boule means turning fermented dough into a smooth, taut round that can support its own structure through proofing and baking. That tension matters because it helps the loaf rise upward instead of outward. It also gives you a cleaner surface for scoring and a more attractive crust after baking.
If you want a fast mental picture, think of shaping as organizing the dough rather than forcing it. You are not squeezing gas out with brute strength. You are folding, tightening, and sealing the outside so the loaf behaves like a well-made package. That is why the best boule shaping starts before the final round ever touches the banneton.
What a boule is and why shaping matters
“Boule” is the classic round bread shape, a loaf that is usually baked as a freeform round or proofed in a round basket. The name comes from the French word for “ball,” which fits the shape well. In artisan baking, though, the boule is more than a round object. It is a structure.
A properly shaped boule should be:
- smooth on top
- taut enough to hold its form
- sealed underneath, though the exact finish can vary a bit with dough strength and hydration
- round without being over-compressed
That structure affects three things you care about:
- Proofing behavior – A well-shaped boule resists spreading.
- Scoring – A smooth, taut surface gives your blade a cleaner path.
- Oven spring – A loaf with good tension can expand upward more effectively in the oven.
Final shaping also influences where the loaf opens: a well-placed seam and a taut outer skin help the dough open along your score instead of bursting randomly.
A loose or weak boule may still bake, but it usually spreads wider, scores less cleanly, and can lose some of the lift you worked for during fermentation.
When to shape the dough
Boule shaping fits after bulk fermentation, once the dough has developed enough strength and fermentation to hold a shape. In most bread workflows, you’ll do two shaping stages:
- Pre-shape: a loose round to organize the dough
- Final shape: the tighter boule that goes into the banneton or onto the proofing surface
That split matters because dough changes during fermentation. After bulk, gluten is more relaxed and the dough is easier to move, but it also needs a short reset before final shaping. If you try to force the final shape too soon, the dough often snaps back or becomes harder to handle. If you wait too long, it can become overly slack and fragile.
A useful decision rule: if the dough feels shaggy, uneven, or hard to round neatly after bulk, it usually benefits from a pre-shape and rest. If it already feels organized and elastic, the pre-shape may be very gentle, but skipping the rest entirely often makes final shaping harder than it needs to be.
For a deeper basket workflow, this guide on how to use a banneton pairs well with the shaping method here.
Tools and materials you need
You do not need a long list of equipment, but a few tools make shaping much easier:
- Bench scraper: essential for lifting, turning, and tightening dough
- Lightly floured work surface: enough to prevent sticking, not so much that the dough slides around
- Flour for dusting: usually a small amount for hands, bench, and banneton
- Banneton or proofing basket: helps the boule keep its round form during proofing
- Clean towel or liner if your banneton uses one
A bench scraper is especially helpful for sticky dough because it lets you move the dough without tearing it with your fingers. Hands alone can work well for firmer dough, but once the dough gets softer or wetter, the scraper becomes less of a convenience and more of a control tool.
How to tell when the dough is ready to shape
The dough is ready when it feels relaxed but not slack, extensible but not runny. That sounds abstract, but the tactile cues are real.
Look for these signs:
- the dough has risen and looks aerated
- it feels smoother than it did earlier in bulk
- it stretches without immediately ripping
- it still has enough strength to gather into a mass
- when lifted, it should feel soft and pillowy rather than dense or rubbery
- when set back on the bench, it may relax outward a little, but it should not immediately puddle
- the edges should look rounded and slightly puffy, not ragged or collapsed
If you press it lightly, it should feel alive and elastic, not dense and stiff. If it snaps back aggressively, it may need more relaxation. If it spreads immediately and seems hard to gather, it may be too weak or too wet for a firm shaping approach.
This is where baker judgment matters. A strong dough and a soft, high-hydration dough may both be ready to shape, but they will not respond the same way. The stronger dough can usually take more tightening. The softer dough needs a gentler hand and more support from the bench and scraper.
Pre-shape the dough into a loose round

Pre-shaping is the step many home bakers skip, then wonder why the final boule fights back. It gives the dough a rough round form and starts organizing the gluten so the final shape is cleaner.
Here is a practical way to pre-shape:
- Turn the dough onto a lightly floured surface.
- Use the bench scraper to gather it into a rough round.
- Fold the edges toward the center just enough to make the mass more even.
- Flip it seam-side down.
- Gently cup your hands around it and rotate it to round it slightly.
At this stage, you are not trying to create a tight skin. You are only making the dough more orderly. Think “loose round,” not “finished loaf.”
Why this helps: a pre-shaped dough has better geometry. When the final shaping begins, the dough is already somewhat organized, so you can create tension more evenly instead of fighting irregular edges and random weak spots.
Let the dough bench rest
After pre-shaping, let the dough rest on the bench. This rest allows the gluten to relax, which makes the final shaping much easier.
If you skip the rest, the dough may keep springing back when you try to tighten it, or it may simply become harder to handle and less cooperative.
That is why a bench rest is not wasted time. It is the part of the process that lets the dough become shapeable again.
If you notice the dough resisting your hands during final shaping, that is usually a sign it needed more rest. If it feels too loose after resting, the dough may simply be softer than average, and you’ll need a gentler shaping style rather than a longer rest.
Shape the final boule step by step
This is the part where the loaf becomes a boule instead of just a round-ish mass.
1. Turn the dough over
Flip the rested pre-shape so the smoother side is now on the work surface. This gives you a clean starting point for building tension.
2. Fold the dough inward
Fold the outer edges toward the center, like closing an envelope. The goal is to create a tighter package with a more organized surface.
3. Seal the center
Bring the folds together so the middle is closed. You do not need to crush it flat; just make sure the dough is joined well enough to hold together.
4. Flip it seam-side down
Turn the dough over so the seam is underneath. The smooth side should now be on top.
5. Tighten by dragging gently
With both hands or with a scraper assisting, drag the dough slightly against the bench in short movements. The bench should give just enough resistance to help the outer layer tighten.
This is the key idea: the bench is helping you create friction. You are not pulling hard. You are using controlled movement so the dough skin becomes taut.
6. Rotate and repeat
Turn the dough a little and repeat the gentle dragging motion. The boule should become rounder and smoother with each pass.
7. Stop when the surface looks taut
The loaf is ready when it looks smooth and rounded, with enough tension to hold its shape but not so much that the skin starts to tear.
A useful comparison: under-shaped dough looks soft and slumpy; properly shaped dough looks inflated, smooth, and slightly domed; over-shaped dough starts to show tearing, tight seams, or a rough, ropey texture.
How to build surface tension without tearing the dough
Surface tension is what keeps the boule from spreading. You build it by tightening the outer layer, not by squeezing the loaf like a stress ball.
The best cue is how the dough moves under your hands. If it slightly sticks to the bench and you drag it gently, the surface tightens. If it slides freely, you may not be getting enough friction. If the top looks smooth and slightly domed, you are usually in the right zone. If you see visible tight seams, small rips, or the surface starts to wrinkle and split, you have gone too far.
A few practical rules help:
- use short, controlled movements
- let the bench do some of the work
- stop before the dough starts to tear
- if the dough resists too much, rest it briefly and try again
A boule should end up smooth, taut, and rounded. Tearing and ropeiness are signs you’ve gone too far.
How much flour to use on the bench and hands
Flour is useful, but too much flour can sabotage shaping. A heavily floured surface reduces friction, which makes it harder to tighten the dough. It can also interfere with seam closure because the dough slides instead of gripping itself.
Use just enough flour to prevent sticking. The surface should feel lightly dusted, not powdery. Your hands only need a light coating if the dough is sticky; too much flour on your palms can make the dough harder to control.
Here is the trade-off:
- More flour = easier release, less sticking
- Less flour = better grip and better tension
For shaping, grip usually matters more than release. That is why many bakers keep the bench only lightly floured and add more flour later, if needed, when the dough is already in the banneton.
For a standard lean dough, a light dusting is often enough. For sticky dough, it can help to flour the scraper lightly and keep your hands clean rather than burying the bench in flour.
How to handle sticky or high-hydration dough
High-hydration dough is often softer, more extensible, and more difficult to shape neatly. That does not mean it cannot become a good boule. It just needs a different touch.
A few adjustments help:
- use the bench scraper more actively
- keep the bench lightly floured, not heavily floured
- handle the dough with fewer, more decisive movements
- avoid rough tugging that can smear or tear the dough
Some bakers find it easier to shape wetter dough on a very lightly floured surface because the dough still grips enough to build tension. Others prefer a scraper-assisted method because the scraper gives more control when the dough wants to spread.
If the dough feels too slack to hold a tight round, do not force it into a rigid boule. Shape it as neatly as it allows, then support it well in the banneton so it can proof without collapsing.
Practical example: a lean dough
A standard lean dough usually responds well to the envelope fold and gentle bench drag. It can often take a firmer final tightening.
Practical example: a wetter dough
A high-hydration dough may need shorter shaping motions, more scraper support, and a softer final round. The goal is structure, not stiffness.
Practical example: a resistant dough
If the dough keeps springing back, it probably needs more bench rest before the final shape. Pushing harder usually makes it worse.
How to place the boule in a banneton or proofing basket
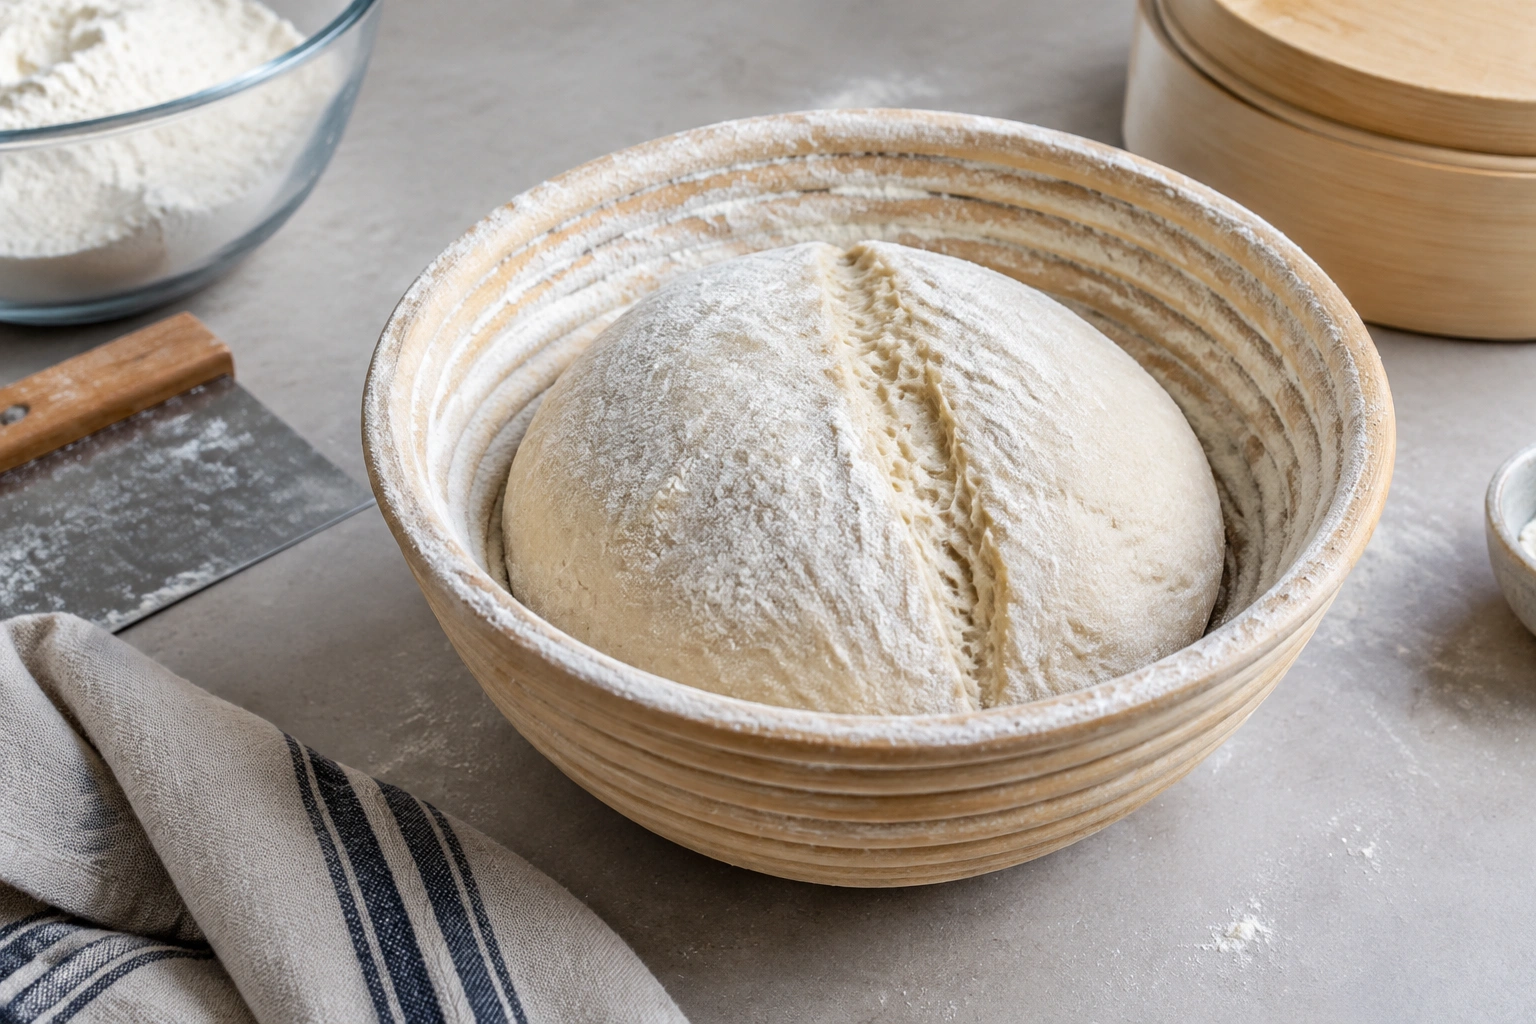
After shaping, transfer the boule carefully into the banneton. For standard banneton proofing, the seam usually goes seam-side up in the basket. That keeps the smooth side facing outward during proofing and makes it the top surface when you turn the loaf out to bake.
Here is the cleanest transfer:
- Dust the banneton with flour so the dough will not stick.
- Slide a bench scraper under the boule.
- Lift it gently without flattening the top.
- Invert it into the basket so the seam faces up.
A floured banneton helps prevent sticking, but flouring should still be light and even. Too little flour and the dough may cling. Too much and it can dry the surface or leave a floury patch on the crust.
If you are proofing directly on a tray or baking seam-side down in a freeform setup, the orientation can be different. In that case, you may place the boule seam-side down so the top surface stays smooth for baking and scoring. The key is to match the seam position to the way the loaf will be released and baked.
If you want a round loaf with a well-defined shape, the basket should support the dough, not squash it. The boule should settle in rather than slump.
Signs the boule is shaped correctly
You can usually tell a good boule by both look and feel.
Look for:
- a smooth top surface
- a round, even profile
- a seam that is closed but not aggressively pinched
- a loaf that holds its shape without immediately spreading
Feel for:
- light tension across the outer skin
- a dough mass that feels organized, not shaggy
- enough elasticity to support proofing without tearing
A properly shaped boule should not feel like a tight rubber ball. It should feel taut but still alive. That balance is what allows it to expand in the oven.
Common boule shaping mistakes and how to fix them
Too much flour
If the dough keeps sliding instead of tightening, the bench may be too floury.
Fix: brush off excess flour and work on a slightly grippier surface.
Under-shaping
If the loaf spreads in the banneton or bakes out flat, it was probably not tightened enough.
Fix: use a firmer final shaping pass next time, but only after a proper rest. If the dough is already proofed, support it better in the basket rather than trying to rework it.
Over-degassing
If the loaf feels flat and dense after shaping, too much gas may have been pressed out.
Fix: shape more gently next time and avoid flattening the dough during folds.
Overproofed dough
If the boule feels fragile, puffy, and unable to hold tension, it may have gone too far in proofing.
Fix: shorten proofing next time and bake sooner. For the current loaf, handle it very gently and score with care; it may still bake, but it will usually have less oven spring.
Very slack or high-hydration dough
If the dough spreads quickly and refuses to hold a tight round, it may simply be too soft for a firm boule shape.
Fix: use a lighter hand, rely more on the scraper, and keep the bench only lightly floured so the dough can grip. If needed, shape it as neatly as possible and let the banneton provide more support during proofing.
Tearing
If the skin rips, the dough was likely overworked, too cold, or too resistant.
Fix: stop, rest the dough for 20 minutes before resuming if needed, and use less force on the next pass.
Skipping the bench rest
If the dough keeps shrinking back, it likely never relaxed enough.
Fix: give it time on the bench before the final shape.
Boule vs batard: what changes in shaping
A boule is round, so the shaping goal is even tension in all directions. A batard is more elongated, so the tension is distributed along a longer axis.
That means:
- boule shaping emphasizes circular tightening
- batard shaping emphasizes length and taper
- a boule is often easier for beginners because the geometry is simpler
- a batard can be better when you want a loaf that fits a pan or scores in a long line
If you understand boule shaping well, batard shaping becomes easier to learn later. The core principle is the same: organize the dough and create enough surface tension for the loaf to hold itself.
Quick boule shaping checklist
Before you place the loaf in the banneton, check these points:
- The dough has been rested after pre-shaping.
- The final shape is smooth and round.
- The outer skin feels taut, not torn.
- The bench flour is light, not heavy.
- The seam is closed well.
- The loaf holds its form instead of spreading.
If you want a reliable round loaf, think in this order: organize, rest, tighten, and support. That sequence is what turns an ordinary dough ball into a boule that bakes with better structure and a more confident rise.
FAQ
Do I need a banneton to shape a boule?
No. A banneton helps support the dough during proofing, but you can also proof a boule in a bowl lined with a towel or on another supported surface if that better fits your setup.
Should a boule be seam-side up or seam-side down in a banneton?
In a standard banneton setup, seam-side up is the norm because the loaf is later inverted for baking, leaving the smooth side on top. If you proof or bake directly on a tray or in a different freeform setup, seam placement can change.
Why does my boule spread instead of staying round?
The most common reasons are insufficient surface tension, too much bench flour, or dough that is very soft or overproofed. A stronger final shape and better basket support usually help.
How tight should a boule feel?
It should feel taut and organized, but not so tight that the skin tears or the dough feels compressed into a hard ball. A slight dome and a smooth outer skin are good signs.
Can high-hydration dough still be shaped into a boule?
Yes. It usually just needs a gentler touch, less flour on the bench, and more support from the scraper and banneton.