
Calzone Dough Made Simple: A Practical Guide to Soft, Strong, and Easy-to-Shape Dough

If you want calzones that bake up with a tender bite, a good seal, and a crust that can actually hold filling, the dough matters just as much as what goes inside it. Calzone dough should be soft enough to stretch, but strong enough to keep its shape in the oven. That balance is the whole game.
The best way to think about it is this: calzone dough is not trying to be the thinnest dough or the chewiest dough. It needs enough gluten strength to resist tearing, enough moisture to stay supple, and enough rest time to relax so it rolls without fighting back. Once you understand those three levers, the process gets much easier.
What Calzone Dough Is and How It Differs from Pizza Dough
Calzone dough is usually built from the same basic ingredients as pizza dough, but the handling goal is a little different. Pizza dough often aims for stretch and open bakeability, while calzone dough needs a bit more structure because it is folded around filling and sealed at the edge.
That extra structure is not about making the dough stiff. In fact, a calzone dough that is too tight becomes hard to roll and more likely to spring back. What you want is a dough that feels supple, elastic, and cooperative. King Arthur Baking describes calzone dough as kneaded until “smooth and supple,” which is a useful target because it captures both strength and flexibility King Arthur Baking calzone recipe.
A simple decision rule helps here:
- If your dough tears when stretched, it needs more gluten development or more resting.
- If it shrinks back stubbornly, it needs a longer rest.
- If it feels slack and fragile, it may be too wet or under-kneaded.
That balance is why calzone dough often benefits from being a little sturdier than a very relaxed pizza dough.
Ingredients for Calzone Dough and What Each One Does
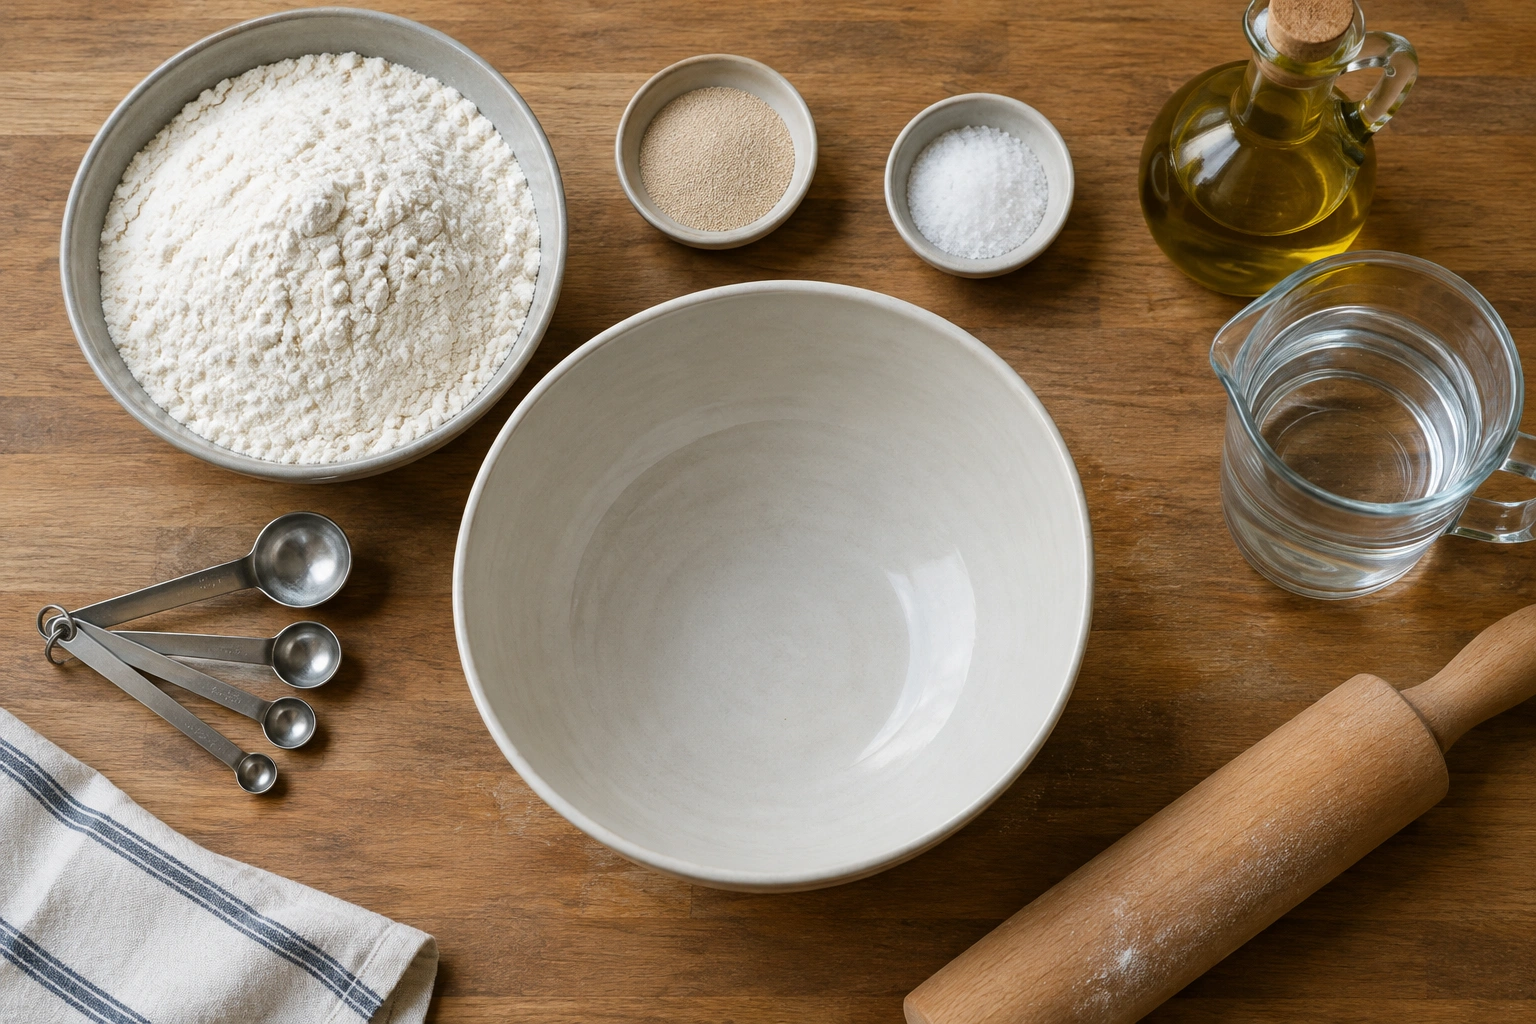
A dependable calzone dough starts with a small set of core ingredients:
- Flour: builds the dough’s structure
- Yeast: creates rise and lightness
- Water: hydrates the flour and activates gluten
- Salt: strengthens flavor and helps regulate fermentation
- Olive oil: adds tenderness and makes the dough easier to handle
- Sugar: optional, but useful for a slight browning boost and a gentle yeast nudge
A Fleischmann’s calzone dough recipe uses flour, undissolved yeast, sugar, salt, very warm water, and oil, then divides the dough into four portions for calzones before baking. That basic formula reflects the classic bread-style approach many home bakers use for calzones Fleischmann’s Yeast calzone dough.
What each ingredient is doing
Flour is where most of the structure comes from. Bread flour gives you more protein, which usually means more gluten potential and a dough that stretches with a little more confidence. All-purpose flour can still work well, but the dough may feel slightly softer and less elastic.
Yeast is the engine of fermentation. Instant yeast and active dry yeast both work; the main difference is handling. Instant yeast is usually mixed directly into the dough, while active dry yeast is commonly dissolved or proofed first, depending on the recipe.
Water controls hydration. More water generally means a softer, more extensible dough, but also a stickier one. Less water makes the dough easier to handle, though it can feel tighter and less forgiving when you roll it out.
Salt does more than season the dough. It tightens gluten just enough to improve handling and keeps the dough from fermenting too quickly.
Olive oil softens the crumb and improves extensibility. Too much oil can weaken the dough, though, so it should support the structure, not replace it.
Sugar is optional. A small amount can encourage browning and give yeast a little food early on. Too much can make the dough softer and less sturdy.
Tools and Setup Before You Begin
You do not need a bakery lab to make good calzone dough, but a few basics make the process smoother:
- Mixing bowl
- Kitchen scale or measuring cups
- Spoon or dough whisk
- Bench scraper
- Rolling pin
- Clean work surface
- Plastic wrap or a covered bowl for proofing
- Baking sheet or pizza stone
- Parchment paper, if you like easier transfer
If you have a scale, use it. Weighing flour is more consistent than scooping, especially when you want repeatable dough texture. If you measure by volume, spoon and level the flour instead of packing it down.
Also think ahead about your proofing space. A covered bowl on the counter works for same-day dough. If you plan to refrigerate the dough, make room in the fridge for a covered container with enough space for expansion.
Choosing the Right Flour, Yeast, and Hydration
Here is a practical comparison to help you choose the version that fits your kitchen and your goals:
| Choice | What it gives you | Trade-off |
|---|---|---|
| Bread flour | More strength, better stretch, easier sealing | Slightly chewier texture |
| All-purpose flour | Softer dough, easier to find | Less elasticity and a little less tear resistance |
| Instant yeast | Fast, convenient, easy mixing | Less forgiving if you want to verify activity first |
| Active dry yeast | Familiar, widely available | Often benefits from proofing or blooming first |
| Same-day dough | Faster from bowl to oven | Less flavor development, less relaxed handling |
| Refrigerated dough | Better flavor and easier shaping | Requires planning ahead |
| Pizza stone | Strong bottom heat and better browning | Needs preheating and careful handling |
| Baking sheet | Simple and accessible | Bottom may brown less aggressively |
Bread flour vs. all-purpose flour
For most home bakers, bread flour is the safer choice if the goal is a calzone that seals cleanly and resists tearing. If you prefer a softer bite and do not mind a little less stretch, all-purpose flour is perfectly workable. I would lean toward bread flour if you are new to shaping calzones or plan to use a generous filling.
Instant yeast vs. active dry yeast
Instant yeast is the easiest route when you want a straightforward dough. Active dry yeast can absolutely make excellent calzone dough, but if you are using it, verify that it is active if the package or recipe calls for blooming. That matters because a dead yeast batch wastes the rest of your ingredients.
Hydration: how wet should the dough be?
A calzone dough should feel soft and slightly tacky, not sticky and unmanageable. If the dough clings to your hands in a thick paste, it is probably too wet. If it feels dry, rough, and hard to bring together, it likely needs a little more water.
The best adjustment method is gradual. Add water a teaspoon at a time if the dough feels too dry. Add flour sparingly if it is too sticky. Dumping in a large handful of flour usually creates a tough dough before you realize it.
Step-by-Step: Mix, Knead, and Form the Dough
-
Combine the dry ingredients. Mix the flour, yeast, salt, and sugar in a bowl so they distribute evenly.
-
Add the water and oil. Pour them in and stir until a shaggy dough forms. At this stage, the dough may look rough and uneven. That is normal.
-
Let it sit briefly if needed. A short rest helps the flour absorb water and makes kneading easier, especially if the dough feels stiff.
-
Knead until smooth. Work the dough by hand on a lightly floured surface or use a stand mixer with a dough hook. You are looking for a dough that becomes smoother, springier, and more elastic as gluten develops.
-
Stop before it turns tough. Over-kneading is less common by hand than people think, but it can happen in a mixer if the dough gets too tight and starts feeling dry or rubbery.
-
Shape into a ball and place in a lightly oiled bowl. Turn the dough once so the surface is lightly coated. This helps prevent drying during fermentation.
King Arthur Baking notes that calzone dough should be mixed until it pulls away from the sides of the bowl, then kneaded until smooth and supple, with a rise of about 1 hour or until puffy King Arthur Baking calzone recipe. That is a useful benchmark, but the dough’s feel matters more than the clock.
How to Tell When the Dough Is Ready
Timing helps, but dough cues are better.
Look for these signs:
- The dough feels smooth rather than shaggy
- It springs back slowly when pressed
- It has increased in volume and looks puffy
- It stretches without immediately tearing
- A small piece can pass a windowpane test
Quick readiness checklist for calzone dough
Your dough is ready to roll when it:
- Feels soft, elastic, and smooth
- Springs back partway when you press it, but does not snap tight immediately
- Holds a gentle indentation for a moment before slowly filling in
- Stretches without ripping when you lift and tug a small edge
- Can be rolled without shrinking back right away
If the dough still feels tight, bouncy, or resistant, it usually needs more rest. If it feels relaxed and cooperative, it is ready to shape.
The windowpane test is simple: stretch a small piece of dough between your fingers. If it stretches thin enough to let light through without ripping immediately, gluten development is usually in a good place.
Bulk Fermentation, Resting, and Proofing Time
For a same-day dough, a rise of around an hour is common in many recipes, but the real cue is puffy dough rather than the exact minute count. If your kitchen is cool, it may take longer. If it is warm, it may move faster.
Resting matters twice:
- During the first rise, fermentation develops flavor and gas
- Before shaping, a short rest relaxes gluten so the dough rolls out without snapping back
That second rest is especially useful for calzones. If your dough keeps shrinking when you roll it, stop and let it rest for 10 to 15 minutes, then try again. A short pause usually works better than adding more flour.
Refrigerating the dough changes the game in a good way. Chilled dough is often easier to handle because gluten relaxes over time. It can also develop a more rounded flavor. The trade-off is planning: you need to bring it back to a cool, workable temperature before shaping, not necessarily fully warm.
How to Divide, Roll, and Shape Calzone Dough
After the first rise, gently deflate the dough and divide it into equal portions. If you want uniform calzones, use a scale. If not, eyeballing works fine for home use as long as the pieces are roughly the same size.
Let the pieces rest before rolling. This is one of the most useful habits in calzone making because it reduces shrinkage.
When you roll, aim for a circle that is even in thickness. A practical target is roughly 8 to 10 inches in diameter and about 1/8 to 1/4 inch thick, which is thin enough to fold cleanly but still sturdy enough to hold filling. The center should be slightly thicker than the very edge if possible, since the rim gets compressed during sealing and the center has to support the filling.
A shaping rule that prevents trouble
Roll the dough so the center is just a touch thicker than the edge, not the other way around. A slightly thinner rim is fine if it is still pliable, but an overly thin center can burst under filling pressure. If the edge is too thick, it may seal poorly and bake up doughy.
A lightly floured surface helps, but do not bury the dough in flour. Too much flour dries the surface and makes sealing harder.
How to Seal Calzones and Prevent Leaks or Bursts
This is where many calzones fail, and the fix is usually not complicated.
First, do not overfill. The filling should sit comfortably on one half of the dough, leaving enough border to seal. If you pile it too high, the seam has to fight pressure from the inside while baking.
Second, keep wet fillings under control. Even though this article is about dough, it is worth saying that excess moisture inside the calzone can weaken the seam and create a soggy base.
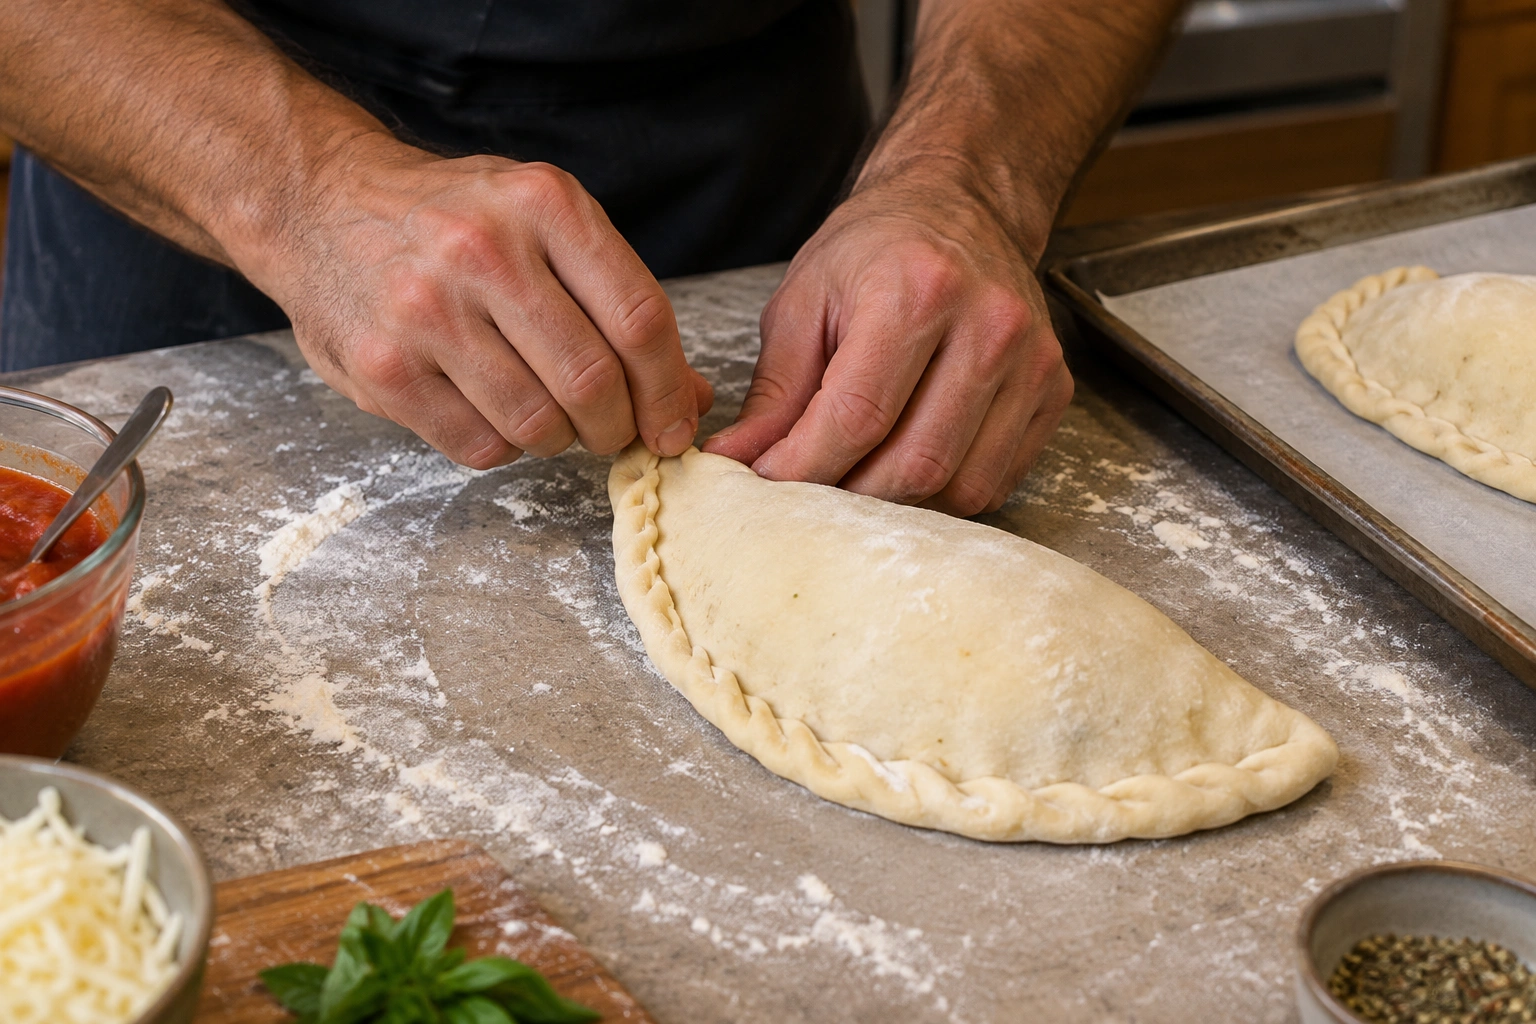
Third, seal firmly. Fold the dough over, press out trapped air around the filling, then crimp or fold the edge tightly. Two beginner-friendly seam techniques work well:
- Pinch-and-fold seam: pinch the two edges together, then fold the pinched edge over itself and pinch again to lock it
- Fork-crimp seam: press the edge with the tines of a fork after folding to reinforce the seal
If you want extra insurance, brush a little water along the edge before sealing. You can also press the seam with the heel of your hand first, then pinch or crimp it for a tighter closure.
A few small vents on top can help steam escape. Make 2 to 4 short slits or small cuts spaced evenly across the top, rather than one large opening, so steam can release without weakening the whole surface. Keep the vents away from the seam and avoid clustering them too close together.
Baking Steel notes that a good calzone dough should be stretchy and flavorful, and that store-bought dough can also work if brought to room temperature before stretching. That is a practical reminder that cold, stiff dough is harder to seal cleanly Baking Steel calzone recipe.
Baking Tips for a Sturdy, Evenly Cooked Crust
A preheated baking surface makes a real difference. A pizza stone can give you stronger bottom heat and better browning. A baking sheet is easier and more accessible, though the base may cook a little more gently.
If you use a stone, preheat it fully before baking. If you use a sheet pan, preheating the pan can also help the bottom set faster and reduce sogginess. For a sturdier crust, place the calzone on a hot surface in the lower-middle part of the oven so the bottom gets enough heat without overbrowning the top too quickly.
Many calzone recipes bake around 450°F, and DeLallo’s guide uses that temperature for calzone-style dough preparation DeLallo stromboli vs calzone. Exact bake time depends on size, filling, and oven behavior, so watch for a deeply golden exterior rather than relying only on the clock.
If you want a more golden finish, a light brush of olive oil on the outside is a simple option. Egg wash can also add color, but it is optional and not necessary for good dough structure. Either way, avoid heavy coating that can make the surface greasy before the crust sets.
What you want from the bake
- The top should be evenly browned
- The bottom should be cooked through, not pale and doughy
- The seam should look sealed and dry, not wet or split
If the top browns too quickly, you may need to lower the rack slightly or tent the calzone loosely with foil partway through baking.
Common Mistakes When Making Calzone Dough
Here are the failures I see most often, and why they happen:
- Too much flour during mixing: creates a dry, tough dough
- Under-kneading: leaves the dough weak and prone to tearing
- Skipping the rest: makes the dough shrink while rolling
- Rolling too thin: increases the chance of leaks and burst seams
- Overfilling: puts too much pressure on the seal
- Baking on an unheated surface: can leave the bottom pale or soggy
Most of these problems come from trying to rush the dough. Calzones reward patience more than speed.
Troubleshooting Sticky, Dry, Shrinking, or Tough Dough
If the dough is too sticky
Dust the work surface lightly and knead in very small amounts of flour only if needed. Sticky dough is not automatically bad; sometimes it just needs a short rest before it becomes easier to handle.
If the dough is too dry
Add a little water and knead again. Do this gradually. A dough that is cracked and rough will usually improve with small additions, but too much water at once can turn it into a mess.
If the dough keeps shrinking
That usually means the gluten is tense. Let it rest, covered, for a short period, then try again.
If the dough feels tough
It may have too much flour, too little hydration, or too much kneading. In future batches, aim for a softer initial mix and stop kneading once the dough becomes smooth and elastic.
Make-Ahead, Refrigerating, and Freezing Calzone Dough
If you want flexibility, calzone dough is a good make-ahead candidate.
Refrigerating
After the dough has risen once, you can refrigerate it in a covered container for about 24 to 72 hours. This slows fermentation and often makes the dough easier to shape later. Bring it out of the fridge and let it sit until it is cool, relaxed, and pliable before rolling. It does not need to become fully warm, but it should no longer feel stiff or hard in the center.
Freezing
For freezing, portion the dough first and wrap each piece well to protect it from freezer burn. Frozen dough is best used within about 1 to 2 months for the best texture, though it may still be safe beyond that if kept continuously frozen. Thaw it in the refrigerator, then let it sit until it becomes soft and flexible enough to roll.
The biggest mistake is freezing dough loosely wrapped. Air exposure dries the surface and damages texture. Tight wrapping matters more than most people realize.
Practical Examples and Dough-Handling Scenarios
Imagine a beginner using all-purpose flour because that is what is already in the pantry. The dough may still work well, but if the calzones tear during sealing, the next batch would likely benefit from bread flour or a slightly longer rest.
Or picture a baker who rolls the dough and it keeps snapping back. That is usually not a sign to add more flour. It is a sign to pause, cover the dough, and let the gluten relax.
Another common scenario: the dough feels fine, but the finished calzone has a pale bottom. In that case, the dough may not be the problem at all. The baking surface may be too cool, which is why a preheated stone or sheet pan can help.
Those small adjustments are the difference between guessing and controlling the result.
When to Consult a Master Baker
If you are consistently getting good rise but poor structure, or if your dough behaves unpredictably even after adjusting flour, hydration, and rest time, it can help to study dough handling with a more experienced baker or instructor. Sometimes the issue is not the recipe but the way the dough is being mixed, rested, or shaped.
FAQ
What makes calzone dough different from pizza dough?
Calzone dough usually needs a little more structure because it has to hold filling and stay sealed. Pizza dough can be more open and stretch-focused, while calzone dough benefits from being supple but sturdy.
How long should calzone dough rise?
Many recipes use about an hour for the first rise, or until the dough looks puffy. That said, temperature and yeast activity matter, so visual cues are more reliable than the clock alone.
How do I know when the dough is kneaded enough?
It should feel smooth, elastic, and supple, and it should pass a basic windowpane test. If it tears easily, it likely needs more kneading or more rest.
Why does my calzone dough keep shrinking when I roll it out?
That usually means the gluten is tight. Let the dough rest, covered, for a short period, then roll again. Resting relaxes the dough and reduces spring-back.
Can I make calzone dough ahead of time?
Yes. Refrigerating the dough after the first rise is a practical way to make it ahead. It often improves handling and can deepen flavor.
How long can I refrigerate calzone dough?
A covered dough can usually be refrigerated for about 24 to 72 hours. Let it sit until it is cool and pliable before shaping.
Can calzone dough be frozen?
Yes, especially if you portion it first and wrap it tightly. Thaw it in the refrigerator and let it soften before shaping.
How long can I freeze calzone dough?
For best texture, use frozen calzone dough within about 1 to 2 months. It should be wrapped tightly to prevent freezer burn.
How thin should I roll calzone dough?
A useful guide is about 8 to 10 inches across and roughly 1/8 to 1/4 inch thick, though the exact thickness should match your filling and dough strength. Thin enough to shape, thick enough to hold.
Should I bake calzones on a stone or a sheet pan?
A pizza stone usually gives stronger bottom heat and better browning. A sheet pan is easier to use and still works well, especially if it is preheated.
Why is my calzone dough too sticky or too dry?
Sticky dough usually needs a little more time or a very small amount of flour. Dry dough usually needs a small addition of water. Make changes gradually so you do not throw off the texture.
How do I keep calzones from leaking?
Do not overfill, keep wet fillings under control, seal the edges firmly, and avoid rolling the dough too thin. A few steam vents on top can also help reduce pressure during baking.