
Cinnamon Swirl Bread That Bakes Soft, Tall, and Beautifully Spiraled

Cinnamon swirl bread has a special kind of appeal: a soft, yeast-raised loaf with a sweet ribbon running through the middle and just enough spice to make the kitchen smell like breakfast worth waking up for. When it’s done well, the crumb is tender, the swirl is distinct, and each slice holds together without turning gummy or collapsing.
That balance is exactly what we’re after here. I’ll walk you through the bread-making decisions that matter most: which flour to choose, how to mix and proof the dough, how to keep the cinnamon filling from leaking, and how to shape the loaf so the swirl stays visible after baking.
If you’ve ever had a loaf with a weak spiral, a sunken filling layer, or a dense center, this guide is built to help you fix those problems at the bench.
Tested Cinnamon Swirl Bread Recipe
Yield: 1 loaf, about 10 to 12 slices
Loaf pan: 9 x 5 inches
Prep time: 25 minutes
First rise: 60 to 90 minutes
Second rise: 45 to 75 minutes
Bake temperature: 350°F
Bake time: 30 to 40 minutes
Total time: about 3 hours, including cooling time
Ingredients
For the dough
– 3 cups all-purpose flour, plus more for dusting
– 2 1/4 teaspoons instant yeast
– 1/4 cup granulated sugar
– 1 teaspoon fine salt
– 3/4 cup warm milk, about 110°F
– 1 large egg
– 3 tablespoons unsalted butter, melted and slightly cooled
For the filling
– 1/3 cup packed light brown sugar
– 1 tablespoon ground cinnamon
– 1 tablespoon all-purpose flour
– 2 tablespoons unsalted butter, very soft
For the pan
– Butter or nonstick spray, for greasing
Yeast note
This recipe is written for instant yeast. If you want to use active dry yeast, use the same amount, but dissolve it in the warm milk with the sugar and let it sit for 5 to 10 minutes until foamy before mixing in the remaining ingredients.
Method
- Mix the dough. In a large bowl, whisk together the flour, instant yeast, sugar, and salt. Add the warm milk, egg, and melted butter. Stir with a wooden spoon or spatula until a shaggy dough forms.
- Knead the dough. Turn the dough out onto a lightly floured surface and knead for 8 to 10 minutes, or knead in a stand mixer with the dough hook for 6 to 8 minutes on medium-low speed. The dough should become smooth, elastic, and slightly tacky, but not wet or sticky enough to smear on your hands.
- First rise. Place the dough in a lightly greased bowl, cover it, and let it rise until doubled in size, about 60 to 90 minutes.
- Make the filling. In a small bowl, mix the brown sugar, cinnamon, and flour.
- Shape the loaf. Grease a 9 x 5-inch loaf pan. Punch down the dough and roll it into a rectangle about 8 x 14 inches. Spread the softened butter over the dough in a thin, even layer, leaving a 1/2-inch border on all sides. Sprinkle the cinnamon-sugar mixture evenly over the butter. Starting from a short side, roll the dough into a tight log, keeping the roll snug but not so tight that the dough stretches or tears. Pinch the seam closed and place the loaf seam-side down in the pan.
- Second rise. Cover loosely and let the loaf rise until the dough looks puffy and rises about 1 inch above the rim of the pan, about 45 to 75 minutes.
- Bake. Bake at 350°F for 30 to 40 minutes, tenting loosely with foil if the top browns too quickly.
- Cool. Let the loaf cool in the pan for 10 minutes, then remove it and cool completely on a rack before slicing.
What Cinnamon Swirl Bread Is, and Why This Method Works
This is a yeast bread, not a quick bread batter. That matters because yeast dough gives you lift, a more bread-like crumb, and a loaf that slices cleanly once fully cooled. In contrast, a cinnamon swirl quick bread is usually mixed more like a cake or muffin batter and relies on chemical leavening, which makes it faster but less structured.
A good cinnamon swirl loaf should be soft and fluffy, with a sweet cinnamon layer that shows up clearly in the slice. Some versions lean more tender and buttery; others are a little leaner and closer to sandwich bread. The method below aims for a practical middle ground: enough structure to hold the spiral, enough softness to feel rich and comforting.
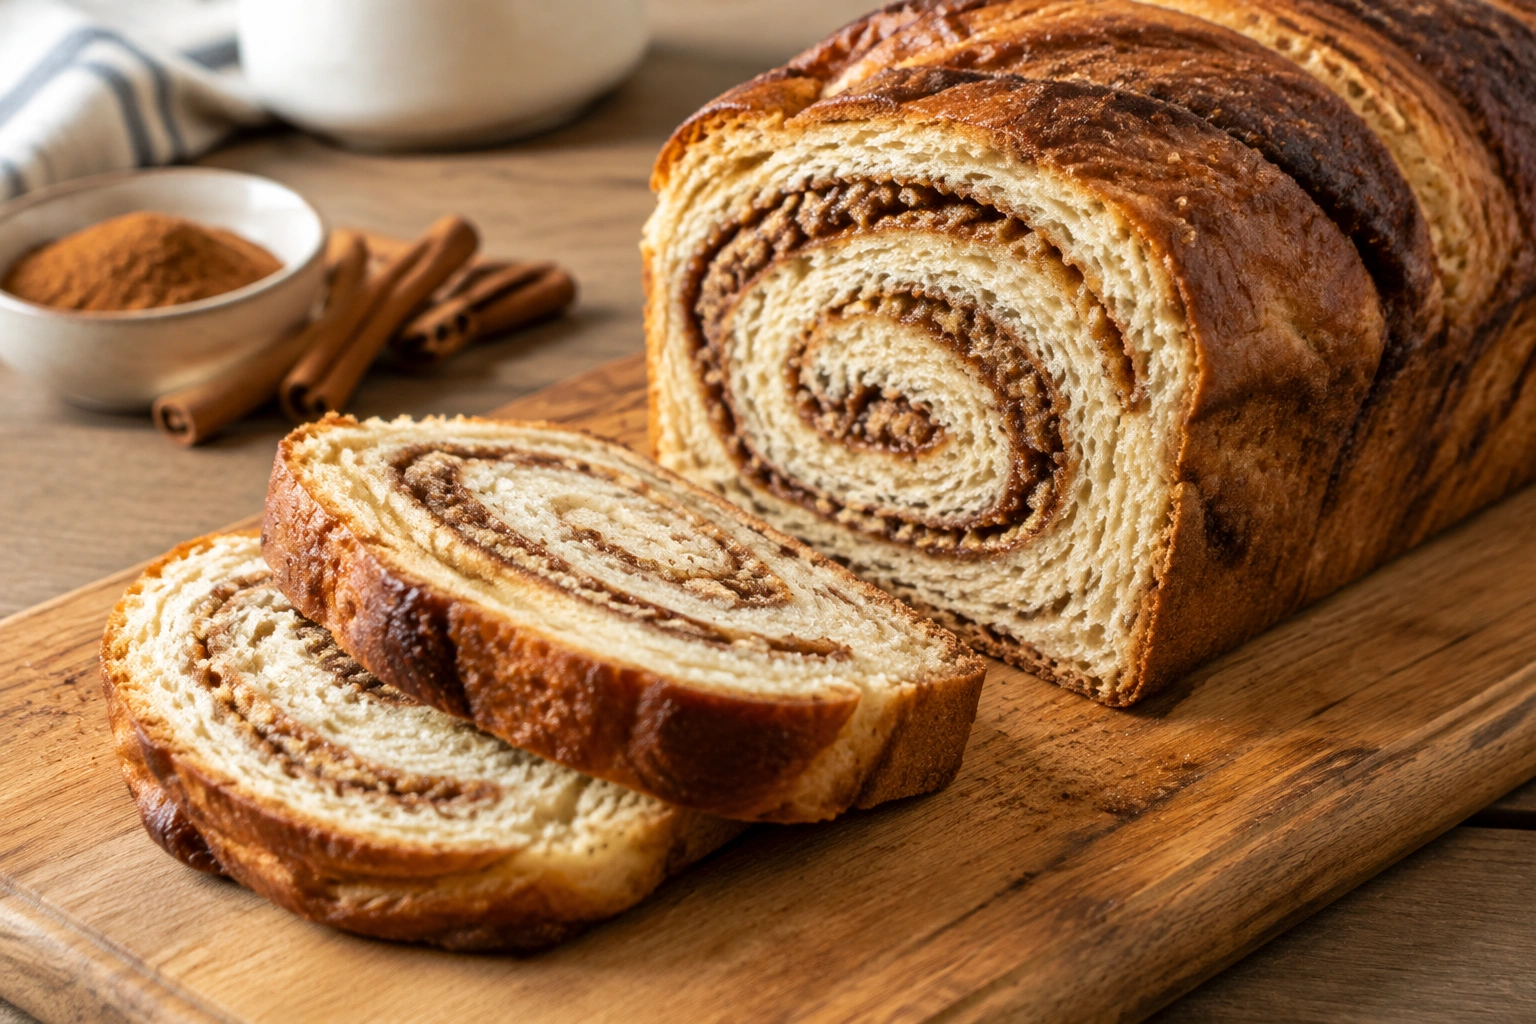
For readers who like a visual benchmark, the swirl should look like a ribbon, not a puddle. You want clear, layered spirals—not a filling that disappears into the dough or leaks out the bottom of the pan.
Ingredients, Tools, and What Each One Does
Here’s the ingredient logic before we get to the method.
| Ingredient | What it does | Trade-off to know |
|---|---|---|
| All-purpose flour | Gives a softer, more tender crumb | Less chew and strength than bread flour |
| Bread flour | Adds structure and a taller loaf | Slightly chewier texture |
| Yeast | Lifts the dough and creates the bread texture | Needs time and proper proofing |
| Sugar | Feeds yeast a little and sweetens the loaf | Too much can slow fermentation |
| Butter or oil | Softens the crumb | Richer dough can be a bit trickier to shape |
| Egg and/or milk | Adds tenderness and flavor | Enriched dough may need a little more mixing |
| Cinnamon-sugar filling | Creates the swirl | Too much filling increases leakage risk |
For a reliable home version, you’ll want:
– A loaf pan, ideally 9 x 5 inches
– A mixing bowl
– A bench scraper or spatula
– A rolling pin
– A pastry brush
– A kitchen scale if you have one
– An instant-read thermometer for doneness
If you’re choosing between flours, bread flour gives more structure, while all-purpose flour usually gives a softer bite. I reach for all-purpose when I want a more tender family-style loaf, and bread flour when I want a slightly sturdier slice that stands up to toasting.
Before You Start: Dough and Pan Prep Checklist
A smooth bake begins before the dough is mixed.
Make sure your yeast is ready to work. If you’re using instant yeast, it can usually go straight into the dough. Active dry yeast often benefits from being mixed into warm liquid first so it can wake up properly. If your kitchen runs cool, proofing will usually take longer than the clock says.
Prep your pan before you get flour on the counter. Grease it well, or line it with parchment with a little overhang so the loaf lifts out cleanly after baking. That matters because a cinnamon loaf can stick where the filling caramelizes near the edges.
Clear a workspace for rolling the dough into a rectangle. You’ll need enough room to keep the dough even without stretching it thin in one corner and thick in another. Uneven thickness often leads to an uneven swirl.
How to Make the Dough
A good swirl starts with good gluten development. The dough needs enough strength to trap gas during proofing, but not so much flour that it turns dry.
- Combine the dry ingredients. Mix the flour, sugar, salt, and yeast in a bowl.
- Add the wet ingredients. Stir in warm milk, melted butter, and the egg.
- Mix until a shaggy dough forms. It should look rough at first, not smooth.
- Knead until elastic. You can knead by hand or with a mixer. The goal is a dough that stretches instead of tearing immediately.
- Check gluten development. Use the windowpane test: stretch a small piece of dough gently. If it can stretch thin enough to let light through without ripping right away, the gluten is developed enough.
If the dough feels very sticky, resist the urge to bury it in flour. Too much extra flour is one of the fastest ways to end up with a dry loaf. A slightly tacky dough usually bakes better than a stiff one.
First Rise: How to Know When the Dough Is Ready
Place the dough in a lightly greased bowl, cover it, and let it rise until it has visibly expanded. Time is only a rough guide. Temperature, dough richness, and yeast strength all affect how long this takes.
Look for these cues:
– The dough is noticeably puffed
– It feels lighter when you lift it
– A gentle poke springs back slowly, not instantly
If it springs back too quickly, it likely needs more time. If the dough seems fragile and overly airy, it may be overproofed. That’s the point where the loaf can rise and then collapse later, especially once it’s shaped and loaded with filling.
How to Make the Cinnamon-Sugar Filling
The filling should be flavorful, but not wet. Moist filling is one of the biggest reasons cinnamon swirl bread leaks or develops a gummy layer.
A practical filling usually includes:
– Brown sugar or granulated sugar
– Ground cinnamon
– A little flour to help absorb excess moisture
– Soft butter or egg wash, depending on the method
The flour in the filling is a small detail with a big payoff. It helps the sugar stay in place instead of melting into a syrupy layer that slides to the bottom of the loaf pan.
If you want a stronger cinnamon hit, increase the cinnamon a little before you increase the sugar. More sugar can make the filling taste richer, but it also raises the risk of seepage.
How to Roll, Fill, and Shape the Swirl
This is the part that determines whether your loaf looks bakery-worthy or just vaguely marbled.
Roll the dough into a rectangle of even thickness, about 8 x 14 inches. You don’t need to force it paper-thin. In fact, too thin can cause tearing and gaps. A rectangle that’s even and manageable is better than one that’s huge and fragile.
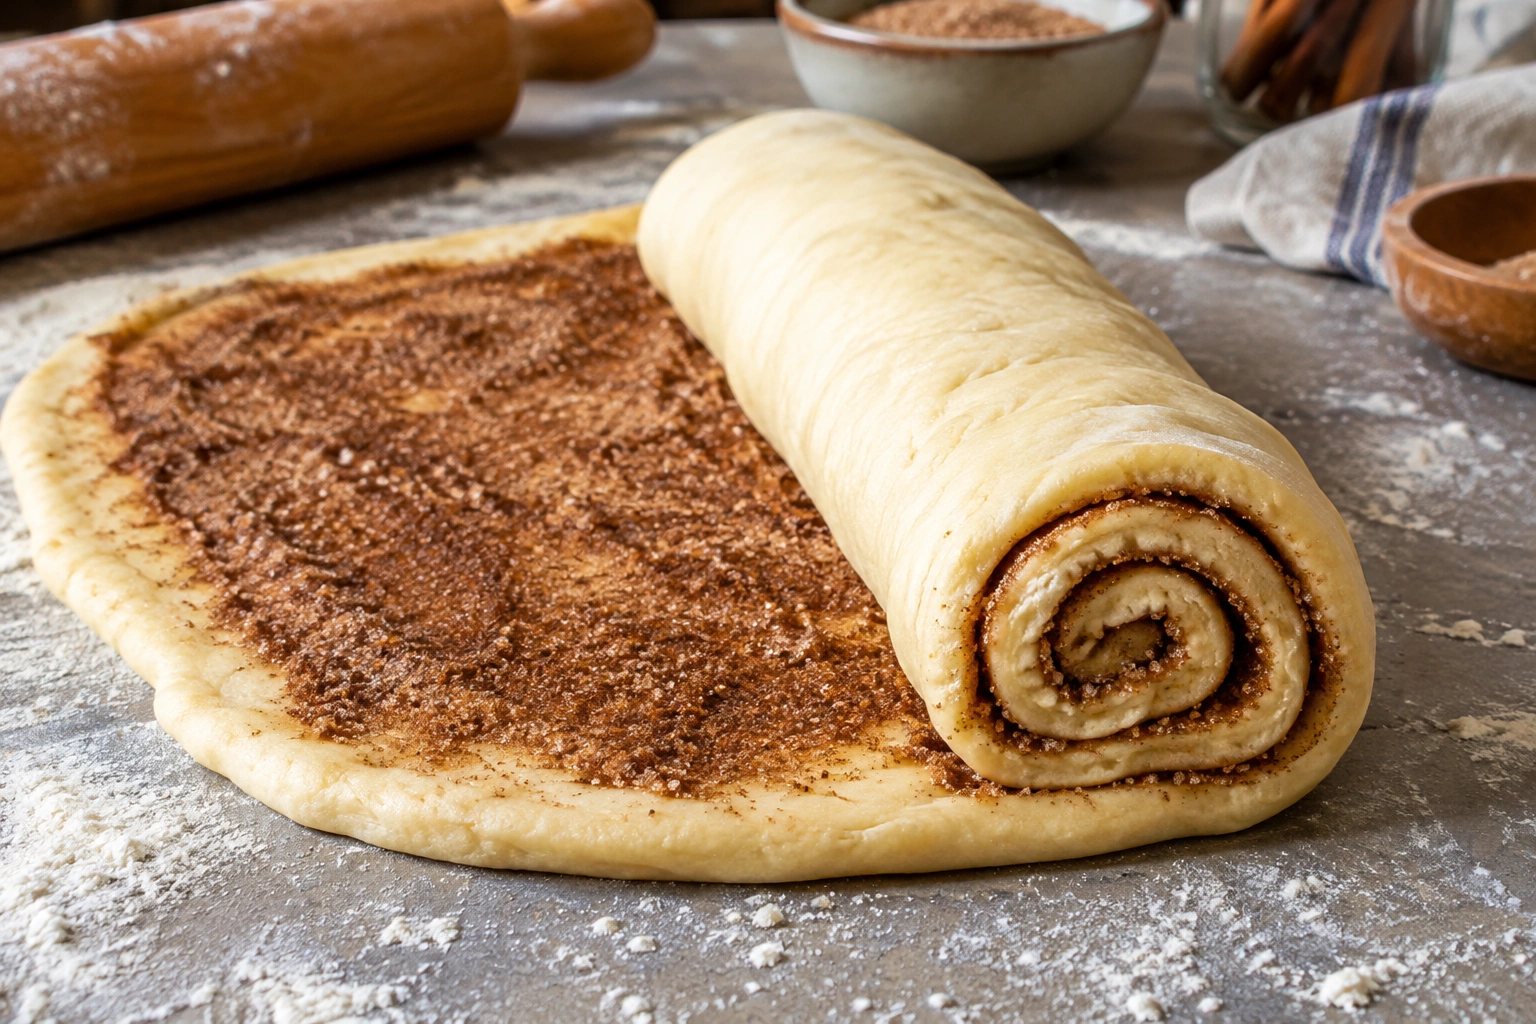
Spread the filling in an even layer over the dough, using the full amount from the recipe. Leave a 1/2-inch border around all edges. That border helps seal the loaf. If the filling goes all the way to the edge, it tends to squeeze out when you roll.
Now roll the dough from a short side into a tight log. Roll firmly enough to create a compact swirl, but not so tightly that the dough tears or squeezes the filling out of the seam. The best swirl comes from a roll that is snug, even, and consistent from end to end.
Pinch the seam closed and pinch the ends too. Think of it as closing the bread’s “package.” If the seam is open, the loaf may unfurl in the pan or leak filling underneath.
If you see a little filling on the outside, that’s normal. What you want to avoid is a thick band of exposed filling or a seam that won’t hold together.
Second Rise and Final Pan Proofing
Place the shaped loaf seam-side down in the prepared pan. Cover it loosely and let it proof until the dough looks puffy and rises about 1 inch above the rim of the pan, about 45 to 75 minutes.
A useful visual check: if the dough has expanded enough that it has a gentle dome above the pan rim, it’s often close to ready. If you poke it lightly and the indentation fills in slowly, that’s another sign of good proofing.
Underproofing usually gives you a tight crumb and a weaker rise in the oven. Overproofing can make the loaf collapse or bake with a fragile, sunken top. For this bread, a slightly underproofed loaf is usually less risky than a fully overproofed one.
Bake the Loaf: Temperature, Time, and Doneness Cues
Bake at 350°F for 30 to 40 minutes, but don’t rely on time alone. Cinnamon swirl bread can look done on top while still being underbaked in the center, especially where the filling is thickest.
Use three doneness checks:
– Color: the top should be deep golden brown
– Touch: the loaf should feel set, not wobbling in the middle
– Temperature: the internal temperature should reach 190°F to 195°F in the center
If you have an instant-read thermometer, insert it into the center without touching the pan. That gives you a much better read than guessing from the crust alone.
If the top browns too quickly, tent loosely with foil so the center can finish baking. This is especially helpful if the loaf has a rich filling or an enriched dough that browns faster than a lean dough.
Cooling and Slicing for the Cleanest Swirl
This is where patience pays off.
Let the loaf cool in the pan for about 10 minutes, then remove it and cool completely on a rack before slicing. If you cut too early, the crumb compresses and the swirl can look smeared instead of defined. A warm loaf also tends to feel gummy in the center even when it’s technically baked through.
Use a serrated knife and a gentle sawing motion. Don’t press down hard. That flattens the spiral and can make the slices look denser than they really are.
For the neatest slices, let the loaf sit until it’s fully cool. If you’re baking for brunch, this is one of those cases where baking the day before can actually improve the result.
Common Mistakes and How to Fix Them
Here’s the short version of what usually goes wrong.
Filling leaks out
Usually caused by too much filling, too much moisture, or a loose seam. Reduce the filling slightly, keep it drier, and pinch the seam and ends more firmly.
Swirl is weak or disappears
The dough may have been rolled too loosely, or the filling may have been spread unevenly. Roll with more tension and distribute the filling in a thin, even layer.
Loaf is dense
This often comes from underproofing, weak gluten development, or too much flour during kneading. Give the dough more time, knead until elastic, and avoid adding flour just to make the dough feel easier.
Center is gummy
Most often this means underbaking or cutting too soon. Bake to temperature and let the loaf cool fully.
Loaf collapses
Overproofing is the usual suspect. The dough rose too far before baking and couldn’t hold its structure in the oven.
Troubleshooting by Symptom
| Symptom | Likely cause | Best fix next time |
|---|---|---|
| Filling pooled at bottom | Filling too wet or too much sugar | Add a little flour to the filling and use less of it |
| Spiral gaps inside the loaf | Dough rolled too loosely | Roll tighter and seal the seam well |
| Tight, heavy crumb | Underproofed dough | Let the first and second rise go longer |
| Dry slices | Too much flour or overbaking | Weigh flour if possible and check temperature earlier |
| Top split oddly | Weak seam or underproofed loaf | Pinch seam firmly and proof a bit longer |
Variations and Ingredient Swaps
If you want a little more structure, use bread flour. If you want a softer, more tender crumb, all-purpose flour is usually the better choice.
Instant yeast is the simpler option because it can go straight into the dough. Active dry yeast can work just as well, but it may need a little more patience at the beginning.
Add-ins like raisins or chopped nuts can be delicious, but they do make shaping harder. Raisins can create little pockets that interrupt the swirl, and nuts can poke through the dough if you roll too tightly. If you add them, keep the layer thin and even.
A richer dough with more butter, milk, or egg will taste softer and more luxurious, but it can also be a little less forgiving to shape. That’s the trade-off: more tenderness, slightly more handling sensitivity.
Make-Ahead, Storage, Freezing, and Reheating
Cinnamon swirl bread is a strong candidate for make-ahead baking.
For a practical overnight option, shape the loaf, place it in the prepared pan, cover it tightly, and refrigerate it overnight before the second rise. The next day, let it sit at room temperature until it looks puffy and ready to bake, then bake as directed. This can be especially useful if you want fresh bread in the morning without doing the full recipe all at once.
For short-term storage, keep the cooled loaf wrapped well at room temperature. If your kitchen is very warm, store it in a cool spot so the filling doesn’t get overly soft. Slices can dry out faster than a whole loaf, so cut only what you need.
To freeze, cool the loaf completely first. Then wrap it tightly and freeze whole or in slices. Slices are especially handy for weekday toast because you can take out only what you need.
To reheat, warm slices gently in a toaster or low oven. If you reheat too aggressively, the crumb can dry out before the center warms.
Cinnamon Swirl Bread vs. Cinnamon Swirl Quick Bread
If you want classic bread texture, choose the yeast version. You’ll get a more substantial crumb, a better rise, and a loaf that feels like bread at the table.
If you want speed, quick bread is the faster route. It usually requires less waiting and no yeast fermentation, but the texture is more cake-like and less structured.
That difference matters most when you’re planning around time. A yeast loaf is the one I’d make for a weekend breakfast or a baking lesson. A quick bread is better when you need something sooner and don’t want to manage proofing.
FAQ
What loaf pan size works best?
A 9 x 5-inch loaf pan is a common and reliable choice for cinnamon swirl bread. If you use a smaller pan, the loaf may rise too high and bake unevenly.
Can I make this bread without a mixer?
Yes. Many cinnamon swirl bread recipes can be mixed and kneaded by hand. You’ll just need a little more time and attention during kneading.
How do I know the loaf is fully baked?
Look for a deep golden crust, a set center, and an internal temperature of 190°F to 195°F in the middle. Don’t rely on color alone.
Can I use whole wheat flour?
You can, but it usually makes the loaf denser. If you want to experiment, swap in part whole wheat rather than all of it at first.
Why did my filling sink?
The filling may have been too wet, too heavy, or spread too thickly. A drier filling with a little flour mixed in is more likely to stay suspended in the swirl.
Can I make it as rolls instead of a loaf?
Yes, but the shaping and bake time will change. Rolls give you more surface area and a more dramatic swirl in each piece, while a loaf is simpler and slices neatly for toast.
How should I store leftover slices?
Wrap them well and keep them at room temperature for short-term storage, or freeze slices for longer keeping. Reheat gently so they stay soft.
Cinnamon swirl bread rewards careful handling, not fussy technique. Once you understand how the dough, filling, and shaping work together, you can make a loaf that looks beautiful on the cutting board and tastes even better toasted the next morning.