
Doughnut Dough Made Simple: A Baker’s Guide to Soft, Light Yeast Doughnuts

If you want doughnuts with a tender crumb, a light bite, and that classic fried-dough aroma, the dough itself matters more than the glaze. Good doughnut dough is enriched, lightly sweetened, and mixed just enough to build structure without turning tough. It should feel soft and a little tacky, not stiff like sandwich bread dough and not pourable like cake batter.
In my kitchen, I think of doughnut dough as a balancing act. You want enough gluten strength to hold gas during proofing and frying, but enough fat, sugar, and dairy to keep the crumb delicate. That is why yeast-raised doughnuts taste and feel so different from cake doughnuts: one is a fermented dough, the other is a batter leavened chemically.
For a reliable home-kitchen result, the process matters as much as the formula. Warm ingredients, careful kneading, proper proofing, and a steady frying temperature all work together. Miss one of those steps, and the result is usually obvious: dense centers, greasy surfaces, or doughnuts that collapse as soon as they hit the oil.
What Yeast-Raised Doughnut Dough Is and Why It Works
Yeast-raised doughnut dough is an enriched dough made with flour, yeast, milk, eggs, sugar, butter, and salt. The yeast gives it lift through fermentation, while the enrichment ingredients soften the crumb and add flavor. That combination is what creates a doughnut that fries up plump and airy instead of bread-like.
Compared with bread dough, doughnut dough is usually softer and sweeter, with more fat and sugar. Those ingredients slow gluten development a little, which is helpful because you do not want a chewy loaf texture here. Compared with cake doughnut batter, yeast dough needs time: mixing, resting, proofing, shaping, and a second rise before frying.
Here is a practical home formula you can actually use:
Sample yeast-raised doughnut dough formula
Yield: about 12 standard ring doughnuts plus doughnut holes, or about 1 kg of dough total
- 500 g all-purpose flour
- 50 g granulated sugar
- 7 g instant yeast
- 8 g fine salt
- 250 g whole milk, lukewarm
- 1 large egg, about 50 g without shell
- 50 g unsalted butter, softened
- Optional: 1 tsp vanilla extract
Method summary: Mix until the dough comes together, knead until smooth and elastic, let it rise until puffy, shape, proof again, then fry at steady temperature until deep golden and cooked through.
If you want the classic bakery-style fried doughnut, yeast-raised dough is the right path. If you want something faster and more muffin-like, cake doughnuts are a separate project.
Yeast-raised vs cake-style doughnuts
| Choice | Texture | Time | Best for |
|---|---|---|---|
| Yeast-raised doughnut dough | Light, airy, tender, slightly chewy | Longer | Classic fried doughnuts |
| Cake doughnut batter | More crumbly, denser, cake-like | Faster | Quicker doughnuts with a different texture |
Ingredients, Tools, and Dough Decisions
A good doughnut dough formula is not complicated, but each ingredient has a job. The dough works best when you understand those jobs before you mix.
Core ingredients and what they do
- Flour: Forms the dough’s structure. All-purpose flour gives a tender result; bread flour adds more strength and chew.
- Yeast: Leavens the dough. Instant yeast is convenient; active dry yeast often needs a little more time and may be bloomed first.
- Milk: Adds flavor and tenderness, and helps the dough brown.
- Eggs or egg yolks: Enrich the dough, improve color, and soften the crumb.
- Sugar: Sweetens the dough and helps browning. Too much can slow yeast activity, so balance matters.
- Butter: Adds richness and a softer bite.
- Salt: Tightens gluten slightly, improves flavor, and keeps the dough from tasting flat.
A useful example comes from a troubleshooting formula that uses all-purpose flour, lukewarm water, lukewarm milk, active dry yeast, egg, egg yolk, sugar, softened butter, and sea salt. That ingredient set is a good model for a balanced enriched dough. The Flavor Bender’s doughnut troubleshooting guide
Which flour should you use?
If you want a softer, more delicate doughnut, all-purpose flour is usually the more forgiving choice. If you want a little more chew and a dough that tolerates handling better, bread flour can help.
Here is the practical trade-off:
- All-purpose flour: softer crumb, easier to keep tender, slightly less chew
- Bread flour: stronger gluten, better handling, slightly more chew
For home bakers, I usually reach for all-purpose flour unless I specifically want extra structure or I know the dough will be handled a lot.
Instant yeast vs active dry yeast
- Instant yeast mixes directly into the dry ingredients and usually fits same-day dough better.
- Active dry yeast may need blooming in warm liquid and can be a little slower.
If you are baking on a schedule and want the simplest workflow, instant yeast is the easier choice. If active dry yeast is what you have, use it confidently; just allow for slightly more time and follow the package directions for activation.
Tools that make the job easier

You do not need a commercial fryer or a pro mixer, but a few tools help a lot:
- Stand mixer or a sturdy mixing bowl and spoon
- Dough scraper
- Rolling pin
- Doughnut cutter or two round cutters
- Thermometer for oil temperature
- Sheet trays lined with parchment
- Slotted spoon or spider strainer
A thermometer is strongly recommended. Frying without one is guesswork, and doughnuts are sensitive to oil temperature.
Before You Start: Doughnut Dough Prerequisites
A little setup saves a lot of frustration later.
Bring ingredients to a workable temperature
Cold eggs, cold milk, and cold butter slow fermentation and make the dough harder to mix evenly. Room-temperature ingredients are easier to incorporate, and lukewarm liquid helps yeast get moving without shocking it.
You do not need everything steaming warm. You just want the dough to mix smoothly and begin fermenting without delay.
Set up your workspace
Clear a flat counter for rolling and cutting. Line a tray with parchment so cut doughnuts can rest without sticking. Have a second tray ready for the finished pieces. Once the dough is proofed, you want to work calmly and efficiently.
Frying safety matters
Hot oil can cause severe burns, so use a thermometer and avoid overcrowding the pot. If you add too many doughnuts at once, the oil temperature drops and the doughnuts can absorb more oil. A crowded fryer also splatters more.
Keep a lid nearby, but never use water on oil. And never leave a pot of hot oil unattended.
How to Make Doughnut Dough Step by Step
This is the part where doughnut dough becomes manageable instead of mysterious.
1) Mix the dry ingredients
Combine the flour, sugar, yeast, and salt in your mixing bowl. If you are using active dry yeast and your recipe calls for blooming, dissolve it in the warm liquid first instead of adding it dry.
2) Add the wet ingredients
Add the milk and eggs, then mix until the dough starts to come together. It may look shaggy at first. That is normal. Enriched dough often looks rough before it smooths out.
If the dough seems very dry and will not hydrate, add a small splash of milk. If it feels more like paste than dough, resist the urge to dump in flour immediately. Let the mixer or your hands work a little longer first.
3) Knead until the dough becomes smooth and elastic
Knead by mixer on medium-low for about 8 to 10 minutes, or by hand for about 10 to 12 minutes, until the dough is smoother, more elastic, and slightly tacky rather than sticky. It should begin to pull away from the bowl, though a little sticking at the bottom is normal in enriched dough.
This is where many bakers go wrong. They add too much flour because the dough feels sticky early on. Enriched dough often starts tacky and becomes more manageable as gluten develops and butter is absorbed. Add flour only if the dough is truly unworkable.
4) Check development with the windowpane test
Take a small piece of dough and stretch it gently between your fingers. If it stretches thin enough to let light through without tearing immediately, the gluten is developed enough. You are not trying to make it indestructible; you are checking for elasticity and extensibility.
5) Let it rise until visibly puffy
Place the dough in a lightly greased bowl, cover it, and let it rise until it looks noticeably expanded and feels airy. At typical room temperature, this often takes about 1 to 2 hours, though enriched dough can take longer in a cool kitchen.
The best cue is not “double in size” as a rigid rule, but a dough that looks rounded, feels lighter, and springs back slowly when gently pressed.
6) Chill if your recipe or schedule calls for it
For make-ahead doughnuts, the easiest home-baker workflow is usually to refrigerate after the first rise, before shaping. Cover the bowl tightly and chill the unshaped dough for 8 to 24 hours. This slows fermentation, improves scheduling, and makes the dough easier to handle the next day.
If you chill shaped doughnuts instead, place them on parchment-lined trays, cover well so they do not dry out, and refrigerate them after shaping and before the final proof. The next day, let them warm slightly and finish proofing before frying.
How to Tell When the Dough Is Ready
Timing helps, but dough tells the truth better than the clock.
Visual cues
Properly developed dough should look smooth, elastic, and slightly domed after rising. It should not be torn, dry, or clumpy. After the first rise, it should feel lighter when you press it gently.
Tactile cues
A ready dough should feel soft and a little tacky, but not gluey. If it resists stretching and snaps back hard, it likely needs more kneading or more resting time. If it tears easily, it may be underdeveloped or too dry.
A simple decision rule
- Sticky but elastic: usually fine
- Dry and stiff: likely too much flour or not enough liquid
- Smooth but weak: may need more kneading
- Puffy and delicate: ready for shaping
Shaping, Rolling, and Cutting Doughnuts
Once the dough is ready, handle it gently. Overworking at this stage can knock out gas and make the final doughnuts less airy.
Roll to the right thickness
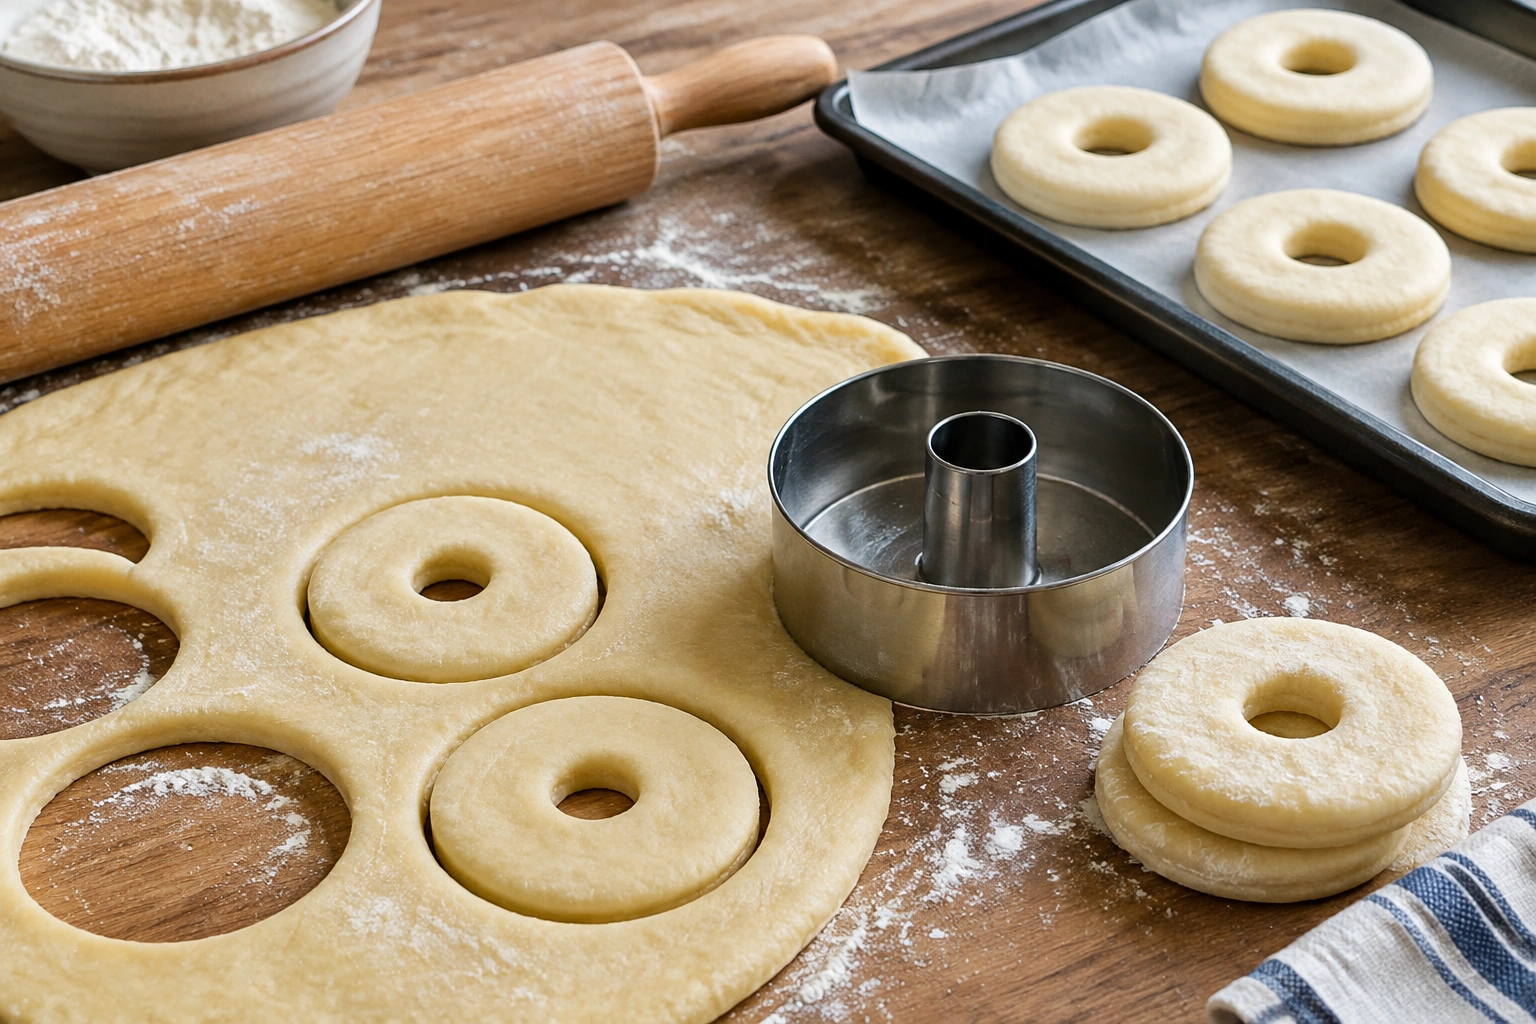
Roll the dough evenly so the doughnuts cook at the same rate. Too thick, and the centers can stay doughy; too thin, and the doughnuts can fry up flat and dry. A moderate thickness works best for most home-kitchen doughnuts.
Cut cleanly
Use a sharp doughnut cutter or round cutters. Press straight down instead of twisting, which can seal the edges and reduce rise. If you are making filled doughnuts, cut circles without the center hole.
Transfer with care
Lift each piece gently with a dough scraper or your fingers. Doughnut dough is delicate after shaping. If you drag it across the counter, it can stretch and deflate.
Final Proofing Before Frying
The second rise is what gives doughnuts their puff just before they hit the oil.
Properly proofed doughnuts should look visibly expanded and feel lighter when you touch them. They should jiggle slightly when the tray is nudged, but still hold their shape.
Underproofed vs overproofed
- Underproofed doughnuts: dense crumb, tight texture, spring back too aggressively, may crack or burst in the fryer
- Overproofed doughnuts: fragile structure, can collapse, absorb more oil, and fry unevenly
A practical test is the fingertip poke: press the dough very lightly. If the indentation springs back immediately, it needs more proofing. If it springs back slowly and leaves a slight mark, it is usually ready. If the dough feels fragile and the indentation stays sunken, it may be overproofed.
This step is less about the stopwatch than the feel of the dough. In a warm kitchen, proofing may move quickly. In a cooler one, it will take longer. Watch the dough, not just the minutes.
How to Fry Doughnuts Correctly
Frying is where all the earlier work shows up.
Aim for steady oil temperature
A common frying range for yeast doughnuts is around 182 to 190°C, or 360 to 374°F.
That range is useful because it gives you a crisp exterior before the interior overcooks. Too cool, and the doughnuts soak up oil. Too hot, and they brown too quickly outside while staying underdone inside.
Fry in small batches
Add only a few doughnuts at a time so the temperature stays steady. Turn them once if needed so they brown evenly. For standard ring doughnuts, a practical fry time is often about 1 to 2 minutes per side, or roughly 2 to 4 minutes total depending on size and thickness. Smaller doughnuts and doughnut holes will finish faster.
Look for more than color alone: properly fried doughnuts should be deeply golden, feel light for their size, and sound slightly crisp at the edges when lifted from the oil. If they brown before the center has time to cook, lower the heat a little and give the oil time to recover between batches.
Drain properly
Set fried doughnuts on a rack or paper-lined tray to drain briefly. If you leave them stacked, steam softens the crust.
Finishing Options After Frying
Keep the finish simple so the doughnut itself stays the star.
A warm doughnut can be rolled in sugar, dipped in glaze, or left plain if you plan to fill it later. The key is to finish while the surface is still slightly warm so the coating adheres well.
If you are making glazed doughnuts, let them cool just enough that the glaze does not melt off completely. If you are using sugar, toss them while they are still warm and a little oily on the surface.
Common Doughnut Dough Mistakes and How to Fix Them
Sticky dough
A slightly sticky dough is normal in enriched doughs. If it is truly unmanageable, the fix is usually a short rest rather than a pile of extra flour. Let the dough relax for a few minutes, then reassess.
Dry or stiff dough
This usually means too much flour or too little liquid. Add liquid sparingly, a teaspoon or tablespoon at a time, and knead until the dough absorbs it.
Dense doughnuts
Dense doughnuts usually come from one of three problems: underkneading, underproofing, or too much flour. The fix depends on the cause, but the prevention is simple: develop the dough properly and proof until it looks and feels airy.
Greasy doughnuts
Greasy doughnuts are often fried in oil that is too cool. The dough sits in the oil too long and absorbs fat instead of sealing quickly. Keep the temperature steady and avoid crowding the pot.
Tearing during shaping
If the dough tears when rolled, it may need a longer rest or a little more gluten development. Letting the dough relax makes it easier to roll without fighting back.
Make-Ahead and Overnight Refrigeration Options
Refrigeration is one of the best tools for home bakers who want better scheduling.
The best make-ahead method for most home bakers is to mix and knead the dough, let it complete the first rise, then refrigerate the unshaped dough overnight. The next day, let the dough sit briefly at room temperature until it is easier to roll, then shape, cut, and proof the doughnuts before frying.
If you prefer to shape first, you can refrigerate the shaped doughnuts overnight on parchment-lined trays, covered well so they do not dry out. The next day, let them finish proofing until they look puffy and pass the gentle poke test before frying.
Cold dough will not fry well straight from the fridge if it is still tight and underproofed. Give it time to become airy again before it goes into the oil.
Practical Scenarios You Can Learn From
Scenario 1: The dough feels sticky after mixing
That does not automatically mean something is wrong. Enriched dough often feels tacky before kneading. If the dough becomes smoother after mixing and passes the windowpane test, it is probably on track.
Scenario 2: The doughnuts look puffy but fry up dense
That often means the dough was underproofed. They may have looked okay on the tray, but they had not built enough gas to expand properly in the oil.
Scenario 3: The doughnuts browned too fast and stayed pale inside
The oil was likely too hot. Reduce the heat slightly and give the oil time to return to temperature between batches.
Scenario 4: The dough was hard to roll after chilling
Let it sit briefly at room temperature, just until it becomes pliable. Chilled dough should be easier to handle, not brittle.
When to Consult a Master Baker
If your doughnut dough keeps failing despite careful measuring, the issue may be formula balance rather than technique. That is especially true if you are adapting a recipe to a different flour, a different kitchen temperature, or a different proofing schedule. A master baker can help you evaluate hydration, fermentation timing, and mixing intensity in a way that is hard to diagnose from one batch alone.
Frequently Asked Questions About Doughnut Dough
Can I make doughnut dough ahead of time?
Yes. Chilling is a practical make-ahead option, especially for enriched yeast dough. Just remember that cold dough needs time to warm slightly and proof if it has not finished rising.
Can I bake doughnut dough instead of frying it?
You can bake it, but the result will be different. Baking produces a softer bun-like texture rather than the classic fried crust and airy interior. If you want a true doughnut experience, frying is the better method.
What is the best flour for soft doughnuts?
All-purpose flour is usually the best starting point for a softer, more tender doughnut. Bread flour can work if you want more chew or a slightly sturdier dough.
Why does my dough feel sticky even after kneading?
Enriched dough often stays a little tacky. The real test is whether it becomes smooth, elastic, and manageable. If it still clings aggressively to everything, it may need a bit more mixing or a short rest.
How long should I proof doughnut dough?
Use the dough’s appearance and feel rather than a fixed clock. It should look visibly expanded, feel light, and spring back slowly when touched. Temperature, dough richness, and yeast strength all affect the timeline.
What oil should I use for frying?
Use a neutral oil with a high enough smoke point for deep frying. More important than the exact oil is keeping the temperature steady and avoiding overcrowding.
Why are my doughnuts oily?
The most common reason is frying at too low a temperature. Overproofed dough can also absorb more oil because its structure is weaker.
Doughnut dough rewards patience, but not fussiness. Once you understand how the ingredients work together, you can judge the dough by touch, look, and feel instead of chasing the clock. That is when homemade doughnuts start to taste like something from a serious bakery.