
How to Make Ciabatta at Home: A Practical Guide to Open Crumb and Crisp Crust

Ciabatta looks simple on the outside, but it asks for a very specific kind of dough behavior. The magic is in the contrast: a thin, crackly crust and a light interior full of irregular holes. To get there, you need a dough that is wetter and more delicate than the average sandwich loaf, plus a gentler approach to mixing, folding, shaping, and baking.

If you’ve ever wondered why ciabatta feels so sticky, or why a loaf can go from promising to flat in a matter of minutes, this guide will help you read the dough instead of fighting it. I’m Ethan Baker, and in bread work, the real skill is learning when to push and when to leave the dough alone.
What Ciabatta Is and Why the Dough Behaves Differently
Ciabatta is an Italian-style bread known for its open crumb, irregular air pockets, and crisp crust. The dough is usually high in hydration, which means it contains a lot of water relative to flour. That extra water helps create a lighter, more open interior, but it also makes the dough slack, sticky, and harder to shape.
That trade-off is the heart of ciabatta. If the dough were drier and firmer, it would be easier to handle, but the crumb would usually be tighter. If the dough is wetter, it can trap more gas during fermentation, but only if the gluten network is strong enough to hold it.
Think of ciabatta as a bread that rewards patience and restraint. You are not trying to force structure into it with heavy kneading. You are building structure gradually through mixing, resting, and folding.
Ingredients, Tools, and Smart Substitutions
Here’s the practical starting point for most home bakers.
Core ingredients
For one medium loaf or about 8 rolls:
– 500 g bread flour
– 400 g water, plus 10 to 20 g more if needed
– 10 g salt
– 2 g instant yeast, or about 3 g active dry yeast
– Optional 10 to 15 g olive oil for a slightly softer, more home-style crumb
This gives you a starting hydration of about 80%, which is a good ciabatta range for many home kitchens. If your flour is very strong and absorbs well, you may be able to go a little higher. If your flour is softer or your kitchen is very warm, start closer to 75% to 78% and add water only if the dough can still hold together.
A practical baker’s percentage formula
- Flour: 100%
- Water: 80%
- Salt: 2%
- Instant yeast: 0.4%
- Olive oil: 0% to 3% optional
If you want a more forgiving dough, start at 75% to 78% hydration. If you want a more open crumb and your flour can handle it, move toward 80% to 82%.
Flour choice: bread flour vs all-purpose
Bread flour is usually the safer choice for ciabatta because its stronger protein content helps the dough hold gas and stay more elastic. That makes it easier to get the open structure ciabatta is known for.
All-purpose flour can work, especially in a softer, more home-style version, but the dough may feel less resilient. If you use all-purpose flour, expect a slightly less chewy crumb and possibly a little less loft.
Yeast or sourdough?
Commercial yeast gives you a more predictable schedule and is easier for beginners. Sourdough brings more flavor and a slower fermentation rhythm, but it asks for more judgment. If you are still learning how ciabatta dough should look and feel, yeast is the simpler path. If you already understand fermentation well, sourdough can be a rewarding next step.
Helpful tools
- Large mixing bowl
- Bench scraper
- Kitchen scale, if available
- Sheet pan or baking tray
- Parchment paper
- Clean kitchen towel
- Oven-safe vessel for steam, if you use steam
- Baking stone or steel, if you have one
A stand mixer is useful, but not mandatory. The dough can absolutely be made by hand if you’re comfortable with a sticky mixture and a few extra rests.
Ciabatta Dough Basics: Hydration, Gluten, and Baker’s Percentages
Ciabatta dough is typically wetter than many basic bread doughs. In practical terms, it should feel soft, sticky, and loose—not dry enough to knead like a sandwich loaf, and not so wet that it behaves like batter.
Hydration matters because water affects both extensibility and crumb openness. More water helps the dough expand during fermentation, but it also makes the gluten network harder to manage. That is why ciabatta often relies on folds instead of aggressive kneading.
If you like to think in baker’s percentages, flour is 100%, and all other ingredients are measured as a percentage of that flour weight. That system helps you understand how a dough will behave. A higher-hydration ciabatta will usually feel very different from a lower-hydration loaf even if the ingredient list looks similar at first glance.
For most home bakers, a ciabatta hydration range of about 75% to 82% is practical. If your dough feels too slack to hold any shape during folding, reduce the water slightly next time. If it feels stiff and tears easily when you stretch it, add a little more water or give it more rest between folds so the flour can fully absorb the liquid.
A good decision rule: if you are new to ciabatta, choose a formula that is wet but still manageable, then learn from the dough. If it spreads like pancake batter, it is probably too loose for your current skill level or flour type. If it feels firm and doughy, you may have added too much flour somewhere along the way.
Step 1: Mix the Dough Without Overworking It
The goal in mixing ciabatta is not to fully develop the dough in one go. You want to combine the ingredients thoroughly, then let time and folds do the rest.
By hand
- Combine the flour, yeast, and salt in a large bowl.
- Add the water and stir until no dry flour remains.
- The dough may look rough, shaggy, and sticky. That is fine.
- Cover and let it rest so the flour can absorb the water.
With a stand mixer
- Add the ingredients to the bowl.
- Mix on low speed until the dough comes together and there are no dry patches.
- Stop before the dough becomes tight or overly smooth.
- Let it rest.
That resting period matters more than many beginners realize. It gives the flour time to hydrate, which makes the dough easier to strengthen later. A short rest of 10 to 20 minutes is often enough for the flour to absorb the water and for the dough to become less ragged.
If you’re using a biga or preferment, break it up into the water first, then add the rest of the ingredients. You do not need to dissolve it completely; loosening it is enough.
Step 2: Build Strength During Bulk Fermentation
This is where ciabatta becomes ciabatta. Instead of kneading hard, you strengthen the dough with folds during bulk fermentation.
A practical pattern is:
– Rest the dough after mixing
– Perform a stretch-and-fold
– Rest again
– Repeat several times
A simple home schedule is three sets of stretch-and-folds spaced about 30 minutes apart. That rhythm works well because it gives the dough time to relax between folds while still building structure.
What a good stretch-and-fold feels like
Lift one side of the dough gently, stretch it upward without tearing, and fold it over the center. Rotate the bowl and repeat on all sides. The dough should gradually feel smoother, stronger, and more elastic.
What to look for during bulk fermentation
- The dough looks more aerated
- Small bubbles appear along the sides or top
- The surface becomes smoother
- The dough feels jiggly and alive rather than dense
- It increases in volume by roughly 30% to 50% in many home kitchens
Temperature changes everything here. A warm room speeds fermentation; a cool room slows it down. In a kitchen around 75°F, bulk fermentation may move along in roughly 2 to 3 hours. In a cooler kitchen around 68°F to 70°F, it may take closer to 3 to 5 hours. Use the clock as a guide, but let the dough tell you when it is ready.
How to Tell the Dough Is Ready to Shape
This is one of the most useful skills in bread baking.
The dough is ready when it has:
– Visible bubbles
– Noticeable expansion
– A lighter, airy feel
– Some strength when you lift it
– A surface that looks supple, not torn
If you gently shake the bowl and the dough wobbles like a soft cushion, that is a good sign. If it still looks tight and heavy, it probably needs more fermentation and another fold. If it is collapsing and extremely fragile, it may be overfermented.
A simple rule: shape ciabatta when the dough is inflated and elastic, not when it is merely mixed.
Step 3: Shape Ciabatta Without Deflating It
Ciabatta shaping is more about handling than sculpting.
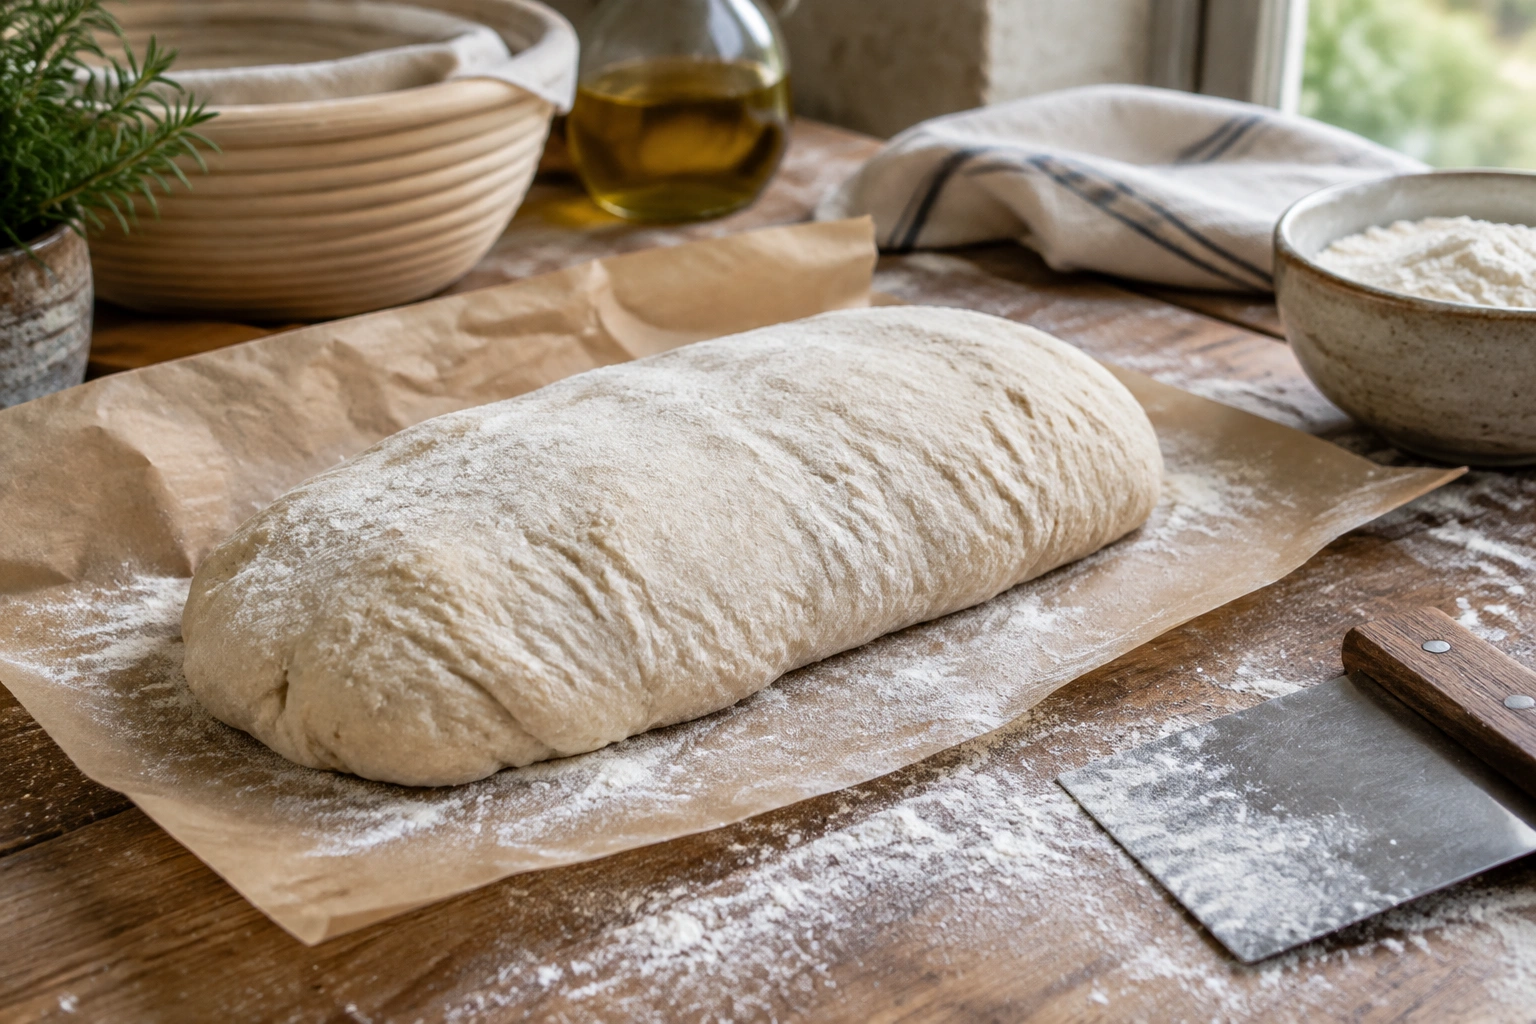
For one loaf
- Flour the work surface generously enough to prevent sticking, but not so much that you dry out the dough.
- Turn the dough out gently.
- Flour the top lightly.
- Use a bench scraper to coax the dough into a rough rectangle.
- Fold or tuck only as much as needed to create a loose loaf shape.
- Transfer it to parchment or a floured towel for proofing.
For rolls
Rolls are often easier for beginners because they are smaller, faster to bake, and less intimidating to handle. Divide the dough into eight portions after turning it onto a floured surface, then place each piece on a parchment-lined sheet pan.
That makes rolls a smart choice if you want more forgiving shaping and easier sandwich portions. Loaves look more dramatic and can give you a classic ciabatta presentation, but they ask for slightly more confidence.
How to avoid deflating the dough
- Use the bench scraper instead of your hands whenever possible
- Handle the dough from underneath rather than pressing down on top
- Avoid excessive flour dusting inside the dough itself
- Move with confidence, not speed
If you press too hard, you will knock out the gas that creates the open crumb. If you use too much flour, you can end up with dry seams and a tighter texture.
Step 4: Final Proofing and Timing Cues
Final proofing is the last rise before baking. It should be long enough for the dough to relax and expand, but not so long that it loses strength.
A practical home-baking cue is that the shaped dough should look puffy, slightly swollen, and soft to the touch. If you poke it lightly, the indentation should spring back slowly rather than snapping back immediately.
If the dough is underproofed, it tends to spring unevenly and can tear in the oven. If it is overproofed, it may spread, flatten, and bake up with less lift.
For timing, final proofing often takes about 30 to 60 minutes in a warm room, or 45 to 90 minutes in a cooler kitchen. If your kitchen is very warm, the proof can move quickly, so keep an eye on the dough rather than relying on the clock alone. You can also chill shaped ciabatta for a short make-ahead rest if you need to delay baking; in that case, cover it well and refrigerate for several hours or overnight, then let it sit at room temperature until it looks slightly puffed and responsive before baking.
Step 5: Bake for Oven Spring and a Crisp Crust
Ciabatta benefits from strong initial heat. That burst of heat helps the loaf expand before the crust sets.
Best home oven setup
- Preheat the oven for at least 30 to 45 minutes
- Place a baking stone or steel on the middle rack if you have one
- If you don’t have one, use a sturdy sheet pan on the middle rack
- Bake on the middle rack for the most even balance of bottom heat and top browning
A baking steel or stone improves heat transfer, which helps the bottom set quickly and supports oven spring. A sheet pan is easier and more accessible, but the crust may be a bit less dramatic.
Simple home-oven steam method
For a safe, simple steam setup, place an empty metal pan on the lower rack during preheating. When you load the bread, pour a small amount of very hot water into that pan and close the door quickly. Use caution, because the steam will be intense and the pan will be extremely hot.
Steam matters because it delays crust formation in the first part of the bake, giving the loaf time to expand. If your oven does not handle steam well, you can still bake ciabatta successfully; just expect a slightly less dramatic oven spring.
Baking cues
A reliable ciabatta bake is usually done when the loaf is deep golden and sounds hollow when tapped underneath. One home-baking approach finishes the bread in about 18 to 20 minutes, then leaves it on the pan for a few minutes before moving it to a rack. Another approach uses a hotter oven for a more assertive crust and stronger oven spring.
Choose the setup that matches your oven and confidence level. If your oven runs cool, a hotter preheat and longer stone or steel heat-up can make a real difference.
Step 6: Cool, Slice, and Serve the Bread Properly
Cooling is not optional if you want the best crumb. Freshly baked bread is still finishing its internal set, and slicing too early can make the interior gummy.
Let the loaf cool completely on a rack before cutting. That waiting period protects the structure you worked to build and gives the crumb time to finish setting.
When you do slice it, use a serrated knife and a gentle sawing motion. Ciabatta is excellent for sandwiches, dipping in olive oil, or serving alongside soup and salad. The irregular holes are part of the appeal, so don’t worry if every slice looks a little different.
Common Mistakes That Make Ciabatta Dense, Flat, or Gummy
Here are the problems I see most often, and what usually causes them.
Dense crumb
Usually caused by weak gluten development, underfermentation, or too much flour added during shaping. The dough needs enough structure to hold gas, but not so much handling that the air is squeezed out.
Flat loaf
Often a sign of overproofing, poor shaping tension, or a dough that was too weak to begin with. If the dough spreads immediately after shaping, it may need more folds during bulk fermentation.
Gummy interior
Most often the result of slicing too soon or underbaking. Ciabatta needs time to cool and set.
Tough crust or tight crumb
This can happen when the dough is handled too aggressively or when too much flour is worked into the surface.
Troubleshooting Guide for Sticky Dough and Other Problems
“My dough is impossibly sticky.”
That is normal to a point. Use damp or lightly floured hands, a bench scraper, and folds instead of trying to knead it dry. If you keep adding flour, you may solve the stickiness but lose the open crumb.
“My dough never seems to get strong.”
You may need more time between folds, or your flour may be weaker than expected. Bread flour usually gives you a better chance of success.
“The holes are too small and even.”
That usually means the dough was too tight, too heavily handled, or too dry. Ciabatta should feel airy, not compact.
“The loaf spread out instead of rising.”
Check proofing and shaping. Underproofed dough can tear and spread; overproofed dough can collapse. A weak dough can also spread if it lacks enough gluten strength.
“The crust is pale.”
Your oven may need more preheating, more heat retention, or a slightly longer bake. A baking steel or stone can help.
Ciabatta Variations: Loaves, Rolls, Yeast, or Sourdough
Here’s the decision framework I use with students.
| Choice | Best for | Trade-off |
|---|---|---|
| Bread flour | Better structure and higher chance of open crumb | Slightly firmer chew |
| All-purpose flour | Softer texture and easier shopping | Less structural strength |
| Hand mixing | More control and low equipment needs | Stickier, more labor-intensive |
| Stand mixer | Faster initial development | Less tactile feedback |
| Commercial yeast | Predictable timing and easier learning | Less fermentation complexity |
| Sourdough | Deeper flavor and longer fermentation | More variable schedule |
| Loaf shape | Classic presentation | Slightly harder to handle |
| Roll shape | Easier portioning and quicker baking | Less dramatic shape |
Ciabatta is often compared with focaccia and baguettes, but they are different breads with different goals. Compared with focaccia, ciabatta is usually leaner, shaped into loaves or rolls, and baked for a more open crumb and crisp crust rather than a soft, olive-oil-rich flatbread. Focaccia is typically spread in a pan, dimpled, and often finished with more oil, which gives it a softer, richer surface and a different texture.
Compared with a baguette, ciabatta is generally wetter, looser, and more irregular in shape. Baguettes are usually tighter, longer, and more structured, with a firmer shaping process and a more uniform loaf profile. Ciabatta aims for a rustic, open, airy interior; baguettes aim for a slender, evenly expanded shape with a thinner crust and more controlled form.
If you’re baking for the first time, I’d choose bread flour, commercial yeast, and rolls. That combination gives you the clearest learning experience with the least risk.
If you already know how to read dough, sourdough ciabatta is a beautiful next step.
Practical Example: A Beginner-Friendly Ciabatta Schedule
Here’s a realistic workflow for a home kitchen using yeast.
Same-day version
- Mix the dough in the morning
- Rest 10 to 20 minutes
- Do three stretch-and-folds over the next 1.5 hours
- Let the dough finish bulk fermentation until bubbly and increased by about 30% to 50%
- Shape gently
- Proof until puffy and slowly springy, usually 30 to 60 minutes in a warm room or 45 to 90 minutes in a cooler kitchen
- Bake on the middle rack after a 30- to 45-minute preheat
- Cool completely before slicing
Overnight version
If you want more flexibility, you can slow the process down with a cooler fermentation or an overnight rest, depending on the formula. That gives you more schedule room and often deeper flavor, but it also requires more attention to dough development and room temperature. For a simple make-ahead option, shape the dough, cover it well, and refrigerate it overnight; the next day, let it sit at room temperature until it looks lightly puffed before baking.
If you want a broader refresher on dough handling, the guide to how to make bread dough from scratch for beginners is a useful companion. And if your kitchen runs warm or you’re trying to coordinate timing, how to make dough rise faster without ruining the texture can help you manage fermentation more confidently.
Final Thought
Ciabatta is one of those breads that teaches you to trust the process. The dough will look too wet, then suddenly it will strengthen. It will seem fragile, then it will bloom in the oven if you’ve handled it well. Once you learn to respect hydration, fermentation, and gentle shaping, ciabatta becomes far less mysterious—and a lot more fun.
If you can read the dough, you can bake the bread.