
How to Make English Muffins at Home: A Clear, Reliable Guide

English muffins look simple, but the best ones depend on a few small decisions: which flour to use, how much heat to apply, and how gently you handle the dough after it rises. Get those right, and you’ll end up with muffins that brown evenly on the outside and open up into those classic nooks and crannies when you split them.
What you’re aiming for is a tender, lightly enriched dough that cooks through without drying out. That means this is not really a bread you rush. English muffins reward patience in the rise, restraint in shaping, and low, steady heat on the pan.
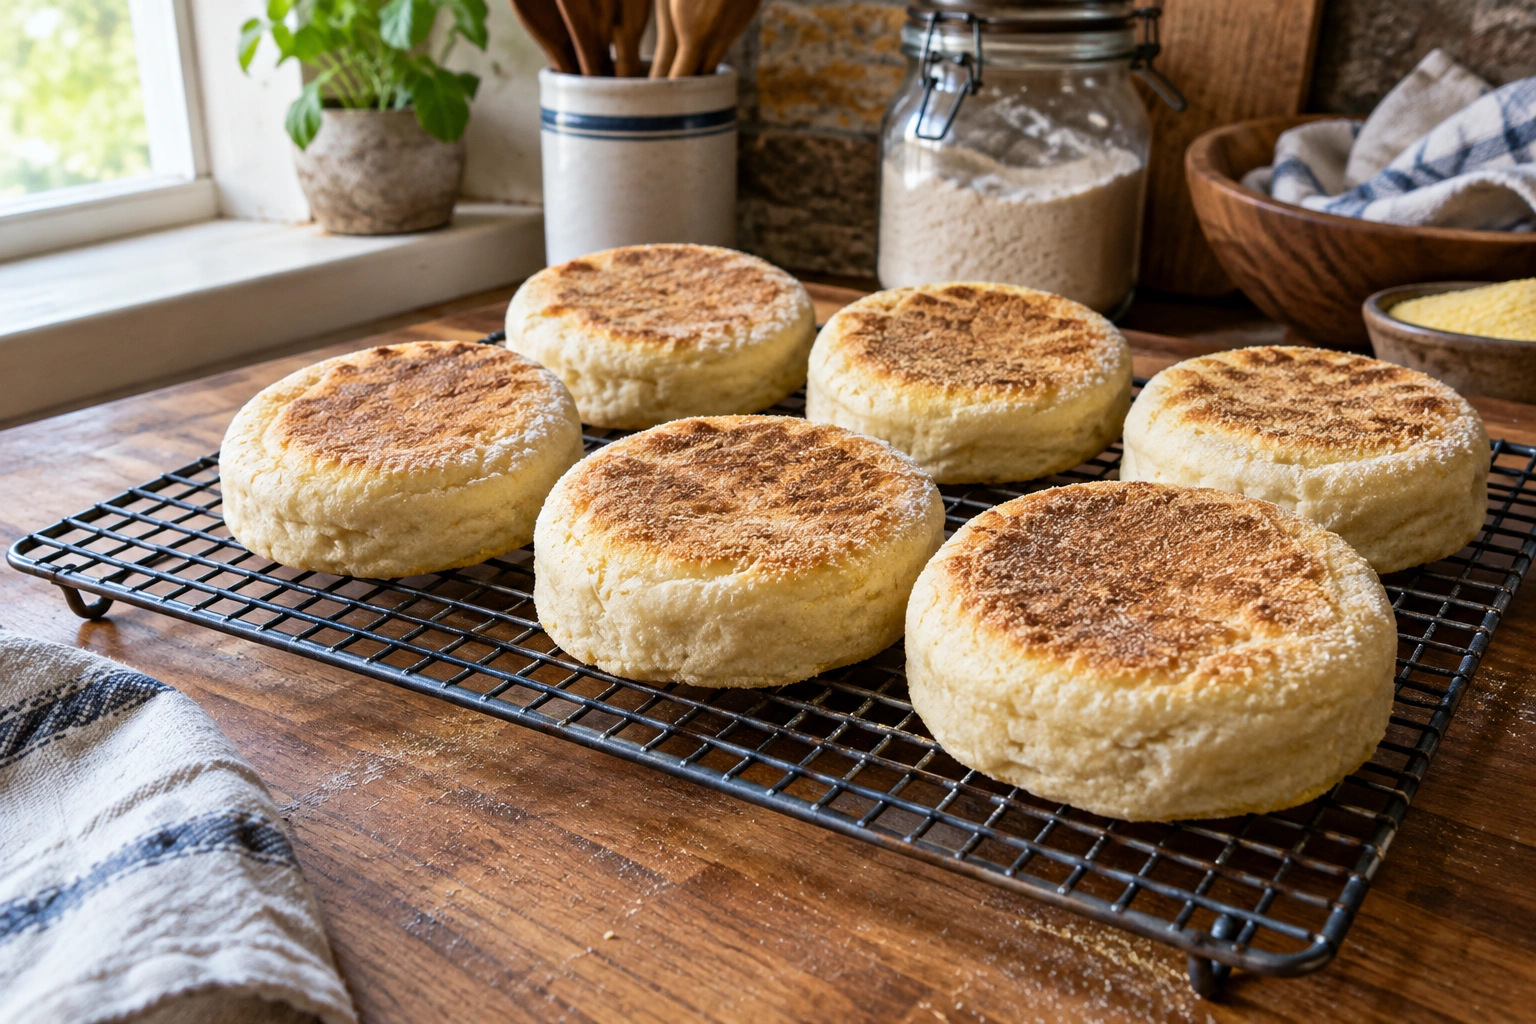
What English Muffins Are and Why the Method Matters
English muffins are usually cooked on a griddle or skillet rather than baked in a hot oven. That’s not just tradition. Gentle surface heat gives the dough time to set and cook through before the outside gets too dark.
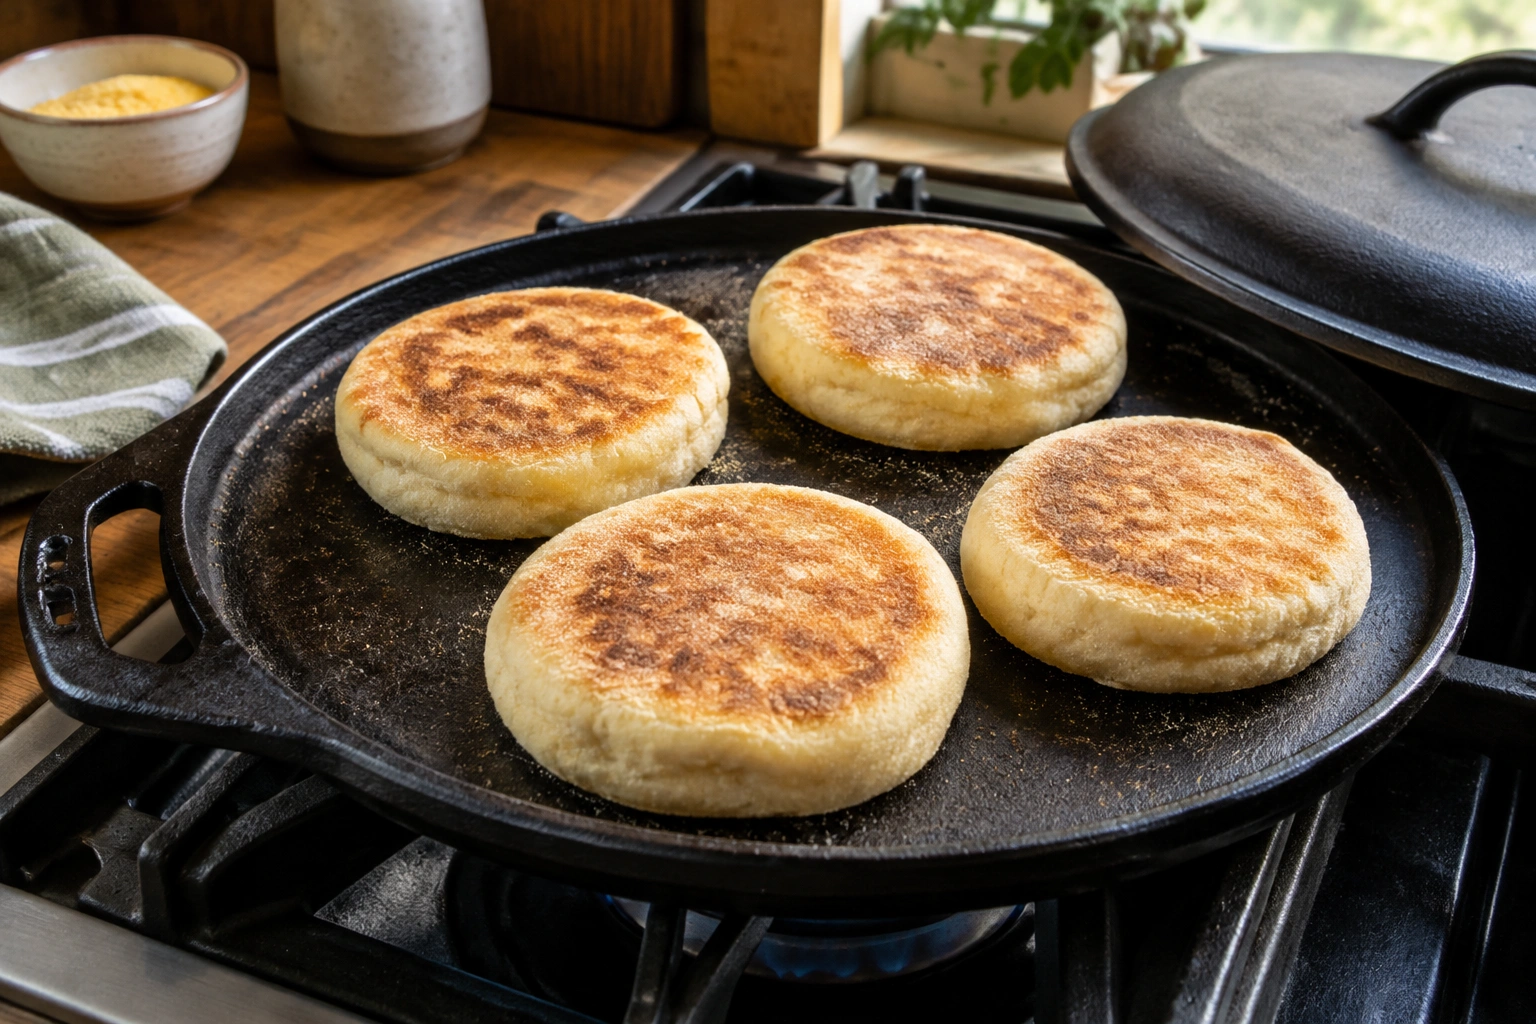
The signature texture comes from two things working together:
- a dough that’s developed enough to trap gas
- careful handling so you don’t press all those bubbles out before cooking
If you want the classic interior, think “soft structure with open pockets,” not “tight sandwich roll.” That difference shapes every step that follows.
Ingredients and Tools You’ll Need
Here’s a practical home version that makes about 8 to 10 muffins, depending on how you portion them.
Ingredients
- 3 cups all-purpose flour
- 2 1/4 teaspoons active dry yeast or instant yeast
- 1 tablespoon sugar
- 1 teaspoon fine salt
- 1 cup warm milk, about 105°F to 110°F
- 2 tablespoons melted butter
- 1 egg, optional, for a slightly richer dough
- 1 to 2 tablespoons warm water, only if needed to bring the dough together
- Cornmeal for dusting
Tools
- Large mixing bowl
- Stand mixer with dough hook, or a sturdy spoon and your hands
- Measuring cups and spoons
- Skillet or griddle with a lid
- Spatula
- Cooling rack
- Fork for splitting
A cast-iron or carbon steel pan is a strong choice because it holds heat well. A heavy-bottomed skillet can also work, especially if you’re careful with the burner.
Choosing Your Ingredients: Flour, Yeast, and Fat
Bread flour vs. all-purpose flour
Bread flour gives you more chew and a little more structure because of its higher protein content. That can help the muffin hold its shape and create a slightly sturdier bite. All-purpose flour makes a softer, more tender muffin.
If you’re after a classic breakfast muffin that splits easily and feels light, all-purpose flour is the safer default. If you want more chew and a little extra strength in the crumb, use bread flour or a blend.
Yeast
Yeast is what gives the dough lift and the open interior. You don’t need a dramatic rise here, but you do need active fermentation. If you’re using active dry yeast, it’s wise to let it bloom in warm liquid first. If you’re using instant yeast, it can usually go straight into the flour, though blooming it still gives you a visual check that it’s alive.
Milk, butter, sugar, and salt
Milk softens the crumb and adds a richer flavor than water alone. Butter adds tenderness and helps with browning. Sugar gives the yeast a quick food source and lightly sweetens the dough. Salt keeps the flavor from tasting flat and helps the dough behave more predictably.
Standard Kneaded Dough vs. Quicker No-Knead Option
This recipe is primarily a standard kneaded dough method. That is the best choice if you want the most reliable structure and the most classic nooks and crannies.
If you want a lower-effort variation, you can use a quicker no-knead-style mix only if you accept a slightly less open crumb. In that version, you mix until no dry flour remains, rest the dough longer, and handle it very gently during shaping. The muffins will still work, but the texture is usually a little less dramatic than the kneaded version.
For the clearest results, the steps below are written for the standard kneaded dough method.
How to Make English Muffin Dough
1. Bloom the yeast
Combine the warm milk, sugar, and yeast in a bowl. Let it sit for 5 to 10 minutes, until foamy. If it looks flat after that, the yeast may be inactive or the liquid may have been too hot.
Foaming is the sign you want. It tells you the yeast is awake and feeding.
2. Mix the dry ingredients
In a large bowl, whisk together the flour and salt.
3. Add the wet ingredients
Pour the foamy yeast mixture into the flour. Add the melted butter, and the egg if you’re using one.
4. Mix until the dough comes together
The dough should look shaggy at first. Keep mixing until it becomes cohesive and starts to pull away from the sides of the bowl. If you’re using a stand mixer, this usually takes 2 to 3 minutes on low speed, then another minute or two on medium-low. By hand, expect a few minutes of stirring followed by a short kneading session.
You’re not chasing a super-smooth sandwich bread dough here. You want a dough that is cohesive, slightly tacky, and able to stretch without tearing immediately.
5. Knead until elastic
Knead the dough for about 5 to 7 minutes by hand, or 4 to 6 minutes in a mixer, until it feels supple and elastic. It should spring back slowly when pressed and no longer feel wet or loose.
If the dough is extremely sticky, resist the urge to bury it in extra flour. A little tackiness is useful. Too much flour will dry the muffins out and make the crumb tighter.
First Rise and Proofing: What to Look For
Place the dough in a lightly oiled bowl, cover it, and let it rise in a warm spot until doubled in size, usually about 1 to 1 1/2 hours.
A dough that has risen properly will look puffy and feel lighter when you handle it. If you press a finger into it, the indentation should slowly fill back in rather than springing back instantly.
What if it rises too quickly?
That usually means your kitchen is warm. Move to shaping sooner and watch the dough, not the timer.
What if it rises slowly?
Give it more time. Cooler kitchens can stretch the rise considerably. The dough is ready when it looks expanded and airy, not when the clock says so.
Shape, Portion, and Rest the Muffins
This stage affects both the shape and the texture. Handle the dough gently so you don’t crush the air pockets that will later become those signature holes.
A practical shaping method
- Turn the dough onto a lightly floured surface.
- Pat it into a rectangle or round about 1/2 to 3/4 inch thick.
- Cut out rounds with a biscuit cutter or ring mold, usually about 3 inches across.
- Re-roll scraps only once if needed, because repeated handling tightens the dough.
- Place the rounds on a tray dusted with cornmeal.
Ring molds or free-form?
Ring molds give you cleaner sides and more consistent height. Free-form shaping is simpler and works fine if you don’t mind rustic edges.
Here’s the trade-off:
| Choice | Best for | Trade-off |
|---|---|---|
| Bread flour | More chew and structure | Slightly firmer bite |
| All-purpose flour | Softer crumb | Less chew |
| Ring molds | Uniform shape and height | Extra equipment to clean |
| Free-form shaping | Simplicity | Less even edges |
| Griddle/skillet | Classic texture and browning control | Needs careful heat management |
| Oven-only baking | Convenience | Less traditional texture |
Rest before cooking
Let the shaped muffins rest until slightly puffy, about 20 to 30 minutes. They should look a little swollen and feel lighter, but they should not collapse if you touch them gently. This final rest helps preserve the bubbles formed during fermentation and reduces the chance of a dense center.
How to Cook English Muffins on a Griddle or Skillet
This is where patience pays off. English muffins are usually cooked over low heat so the center can set before the outside browns too much.
Pan setup
Use a dry skillet or griddle. No oil is necessary for the pan itself, though a little cornmeal on the outside of the dough helps prevent sticking and adds a familiar texture.
Preheat the pan over low to medium-low heat until it reaches about 300°F to 325°F on the surface, if you have an infrared thermometer. If you do not, the pan should feel hot but not smoking, and a small test piece of dough should sizzle gently, not aggressively.
Cooking steps
- Place the muffins on the pan with enough space between them.
- Cover the pan with a lid to help trap gentle heat.
- Cook for 5 to 7 minutes on the first side, until the bottom is golden brown.
- Flip and cook the second side for 4 to 6 minutes.
- If the outside is browning too fast before the center is done, lower the heat immediately and continue cooking more slowly.
- If the muffins are thick, you can transfer them to a 325°F oven for a few minutes after griddling to finish the centers without darkening the crust too much.
The rule is simple: keep cooking on the griddle while the muffins are pale or lightly golden and still feel soft in the middle; move to the oven only if the outside is browning faster than the center can cook through.
How to Tell When They’re Fully Cooked
This is the part that trips up a lot of home bakers. A muffin can look browned and still be undercooked inside.
Signs they’re done
- Both sides are golden brown, not dark brown
- The muffins feel set when gently pressed
- They sound hollower when tapped
- No raw or gummy dough shows when you split one open after cooling slightly
Specific internal doneness check
For the most reliable check, use an instant-read thermometer in the center of one muffin. The internal temperature should reach about 190°F to 200°F. If it is below that range, keep cooking gently or finish in the oven.
If you’re unsure, sacrifice one muffin from the batch and check the center. It’s better to confirm doneness than to serve a tray of muffins with a gummy middle.
Avoiding burnt outsides
If the muffins are browning too quickly, the heat is too high. Lower it and give the centers time to finish. A lid helps by holding in heat without forcing the surface to color too fast.
How to Cool, Split, and Serve Them for the Best Texture
Let the muffins cool on a rack before splitting. If you cut into them too soon, steam will escape too quickly and the inside can turn gummy.
Split with a fork
Use a fork to pierce around the edge and gently pry the muffin open. This is the best way to preserve the nooks and crannies. A knife slices cleanly, but it tends to compress the crumb and lose that rough, textured interior.
Why cooling matters
As the muffin cools, the crumb finishes setting. If you split too early, the structure can collapse. A short rest makes the interior cleaner and easier to toast later.
Make-Ahead, Storage, Freezing, and Reheating
Make-ahead dough
You can refrigerate the dough after the first rise or shape the muffins and chill them before cooking, depending on your schedule. This is useful for busy mornings, but expect the dough to need a little time to warm up before it cooks evenly.
Storage
- Room temperature: Store fully cooled muffins in an airtight container for up to 2 days.
- Refrigerator: Store them in an airtight container or bag for up to 5 days.
- Freezer: Freeze fully cooled muffins for up to 3 months.
For the best texture, split them before freezing so they can go straight into the toaster.
Reheating
The best reheating method is toasting. Toast from frozen, or thaw first and then toast. This restores the crisp exterior and soft interior much better than microwaving. If you want to warm several at once, reheat them in a 300°F oven for about 8 to 10 minutes, then split and toast briefly if you want extra crisp edges.
Common Mistakes and How to Fix Them
Dense muffins
Usually caused by underproofing, overhandling, or too much flour during shaping. Let the dough rise until it looks visibly puffy, and handle it gently.
Gummy centers
The heat was probably too high, or the muffins were removed too soon. Lower the burner and extend the cooking time. If needed, finish them briefly in the oven.
Flat muffins
The dough may have been overworked, rolled too thin, or not given enough final rest. Shape them a little thicker and let them puff before cooking.
Burnt outsides
This almost always means the pan is too hot. English muffins need patience, not aggressive heat.
Weak nooks and crannies
That usually comes from compressing the dough too much during shaping or cutting with a knife instead of splitting with a fork. If you want more open texture, also avoid adding too much flour during kneading and shaping.
Practical Example: A Beginner-Friendly Same-Day Method
Here’s how a first batch can realistically flow in one day:
- Mix and knead the dough in the morning
- Let it rise until doubled
- Shape the muffins and let them rest 20 to 30 minutes
- Cook them slowly on a low griddle
- Cool on a rack
- Split and toast when ready to eat
That schedule works well if you’re home for a few hours and want fresh muffins by lunch or dinner. The biggest success factor is not speed; it’s giving the dough enough time to rise and the pan enough time to cook gently.
Practical Example: Overnight Dough for Busy Mornings
If you want breakfast muffins without a morning project, make the dough the day before.
- Mix and complete the first rise
- Shape the muffins
- Cover and refrigerate overnight
- Let them sit at room temperature for 20 to 30 minutes while the pan heats
- Cook slowly the next morning
This approach trades a little spontaneity for convenience. The texture can still be excellent, and the schedule is far easier to manage on a weekday.
FAQs
Do English muffins need to be baked?
Not necessarily. The classic method is griddle- or skillet-cooked, often with a lid to help the centers cook through. Some recipes finish in the oven, but pan cooking is the more traditional approach.
Can I make English muffins without a stand mixer?
Yes. A bowl, spoon, and your hands are enough. The dough may take a little more effort to bring together, but it does not require specialized equipment.
Why use cornmeal?
Cornmeal helps keep the dough from sticking and gives the outside a familiar, lightly gritty texture.
What’s the best way to split them?
Use a fork. It preserves the uneven interior better than a knife and helps keep the nooks and crannies intact.
Can I use bread flour instead of all-purpose flour?
Yes. Bread flour gives a chewier, slightly more structured muffin. All-purpose flour makes a softer result.
Final Thoughts
Once you understand the logic behind the method, English muffins become much less mysterious. Gentle fermentation, minimal handling, and low, steady heat are the real keys. Keep the dough airy, keep the pan calm, and split the finished muffins with a fork. That’s the path to a batch that toasts well, tastes fresh, and delivers the texture people are hoping for when they make them from scratch.