
How to Make Whole Wheat Bread That’s Soft, Flavorful, and Reliable

Whole wheat bread has a reputation for being dense, dry, or hard to work with. In practice, though, those problems usually come from treating whole wheat dough like white bread dough. Whole wheat flour behaves differently because it contains the bran and germ, which change how the dough hydrates, stretches, and rises.
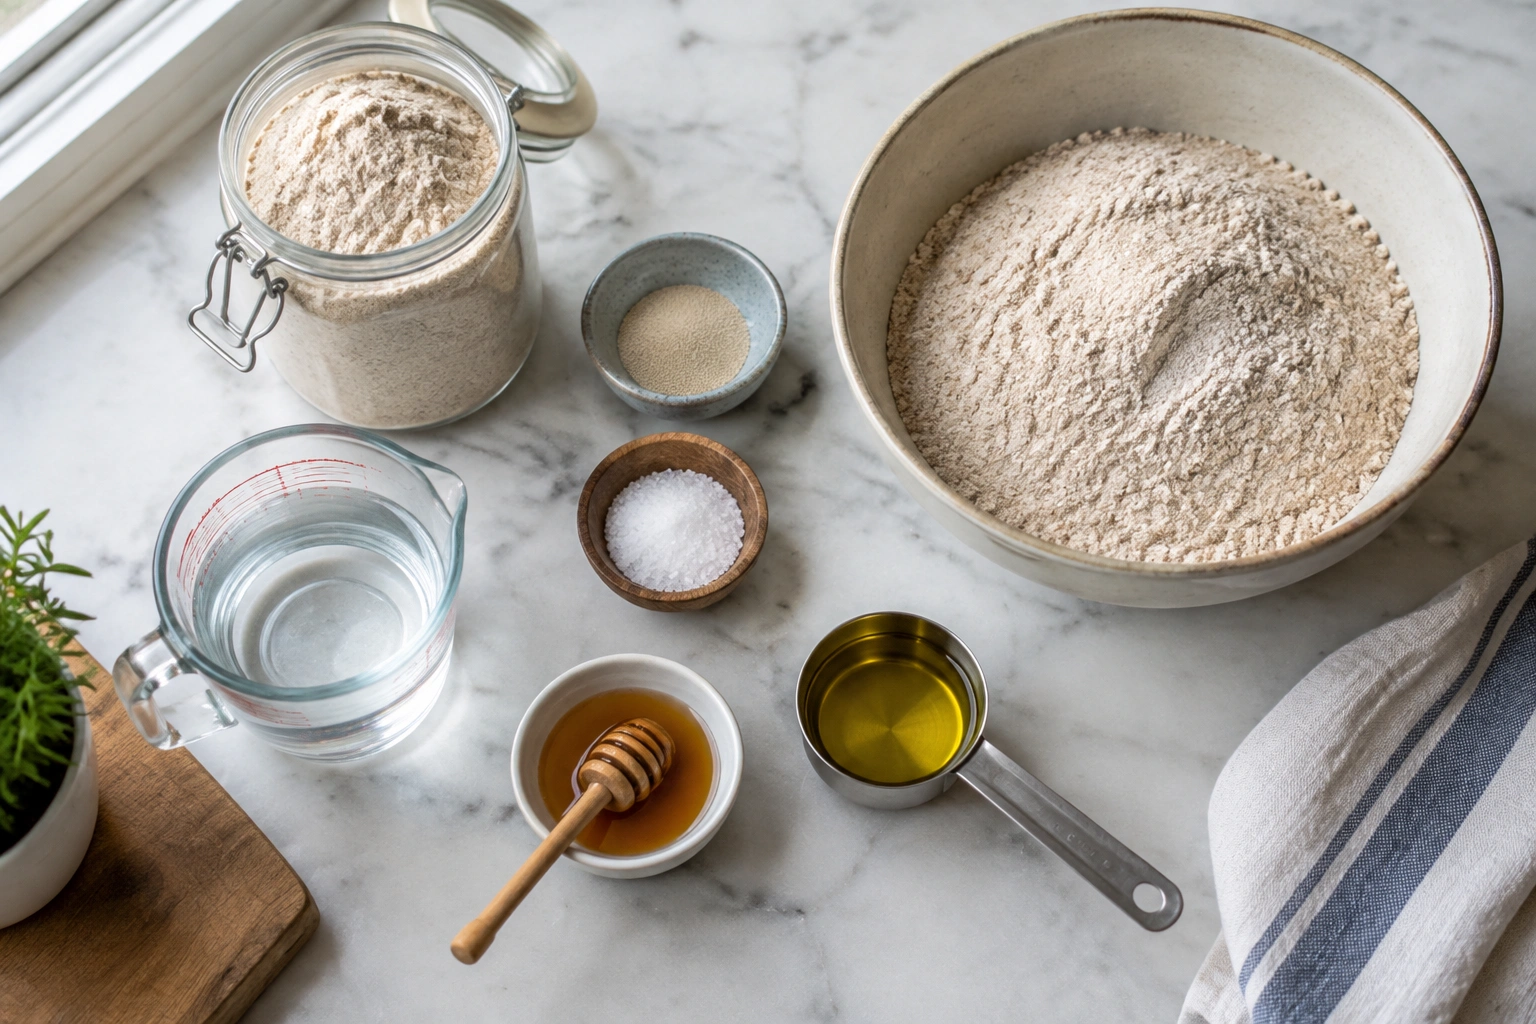
If you understand those differences, you can make a loaf that is hearty without being heavy, and soft without losing that nutty whole-grain character. I’ll walk you through the method I use to help home bakers and culinary students get consistent results: what to buy, how to mix, how to judge the dough, when to proof, and how to bake it through without drying it out.
What You’ll Need Before You Begin
Before you mix anything, gather your ingredients and tools. That simple step prevents the most common bread mistake: adding flour or water on impulse because the dough “looks wrong” halfway through.
Ingredients
For a basic whole wheat loaf, you’ll usually need:
- Whole wheat flour
- Water
- Yeast
- Salt
- A sweetener such as honey or sugar
- A fat such as oil or butter
Each ingredient has a job:
- Whole wheat flour gives flavor, color, and structure.
- Water hydrates the flour and lets gluten form.
- Yeast produces gas that helps the loaf rise.
- Salt strengthens flavor and helps regulate fermentation.
- Honey or sugar can soften the crumb and improve browning.
- Oil or butter adds tenderness and helps the loaf stay soft longer.
If you want a softer sandwich loaf, enrichment matters. If you want a more rustic loaf with a stronger whole-grain flavor, keep the dough simpler.
Beginner-friendly default formula
If you’re new to whole wheat bread, start with a 50/50 blend of whole wheat flour and bread flour. It is usually the easiest balance of flavor, softness, and handling.
Beginner loaf pan formula:
– 2 cups whole wheat flour
– 2 cups bread flour
– 1 1/2 cups warm water, plus 1 to 3 tablespoons more as needed
– 2 1/4 teaspoons instant yeast or active dry yeast
– 1 1/2 teaspoons salt
– 2 tablespoons honey or sugar
– 2 tablespoons oil or melted butter
Yield: 1 standard loaf
Loaf pan size: 9 x 5 inches
Hydration target: about 70% to 75% for this beginner blend, with the understanding that whole wheat flour often needs a little more water than white flour. The dough should feel soft, slightly tacky, and pliable, not stiff or dry. If it feels tight or shaggy after mixing, expect to add 1 to 3 tablespoons of extra water.
If you want to go all the way to 100% whole wheat, start with the same loaf pan and aim for a slightly higher hydration, often around 75% to 80%, depending on the flour. That version is absolutely doable, but it is less forgiving for first-time bakers.
Tools
You do not need fancy equipment, but these tools help:
- Large mixing bowl
- Measuring cups or, better yet, a kitchen scale
- Wooden spoon or dough whisk
- Loaf pan for a sandwich-style loaf
- Clean work surface for kneading
- Kitchen towel or plastic wrap for covering the dough
- Oven thermometer if your oven runs hot or cool
- Instant-read thermometer for checking doneness
A scale is especially useful. Measuring by weight is the most reliable way to keep dough balance consistent. You can see that guidance in their classic whole wheat bread method.
Choose the Right Whole Wheat Bread Approach
Before you mix, decide what kind of loaf you want. This choice affects texture, rise, and handling.
| Approach | Best for | Trade-off |
|---|---|---|
| 100% whole wheat flour | Strong whole-grain flavor, highest whole grain content | Usually denser and less airy than a blend |
| Whole wheat + bread flour blend | Softer crumb, easier handling, taller loaf | Less whole grain per slice |
| Loaf pan bake | Predictable shape, sandwich slices, easier for beginners | Less rustic appearance |
| Free-form loaf | Rustic look, crustier exterior | More spread risk, shaping matters more |
If this is your first whole wheat loaf, a blend of whole wheat and bread flour is the easiest route to a soft, tall loaf. If your goal is to master 100% whole wheat bread, go all in—but expect to treat hydration and proofing more carefully.
How Whole Wheat Dough Behaves Differently
Whole wheat flour does not act like white flour. The bran cuts through gluten strands, and the flour often needs more water to feel supple. That means the dough may look rough at first, then improve after a short rest.
A useful rule: whole wheat dough often looks too stiff when first mixed, then becomes more workable after it sits. King Arthur Baking notes that a 20- to 30-minute rest helps the flour absorb liquid and the bran soften, which makes the dough easier to knead.
That rest is not a gimmick. It gives the flour time to hydrate before you judge whether the dough needs more liquid or more flour.
Practical hydration guidance
For most home bakers, whole wheat dough should feel softer than a typical white bread dough. It should be tacky but not sticky enough to smear across your hands. If you press it into a ball, it should hold together without cracking at the edges.
A practical range to keep in mind:
- 50/50 whole wheat and bread flour: usually around 70% to 75% hydration
- 100% whole wheat: often around 75% to 80% hydration
If the dough feels dry, add water 1 tablespoon at a time. If it feels overly loose, let it rest for 10 minutes before adding flour. Whole wheat flour often absorbs water more slowly than you expect.
Step 1: Mix the Dough
Combine the ingredients in a large bowl or stand mixer bowl. Mix just until everything is incorporated and the dough begins to pull away from the sides of the bowl. That “leave the sides of the bowl” cue is useful because it tells you the flour is hydrated enough to form a dough mass, even if it still looks rough.
For the beginner loaf formula above, mix the flour, yeast, salt, honey or sugar, oil or butter, and 1 1/2 cups warm water. If the dough seems dry and shaggy, add a small splash of water. If it looks sticky and loose, resist the urge to dump in a lot of extra flour right away. Whole wheat dough often tightens as it hydrates.
A practical decision rule:
- Too dry: the dough won’t come together, or it tears immediately when you try to knead it.
- Too wet: it smears like batter and won’t hold a rough shape.
- About right: it feels tacky, but it can be gathered into a ball.
If you’re using a stand mixer, mix on medium until combined, then knead on medium or medium-high until the dough looks smoother. If the dough still feels stiff after mixing, add water in small increments rather than waiting until the end.
Step 2: Rest, Knead, and Develop the Dough
After the first mix, let the dough rest for 20 to 30 minutes. This short pause is one of the easiest upgrades you can make to whole wheat bread. It softens the bran and improves kneadability.
Kneading by hand
If you knead by hand, work the dough until it becomes smoother, more elastic, and less rough. Whole wheat dough rarely turns as silky as white dough, so don’t wait for perfection. Look for:
- A more cohesive ball
- Less tearing when stretched
- A springier feel under your palms
Kneading with a mixer
A mixer can save time and effort, especially with sticky dough. A solid practical reference point is to knead until the dough looks smoother and elastic, but the real target is dough development, not the clock.
How to know the dough is ready
Use the feel of the dough, not just the timer. It should be:
- Smooth enough to hold together
- Elastic enough to stretch a little
- Slightly tacky, but not wet or gluey
If you press a fingertip into it, the dough should slowly spring back. If it tears immediately, it needs more kneading or a short rest. If it feels stiff and resistant, it may need a little more water.
Step 3: First Rise and Bulk Fermentation
Place the dough in a lightly oiled bowl, cover it, and let it rise until it looks noticeably puffy. For many enriched whole wheat doughs, that can take about 1 to 2 hours in a warm kitchen, though the exact timing depends on yeast type and room temperature.
Active dry yeast vs. instant yeast
Both work well in whole wheat bread, but they behave a little differently:
- Instant yeast usually mixes directly into the dry ingredients and tends to work a bit faster.
- Active dry yeast is often dissolved in warm water first and may need a little more time to get going.
In practical terms, instant yeast can shorten the first rise slightly, while active dry yeast may need a bit more patience. Dough temperature matters too: warmer dough rises faster, cooler dough rises more slowly.
What you’re looking for
The dough is ready for shaping when it has:
- Increased visibly in volume
- A lighter, airier feel
- A domed or puffy surface
If you poke it gently, the indentation should fill in slowly. If it springs back instantly, it likely needs more time. If it collapses, it may be over-proofed.
Temperature matters
A cooler kitchen slows yeast activity. A warm kitchen speeds it up. If your kitchen is cold, plan on a longer rise rather than trying to force the dough with too much heat. For more guidance on managing yeast dough timing, see our guide on how to make dough rise faster.
Step 4: Shape the Loaf
Turn the risen dough onto a lightly floured surface. Press it gently to remove large gas pockets, then shape it into a tight loaf.
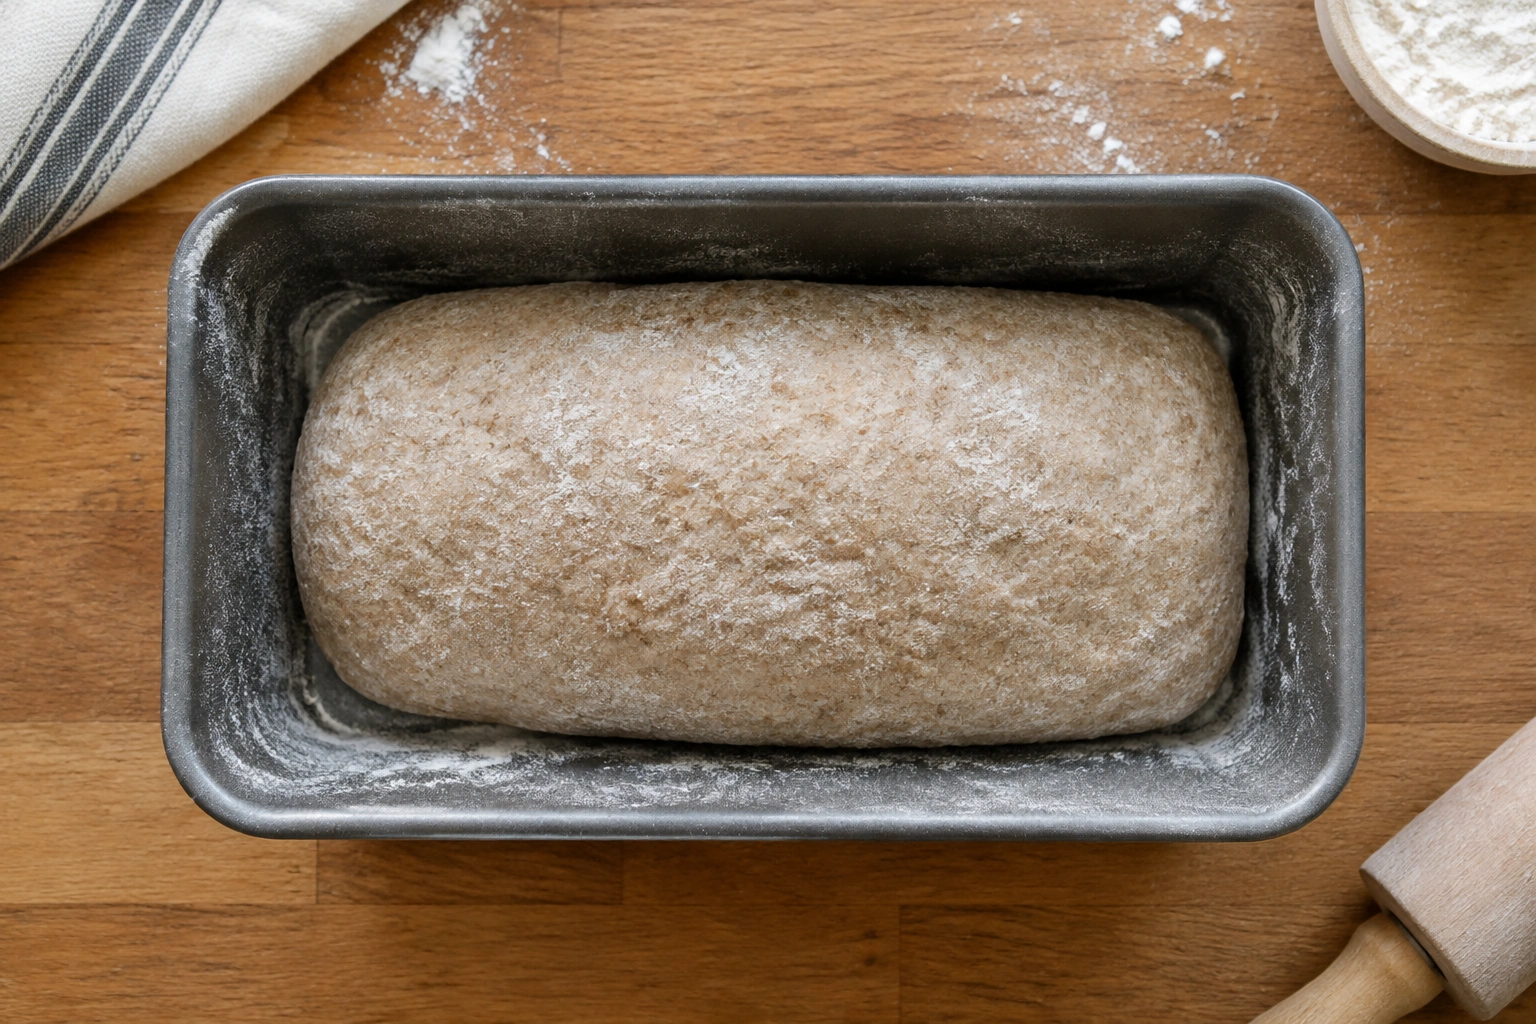
For a loaf pan, shape the dough into a log that matches the pan’s length. Tuck the sides underneath so the top is smooth and the seam is on the bottom.
For a free-form loaf, shape the dough into a taut round or oval. This gives the dough structure, but it also demands better tension and can spread more if the dough is underdeveloped.
Avoid these shaping mistakes
- Using too much flour on the bench, which can keep the seam from sealing
- Flattening the dough too aggressively, which pushes out too much gas
- Leaving the surface slack, which can lead to a flat loaf
A well-shaped loaf should feel snug and supported, not loose and floppy.
Step 5: Final Proof
After shaping, let the dough rise again until it looks puffy and slightly expanded. This final proof is shorter than the first rise, but it matters just as much.
For a 9 x 5-inch loaf pan, the final proof often takes about 30 to 60 minutes, though it can be longer in a cool kitchen and shorter in a warm one. Don’t proof by the clock alone. The dough is ready when it has risen enough to sit just above the rim of the pan or looks clearly fuller and aerated.
A loaf is ready to bake when:
- It looks fuller and slightly rounded
- The surface feels airy
- A gentle finger press leaves an indentation that slowly springs back
If the dough is under-proofed, it will burst unpredictably in the oven and may bake up dense. If it is over-proofed, it can collapse or bake with a weak structure.
A loaf pan helps here because it supports the dough while it proofs. That makes it a smart choice if you want a more dependable sandwich loaf.
Step 6: Bake the Bread
Bake the loaf in a preheated oven until the crust is deeply golden and the interior is fully set. For a 9 x 5-inch loaf pan, a practical bake-time range is 35 to 45 minutes at 350°F for the beginner blend, though some ovens and doughs may need a few minutes more or less.
If you want the most reliable doneness check, use an internal thermometer. Bread is usually done when the center reaches about 190°F to 200°F. That is more dependable than judging by crust color alone, especially with whole wheat bread, which can brown quickly.
What to watch for in the oven
- The loaf should rise in the first part of baking
- The top should color evenly
- The loaf should sound hollow when tapped, though that cue is less precise than temperature
- The crust should feel set, not soft and doughy, when gently pressed
If the crust darkens too quickly before the center is done, tent the loaf loosely with foil for the remaining bake time.
Step 7: Cool, Slice, and Store
Let the loaf cool completely before slicing. I know that’s hard to do when the kitchen smells like fresh bread, but slicing too early traps steam in the crumb and can make the interior gummy.
Once the loaf is cool:
- Use a serrated knife for clean slices
- Slice from the center outward if you want even sandwich pieces
- Store the bread in a sealed bag or wrapped container once fully cool
For longer storage, freeze slices or the whole loaf. Whole wheat bread often benefits from freezing because it helps preserve softness without drying the crumb out on the counter.
Common Mistakes and How to Fix Them
Dense loaf
Most dense whole wheat bread comes from one of three things:
- Too little water
- Too much added flour during kneading or shaping
- Under-proofing
Fix: hydrate the dough properly, knead until it feels elastic, and give the loaf enough time to rise. If the loaf is consistently heavy, try the 50/50 beginner formula first instead of jumping straight to 100% whole wheat.
Dry crumb
Dry bread usually means the dough started too stiff or baked too long.
Fix: add water in small increments next time, and consider a little oil, butter, honey, or sugar if you want a softer sandwich loaf. If the loaf bakes dry even when the dough feels right, shorten the bake by a few minutes and check the internal temperature earlier.
Poor rise
If the loaf barely rises, check your yeast freshness, room temperature, and proofing time.
Fix: use yeast that is still active, let the dough rise until it looks visibly puffy, and avoid rushing the proof. If your kitchen is cool, expect the rise to take longer. If the dough is very cold, give it more time before baking.
Sticky dough
Sticky whole wheat dough is not automatically a problem. It often reflects higher hydration.
Fix: let the dough rest before adding more flour. If it still feels unmanageable, add flour a tablespoon at a time, not by handfuls. If it’s sticky but elastic and holds its shape, it is probably fine.
Heavy or crumbly loaf
A loaf can turn heavy if the dough is underdeveloped or crumbly if it lacked enough moisture.
Fix: knead until the dough has some stretch, then give it enough time to rise. For crumbly bread, increase hydration slightly next time and avoid overbaking. Whole wheat flour often needs a little more water than white flour to stay tender.
Practical Example: A Beginner-Friendly Whole Wheat Loaf
If you want a realistic first try, use this framework:
- 2 cups whole wheat flour
- 2 cups bread flour
- 1 1/2 cups warm water, plus 1 to 3 tablespoons more if needed
- 2 1/4 teaspoons instant yeast or active dry yeast
- 1 1/2 teaspoons salt
- 2 tablespoons honey or sugar
- 2 tablespoons oil or melted butter
Yield: 1 loaf
Loaf pan size: 9 x 5 inches
Bake time: 35 to 45 minutes at 350°F
Doneness: 190°F to 200°F in the center
Mix until the dough forms, rest it, knead until smoother, then let it rise until puffy. Shape it into a loaf pan, proof again, and bake until the center is fully cooked. This is the kind of formula that teaches you how whole wheat dough feels without forcing you to guess at every stage.
If you’d like a deeper foundation for dough handling in general, our guide to making bread dough from scratch for beginners pairs well with this recipe.
Tips for a Softer, Lighter Whole Wheat Loaf
If softness is your priority, these adjustments help most:
- Use a blend of whole wheat and bread flour. This usually makes the dough easier to handle and the loaf lighter.
- Add a little fat. Oil or butter tenderizes the crumb.
- Use honey or sugar. A small amount supports browning and softness.
- Hydrate fully. Whole wheat flour often needs more liquid than white flour.
- Give the dough a rest before kneading. That pause helps the bran soften.
- Bake in a loaf pan. It supports the loaf and creates a more even sandwich shape.
The trade-off is simple: the more you optimize for softness, the less rustic and deeply whole-grain the loaf may taste. That’s not a flaw; it’s a choice.
When to Consult a Master Baker
If your loaf keeps failing even after you’ve adjusted hydration, proofing, and baking time, the issue may be deeper than the recipe. At that point, a master baker can help you evaluate flour quality, dough development, fermentation timing, and oven behavior in a way that’s hard to diagnose from a written guide alone.
FAQs
Can I make whole wheat bread with only whole wheat flour?
Yes. A 100% whole wheat loaf is absolutely possible. Expect a denser crumb and a dough that needs careful hydration and patience during proofing. For beginners, a 50/50 whole wheat and bread flour blend is usually easier.
Which is better for beginners: 100% whole wheat or a blend?
A blend is usually better for beginners because it is easier to mix, knead, and shape, and it tends to rise more reliably. If you want to learn how whole wheat dough behaves without fighting the dough, start with the 50/50 formula.
Why does whole wheat dough need more water?
Whole wheat flour contains bran and germ, and bran absorbs water. That means the dough often needs more liquid to feel supple and bake into a softer loaf.
Is bread flour better than all-purpose flour for whole wheat bread?
Bread flour usually gives better structure and a slightly taller loaf because it has more protein. All-purpose flour can still work, but the loaf may be a bit less chewy and less lofty.
Can I knead whole wheat dough by hand?
Yes. It just takes more patience. The dough may never feel as silky as white dough, so judge it by elasticity and cohesion rather than smoothness alone.
How do I know when whole wheat bread is done baking?
The most reliable method is an internal temperature check. Aim for about 190°F to 200°F in the center, then cool the loaf fully before slicing. A fully baked loaf should also feel set, sound hollow when tapped, and have a crust that is deeply golden rather than pale and doughy.
How do I keep whole wheat bread soft after baking?
Cool it completely, store it airtight once fully cool, and freeze extra slices if you won’t finish the loaf quickly. A little fat or sweetener in the dough also helps the bread stay soft longer.