
How to Measure Baking Ingredients Accurately for Better Results Every Time

If your cookies spread too much, your cake turns dense, or your muffins bake up dry, the problem may not be the recipe. It may be the measuring.
Accurate measuring is one of the simplest ways to improve baking at home. Baking depends on ratios, so even small changes in flour, sugar, or liquid can shift texture, rise, and moisture. That matters whether you bake once a month or every weekend, especially when you want to avoid wasting ingredients.
This guide keeps the process practical. You’ll learn which tools to use, when weight beats volume, and how to measure flour, liquids, and sticky ingredients without guesswork.
Why Accurate Measuring Matters in Baking
In cooking, a little extra or less of an ingredient often blends in. In baking, the same change can alter the final structure. Too much flour can make baked goods dry or heavy. Too little liquid can leave batter stiff. Too much leavening can push a cake up fast and then cause it to collapse.
That is why bakers pay close attention to measurement method, not just the ingredient list. A recipe written in cups assumes you measure the same way every time. If one batch uses loosely spooned flour and the next uses a packed cup, the results will drift.
For busy home cooks, that inconsistency is frustrating because it wastes time and ingredients. A more careful measuring routine gives you a better shot at repeatable results, especially with everyday bakes like muffins, quick breads, cookies, and pancakes.
The Best Tools for Measuring Baking Ingredients
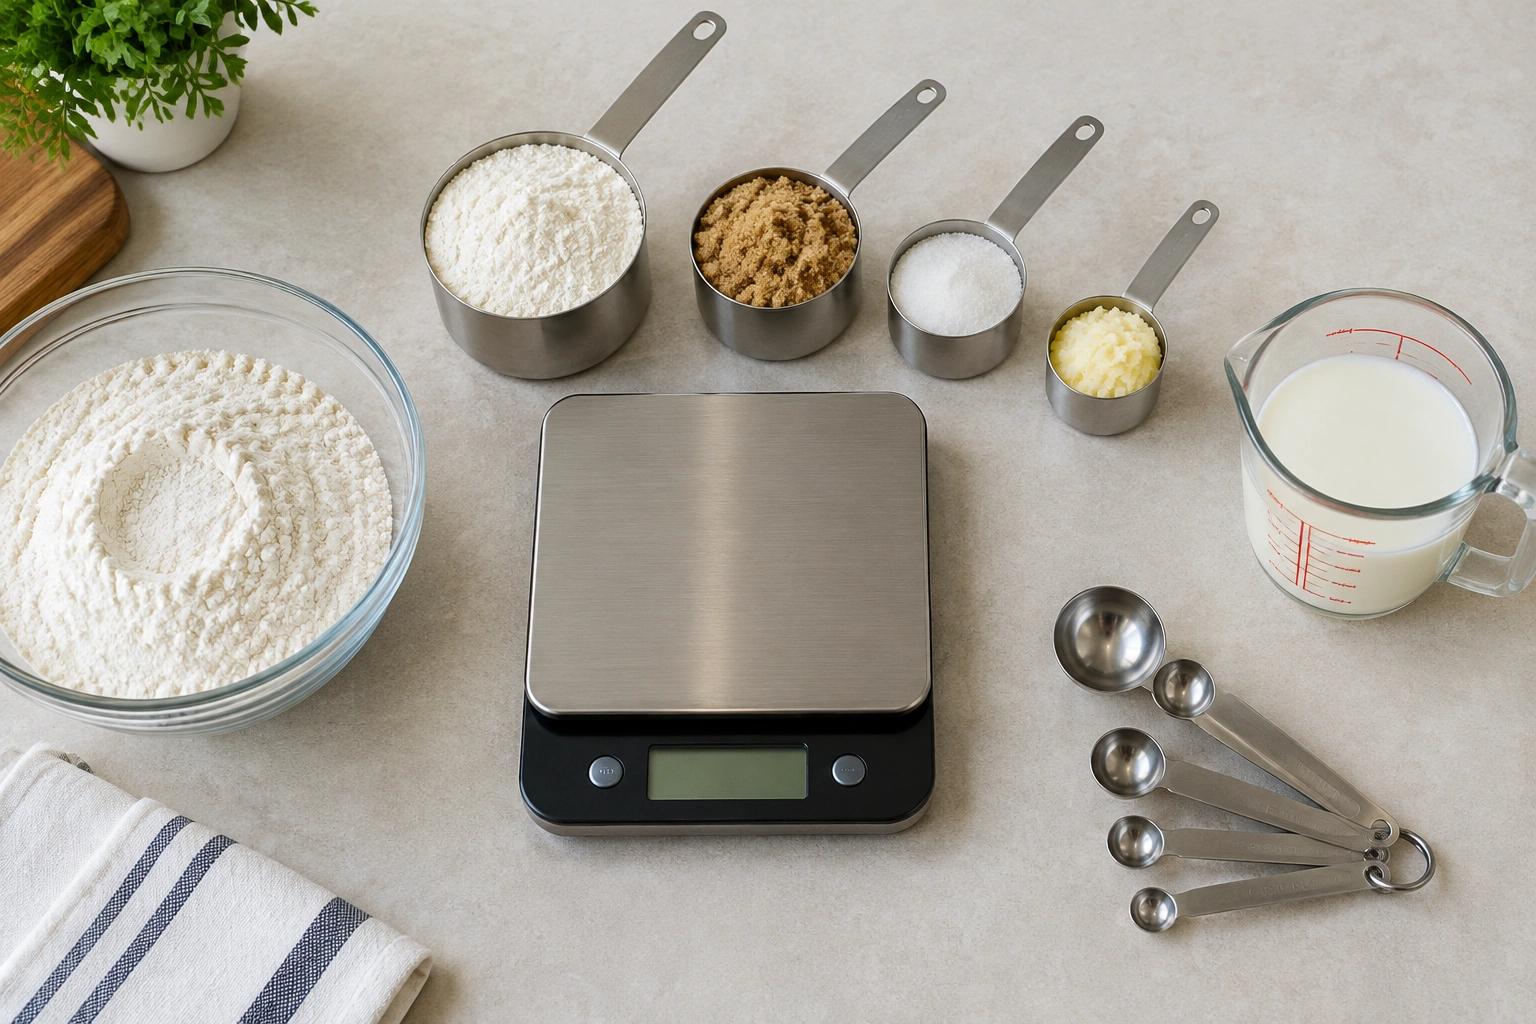
You do not need a drawer full of specialty tools. Four basics cover most home baking.
Digital kitchen scale
A digital kitchen scale is a reliable choice when a recipe gives ingredient weights in grams or ounces. It removes the variation that comes from different cup-filling habits. If you bake often, it is usually the best upgrade for consistency.
Dry measuring cups
Use dry measuring cups for ingredients like flour, granulated sugar, cocoa powder, and oats. These cups are meant to be filled to the top and leveled off.
Liquid measuring cup
Use a liquid measuring cup for water, milk, oil, and other pourable ingredients. The extra headspace helps prevent spills and makes reading the line easier.
Measuring spoons
Use measuring spoons for small amounts of baking powder, baking soda, salt, spices, vanilla, and other ingredients that can throw off a recipe if estimated.
A practical rule: if the ingredient is dry and scoopable, use a dry cup or scale. If it pours, use a liquid cup or scale. If the amount is small, use a spoon or scale.
Weight vs. Volume: Which Measuring Method Should You Use?
Here is the short version: weight is better for precision, while volume is faster and more familiar.
| Method | Best for | Strengths | Trade-offs |
|---|---|---|---|
| Weight in grams or ounces | Most baking recipes, especially repeated bakes | Most consistent from batch to batch | Requires a scale |
| Volume in cups and spoons | Older recipes, casual baking, quick measuring | Familiar and convenient | More variation between bakers |
| Dry measuring cups | Flour, sugar, cocoa, oats | Easy for pantry ingredients | Depends on how you fill the cup |
| Liquid measuring cup | Milk, water, oil, juice | Easier to read for pourable ingredients | Not ideal for dry ingredients |
| Measuring spoons | Leaveners, spices, vanilla | Good for small amounts | Easy to overfill if rushed |
If a recipe gives grams, use grams. If it gives only cups and spoons, follow the recipe closely and use the proper cup type. If you bake the same recipe often, converting it to weight once and writing it down can save time later.
For home bakers who want dependable results, a scale is worth having. For occasional baking, cups and spoons can still work well if you use them correctly.
How to Measure Dry Ingredients Correctly
Dry ingredients are where many baking mistakes begin, especially flour.
Flour: use the spoon-and-level method
Flour is the ingredient most likely to be over-measured. Instead of dipping the measuring cup straight into the bag, fluff the flour first if it looks compacted, then spoon it lightly into the cup. After that, level the top with the flat edge of a knife or straight scraper.
This method helps avoid compressing the flour. Scooping directly from the bag can pack in more flour than the recipe expects, which is one reason baked goods can turn out dry or dense.
If a recipe gives flour by weight, use that instead. It removes the guesswork entirely.
Sugar: measure by ingredient type
Granulated sugar can be measured in a dry cup and leveled. Brown sugar is different because recipes often expect it packed firmly into the cup. Loose brown sugar can leave you short, while a properly packed cup gives the amount the recipe was written for.
Powdered sugar is light and can clump. If it is lumpy, sift or whisk it before measuring so you do not end up with compacted pockets.
Cocoa powder and other fine powders
Cocoa powder, cornstarch, and similar powders should be spooned into the cup and leveled. These ingredients can settle easily, so tapping the cup hard is not a good fix. If the powder is clumped, break it up first.
Sift only when needed
Sifting is useful when a recipe says to sift, or when an ingredient is lumpy and you need a lighter, more even texture. If the recipe does not call for it, you usually do not need to sift just for the sake of doing it.
How to Measure Liquid Ingredients Accurately
Liquid ingredients are easier to measure well than many people think, but the setup matters.
Use a liquid measuring cup, place it on a flat counter, and pour in the ingredient until the line is level with your eye. Do not hold the cup in the air while reading it. That angle can make you think you have more or less than you really do.
This same approach works for milk, water, oil, vinegar, and similar ingredients. If you need a very small amount, use a measuring spoon instead of trying to estimate in a cup.
A helpful habit is to check the line after the liquid settles. Some ingredients, especially thicker ones, cling to the sides and can make the level look uneven for a moment.
How to Measure Sticky Ingredients and Butter
Sticky ingredients are often easiest to measure by weight. If your recipe gives grams or ounces, use a scale first and avoid guessing with cups whenever possible.
Honey, maple syrup, molasses, and peanut butter
For sticky liquids and spreads, weighing is usually the cleanest approach. If you need to use a cup or spoon instead, measure carefully and scrape the ingredient in fully so you do not leave too much behind.
For peanut butter and similar spreads, press firmly enough to remove air pockets if the recipe expects a packed measure, then level it off. If the recipe gives a weight, that is usually easier and cleaner.
Butter
Butter is often measured by markings on the wrapper, which is convenient when the package is labeled clearly. If you are using a block or stick without markings, a scale is the most direct option.
For recipes that call for softened butter, measure first, then soften. If the recipe calls for melted butter, melt it before measuring if you want the most accurate result for a liquid measure.
When to Pack, Level, or Sift Ingredients
These three actions are not interchangeable, so the recipe’s wording matters.
Pack
Pack ingredients when the recipe says to pack them, most commonly brown sugar. That means pressing the ingredient into the cup so there are no empty spaces. Do not use that same method for flour unless a recipe specifically says to.
Level
Level dry ingredients whenever the recipe gives a cup measure and does not say to pack. Fill the cup, then sweep off the excess with a straight edge. Keep the leveling action above the counter or bowl only if you are certain you will not knock extra ingredient in by accident.
Sift
Sift when the recipe calls for it or when an ingredient is lumpy and needs loosening before measuring. Sifting can improve texture in some cakes and pastries, but it adds a step, so it is best used with a purpose.
Common Measuring Mistakes That Cause Baking Failures
A few habits cause most of the trouble.
Scooping flour straight from the bag
This can pack in too much flour. The result is often a thicker dough or a drier bake than intended.
Using the wrong cup
Dry measuring cups and liquid measuring cups are designed for different jobs. A liquid cup is hard to level cleanly for dry ingredients, and a dry cup is awkward for liquids.
Reading liquids at the wrong angle
If you lift the cup and guess from above, the line can look off. Place it on the counter and read at eye level.
Estimating small ingredients
Baking powder, baking soda, salt, spices, and vanilla are small, but they still matter. A measuring spoon gives you a repeatable amount, while a quick pour or shake can vary more than you think.
Measuring over the mixing bowl
If you spill or overfill, correcting the mistake is harder once the ingredient is already in the bowl. Measuring first and adding second is slower by only a few seconds, but it is much easier to control.
Simple Conversions and Ingredient-Specific Tips
A scale becomes especially useful when you want to repeat a recipe exactly. If you are converting from cups to grams, use a trusted recipe source or a consistent conversion reference and keep your own notes for the recipes you bake often.
A few common reference conversions:
- All-purpose flour: 1 cup = about 120 g
- Granulated sugar: 1 cup = about 200 g
- Packed brown sugar: 1 cup = about 220 g
- Unsweetened cocoa powder: 1 cup = about 85 g
A few practical habits help reduce mistakes:
- Flour: spoon and level unless the recipe gives weight.
- Brown sugar: pack it firmly unless told otherwise.
- Granulated sugar: fill and level.
- Cocoa powder: spoon lightly and level.
- Liquids: use a liquid cup on a flat surface.
- Small ingredients: use measuring spoons, not guesses.
- Sticky ingredients: weigh them when possible.
If you bake a family favorite often, measure it once by weight and write the numbers on the recipe card. That small step can save time and reduce variation later.
A Simple Accuracy Checklist Before You Bake
Before you mix, run through this quick check:
- Read the recipe all the way through.
- Confirm whether ingredients are listed by weight or volume.
- Set out the right tools: scale, dry cups, liquid cup, and spoons.
- Decide which ingredients need packing, leveling, or sifting.
- Measure dry ingredients away from the mixing bowl.
- Read liquid levels on a flat counter at eye level.
- Keep sticky ingredients and small ingredients measured separately before combining.
That short routine helps you avoid the most common errors without slowing you down much.
FAQ
Should I measure baking ingredients by weight or by volume?
Use weight when the recipe provides grams or ounces. It is more consistent from batch to batch. Use volume when the recipe is written that way, but measure carefully and use the correct tool.
How do I measure flour accurately without packing it down?
Fluff the flour, spoon it into a dry measuring cup, and level it off with a straight edge. Do not scoop directly from the bag with the cup.
Do I need to sift flour before measuring?
Only if the recipe says to sift, or if the flour is lumpy and needs loosening. Many recipes do not require sifting.
What is the best way to measure liquids for baking?
Use a liquid measuring cup, set it on a flat surface, and read the line at eye level.
How do I measure brown sugar correctly?
Pack it firmly into the cup unless the recipe says otherwise, then level the top.
Is a digital scale worth it for occasional bakers?
It can be helpful if you want more consistent results and less ingredient waste. Even a basic scale can make everyday baking easier to repeat.
Final Takeaway
Accurate baking comes down to a few repeatable habits: use the right tool for the ingredient, follow the recipe’s wording on packing or sifting, and choose weight when precision matters most. Once those habits become routine, your bakes are more likely to turn out the way you expected.