
How to Organize a Silverware Drawer That Actually Stays Neat

A well-organized silverware drawer is less about making it look perfect and more about making daily kitchen use easier. When forks, spoons, knives, and the odd serving utensil each have a clear place, you spend less time rummaging and more time cooking, packing lunches, and clearing the table.
The best setup is the one that fits your drawer, your flatware, and your household habits. That may mean a simple tray, an expandable organizer, built-in dividers, or a low-cost DIY solution. The process below will help you choose a system that works now and still makes sense a few months from now.
Quick Step-by-Step Overview
- Empty the drawer completely and sort every utensil.
- Decide what truly belongs in the silverware drawer.
- Measure the drawer before buying any organizer.
- Choose the best tray, divider, or DIY setup for the drawer shape.
- Stabilize the organizer with a non-slip liner if needed.
- Group utensils by type and daily use.
- Put oversized or specialty tools somewhere else.
- Check the drawer periodically and reset it as needed.
What You Need Before You Start
Before buying anything, gather the basics:
– A tape measure
– A trash bag or donation box
– A damp cloth or mild cleaner
– Your current silverware and any cooking utensils you want to consider for the drawer
– Optional: a silverware drawer organizer, drawer dividers, or a non-slip liner
A quick note on knife storage: if you keep sharp knives in the same drawer, they should be separated so blades cannot shift into loose utensils. A dedicated slot, blade-safe organizer, or another secure storage method is the safer choice.
If you want a layout that supports daily routines, it can help to think about where the drawer sits in the kitchen. Some home cooks prefer a drawer near the dishwasher because it makes unloading easier. That is a convenience choice, not a rule, but it can reduce extra steps during cleanup.
Empty the Drawer and Sort Everything
Pull everything out of the drawer first. If utensils stay partly hidden in the drawer, it is easy to underestimate how much you own and overbuild the new system.
Sort items into simple groups:
– Forks
– Spoons
– Knives
– Teaspoons or dessert spoons
– Serving utensils
– Cooking tools that may not belong in the main silverware drawer
– Duplicates, damaged items, or pieces you never reach for
This is the point to be honest about what actually earns drawer space. If you have four sets of the same spoon size, keep the amount your household uses regularly and move the extras elsewhere. The same goes for warped plastic handles, bent pieces, or random utensils that do not belong with everyday flatware.
If your household uses a lot of mixed utensils, sort by function first and then refine by type. For example, a family that uses teaspoons constantly may want those in the most accessible compartment, while serving spoons can go to a less prominent spot.
A simple decision rule for decluttering
Keep it in the drawer if you use it weekly and can grab it without digging.
Move it out if it is duplicate, oversized, specialty, or awkward to fit.
That rule keeps the drawer focused on daily life instead of turning it into a catchall.
Measure Your Drawer and Choose the Right Organizer
Measure the drawer’s width, depth, and height clearance before you buy an insert. That matters because a tray that is technically “close enough” may still slide, waste space, or leave you with compartments that do not match your actual utensils. Measuring the drawer first is practical advice worth following. Measure your drawer first
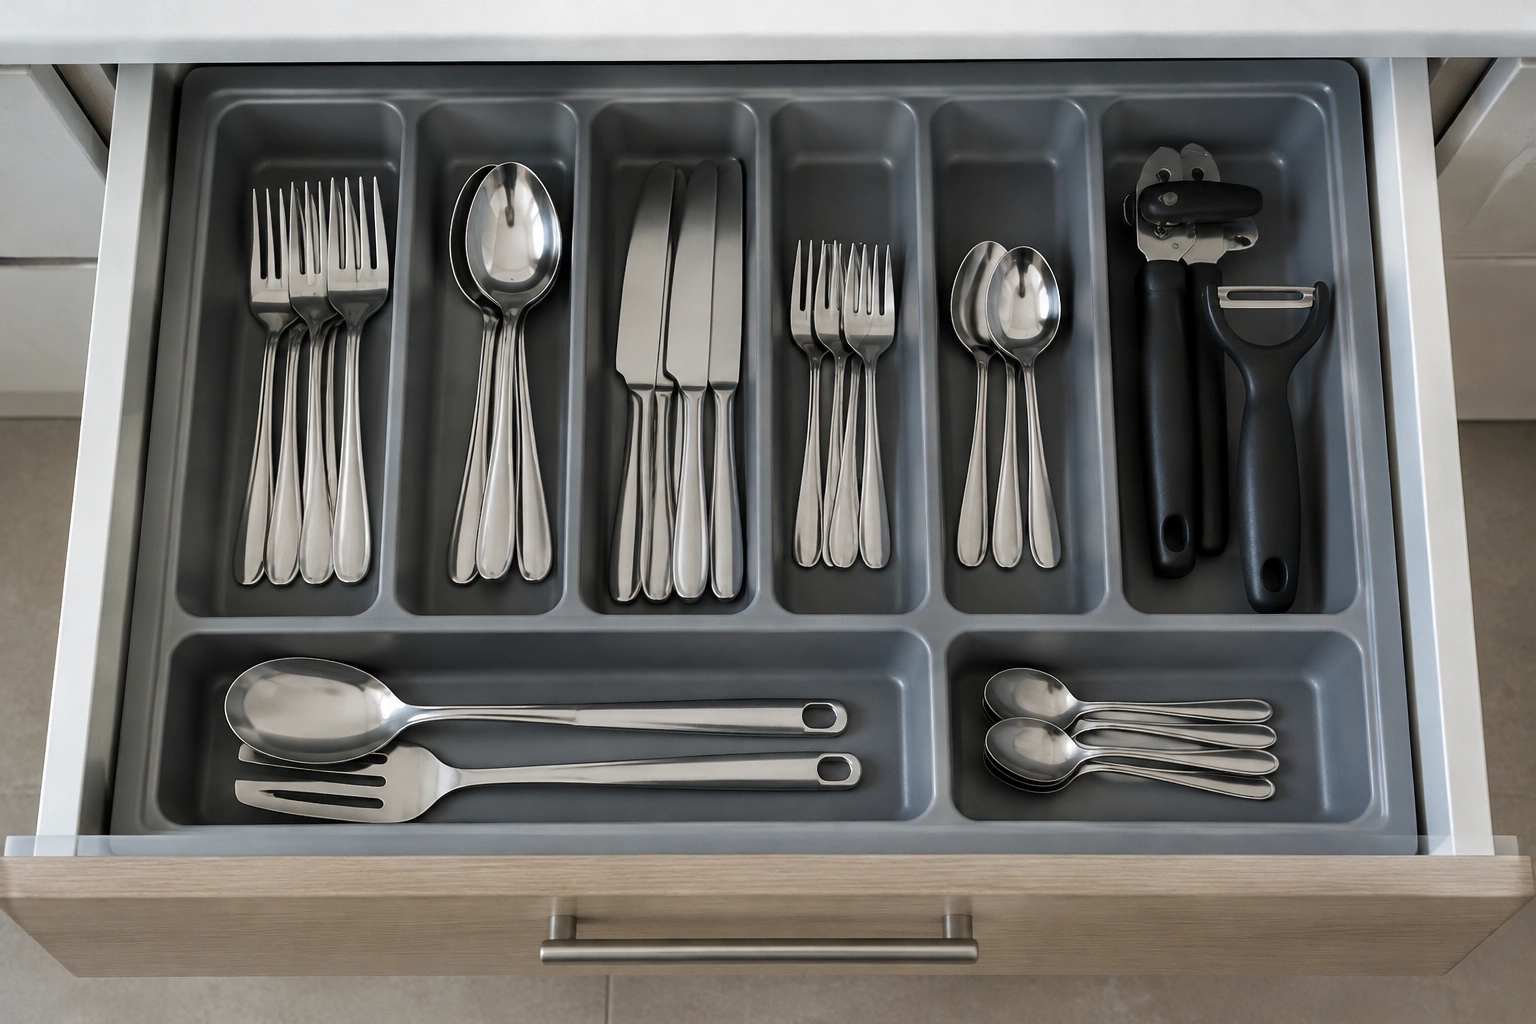
Use the measurements to decide which setup makes sense:
| Option | Best for | Trade-off |
|---|---|---|
| Bamboo tray | A sturdier look and a more substantial feel | Usually less flexible if the drawer size is odd |
| Plastic tray | Budget-friendly, lightweight, easy to replace | May shift more easily if the fit is loose |
| Expandable organizer | Drawers that need side-to-side flexibility | Can work well, but the fit still needs checking |
| Built-in dividers | A more customized layout | Less portable and harder to change later |
| DIY setup | Tight budgets or unusual drawer shapes | Takes more effort and may look less polished |
For buying guidance:
– Shallow drawers usually work best with a low-profile utensil tray that does not add much height.
– Deep drawers can handle a taller organizer or a divided setup if you want to separate flatware from larger tools.
– Narrow drawers often need a slim tray or adjustable dividers rather than a wide, rigid insert.
– Extra-wide drawers are good candidates for expandable organizers or modular dividers, as long as the pieces stay stable and do not leave awkward dead space.
Kelley Nan noted that a plastic expandable organizer fit horizontally, but the largest compartment was too large for any single item that belonged in the drawer, and the smaller compartments shifted around. She also found the silverware was heavy enough to make the plastic organizer move. That is a useful reminder: a tray that seems flexible on paper may still feel unstable in real use. See her drawer organizer experience
IKEA’s drawer organization guide shows flatware trays in different sizes, including a six-compartment tray and a three-compartment tray. That range is a good clue that there is no single ideal compartment count; the right number depends on what you store and how much separation you actually need. View IKEA’s kitchen drawer guide
How many compartments do you really need?
Use enough compartments to separate the items you reach for every day. If a category is tiny and never causes confusion, it probably does not need its own slot. Too many compartments can be just as annoying as too few.
Should you sort by size?
Usually, size sorting is secondary to type and frequency. Forks, spoons, and knives are easier to find when they are grouped by function first. Size only becomes the main sorting method if your drawer holds several utensil sizes that are constantly getting mixed up, such as teaspoons, tablespoons, and serving spoons. In most homes, type-based sorting is the clearest starting point, and size is better used as a refinement within each category.
Set Up the Drawer for Stability
Once you choose an organizer, make the drawer stable before loading it. A non-slip liner or grippy base can help keep the tray from drifting every time the drawer opens and closes. That matters most in lightweight plastic trays or in drawers where utensils are added and removed all day long.
If the organizer is removable, place it so it sits flat from front to back and side to side. Any tilt can turn into sliding, and sliding is what causes the neat divisions to collapse into a jumble.
Regular cleaning helps prevent dust and debris buildup, and liners can help protect the organizer. Plastic organizers often have rounded corners at the bottom, which can make cleaning easier. Those small design details are worth noticing because a drawer that is easier to clean is more likely to stay organized. Read OVIS’s organizer maintenance guidance
If your drawer is especially slick, a liner under the organizer may help more than a liner under the utensils alone. The goal is simple: stop movement at the base, not just at the top.
Arrange Silverware for Fast, Easy Access
Most households do best when flatware is grouped by type. Forks in one space, spoons in another, knives in another. That layout is easy to understand at a glance, which matters when several people use the same drawer.
Here is a practical order for a shared family drawer:
1. Put everyday forks in the most reachable compartment.
2. Place everyday spoons beside them.
3. Keep knives in a separate slot or protected section.
4. Store teaspoons or dessert spoons where they are easy to grab but not mixed with dinner spoons.
5. Set serving utensils or less-used items in the back or in a separate section if they must stay in the drawer.
If your family reaches for teaspoons constantly, promote them closer to the front. If knives are used mainly at meals and you want extra caution, give them a clearly separated section. The point is not to follow a rigid rule; it is to match the layout to actual routines.
A tidy drawer can also support faster cleanup because each utensil has a predictable home. That does not require perfection, just consistency.
Type-based sorting vs. frequency-based sorting
- Type-based sorting is easier to understand and keeps the drawer visually clean.
- Frequency-based sorting can be faster if one utensil gets used far more often than the others.
If your household is simple, type-based sorting usually wins. If one category gets heavy daily use, move that category to the easiest-to-reach compartment.
How to Handle Extra, Oversized, or Odd-Shaped Utensils
Not every utensil belongs in the main silverware tray. Oversized serving spoons, salad tongs, soup ladles, and awkward gadgets can crowd the drawer fast.
Use these rules:
– Keep everyday flatware in the main tray.
– Move oversized serving tools to a separate drawer if they do not fit cleanly.
– Store duplicate pieces only if they are truly needed.
– Put specialty items somewhere that does not block the utensils you use most.
If you have a deep drawer, a divided layout can sometimes work better than a shallow tray because it lets you separate flatware in front and larger tools in back. If the drawer is narrow, resist the urge to force everything into it. A cramped drawer is harder to keep tidy and more likely to mix items together.
Low-Cost and No-Cost Organization Options
You do not need an expensive insert to get a functional result. In many kitchens, the best solution is simply the one that fits the drawer and stays put.
Budget-friendly options include:
– A basic plastic utensil tray
– A bamboo tray from a standard retailer
– An expandable organizer if it truly matches the drawer width
– A simple divider setup made from inexpensive materials
– A repurposed tray or box that fits the drawer safely and sits flat
If you want to avoid buying a specialty insert, try one of these low-cost or no-buy ideas:
– A shallow box: Use a clean, shallow cardboard or plastic box that fits the drawer, then divide it with folded cardboard strips.
– Repurposed containers: Small food containers, takeout tubs, or sturdy bins can become simple utensil sections if they fit side by side.
– Cardboard dividers: Cut strips of cardboard to the drawer’s width and slot them together to make a basic grid.
– A custom cut insert: Trim foam board, thin wood, or heavy cardboard to create a snug insert for an odd-sized drawer.
– Paperboard sleeves or strips: For a temporary fix, use folded paperboard to separate teaspoons, forks, and knives until you decide on a permanent setup.
Epicurious found a modular system to be the organizer style it favored after trying other options, which is a useful reminder that flexibility can matter more than appearance. Modular pieces can be helpful if your drawer is oddly shaped or your utensil collection changes often. See Epicurious’s discussion of utensil organizers
If your budget is tight, spend first on fit and stability, not on aesthetics. A plain tray that stays in place is more useful than a prettier one that slides around.
Store-bought tray vs. DIY setup
- Store-bought trays are faster and usually easier to clean.
- DIY setups can cost less and may fit unusual drawers better.
If you are short on time, buy the simplest tray that fits. If your drawer has an odd shape or you are trying to avoid unnecessary spending, a DIY approach may be the better trade-off.
Very Small Silverware Drawers
If the drawer is extremely small, do not try to force in a standard silverware drawer organizer. Keep only the daily-use flatware there, usually one small set of forks, spoons, and knives that your household reaches for most often.
For very small drawers:
– Prioritize everyday forks, spoons, and knives only.
– Move teaspoons, serving utensils, and backup pieces elsewhere.
– Store cooking utensils in a different drawer, crock, or wall-mounted container.
– Use a slim tray, a shallow box, or simple cardboard dividers if a commercial insert will not fit.
– Keep the layout as simple as possible so the drawer does not become overcrowded again.
The goal is to protect the drawer’s usefulness, not to make it hold everything.
Common Mistakes to Avoid
The most common mistake is buying an organizer before measuring the drawer. That often leads to wasted money or a tray that never feels quite right.
Other mistakes to avoid:
– Keeping too many duplicate utensils in the main drawer
– Making the layout too complicated
– Choosing compartments that are too small for real utensils
– Ignoring sliding and shifting
– Storing bulky tools in a drawer that is already crowded
A silverware drawer should be easy to use without thought. If you need a mental map every time you open it, the setup is probably too fussy.
Another common issue is trying to make the drawer hold everything. That usually backfires. A clean system works best when it has a clear job: everyday flatware, not the entire kitchen.
Troubleshooting a Small or Messy Silverware Drawer
If your drawer is too small for a standard tray, narrow the mission. Keep only the flatware you use most often in the drawer and move the rest elsewhere. That is often the simplest fix.
If the drawer is so small that even a compact tray will not fit, use a very simple layout instead of forcing a full organizer into place. A shallow box, cardboard dividers, or separate repurposed containers can create a workable system for daily-use flatware. Then move cooking utensils, specialty tools, and duplicate sets to another drawer, a countertop crock, or a wall-mounted holder.
If utensils keep mixing, check the base. A tray that slides a little at a time will eventually blur the categories. A non-slip liner, tighter fit, or heavier organizer may solve the problem better than re-sorting the utensils again and again.
If the drawer looks neat for a day and then falls apart, the layout may be too complicated for the household. In that case, reduce the number of categories. Three clear groupings are often easier to maintain than six tiny ones.
If the drawer is crowded with serving pieces, ask one question: does this item belong where I reach for daily flatware? If the answer is no, it probably needs a different home.
How to Keep the Drawer Organized Over Time
Maintenance should be simple enough that you will actually do it. A quick reset after unloading dishes or after a family meal is usually enough to keep categories from drifting.
A practical maintenance routine:
– Put utensils back in their assigned section right away
– Remove random items that do not belong there
– Check once in a while for duplicates or pieces you no longer use
– Wipe out crumbs or debris when the drawer starts to look dusty
Reviewing contents and adjusting layouts as needs change makes sense because kitchen habits change. A new baby, a different meal routine, or a change in how often you cook can all shift what belongs in the drawer. Review and adjust over time
If the drawer starts to feel crowded again, do not assume you need a new organizer. Often the real problem is that too many items have drifted back into the drawer. A five-minute reset is usually easier than a full redesign.
A Simple Final Check Before You Call It Done
Open the drawer and test it the way your household actually uses it. Can you find forks without moving spoons? Do knives stay separated? Does the tray stay in place when the drawer opens and closes?
If the answer is yes, the system is working. If not, adjust the layout before you decide the organizer failed. Small changes in placement, compartment use, or what you allow in the drawer can make a big difference.
The goal is not a perfect display. It is a drawer that helps busy mornings, weeknight dinners, and cleanup go more smoothly with as little effort as possible.
FAQ
What is the best way to organize a silverware drawer?
The best way is usually to group everyday flatware by type, keep the drawer simple, and use an organizer that fits the drawer size. Stability matters as much as appearance.
Should I use a bamboo organizer or a plastic one?
A bamboo organizer can feel sturdier and look more polished, while a plastic organizer is often lighter and more budget-friendly. The better choice is the one that fits well and stays put.
Can I organize a silverware drawer without buying anything?
Yes. You can use a shallow box, repurposed containers, cardboard dividers, or a simple custom cut insert to create a workable layout without a specialty organizer.
What should I do if my drawer is very small?
Keep only daily-use flatware in the drawer and move cooking utensils, serving pieces, and duplicates elsewhere. A very small drawer usually works best with a minimal layout.
Is it better to sort silverware by size or by type?
Type is usually the better starting point. Size is helpful as a secondary detail, especially for teaspoons, tablespoons, and serving utensils.
How do I stop my silverware organizer from sliding?
Use a non-slip liner or a grippy base under the organizer. A tighter fit and a heavier tray can also help.
