
How to Shape a Baguette: A Baker’s Step-by-Step Guide to Better Loaves

If you’ve ever pulled a baguette from the oven and thought, “Close, but not quite,” the shaping stage is often where the difference was made. A well-shaped baguette holds its line, proofs evenly, scores cleanly, and bakes with better volume. A poorly shaped one can spread, split awkwardly, or bake up lopsided even if the dough itself was excellent.
I’m Ethan Baker, and I’ve found that baguette shaping becomes much less mysterious once you understand two things: how relaxed the dough is, and how much structure you’re building while you handle it. The goal is not to wrestle the dough into submission. It’s to guide it into a long, even cylinder with enough surface tension to support proofing and oven spring.
What You Need Before Shaping a Baguette
Before you touch the dough, get your workspace ready. Baguette shaping moves quickly once you begin, and stopping mid-process to hunt for flour or a scraper usually leads to overhandling.
Here’s the practical setup:
- A lightly floured work surface
- A bench scraper
- A couche or clean kitchen towel for proofing support
- A scale if you’re portioning dough by weight
- A light touch with flour, not a heavy dusting
If you’re making classic baguettes, the dough should already be divided into portions that match the size you want. A shaping guide from The Perfect Loaf begins with dividing and scaling the dough before preshaping, a sequence that supports consistency.
See the shaping sequence from The Perfect Loaf
Pre-shape vs. final shape
Pre-shaping is the gentle first pass. Final shaping is where you create the long baguette form.
| Step | Purpose | What it should feel like | Common mistake |
|---|---|---|---|
| Pre-shape | Organize the dough into a rough, even form | Soft, lightly tightened, still relaxed | Skipping it and fighting uneven dough later |
| Bench rest | Let gluten relax after handling | Dough spreads a little and becomes easier to stretch | Shaping too soon and getting shrink-back |
| Final shape | Build the baguette’s length and surface tension | Smooth, even, and long without tearing | Rolling too loosely or too tightly |
That simple sequence matters because baguette dough is long and narrow by design. If the dough is uneven before the final shape, those flaws usually get magnified in the oven.
How to Tell When the Dough Is Ready to Shape
The dough should feel extensible, not stubborn. If it springs back hard when you try to stretch it, it needs more rest. If it feels so slack that it slumps and tears, it may be over-relaxed or overhydrated, and you’ll need a gentler approach.
A more practical readiness check:
- A light poke should spring back slowly, not snap back immediately
- The dough should spread slightly under its own weight, but not puddle
- When you lift a piece, it should stretch before it tears
- After a short bench rest, it should feel easier to flatten and lengthen than it did right after pre-shaping
Good visual and tactile cues include:
- The dough feels soft but still holds together
- It stretches without immediately snapping back
- The surface looks slightly puffy, not dense and tight
- When you lift a portion, it moves as one piece rather than tearing at the edges
A useful rule: if the dough resists strongly during the pre-shape or first stretch, pause and let it rest longer. If you force the final shape too early, you’ll spend the whole time fighting the gluten instead of guiding it.
Tools and Setup for Easier Shaping
A bench scraper is more than a convenience. It helps you lift sticky dough without dragging it across the counter and flattening it. That matters most with wetter doughs, where your hands alone can leave you over-flouring the surface or distorting the piece.
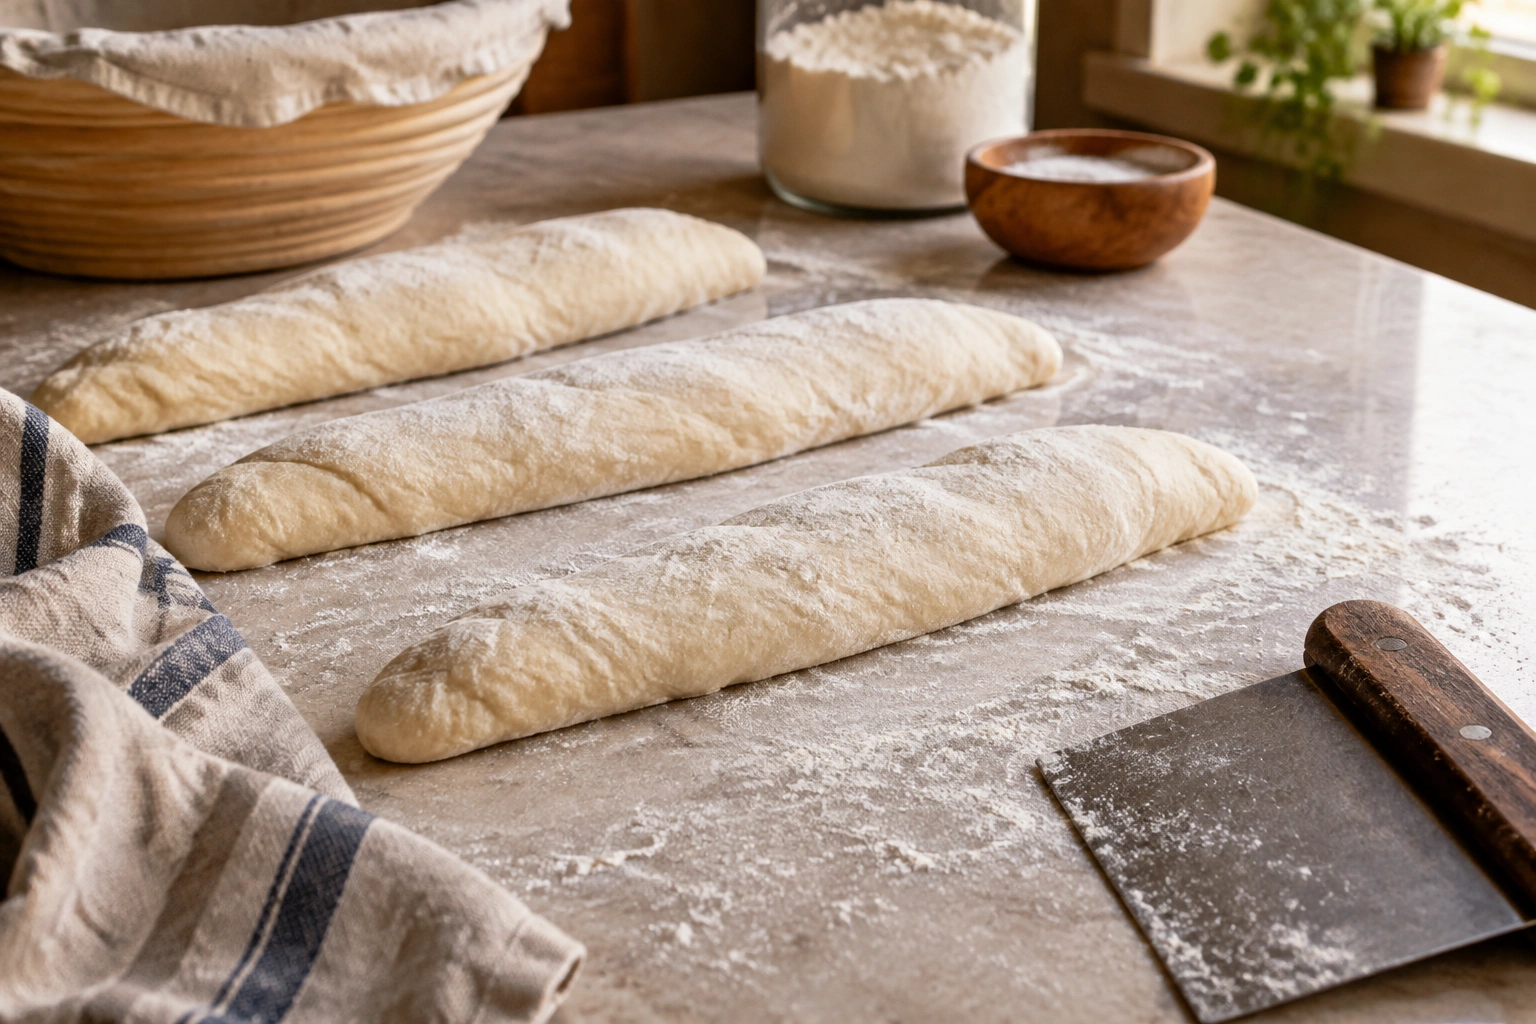
A couche or towel is just as useful after shaping. Baguettes need side support during proofing so they don’t spread outward. If you don’t have a couche, a well-floured towel can still cradle the loaves.
The flour balance is worth paying attention to. Too much flour on the bench makes the dough slide instead of grip, and that weakens seam sealing. Too little flour makes the dough stick and tear. Aim for the smallest amount that lets you move the dough cleanly.
Pre-Shape the Dough into Rough Logs
Pre-shaping gives the dough a simple, even starting point. For baguettes, that usually means a short, loose log or an oval that can later be extended into the final shape.
A gentle pre-shape works best:
- Turn out one portion of dough onto the lightly floured bench.
- Flatten it only enough to release obvious large gas pockets.
- Fold the edges inward to create a rough log or short rectangle.
- Turn it seam-side down and nudge it into a compact, even piece.
This first pass is not about creating full tension. It’s about organizing the dough so the final shaping stage is cleaner and more even. If you compress it too much here, the dough may become resistant later. If you barely handle it at all, the final loaf can end up uneven or weak.
Bench Rest: Why It Matters and How Long to Wait
After pre-shaping, let the dough rest so the gluten relaxes. That rest is what makes the final stretch possible without tearing or constant spring-back.
For home bakers, a bench rest often falls in the 10 to 20 minute range, though dough temperature, hydration, and gluten strength can shift that. You’ll know the rest is working when the dough feels softer, wider, and easier to flatten. A properly rested piece should also look a little more relaxed and slightly spread out, rather than tight and springy.
If you try the final shape too soon and the dough keeps shrinking back, give it more time on the bench. That extra pause is often the difference between a smooth baguette and a frustrating one.
A longer rest helps extensibility, but there’s a trade-off: if you let the dough relax too much, it can become harder to control and may spread too easily. The sweet spot is when the dough is relaxed enough to lengthen but still has enough body to hold a shape.
Final Shaping: Step-by-Step Baguette Technique
This is the part most bakers want to get right, and thankfully the motion is repeatable once you understand the sequence. King Arthur Baking’s method begins with a letter fold, then folds the dough in half along the long axis and seals it gently. That gives you a structured starting point before rolling.
Follow the classic baguette shaping steps from King Arthur Baking
Here’s a practical shaping sequence:
-
Place the rested dough seam-side up.
If the pre-shape has relaxed well, it should flatten slightly on its own. -
Gently pat it into a rectangle.
Don’t press out every bubble. You’re organizing the dough, not flattening it into a sheet. -
Fold the top third down toward the center.
Press lightly to anchor it. -
Fold the bottom third up and over.
You’re creating a letter-fold structure that helps the loaf hold shape. -
Seal the long seam with your fingertips or heel of the palm.
The seal should feel closed, not just pressed together loosely. -
Turn the dough around and repeat on the other side if needed.
Some shaping methods use another fold-and-seal pass for added structure. -
Place the seam side down.
This gives you a smoother outer surface for the final roll. -
Roll gently from the center outward with cupped hands.
The loaf will lengthen as you apply even pressure along the full length.
That rolling motion matters. If you press harder in the middle than at the ends, you’ll get a thick center and skinny tips. Even pressure keeps the circumference more consistent from end to end.
How to Create Surface Tension Without Tearing the Dough
Surface tension is what helps a baguette hold its shape. Think of it as the dough’s outer skin becoming organized and slightly taut, not stretched to the breaking point.
A useful comparison: a loose shape will settle outward during proofing, while a well-tensioned shape stays tall enough to expand upward in the oven. But if you pull too hard, the surface can tear or the loaf can become overly tight, which may restrict expansion.
The best tension feels like this:
- The surface is smooth, not wrinkled
- The loaf feels supported, not squeezed
- The dough resists just enough to keep its long form
- You can see a slight tightening of the outer skin without cracks
If the dough tears while rolling, you’re likely using too much force or working with dough that hasn’t rested enough. Back off, let it relax, and return with lighter pressure.
Seam Placement, Sealing, and Orientation
The seam is not a detail to ignore. It affects how the loaf proofs and how it behaves in the oven.
For a standard baguette shape, the seam is sealed during shaping and then the loaf is usually placed seam-side down for proofing in a couche or towel. That helps the outer surface stay smooth and keeps the seam from opening too early.
What a good seam should look like:
- Closed along the full length
- No obvious gaps or thick ridges
- Firm enough that it doesn’t separate when lifted
- Not dusted so heavily with flour that it refuses to stick together
For a more reliable seal, pinch or press the seam firmly enough that the two edges actually fuse, not just touch. If you run a fingertip lightly over it, it should feel smooth and closed rather than loose or springy. If the seam keeps opening, dust off excess flour first, then pinch again with a bit more pressure before moving on.
Too much flour on the seam is a common problem. It makes sealing difficult and can leave a weak line that opens unpredictably during proofing or baking.
How to Handle Sticky, Slack, or High-Hydration Dough
Sticky baguette dough can be shaped successfully, but your technique needs to become more restrained.
Use these adjustments:
- Keep the bench lightly floured, not heavily dusted
- Use the bench scraper to lift and reposition the dough
- Handle the dough with quick, deliberate movements instead of prolonged kneading on the counter
- Avoid repeatedly flattening and reforming the same piece

High-hydration dough often benefits from a gentler final shape because the dough is more extensible and more likely to spread. In that situation, the goal is not to force a tight cylinder in one pass. It’s to build enough structure that the loaf can support itself without tearing.
If the dough feels limpy and spreads out too easily, it may need more structure from the earlier mixing or folding stages. But during shaping, the best correction is often a cleaner, more efficient motion rather than more flour.
What a Properly Shaped Baguette Should Look Like
Before proofing, a well-shaped baguette should have a few clear visual traits:
- Long and narrow, but not pencil-thin
- Even thickness from end to end
- Smooth outer surface
- Sealed seam with no obvious openings
- Ends that are tapered, but not pinched shut
- A shape that holds its line when moved to the couche or tray
If the baguette looks thick in the middle and thin at the ends, the rolling pressure was uneven. If it spreads wide right away, the dough was probably too loose or the shaping was too gentle. If the surface looks torn or wrinkled, the dough was likely overworked or not rested enough.
Common Baguette Shaping Mistakes and How to Fix Them
1. Skipping the pre-shape
This usually leads to uneven loaves and more resistance during the final shape.
Fix: Give the dough a light pre-shape first, then rest it before the final roll.
2. Using too much flour
Excess flour makes the dough slide instead of grip, which weakens the seam.
Fix: Dust lightly and brush off excess flour where the seam needs to close.
3. Degassing too aggressively
You want to remove large pockets, not flatten the dough into a dense slab.
Fix: Press only enough to organize the dough and keep some internal structure.
4. Shaping too loosely
A loose baguette often spreads during proofing.
Fix: Build a bit more surface tension in the final roll.
5. Shaping too tightly
Too much tension can tear the skin or limit expansion.
Fix: Use lighter pressure and stop as soon as the loaf holds its shape.
6. Uneven thickness
This creates weak spots and uneven baking.
Fix: Roll from the center outward with even pressure along the full length.
Troubleshooting Shaping Problems
If the dough keeps shrinking back, it usually needs more bench rest. That is the first thing to try.
If it tears during rolling, reduce pressure and let it relax before trying again. Sometimes the dough is simply too cold or too tight from earlier handling.
If it spreads out after shaping, the shape may be too loose, or the dough may be too soft for the amount of support it has. In that case, a couche or towel becomes especially useful because it helps the loaves keep their profile while proofing.
If one end is thicker than the other, the roll was uneven. Re-center your hands and use the same pressure on both ends the next time.
Practical Baguette Shaping Scenarios
A standard dough that behaves well
This is the easiest case. Use a gentle pre-shape, rest until relaxed, then do a clean final roll. You should feel the dough elongate without much fight.
A sticky, high-hydration dough
Use minimal flour, a bench scraper, and shorter handling time. Don’t try to make the surface perfect in one pass. Focus on keeping the loaf aligned and supported.
A lopsided loaf
If one side is thicker, the dough usually needs more even pressure during the final roll. Correcting it mid-shape is possible, but only if you do so gently. Overcorrecting often makes the opposite side too thin.
Final Check Before Proofing
Before the baguettes go into their proofing support, pause for a quick inspection. Each loaf should feel balanced in your hands, look long and even, and show a closed seam with a smooth outer surface. If it still feels tense and springy, give it more rest. If it feels loose and shapeless, it may need better support or a slightly firmer final roll next time.
Right before proofing, the loaves should also look slightly fuller and a bit puffy, not flat or slack. They should hold their shape in the couche without spreading immediately into the folds. That’s a good sign they’re ready to proof and, later, to bake.
The best baguette shaping sessions are rarely the most forceful ones. They’re the ones where the dough is handled just enough to organize it, tighten it, and leave it ready for its final proof.
FAQs
Do you need to pre-shape baguette dough?
Yes, in most cases. A gentle pre-shape makes the final shaping more even and helps the dough relax into a better final form.
How tight should a baguette be when shaped?
Tight enough to hold a long, narrow shape, but not so tight that the surface tears or the loaf feels rigid.
Where should the seam go on a baguette?
The seam is usually sealed during shaping and placed seam-side down for proofing in a couche or towel.
What if the dough keeps shrinking back?
That usually means it needs more bench rest. Let the gluten relax before trying to elongate it again.
Can you shape baguettes without a couche?
Yes. A well-floured towel can also support the loaves during proofing, though a couche makes it easier to keep the shape consistent.
How do you know if the baguette is shaped correctly?
It should look even, long, and smooth, with a sealed seam and no obvious thick spots or tears.
What if the dough is too sticky to shape?
Use less flour than you think, rely on a bench scraper, and work quickly with gentle pressure so the dough doesn’t smear across the counter.
How much should you degas the dough?
Only enough to remove large air pockets and organize the dough. The goal is to preserve structure, not flatten all the gas out.
Should baguettes be shaped by hand or with a scraper?
Hands do the shaping, while a scraper helps with lifting, moving, and keeping sticky dough under control. The scraper supports the process; it doesn’t replace the shaping motion.
Why does shaping affect oven spring?
Because shaping controls surface tension and seam placement. A well-shaped loaf is better able to expand upward instead of spreading outward during baking.
How do baguettes differ from batards or boules?
Baguettes are shaped into long, narrow cylinders, so the shaping focuses on even length and surface tension along the full loaf. Batards and boules are shorter and rounder, so their shaping usually emphasizes a more compact, rounded structure rather than an extended form.
How long should shaped baguettes proof before baking?
It depends on the dough and room temperature, so time alone isn’t the best guide. In general, proof until the baguettes look slightly puffy, hold their shape in the couche, and feel airy but still supported when gently nudged.