
How to Store Kitchen Utensils for a Cleaner, Easier-to-Use Kitchen

If your utensil drawer is a jumble of spoons, spatulas, whisks, and tongs, the fix is usually not “buy more organizers.” The fix is to store each utensil where it is easiest to grab, easiest to clean, and least likely to get damaged.
For most busy homes, that means using a simple three-zone system:
- Daily-use utensils stay closest to the stove or prep area.
- Occasional tools move to a drawer, cabinet bin, or secondary organizer.
- Specialty or bulky items get a separate spot so they do not crowd the everyday tools.
That approach keeps the kitchen faster to work in and easier to maintain. It also reduces the common problem of overstuffed drawers, where utensils tangle, scratch each other, or disappear under heavier tools.
Quick Answer: The Best Ways to Store Kitchen Utensils
The best storage method is the one that matches your kitchen layout and how often you cook.
- Drawer organizers work best if you want a clean look and protected storage.
- Countertop crocks or containers are best for the tools you use every day.
- Hooks, rails, and pegboards are smart when drawer space is limited.
- Cabinet bins and pull-out organizers help hide less-used utensils or bulkier items.
If you want the simplest rule, use this: the more often you reach for a utensil, the closer it should be to your main work zone. That may mean a crock beside the stove for spatulas and ladles, a drawer tray for measuring spoons and peelers, and a cabinet bin for backup tools.
For a related deep dive on maximizing storage in tight spaces, see how to organize deep kitchen drawers.
How to Choose the Right Utensil Storage Method
Before buying anything, look at four things: space, frequency of use, cleanliness, and safety.
1. Space
If your drawers are shallow, a flat tray usually works better than a deep bin. If your drawers are deep, you can use stacked bins or a pull-out organizer to separate larger tools from smaller ones. In a galley kitchen, wall-mounted storage or a slim crock often frees up the most usable prep space. In a wider kitchen with more cabinet room, a drawer-and-cabinet mix usually works well.
2. Frequency of use
Keep the tools you use daily in the easiest place to reach. That might be a countertop crock, a top drawer, or a wall rail. Rarely used tools should not take up prime space just because they came in a matching set.
3. Cleanliness
Closed storage protects utensils from dust and grease better than open storage. Open storage is still practical, but it works best for tools you use often and wash regularly. In kitchens near the stove or in humid climates, open storage is usually better for a small, frequently washed set than for a large collection.
4. Safety
Sharp, long, or heavy utensils need stable storage. A loose knife in a drawer or a crowded jar can create avoidable injuries. If children are in the home, place sharp tools higher up or in a more secure system.
A helpful decision rule: choose the storage method that gives you the fastest access without making cleaning harder. If a system is convenient but hard to wipe out, it usually becomes clutter later.
A few practical layout examples
- Shallow drawers: use a flat tray for spatulas, peelers, and measuring tools, then keep taller items elsewhere.
- Deep drawers: use dividers or bins so long-handled utensils do not slump into a pile.
- Galley kitchens: use a wall rail, pegboard, or narrow crock to keep counters open.
- Renters: choose no-drill options like countertop crocks, adhesive hooks, or over-the-door organizers.
- Families with children: store sharp or breakable tools in a higher cabinet or a latched drawer, and keep only safe, everyday tools within reach.
Store Everyday Utensils by How Often You Use Them
Before organizing, spread everything out on the counter or table and sort like items together. This is a practical first step because it shows duplicates, broken tools, and items that no longer match your cooking habits.
A simple sorting system works well:
- Daily-use: spatulas, tongs, ladles, wooden spoons, slotted spoons
- Weekly-use: whisks, peelers, measuring tools, can openers
- Occasional-use: specialty baking tools, pastry brushes, zesters, melon ballers
- Rare-use: holiday tools, backup sets, duplicates, oversized gadgets
This is where many kitchens get stuck. They store everything together, which makes the most-used tools harder to find. A better setup puts the daily tools in the most accessible place and moves the rest out of the way.
If you have duplicates, keep the best-fitting or easiest-to-clean version in the main storage zone. Extra utensils can go in a backup bin or a less convenient cabinet.
Drawer Storage: Trays, Dividers, and Pull-Out Organizers
Drawer storage is one of the cleanest ways to store utensils because it keeps tools protected from dust and splatter. It also makes it easier to separate similar items so they do not tangle.
Best for:
- measuring spoons and cups
- peelers and small handheld tools
- flat utensils like spatulas and turners
- backup tools you do not need on the counter
How to make it work
Use a drawer organizer or utensil tray with sections sized to your actual tools. Long-handled utensils need deeper or longer compartments; small gadgets need narrow sections so they do not slide around.
A practical layout is to group by function:
– cooking tools in one section
– prep tools in another
– baking tools in a third
If you have a deep drawer, a pull-out organizer or stacked bins can help separate bulky items from smaller ones. The goal is not to fit every utensil in one space. The goal is to keep them visible enough that you can grab what you need without digging.
Trade-off
Drawer storage is cleaner and less cluttered, but it can be less convenient if the drawer is far from your prep area. If that happens, reserve the best drawer for the most-used tools and move less-used items elsewhere.
Countertop Storage: Utensil Crocks and Containers
A countertop utensil crock or countertop container is the fastest option for everyday tools. It works especially well beside the stove, where you need spatulas, tongs, and spoons within arm’s reach.
Best for:
- daily cooking tools
- tools used while stirring, flipping, and serving
- kitchens with limited drawer space
What to keep in it
Use the crock for only the tools you reach for constantly. If it starts holding everything, it becomes a clutter bucket instead of a helper.
A good crock usually holds:
– 4 to 8 frequently used utensils
– tools with sturdy handles
– items you wash and dry often
Hygiene and maintenance
Open storage is more exposed to dust, grease, and splatter, so it works best when utensils are fully dry before they go in. A container with a wide opening is easier to clean than a narrow one with corners that trap crumbs or residue.
If your stove area gets a lot of grease, place the crock a little farther away from direct splatter. In a humid kitchen, avoid putting the holder right next to the sink or dishwasher, where moisture can linger longer than you expect.
Trade-off
Countertop storage is convenient, but it uses visible space. If you want a cleaner look, keep only the most-used tools on the counter and move the rest to a drawer or cabinet.
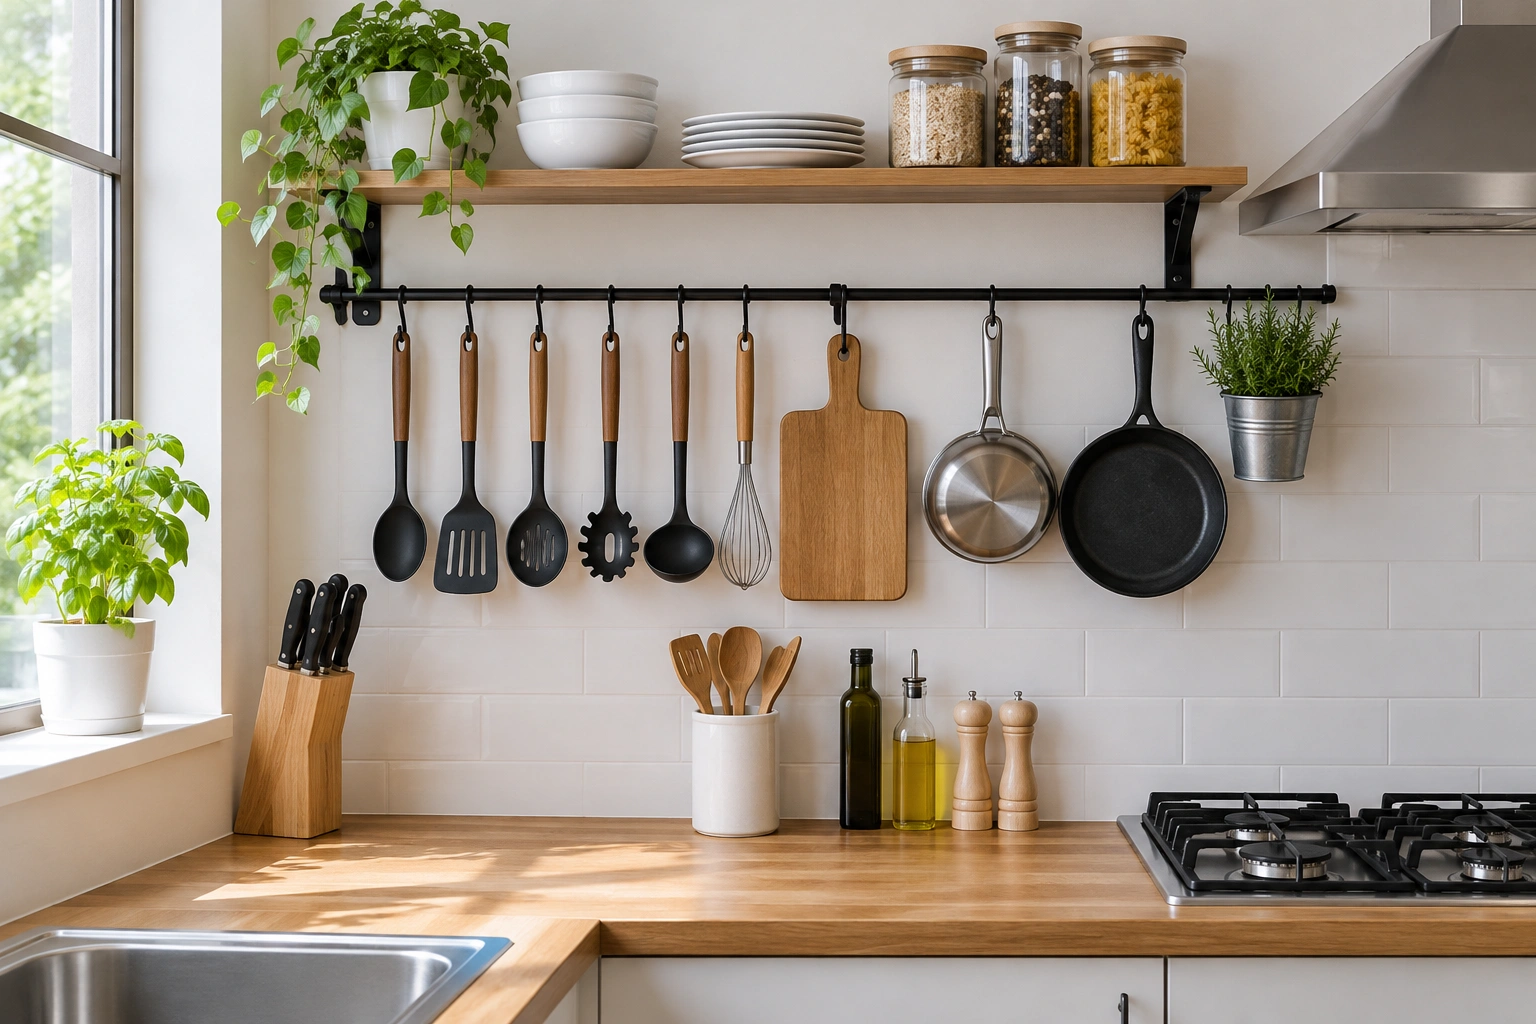
Hanging and Wall-Mounted Storage for Small Kitchens
When drawer space is tight, vertical storage can be the difference between a workable kitchen and a crowded one.
Good options include:
- hooks
- wall racks
- pegboards
- magnetic knife strips for compatible metal items
Best for:
- small kitchens
- narrow drawers
- tools used near the stove
- homeowners who want counters clear
What to hang
Hang tools that are sturdy, easy to grab, and used often. Measuring cups, ladles, whisks, and some spatulas can work well if the hanging system is secure.
What to avoid
Do not hang items that swing into each other, block a walkway, or become awkward to remove. If a tool is hard to return to the hook, it will probably end up on the counter.
Trade-off
Hanging storage saves space, but it is more exposed to dust and grease than closed storage. It also changes the look of the kitchen, which some people love and others do not. If you want a balanced setup, use hanging storage for daily tools only and keep the rest hidden.
Cabinet Storage and Other Hidden Solutions
If you prefer a tidier look, cabinet storage can hold utensils without crowding the counter.
Useful hidden options:
- cabinet bins
- pull-out organizers
- deep shelf containers
- knife blocks for knives and other sharp tools
This approach works well for less-used utensils or bulkier items that do not fit neatly in a drawer. It is also useful if you want to separate cooking tools from serving or baking tools.
For example:
– one cabinet bin for baking utensils
– one drawer for cooking tools
– one crock for stovetop essentials
That kind of zoning keeps the kitchen from becoming one giant mixed pile.
Trade-off
Hidden storage looks cleaner and protects utensils from dust, but it may take an extra step to reach them. That is fine for items you use occasionally. It is a poor fit for tools you grab several times a day.
Comparison Table: Drawer vs Countertop vs Hanging vs Cabinet Storage
| Storage type | Space use | Cleanliness | Accessibility | Cost | Best fit |
|---|---|---|---|---|---|
| Drawer organizer | Efficient inside drawers | High | Medium | Low to moderate | Homes with available drawer space |
| Countertop crock | Uses visible counter space | Medium | High | Low | Daily-use utensils near the stove |
| Hanging rack / pegboard | Very space-saving vertically | Medium | High | Low to moderate | Small kitchens and limited drawers |
| Cabinet bin / pull-out organizer | Hidden and tidy | High | Medium | Low to moderate | Less-used or bulky utensils |
How to Store Sharp, Long, or Bulky Utensils Safely
Some utensils need more than a simple container.
Knives
Use a knife block, drawer insert, or other dedicated knife storage. Loose knives in a drawer are a cutting hazard and can dull faster from contact with other tools.
Long-handled tools
Ladles, tongs, and oversized spatulas can tip over in a small crock if the container is too light or too narrow. Use a heavier holder or a deeper drawer section so they stay stable.
Skewers and similar sharp tools
Keep them in a closed container, sleeve, or dedicated drawer section so they do not poke through a jar or become a hand injury risk.
Bulky tools
Items like large whisks or specialty serving utensils often work better in a deep drawer or cabinet bin than in a countertop crock. If they do not sit neatly upright, they will clutter the space fast.
A good safety rule: if a utensil can fall, poke, or slash when you reach for it, it needs dedicated storage.
How to Keep Stored Utensils Clean and Sanitary
Storage only works if the utensils go in clean and dry.
Dry them fully first
Wet utensils can leave moisture in drawers, bins, or containers. That can lead to odors, mildew, or sticky buildup over time. Air-drying is the safest general practice, and storing utensils upside down or in a self-draining position can help reduce pooled water.
Keep holders clean too
A utensil holder is not a set-it-and-forget-it item. Wipe out crocks, bins, and drawer inserts regularly so crumbs and grease do not build up.
A practical routine works better than a vague rule:
– Weekly: empty and wipe countertop crocks or open containers
– Every 1 to 2 weeks: check drawer inserts for crumbs, sticky spots, or dust
– More often in humid or high-grease kitchens: clean open storage before buildup becomes visible
Place open storage carefully
Open storage is best kept away from the heaviest splatter zones. If possible, place crocks a little to the side of the stove rather than directly behind a burner. In kitchens with lots of steam or grease, closed drawers and cabinets are usually easier to maintain than open holders.
Separate clean from dirty
Do not return utensils to storage after a quick rinse if they still have residue. Food particles can transfer to the next tool or create a smell in closed storage.
For food safety guidance on cleaning and handling, FoodSafety.gov’s kitchen basics is a useful reference.
Budget-Friendly Utensil Organization Ideas
You do not need a full kitchen makeover to get organized.
Low-cost setups that work well in different spaces
- About a $10 drawer setup: use a basic tray or a few inexpensive dividers to separate spatulas, peelers, and measuring tools in one shallow drawer.
- No-drill rental solution: use a countertop crock plus adhesive hooks or an over-the-door organizer, so you do not have to mount anything permanently.
- One-crock-plus-one-drawer system: keep the 5 to 8 most-used utensils in a crock near the stove and store everything else in a single drawer organizer.
- Small cabinet-bin setup: assign one low-cost bin to baking tools and another to occasional gadgets so they do not spread across multiple shelves.
- Under-shelf hook setup: hang lightweight tools from hooks under a shelf to free up drawer space without drilling into walls.
Budget solutions work best when they match the size of the utensil collection. A cheap organizer that is too small is not a bargain if it creates clutter.
If you are choosing between DIY and store-bought, think about durability and cleaning. A simple bin that wipes clean easily is often more useful than a decorative holder that traps crumbs.
Common Mistakes to Avoid When Storing Kitchen Utensils
A few habits create most utensil clutter problems.
1. Storing everything together
Mixed utensils are harder to find and more likely to tangle or scratch.
2. Keeping damp utensils in closed storage
Moisture is the fastest way to create odors and grime.
3. Overcrowding drawers or crocks
If you have to force items in, the system is too full. Overcrowding makes cleanup harder and can damage handles or edges.
4. Using prime space for rarely used tools
Daily tools should not be buried behind special gadgets.
5. Ignoring the holder itself
A clean utensil system can still feel messy if the drawer insert or crock is dirty.
Simple Setup Plan for an Organized Utensil System
If you want a quick reset, use this sequence:
- Empty every utensil from drawers, crocks, and cabinets.
- Sort items into daily, occasional, and specialty groups.
- Remove broken, duplicated, or worn-out tools.
- Choose the main storage zone for daily-use utensils.
- Assign secondary storage for the rest.
- Add dividers, bins, hooks, or a crock only where they solve a real problem.
- Return utensils only after they are clean and fully dry.
- Recheck the setup after a week and move any tool that feels awkward to reach.
If you want a simple rule to keep the system working, use this: when a utensil becomes annoying to find, it is probably in the wrong zone. Move it once, and the whole kitchen usually feels easier.
For readers also organizing other kitchen storage, this guide pairs well with how to store Tupperware and lids without the cabinet chaos.
FAQ: How to Store Kitchen Utensils
What is the best way to store everyday kitchen utensils?
The best setup is usually the one closest to where you cook most often. Many households do well with a countertop crock for daily tools and a drawer organizer for the rest.
How do I store utensils in a small kitchen with limited drawer space?
Use vertical storage. Hooks, rails, and pegboards can free up drawers, while a small crock can hold only the most-used tools.
Should utensils be stored in drawers, jars, trays, or hanging racks?
All of those can work. Drawers are best for cleanliness, jars or crocks are best for speed, and hanging racks are best when space is tight.
How do I keep utensils clean and sanitary while stored?
Dry them completely before storage, clean the holder regularly, and avoid returning utensils that still have food residue.
What’s the most affordable way to organize kitchen utensils?
Simple bins, drawer dividers, and repurposed containers are often the lowest-cost solutions. The key is matching the organizer to the size and shape of your utensil collection.
How do I separate cooking utensils from serving or baking utensils?
Group them by function and store each group in its own section or container. That keeps daily cooking tools from getting buried under specialty items.
How can I stop utensils from getting cluttered or damaged?
Limit each storage area to the tools it can comfortably hold, and remove duplicates or worn-out items. Overcrowding is usually what causes damage and clutter.
What should I do with sharp or oversized utensils?
Give them dedicated storage. Use a knife block, drawer insert, deep drawer, or stable bin so they do not shift around or create injury risks.
What’s a good utensil storage option for renters?
Choose no-drill solutions like countertop crocks, drawer organizers, adhesive hooks, or over-the-door storage so you can improve organization without permanent changes.