
How to Use a Bread Machine for Better Homemade Loaves

A bread machine can feel a little mysterious the first time you use it, but the workflow is simpler than it looks: load the ingredients, choose the right cycle, let the machine mix and knead, then bake or shape the dough depending on your recipe. The real skill is not pressing buttons; it’s understanding how the machine wants the dough to behave.
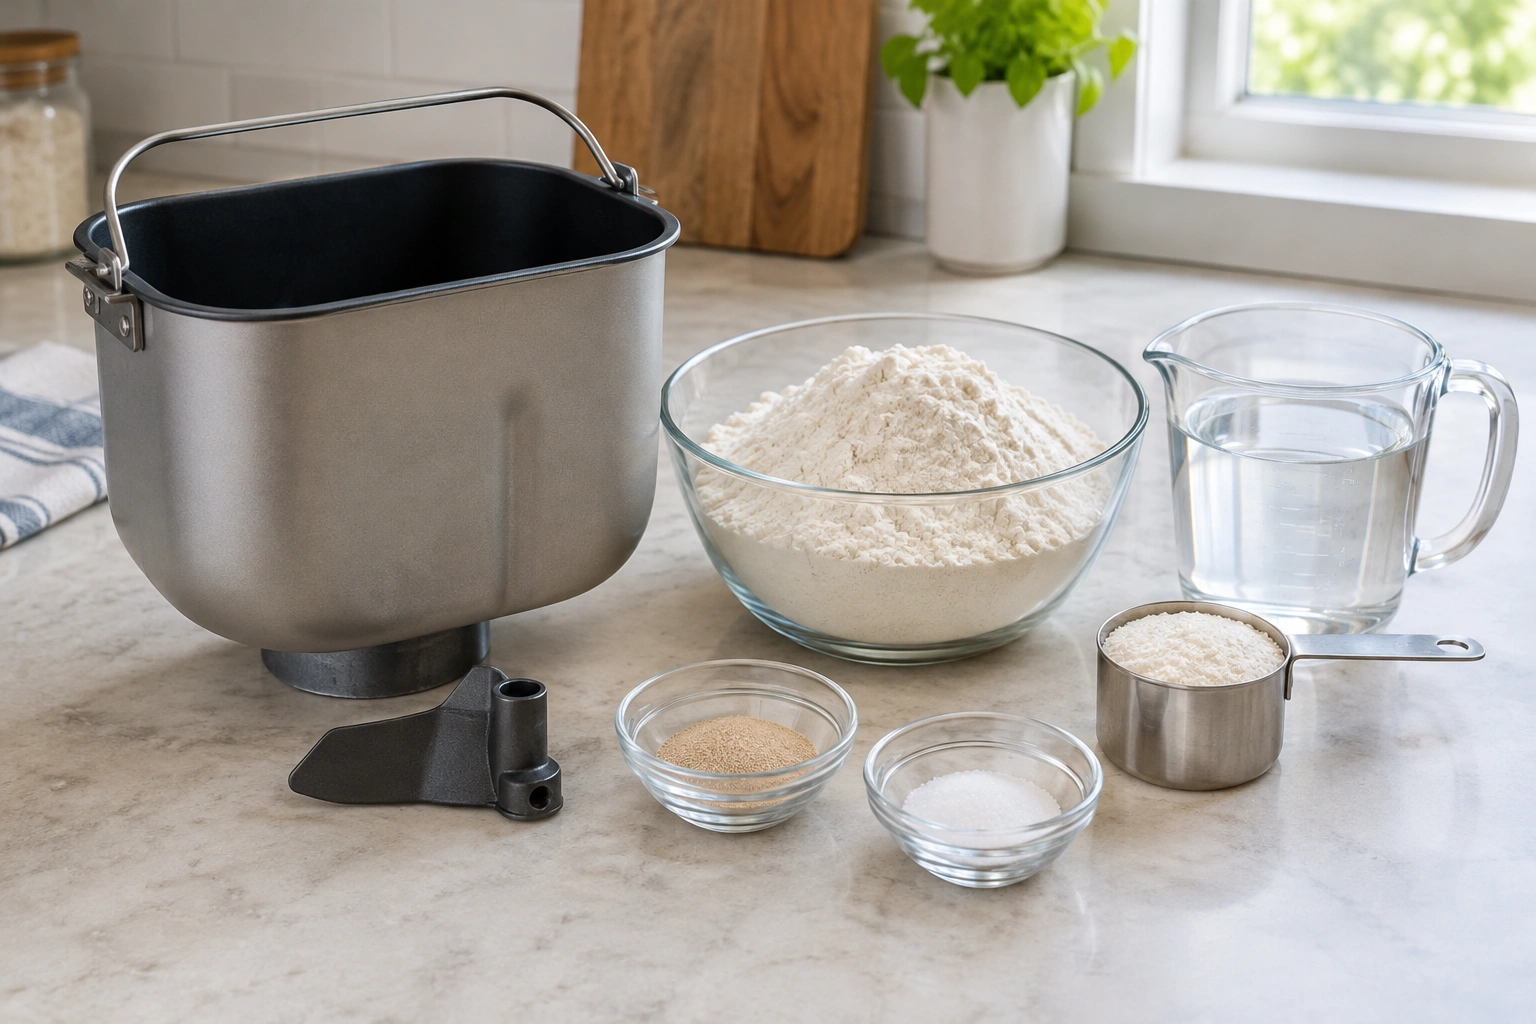
If you’ve ever ended up with a dense loaf, a sunken top, or bread that tastes fine but looks a little off, the fix is usually in the setup. Ingredient order, flour choice, yeast type, and cycle selection matter more in a bread machine than they do in many hand-mixed loaves. Once those pieces make sense, you can move from guesswork to repeatable results.
What You Need Before You Start
A bread machine has a few key parts you should know before the first loaf:
- Bread pan: the removable pan where the dough mixes, rises, and often bakes
- Kneading paddle: the small arm that stirs and develops the dough
- Control panel: where you choose the cycle, loaf size, and crust color
- Lid: usually closed during mixing, rising, and baking
Before your first loaf, do a quick setup check:
- Unpack the machine and read the manual.
- Confirm the bread pan is seated properly.
- Make sure the kneading paddle is installed.
- Check that the machine is clean, dry, and ready to run.
- Plug it in and confirm the display or controls power on.
- Gather your ingredients, and if the recipe says so, let refrigerated ingredients come to room temperature.
You’ll also want the basics on hand:
- a bread machine recipe written for your machine size
- flour
- yeast
- salt
- water or other liquid
- fats like butter or oil, if the recipe uses them
One practical note: if you’ve never used your machine before, read the manual once before baking. Different models can vary in ingredient order, cycle names, and loaf limits. That small step saves a lot of confusion later.
Choose the Right Recipe, Yeast, and Flour
Not every bread recipe behaves well in a machine. Bread machine recipes are usually built around the machine’s mixing and proofing rhythm, so they’re the safest place to begin. A standard oven loaf can sometimes be adapted, but it often needs adjustments in hydration, yeast, and timing.
Bread machine recipe or regular bread recipe?
Use a bread machine recipe when you want the simplest path: add ingredients, choose a cycle, and let the machine handle the rest. Use a dough cycle if you want the machine to mix and knead, but you’d rather shape and bake the loaf yourself.
That split matters. A machine-baked loaf and an oven-baked loaf don’t always need the same dough strength or hydration. The dough cycle gives you more control, especially for rolls, pizza dough, or shaped loaves.
Instant yeast vs. active dry yeast
For bread machines, instant yeast is usually the easiest choice. It blends well into the dry ingredients and is designed to work efficiently in doughs with machine timing.
Active dry yeast can still work, but it may be a little less convenient because it was traditionally designed to be dissolved first. If your recipe specifically calls for active dry yeast, follow that recipe. If you’re choosing from scratch, instant yeast is the smoother route.
Bread flour vs. all-purpose flour
Bread flour has more protein than all-purpose flour, which usually helps a loaf hold its shape and rise taller. That extra structure is useful in a bread machine, where the dough gets a long, consistent knead.
All-purpose flour can still make good bread, especially for softer sandwich loaves. The trade-off is structure: the loaf may be a little less tall or less chewy than one made with bread flour.
A simple rule:
– choose bread flour when you want better rise and a stronger crumb
– choose all-purpose flour when you want a softer loaf and that’s what your recipe is written for
If you want a deeper dive into machine-friendly dough behavior, King Arthur Baking’s guide to bread machines is a useful reference.
How to Load Ingredients Into a Bread Machine
For most machines, the safest loading order is:
- Liquid ingredients
- Oils or fats
- Dry ingredients
- Yeast last, on top
That order helps keep the yeast separated from the liquid until the cycle begins, which matters if you’re using a delay start or simply want more predictable activation. That said, always follow your manual if your machine uses a different loading sequence, such as a yeast dispenser or a model that specifies a different order.
Why the order matters
The machine usually starts with a rest period before mixing. If yeast touches liquid too early, it may begin working before the cycle is ready. That can weaken the final rise, especially in delayed-start recipes.
A few practical tips:
– keep salt away from direct contact with yeast when possible
– make a small well in the flour for the yeast if your manual suggests it
– if your recipe calls for dry milk, sugar, or powdered ingredients, add them with the dry ingredients unless the recipe says otherwise
Measuring accurately
Bread machine dough is less forgiving than many hand-mixed doughs. Too much flour can make the loaf dense and dry. Too much liquid can lead to a sticky dough that collapses or bakes up gummy.
For best results:
– level flour instead of packing it
– measure liquids at eye level in a clear cup
– use the exact yeast amount the recipe gives
– don’t “eyeball” salt or flour on the first attempt
If you’re converting an old family recipe, that recipe may not be machine-ready without adjustment. More on that later.
Select the Correct Cycle, Loaf Size, and Crust Setting
This is where the machine becomes less intimidating. The settings tell it how long to knead, rise, and bake.
| Setting | Best for | Trade-off |
|---|---|---|
| Basic white cycle | Standard sandwich bread, enriched white loaves | Simple and reliable, but not ideal for heavy whole-grain doughs |
| Whole wheat cycle | Whole wheat and other heavier doughs | Better kneading and rise time, but takes longer |
| Dough cycle | Pizza dough, rolls, shaped loaves | More control, but you must shape and bake separately |
| Rapid bake cycle | Recipes written specifically for fast baking | Convenient, but usually less flavor development than standard cycles |
Simple decision rule
If the recipe is a standard sandwich-style loaf and the ingredient weight is moderate, start with the basic white cycle. If the dough is heavier, denser, or includes a lot of whole grain, choose the whole wheat cycle. If you want to shape the dough yourself or bake it in the oven, choose the dough cycle instead.
Loaf size
Choose the loaf size that matches the recipe amount and your machine’s capacity. A machine that’s too small for the dough can overflow; a machine that’s too large may bake a short, pale loaf. If your manual gives capacity limits, follow them. If it does not, use the recipe’s recommended size rather than guessing.
Crust color
Crust color is partly preference, partly function. A lighter setting gives a softer crust and can be helpful if your machine tends to brown aggressively. A darker setting gives more color and a firmer crust.
For a first loaf, medium is often a sensible middle ground unless the recipe suggests otherwise.
Step-by-Step: Run a Basic Bread Machine Cycle
Once the ingredients are in and the settings are chosen, the process is mostly hands-off.
- Place the pan in the machine and make sure it locks into position.
- Confirm the paddle is in place before you start.
- Close the lid.
- Choose the cycle that matches the recipe.
- Select loaf size and crust color if your machine offers those options.
- Press Start.
From there, the machine usually moves through phases like mixing, kneading, rising, and baking. The first-loaf preflight check is simple: pan seated, paddle installed, ingredients loaded, machine powered on, and the correct program selected.
During the first knead, the dough should come together into a smooth, slightly tacky ball. That texture is a strong sign you’re in the right range. If it looks like batter, or if the dough is dry and crumbly, you’ll likely need a small adjustment.
Check the Dough During Kneading and Adjust If Needed
This is one of the most useful habits you can build.
After the machine has mixed the dough for a few minutes, peek inside. You’re looking for a dough that:
- gathers into a ball
- feels soft and elastic
- is slightly tacky, not soupy
- clears the sides of the pan for most of the knead
If the dough is too wet
Signs:
– it smears along the pan
– it sticks heavily to the sides and won’t gather
– the dough looks slack or shiny
Fix:
– add flour a teaspoon or tablespoon at a time
– let the machine knead for a minute or two between additions
If the dough is too dry
Signs:
– it looks shaggy or broken
– it won’t form a smooth ball
– the machine sounds like it’s struggling because the dough is too stiff
Fix:
– add water a teaspoon at a time
– give the dough time to absorb it before adding more
This is where bread machine baking becomes a craft. The recipe is your starting point, but flour brands, humidity, and measuring style all affect the dough. Small corrections early are much better than trying to rescue a finished loaf.
When and How to Add Mix-Ins
Nuts, seeds, dried fruit, chocolate chips, and similar add-ins can be great in bread machines, but timing matters.
Best timing
Add mix-ins when your machine signals for them, if it has a beep or add-in indicator. If it does not, many machines handle mix-ins best after the dough has already formed and kneaded a bit. That keeps the pieces from getting crushed or overmixed.
Practical examples
- Raisins: add at the mix-in signal so they stay intact
- Walnuts: add late for better distribution
- Seeds: add late if you want them visible in the crumb
- Very soft add-ins: use sparingly, because they can smear into the dough
If you add them too early, the machine may chop them up or distribute them unevenly. That’s not always bad, but it changes the texture and look of the loaf.
How to Tell When the Loaf Is Done
A finished loaf should feel set, look evenly browned, and sound hollow-ish when tapped on the bottom once removed from the pan.
Right after baking:
1. remove the pan carefully with oven mitts or a towel
2. turn the loaf out onto a rack
3. remove the paddle if it stayed inside the loaf
4. let the bread cool before slicing
If the paddle bakes into the loaf, let the bread cool a bit first, then use a utensil or your fingers to lift it out carefully so you don’t tear the bread.

Cooling matters more than many beginners realize. The crumb is still setting as steam escapes. Slice too soon and the inside may seem gummy even if it was baked properly.
A good rule is to wait until the loaf is at least warm rather than hot before cutting. If you want clean slices, let it cool longer.
Common Bread Machine Mistakes and How to Fix Them
Wrong ingredient order
If yeast touches liquid too early, the loaf may overproof or rise unevenly. Follow your manual’s order, or use the standard liquid-first method if your machine instructions support it.
Using the wrong cycle
A heavy whole wheat dough on the basic cycle can end up underdeveloped. A recipe designed for rapid bake won’t behave the same on a standard cycle. Match the cycle to the recipe.
Too much flour
This is one of the most common beginner mistakes. The loaf turns out dense, dry, and small. Measure carefully and adjust during kneading instead of dumping in extra flour from the start.
Opening the lid too often
A quick peek during kneading is useful. Repeated opening during proofing or baking can interfere with temperature and rise.
Using old yeast
Yeast loses strength over time. If a loaf barely rises, stale yeast is worth checking before you blame the recipe.
Troubleshooting Dense, Gummy, or Collapsed Bread
Here’s a practical diagnosis guide.
Dense loaf
Likely causes:
– too much flour
– weak or old yeast
– wrong cycle for the recipe
– insufficient kneading or rise time
What to try next time:
– measure more carefully
– use bread flour if the recipe allows it
– choose the whole wheat cycle for heavy doughs
– replace old yeast
Gummy interior
Likely causes:
– too much liquid
– loaf sliced too soon
– underbaking
– too much rich ingredient for the formula
What to try next time:
– reduce liquid slightly
– cool the loaf longer
– check whether the recipe is meant for a bread machine
Collapsed or sunken top
Likely causes:
– too much liquid
– too much yeast
– overproofing
– lid opened during rise or bake
– loaf too large for the pan
What to try next time:
– reduce liquid a little
– use the correct loaf size
– avoid opening the machine during rising
– make sure the recipe fits the pan capacity
If the loaf looks misshapen or starts to collapse, check the dough during the knead window before it reaches the final rise. A dough that is too wet, too dry, or too large for the pan is often easier to fix early than after the cycle is underway.
How to Use the Dough Cycle Instead of Baking in the Machine
The dough cycle is one of the most flexible features on a bread machine. It’s often the best choice for beginners when you want the machine to handle the mixing and kneading, but you want more control over the final shape, bake, or crust. That makes it especially useful for sandwich loaves, rolls, pizza dough, and recipes that are easier to judge by hand before baking.
Use the dough cycle when you want to:
– shape sandwich loaves by hand
– make rolls
– bake pizza crust
– control the final oven bake yourself
That trade-off is worth it when you want better shape or crust control. The machine handles the tiring part—mixing and kneading—while you decide the final form.
A simple workflow:
1. run the dough cycle
2. remove the dough after the first rise
3. shape it
4. let it rise again if the recipe calls for it
5. bake in the oven
How to Adapt Regular Recipes for a Bread Machine
You can sometimes adapt a standard bread recipe, but not all oven recipes translate cleanly.
What usually needs adjustment
- Liquid: bread machine dough often needs slightly less or more depending on flour and humidity
- Yeast: use the amount the recipe or machine method calls for
- Mixing method: skip hand-kneading if the machine is doing the work
- Timing: use a machine cycle that matches the dough style
A practical rule of thumb
Start by reducing the liquid slightly if the original recipe was designed for hand kneading, then check the dough during the knead cycle. The dough should form a soft, slightly tacky ball that clears the sides of the pan most of the time. If it smears, add a little flour; if it looks dry or breaks apart, add a teaspoon of water. If a recipe seems very wet, very enriched, or unusually large, it may be better suited to the dough cycle or to a recipe already tested for bread machines.
What to watch for
- very wet doughs may not hold shape in a bread machine
- enriched doughs may need a richer cycle or dough-only approach
- rapid bake should only be used with recipes designed for it
If you’re adapting a favorite oven recipe, test it as a dough-cycle recipe first. That gives you a chance to shape and judge the dough before committing to a full machine bake.
Delay Start Safety: When Not to Use It
Delay start is convenient, but it is not safe for every recipe. Avoid using it with dairy, eggs, meat, or other perishable ingredients that can sit in the pan for several hours before baking. Those ingredients can spoil if they warm too slowly or stay in the machine too long before the bake cycle begins.
Delay start works best with shelf-stable ingredients such as flour, salt, sugar, water, oil, and dry yeast. If your recipe includes milk, yogurt, butter in large amounts, or any perishable filling, make the bread right away instead of delaying it.
Cleaning and Maintaining Your Bread Machine
After the loaf is out, let the pan cool before washing it. Most pans and paddles clean up best with warm water, mild soap, and a soft sponge. Avoid abrasive scrubbers that can damage the nonstick surface.
A few care habits go a long way:
– remove crumbs from the pan after each use
– check the paddle shaft area for stuck crumbs or dough
– make sure the paddle is clean and dry
– wipe the interior if flour or dough splashed inside
– dry all removable parts thoroughly before storage
– store the machine with the lid open if your manual allows it, so moisture does not linger
If the paddle sticks, soak it rather than forcing it. Gentle care keeps the nonstick surface and moving parts working longer.
For other dough-handling basics that pair well with machine baking, you may also find our guides on using a bench scraper for baking and cutting dough cleanly and evenly helpful.
Quick First-Loaf Example
If this is your first loaf, keep it simple:
- use a recipe written for a bread machine
- choose instant yeast
- measure ingredients carefully
- add liquids first, then fats, then dry ingredients, then yeast, unless your manual says otherwise
- confirm the pan and paddle are installed before starting
- select the basic white cycle
- choose the loaf size the recipe recommends
- pick medium crust if you’re unsure
During kneading, check the dough once. If it looks too wet, add a little flour. If it looks too dry, add a teaspoon of water. Then let the machine finish the cycle without opening it again.
When the loaf is done, remove it carefully, cool it on a rack, and wait before slicing. That first loaf teaches you the machine’s rhythm better than any instruction label can.
Frequently Asked Questions
Can I use any bread recipe in a bread machine?
Not always. Some oven recipes need adjustment to work well in a machine, especially for liquid amount, yeast amount, and cycle choice.
What is the dough setting for?
It lets the machine mix, knead, and give the dough its first rise, then you shape and bake it elsewhere if you want.
Why is my bread machine bread dense?
The most common reasons are too much flour, old yeast, or using the wrong cycle for the dough type.
When should I add nuts or raisins?
Usually after the dough has begun mixing well, or at the machine’s add-in signal if it has one.
Can I open the lid while it’s running?
A quick look during kneading is fine, but avoid opening during the second rise or baking cycle.
How do I know if my loaf is done?
Remove it carefully, turn it out onto a rack, and let it cool. A fully baked loaf should be set and evenly browned, not wet or doughy inside.
Is the dough cycle better than baking in the machine?
It’s better when you want more control over shaping, a different pan, or a crust baked in the oven. If you want convenience, the full bake cycle is simpler.
When to Consult a Master Baker
If you’ve tried a recipe more than once and the loaf still collapses, stays gummy, or refuses to rise properly, the issue may be recipe balance rather than technique. At that point, it helps to compare the formula with a reliable bread machine recipe and adjust one variable at a time. That approach is often faster than changing everything at once.
The good news is that bread machines reward consistency. Once you learn how your machine likes dough to look and feel, the process becomes much more predictable. And that’s when the real fun starts: fewer surprises, better loaves, and a lot more confidence.