
How to Use a Mandoline Slicer Safely Without Cutting Yourself

A mandoline slicer can save real time in a busy kitchen, especially when you need a pile of even potato slices, cucumber rounds, or onion strips. It also deserves respect. The blade is exposed, the cuts are fast, and a small lapse in attention can turn a simple prep task into a painful one.
The safest approach is not complicated: set the tool up correctly, use the guard or a glove, move slowly and steadily, and stop before the food gets too small to hold securely. That routine is what keeps the tool useful instead of risky.
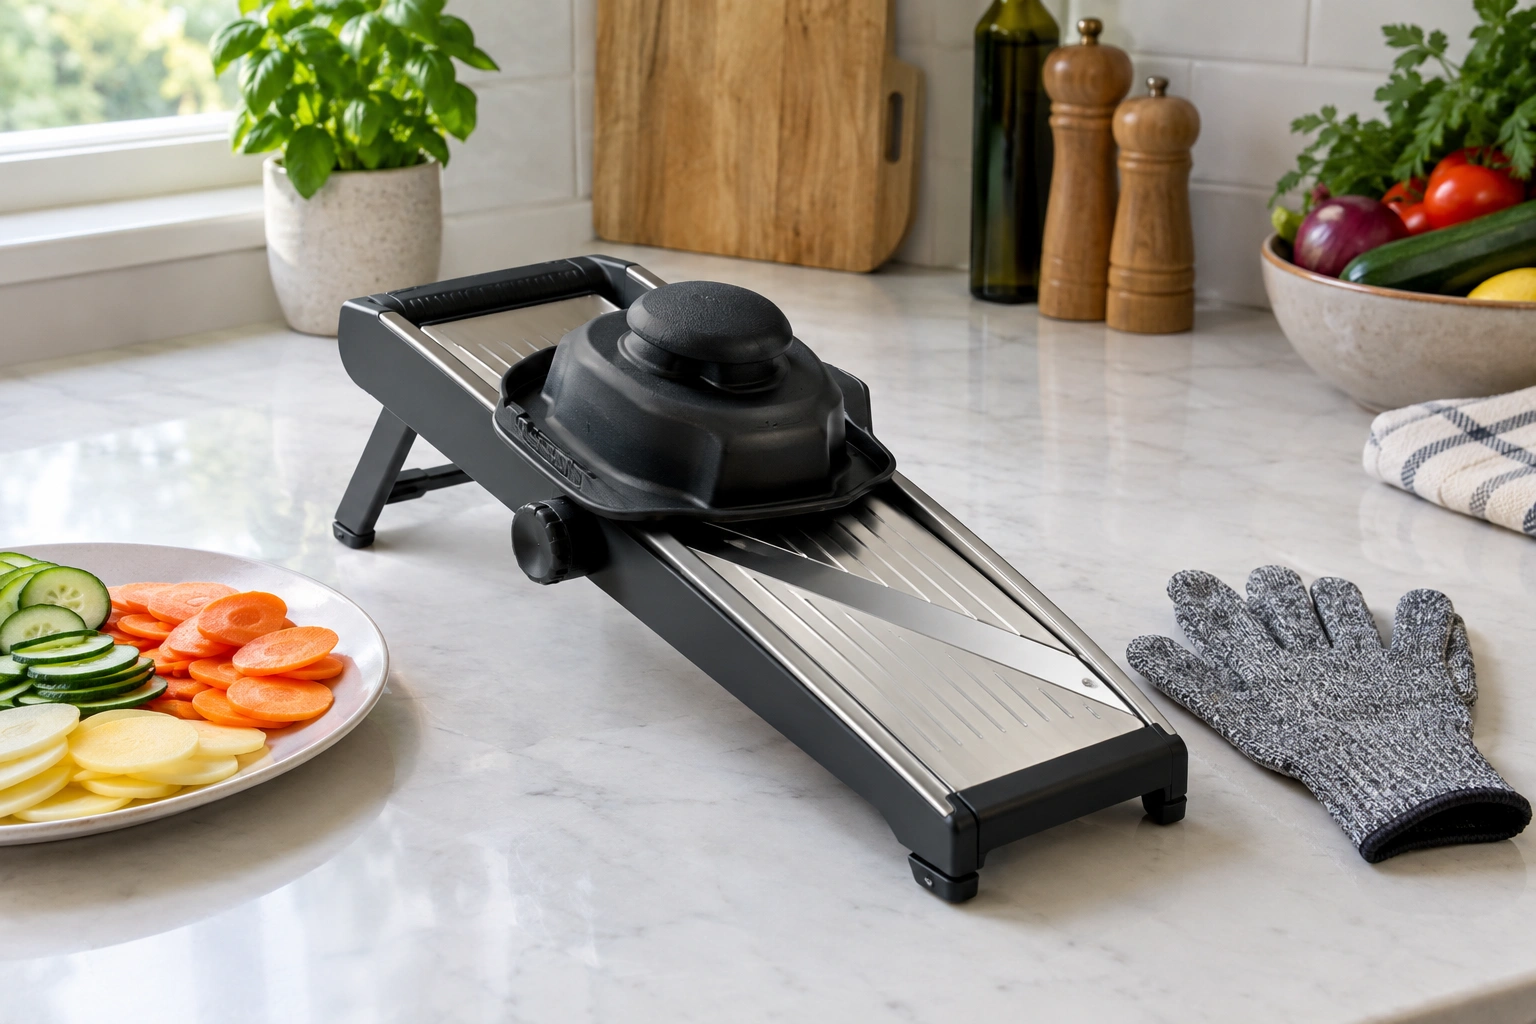
If you prep vegetables often, a mandoline can be worth using for the jobs where uniform slices matter most. If you only need a few rough cuts, a knife may be the simpler, safer choice. The goal is to use the right tool for the task, not to force every ingredient through the mandoline.
What a Mandoline Slicer Does and When to Use One
A mandoline slicer is a hand tool with a fixed blade and an adjustable slicing surface. You slide food across it to make consistent cuts quickly. Many models also include a julienne blade or other attachments for specialty cuts.
The main advantage is consistency. Thin, even slices cook at the same rate, stack neatly in casseroles, and look cleaner in salads or meal-prep containers. That matters when you are trying to batch-cook potatoes, cucumbers, carrots, or onions without spending extra time at the cutting board.
Use a mandoline when the task benefits from speed and uniformity:
– potato slices for gratins or chips
– cucumber rounds for lunches
– onion slices for caramelizing or roasting
– carrots or zucchini for quick prep
Use a knife when the job is small, uneven, or awkward. A few chopped tomatoes, one onion wedge, or the last little piece of a vegetable usually does not justify the extra setup and blade exposure.
Mandoline vs. Knife: A Practical Trade-Off
| Task | Mandoline | Knife |
|---|---|---|
| Large batch of even slices | Faster and more consistent | Slower, more variation |
| Small amount of produce | Often not worth the setup | Easier and safer |
| Very uniform thickness | Strong advantage | Harder to match by hand |
| Odd shapes or tiny end pieces | Higher risk | Better control |
| Cleanup after use | More caution needed | Usually simpler |
If your goal is to process a whole tray of vegetables for the week, the mandoline earns its place. If you only need one or two onions diced for dinner, a knife is usually the better call.
Safety Gear and Features to Use Before You Start
The safest mandoline setup uses layers of protection, not just one accessory. The hand guard or food holder is the first line of defense. A cut-resistant glove adds another layer if you slice often or work with slippery produce. A non-slip base or stable surface keeps the tool from shifting while you work.
According to OXO’s mandoline guidance, if the slicer has feet, extend them and brace them against a cutting board on a stable surface. That detail matters because a moving mandoline is harder to control. OXO mandoline safety tips
What Each Safety Feature Does
- Hand guard / food holder: Keeps your fingers away from the blade and grips the food as it gets smaller.
- Cut-resistant glove: Useful when you want extra protection for your guiding hand, especially with wet or slippery produce.
- Non-slip base or feet: Helps the slicer stay put while you push food across the blade.
- Blade cover: Protects the sharp edge during storage and reduces accidental contact later.
The hand guard is the accessory most people should actually use every time. The Kitchn notes that the guard is there because the blade does not care whether you are tired, rushed, or “just doing one more slice.” The Kitchn’s mandoline safety reminder
A cut-resistant glove can be a helpful extra layer, especially if you prep large amounts of vegetables or if the food tends to slip when it is wet. It should complement the guard, not replace common sense.
Set Up the Mandoline Safely
Before any food touches the blade, make the setup stable and predictable. That means no balancing the tool on a slick counter edge and no adjusting settings while you are mid-slice.
A Safe Setup Sequence
- Put the mandoline on a flat, dry, stable surface.
- Extend the feet if the model has them.
- Brace those feet against a cutting board if the design calls for it.
- Set the blade thickness before you begin slicing.
- Attach the hand guard or put on the cut-resistant glove.
- Check that the food path is clear and the tool is not wobbling.
That sequence prevents two common problems: movement and mid-task fiddling. Once the blade is exposed and the food is in motion, you want your attention on the cut, not on the hardware.
If the tool feels unstable, stop and reset it before you continue.
How to Adjust Blade Thickness Without Risk
Blade adjustment is part of the setup, not something to figure out while slicing. OXO notes that the blade position controls slice thickness: moving it closer to the body of the mandoline makes thinner slices, while moving it farther away makes chunkier slices or pieces. That is useful because you can match the cut to the recipe before you start. OXO blade adjustment guidance
Thinner slices work well when you want fast cooking or delicate layers. Thicker slices give you more control and can be easier to handle, especially with firmer vegetables. If you are new to the tool, a slightly thicker setting is often the calmer choice because the food is less likely to break or slip.
Set the thickness once, then leave it alone until the batch is finished. Changing the blade position mid-use increases the chance of accidental contact and interrupts your rhythm.
Step-by-Step: How to Slice Safely
Safe mandoline use is mostly about control. The food should move smoothly, the blade should do the work, and your fingers should stay out of the cutting path.
Knifewear’s safety guidance is straightforward: hold the mandoline firmly, keep fingers clear of the blade, place it on a flat stable surface, and use gentle, steady pressure. Slow and steady really does win here. Knifewear mandoline technique guide
The Basic Motion
- Secure the mandoline.
- Place the food in the hand guard or holder.
- Keep your guiding hand behind the protection.
- Slide the food forward in a smooth, even motion.
- Let the blade cut; do not force the food through.
- Reset the food and repeat.
The motion should feel controlled, not aggressive. If you have to push hard, something is wrong: the blade may be dull, the food may be awkwardly shaped, or the surface may be unstable.
A Note on Pace
A mandoline can tempt people to speed up once they find a rhythm. The Kitchn points out that this is exactly when people get reckless. That warning is worth remembering. Once your pace gets sloppy, the blade does not care that you are “almost done.”
How to Safely Slice Common Produce
Different vegetables create different risks. Round, wet, and hard foods behave differently on the blade, so a one-size-fits-all approach does not work very well.
Potatoes
Potatoes are one of the most common mandoline jobs because the slices can be very even. They are also dense, so they can require more pressure than softer produce. That makes a stable setup especially important.
Use the hand guard from the first slice. If the potato is wet, dry it first so it does not slip in the holder. For gratins or chips, choose the thickness before starting so every slice is consistent.
Onions
Onions are a good mandoline candidate when you want even rings or half-moons. The main issue is shape. A curved onion can shift as it gets smaller, so keep the flat side stable whenever possible.
When the piece becomes too short to hold securely, stop. Do not try to “save” the last bit by pressing it through bare-handed.
Cucumbers
Cucumbers are often slippery, especially if they have been rinsed and are still damp. That slipperiness can make them harder to control than a firmer vegetable.
Dry the cucumber before slicing. If the skin is slick or the piece is short, a cut-resistant glove can be helpful along with the guard. This is one of the best examples of when extra grip matters.
Carrots and Other Firm Vegetables
Firm vegetables can be excellent for mandoline work, but they may need more force. That can cause people to lean in or press too hard.
Keep the pressure steady and moderate. If the carrot is very short, switch to a knife rather than trying to finish it on the mandoline. The last little piece is where many avoidable cuts happen.
What to Do With Small, Round, Wet, or Slippery Pieces
This is the highest-risk category, and it deserves a clear rule: if you cannot hold the food securely, stop using the mandoline.
Use Extra Caution When the Food Is:
- Small: hard to grip safely
- Round: more likely to roll or twist
- Wet: more likely to slip
- Hard: may require more pressure
A cut-resistant glove is most useful here, especially if the food is slippery or you are slicing a large batch. The glove does not make the task risk-free, but it can improve confidence and grip.
For awkward pieces, ask a simple question: can I keep my hand safely behind the guard for the next slice? If the answer is no, switch tools.
When to Stop Slicing and Switch Tools
Do not keep slicing just because there is still food left. The cutoff point is when the remaining piece is too small, too curved, or too slippery to grip securely in the holder or glove.
That last inch of produce is not worth forcing through the blade. Set it aside and finish it with a knife, or save it for another use. This is one of the easiest ways to reduce cuts in a real kitchen, because the danger usually rises at the end of the batch, not the beginning.
A good habit is to stop earlier than you think you need to. If the remaining piece feels awkward now, it will not become safer after one more push.
Common Mistakes That Lead to Cuts
The most preventable mandoline injuries usually come from habits that feel harmless in the moment.
Avoid These Errors
- slicing without the hand guard or glove
- using the tool on a wet or unstable surface
- changing blade settings while the mandoline is in use
- pushing food too hard instead of using steady pressure
- trying to slice tiny leftover pieces by hand on the blade
- cleaning the blade carelessly with bare fingers
- storing the tool with the blade exposed
Each of these mistakes has the same root problem: they reduce control. A mandoline is safest when the setup is stable and the workflow is predictable.
How to Clean a Mandoline Without Getting Cut
Cleaning is often when people get careless, because the food is finished and the guard is off. Treat the blade as if it is still in use.
If possible, rinse or wipe the slicer from the dull side or from behind the blade path. Do not drag a sponge or cloth directly across the cutting edge. Use a brush or a careful rinse to remove residue from the blade area without putting your fingers in front of it.
If food has dried on, soak the removable parts if the manufacturer allows it, then clean again with the blade protected. For a related example of careful cleaning around sharp kitchen tools, see our guide on how to clean a cheese grater safely without cuts.
Safe Drying and Storage
Once the mandoline is clean, dry it fully before putting it away. Moisture can make the tool harder to handle and can encourage people to grab it carelessly later.
Store the blade covered or locked in its protected position if the model includes that feature. Keep it where nobody will reach in blindly and catch a finger on the edge. A drawer insert, a dedicated shelf, or the original box can work if the blade is fully protected.
If the tool came with a blade cover, use it. That small step prevents a lot of accidental cuts during later cleanup or meal prep.
Quick Safety Checklist Before You Slice
Use this as a final check before every batch:
- Mandoline is on a flat, stable, dry surface
- Feet are extended and braced if applicable
- Blade thickness is set before slicing
- Hand guard or cut-resistant glove is in place
- Food is dry enough to grip securely
- Pressure will be steady, not forced
- Small end pieces will be discarded or cut by hand
- Blade will be cleaned carefully and stored covered
If you can check every box, you are set up for safer, faster prep.
What to Do After a Cut
If you do get nicked by the blade, stop slicing right away, rinse the cut, and apply direct pressure with a clean cloth or bandage. If the bleeding does not stop, the cut is deep, or the wound looks dirty or contaminated, seek medical care promptly.
A mandoline is a useful tool when you respect its blade and build a simple routine around it. Once that routine becomes automatic, the tool stops feeling intimidating and starts feeling efficient.