
How to Use a Pastry Blender for Flaky Pie Crusts, Biscuits, and Scones

A pastry blender is one of those small tools that earns its keep quickly. If you bake pie crusts, biscuits, or scones even a few times a year, it gives you a reliable way to cut cold fat into flour without warming everything up with your hands.
That matters because the size of the fat pieces affects the final texture. When the butter or shortening stays in small, uneven bits, those bits create pockets as the dough bakes. That is what helps a crust turn tender and flaky instead of dense.
The good news: you do not need special skill to use one well. You just need the right setup, a light touch, and a clear idea of when to stop.
What a pastry blender does
A pastry blender is a handheld tool with curved or straight metal blades and a handle. Its job is simple: press the blades down through cold fat and flour so the fat breaks into smaller pieces and gets coated with flour.
In general baking guidance, a pastry blender is often recommended for pie crust and scone dough, and the basic motion is repeated pressing until the butter or shortening is blended with the flour. That repeated pressing motion is the key. You are not stirring. You are cutting.
In practical terms, the tool helps you avoid two common problems:
- Overwarming the fat with your hands
- Overmixing the dough into a paste
It can also do more than pastry work. Some cooks use it for mashing foods like potatoes, chickpeas, and avocados. Still, for most home bakers, its best use is in dough that needs cold fat distributed through dry ingredients.
When to use a pastry blender instead of your hands, a fork, or a food processor
Different tools give you different levels of control, speed, and texture. Here is a simple way to choose.
| Tool | Best for | Main advantage | Main trade-off |
|---|---|---|---|
| Pastry blender | Pie crust, biscuits, scones | Good control without warming the fat much | Requires hand effort |
| Hands | Fast, small batches | Easy to feel the dough | Hand warmth can melt the fat |
| Fork or two knives | Emergency substitute | Usually already in the drawer | Slower and less efficient |
| Food processor | Very fast mixing | Speed and convenience | Easy to overdo; less tactile control |
If you want the most control for a small or medium batch, the pastry blender is usually the most forgiving choice. If you are making a large batch and know your recipe well, a food processor can save time, but it asks for close attention. Once the mixture goes past the right stage, it is hard to undo.
Hands can work, especially for experienced bakers, but they are not ideal when the kitchen is warm or when the recipe depends on keeping the butter cold. A fork or two knives can get the job done in a pinch, though it usually takes longer and can be awkward in a deep bowl.
What to prep before you start
A little setup prevents most pastry problems.
Use cold butter or shortening, not warm fat. Cold butter that is not frozen is usually easiest to cut in evenly. If your kitchen runs warm, chill the pastry blender and mixing bowl ahead of time so they do not warm the fat as quickly. If the bowl or butter starts to soften while you work, put them back in the fridge for a few minutes before continuing.
Set out:
- Flour and any dry ingredients
- Cold butter, shortening, or both
- A medium or large mixing bowl
- The pastry blender
- A scraper or spoon for later cleanup
If you are measuring flour by volume, level it off consistently. If your recipe uses weight, even better. Accurate measuring matters because too much flour can make the dough dry before you even begin mixing. If you want tighter control, a digital kitchen scale is worth using.
Butter, shortening, or both?
Butter gives you better flavor and usually a flakier result. Shortening is more stable and often easier to cut in because it stays firm and blends smoothly. Many bakers use a mix of both: butter for flavor, shortening for easier handling.
A simple rule helps:
- Choose butter when flavor and flakiness matter most
- Choose shortening when you want the dough to be more forgiving
- Use both when you want a balance of flavor and ease
How to use a pastry blender step by step
Here is the cleanest way to do it.
-
Add the dry ingredients to the bowl.
Put the flour and any sugar, salt, or other dry ingredients into the bowl first. -
Add the cold fat.
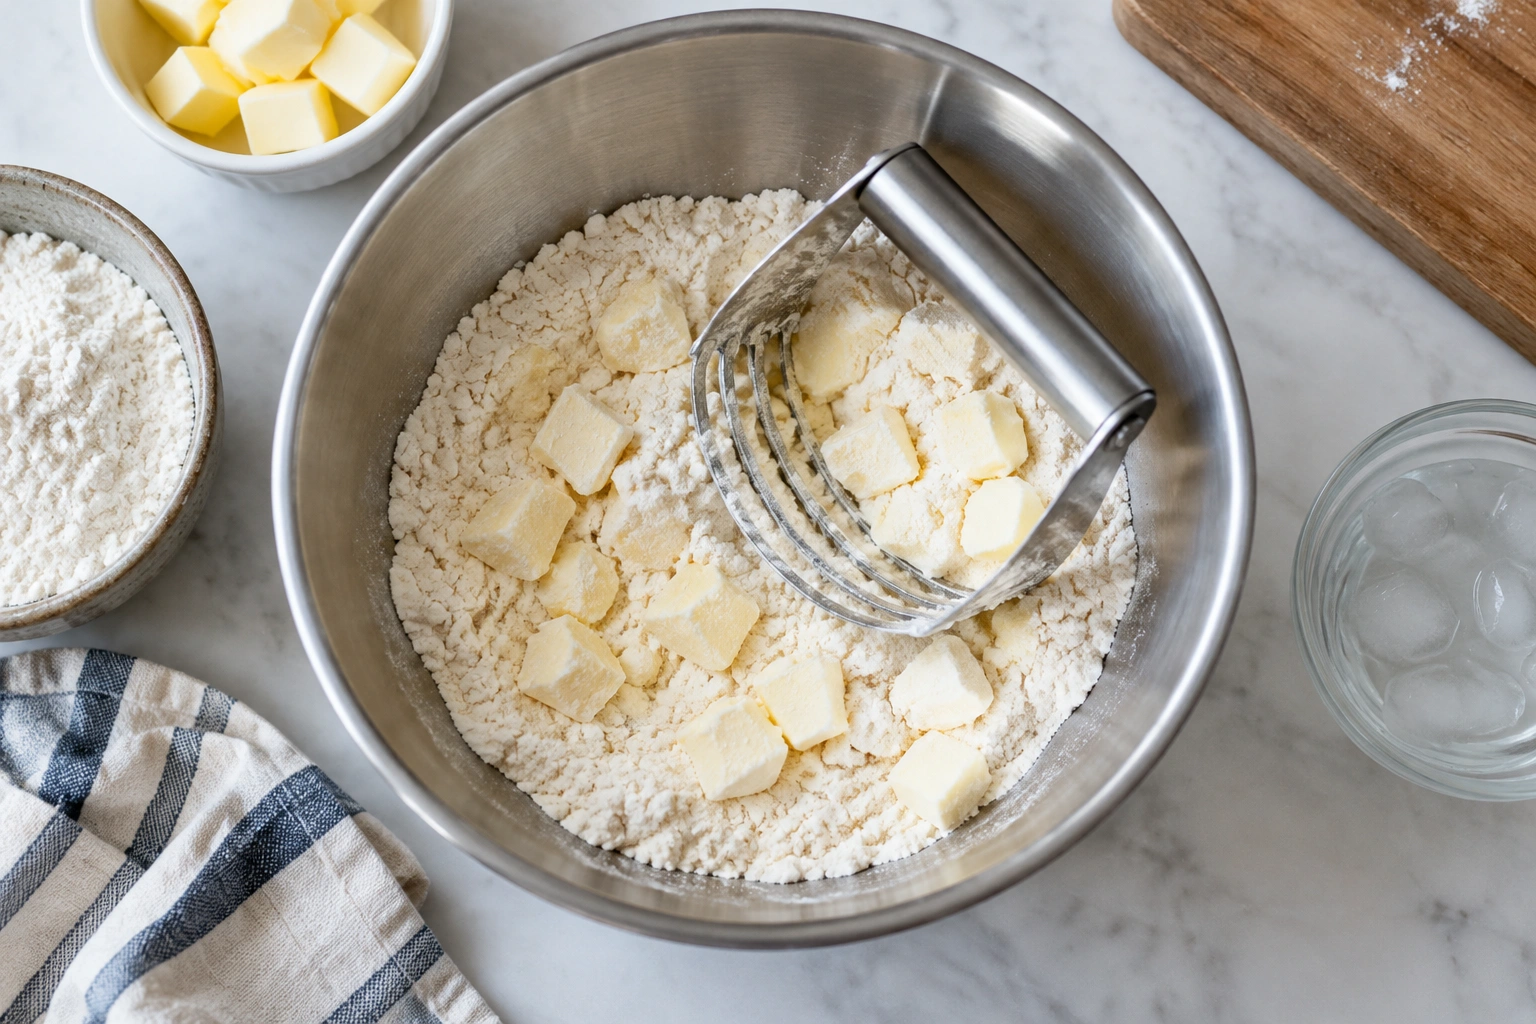
Cut the butter or shortening into chunks so it is easier to handle. Drop the pieces into the flour. -
Press down with the blender.
Push the blades straight down through the mixture, then lift and repeat. This repeated pressing motion is the basic technique. -
Turn the bowl as you work.
Rotate the bowl a little between passes so you reach all parts evenly. This keeps you from overworking one area while missing another. -
Keep the motion short and controlled.
Think “press and lift,” not “stir and mash.” The goal is to break the fat into smaller pieces, not smear it into the flour. -
Stop when the texture looks right for the recipe.
For many pie doughs, that means coarse crumbs with some pea-sized pieces of fat still visible. For biscuits and scones, stop when the mixture looks like rough, sandy crumbs with a few larger butter pieces still scattered through it; you should not wait until it looks smooth or fully uniform.
A pastry blender should feel efficient, not like a workout. If you are forcing it, the fat may be too hard or the bowl too small.
What the dough should look like when it’s ready
The visual cue matters more than the clock.
For many pie crusts, you are looking for a mixture that resembles coarse crumbs with scattered pea-sized pieces of fat. That uneven texture is what helps create layers and flakiness later.
A useful test is this: when you pinch a little of the flour-fat mixture between your fingers, it should hold together loosely, but you should still see distinct pieces of fat in the bowl. If it looks smooth and pasty, you have gone too far.
For biscuits and scones, the mixture can look a little rougher and more shaggy than pie dough. You should still see small bits of butter, but the flour should not be fully coated into a paste. Think “crumbly with visible pieces,” not “creamed together.”
Stop early rather than late if the recipe calls for a flaky crust. If the dough is meant to be especially tender, the fat pieces may be cut slightly smaller, but the mixture should still not look like a smooth paste.
How to use it for pie crust, biscuits, and scones
The same tool works across these recipes, but the target texture changes a bit.
Pie crust
For pie dough, the pastry blender is especially useful because the fat pieces need to stay distinct. That is why many pie recipes call for cold butter cut into flour until the mixture looks like coarse crumbs with some pea-sized pieces.
If you are making a single crust for a family pie, keep the bowl close to the counter and work quickly. The longer the butter sits out, the more likely it is to soften.
Biscuits
Biscuits usually need the fat distributed fairly evenly, but not fully disappeared. You still want some visible pieces so the baked biscuits stay tender. A pastry blender gives you enough control to stop at that stage without turning the dough into a paste.
Scones
Scone dough often behaves a lot like biscuit dough. The blender helps keep the butter cold while you cut it into the flour, which supports a lighter texture.
For all three, the biggest mistake is overmixing after the fat is added. Once the dough starts to come together, move on to the liquid stage only when the recipe calls for it.
Common mistakes and how to fix them
The butter is too warm
Warm butter smears into the flour instead of cutting into pieces. If that happens, stop mixing and chill the bowl briefly before continuing. You do not need to freeze the dough solid; you just need the fat to firm back up.
The mixture looks pasty
That usually means the fat has been worked too far. If the recipe is still dry enough to recover, add the liquid very cautiously and stop as soon as the dough holds together. If the texture is already greasy and soft, the final bake may be less flaky. Once the fat has melted too much into the flour, some doughs cannot be fully recovered, though a short chill may still help if the mixture has only started to soften.
There are still large chunks of fat
Keep blending a little longer, but only in short bursts. Large unworked pieces can leave uneven pockets in the dough and may make rolling difficult later.
The tool feels awkward
If the handle digs into your hand or the blender is hard to control, the issue may be the tool, the bowl, or your grip. A deeper bowl can help keep ingredients from spilling. A more ergonomic pastry blender may also be easier to use. If not, a fork or food processor may be the better choice for your hands.
How to keep butter cold while you work
Cold fat is the whole game here.
Keep the butter in the refrigerator until the last moment, and only take out what you need. If the kitchen is warm, chill the bowl and pastry blender ahead of time. That gives you a little extra working time before the butter softens.
A few practical habits make a difference:
- Cut the butter into chunks before adding it to the bowl
- Work in a cool part of the kitchen if possible
- Pause if the mixture starts to look shiny or soft
- Avoid using your hands unless the recipe specifically calls for it
If you are making pie dough for later use, keep in mind that the dough itself may need chilling before rolling, but that depends on the recipe. Do not assume all dough behaves the same way.
What to do if a pastry blender feels awkward or hard to use
Some people find the tool uncomfortable at first. That does not mean you are using it wrong.
Try these adjustments:
- Use a wider or deeper bowl so ingredients stay contained
- Hold the handle with a steady, neutral wrist
- Press straight down instead of angling the tool
- Work in shorter bursts so your hand does not tire out
If the tool still feels clumsy, switch methods. A fork can work for small batches. A food processor can work when speed matters more than maximum control. The best tool is the one that helps you keep the fat cold and stop at the right texture.
How to clean and store a pastry blender
Cleaning is usually simple, but it matters. Fat and flour can collect between the blades, so rinse the tool soon after use before residue hardens.
Wash it with warm soapy water, then dry it thoroughly. That helps prevent rust and keeps the handle and blades in good shape. If your blender has narrow gaps, use a brush or sponge to get into the corners.
Store it dry in a drawer or utensil container where the blades will not snag on other tools. If the metal edges are sharp or stiff, handle it carefully during washing and drying.
A quick decision rule for better results
If you are standing at the counter and wondering whether the dough is ready, use this rule:
- Still looks like flour with uneven fat bits? Keep blending.
- Looks like coarse crumbs with some pea-sized pieces? Stop.
- Looks smooth, shiny, or paste-like? You went too far.
That simple check will save more pie crusts than any fancy technique.
FAQ
Can I use a pastry blender for foods besides dough?
Yes. Some cooks also use it for mashing potatoes, chickpeas, or avocados. That said, its main purpose is still cutting fat into flour for pastry and similar doughs.
Is a pastry blender better than using my hands?
For many bakers, yes. It keeps your hands out of the mixture, which helps the fat stay cold longer. Hands can still work, but they warm the dough faster.
Can I use frozen butter?
Cold butter is usually the better choice. Frozen butter is harder to cut evenly and can be difficult to control.
What if I don’t own one?
A fork, two knives, or a food processor can substitute. Just watch the texture closely so you do not overmix.
Do I need to chill the bowl?
Not always, but it can help. Chilling the bowl and pastry blender for a short time may keep the butter cool longer, especially in a warm kitchen.
If you learn to read the texture, a pastry blender becomes a very dependable tool. It gives you control, keeps the fat cold, and helps you make dough with better structure and fewer surprises.