
How to Use an Instant-Read Thermometer for Fast, Safe, Reliable Cooking

An instant-read thermometer is one of the simplest tools you can keep in a busy kitchen, yet it solves a problem that sight and guesswork cannot: knowing the actual internal temperature of food. That matters whether you are cooking chicken for dinner, checking a casserole for the family meal, or reheating leftovers without drying them out.
For home cooks and meal preppers, the payoff is practical. You waste less food, avoid undercooking, and stop chasing vague cues like “the juices run clear” or “it looks done.” A thermometer gives you a number you can act on.
If you already own one and only use it for roasts, you are leaving value on the table. Instant-read thermometers work for meats, poultry, fish, casseroles, desserts, and even thick liquids. That is the real strength of the tool: quick spot checks when you need a decision, not a long wait.
What an Instant-Read Thermometer Does Best
An instant-read thermometer is designed for quick temperature checks, not continuous monitoring. That makes it especially useful near the end of cooking, when you want to know whether food has reached a safe minimum internal temperature or whether it needs a few more minutes.
That is different from a leave-in probe thermometer, which stays in the food while it cooks. A leave-in probe is helpful for long roasts or smokers where you want to watch temperature rise over time. An instant-read model is better when you want to open the oven, check multiple spots, and move on.
Use an instant-read thermometer when:
- You need a fast answer at the end of cooking.
- The food cooks unevenly.
- You are checking several items, like chicken pieces or burgers.
- You want to avoid overcooking by guessing too long.
Use a leave-in probe thermometer when:
- The food will cook for a long stretch.
- You want to monitor temperature without reopening the oven.
- You are cooking a large roast or similar item where continuous tracking helps.
If you are choosing between the two, think about your usual cooking style. Busy weeknight meals and meal prep batches usually benefit from instant-read checks. Long, slow cooks benefit from a leave-in probe.
How to Use an Instant-Read Thermometer Correctly
The basic method is simple, but a few details make the difference between a trustworthy reading and a misleading one.
-
Turn the thermometer on first.
Some digital models switch on with a button on the back and may auto shut off after a period of idleness. -
Insert the probe into the thickest part of the food.
That is usually where the temperature rises slowest, so it is the best place to test doneness. -
Avoid bone, fat, gristle, and the cooking vessel.
These can distort the reading, especially in bone-in chicken, thin chops, burgers, and casseroles where the probe can accidentally touch the pan or dish. -
Wait for the reading to stabilize.
Most digital instant-read thermometers give a usable reading in a few seconds; take the number once it stops changing or the display beeps.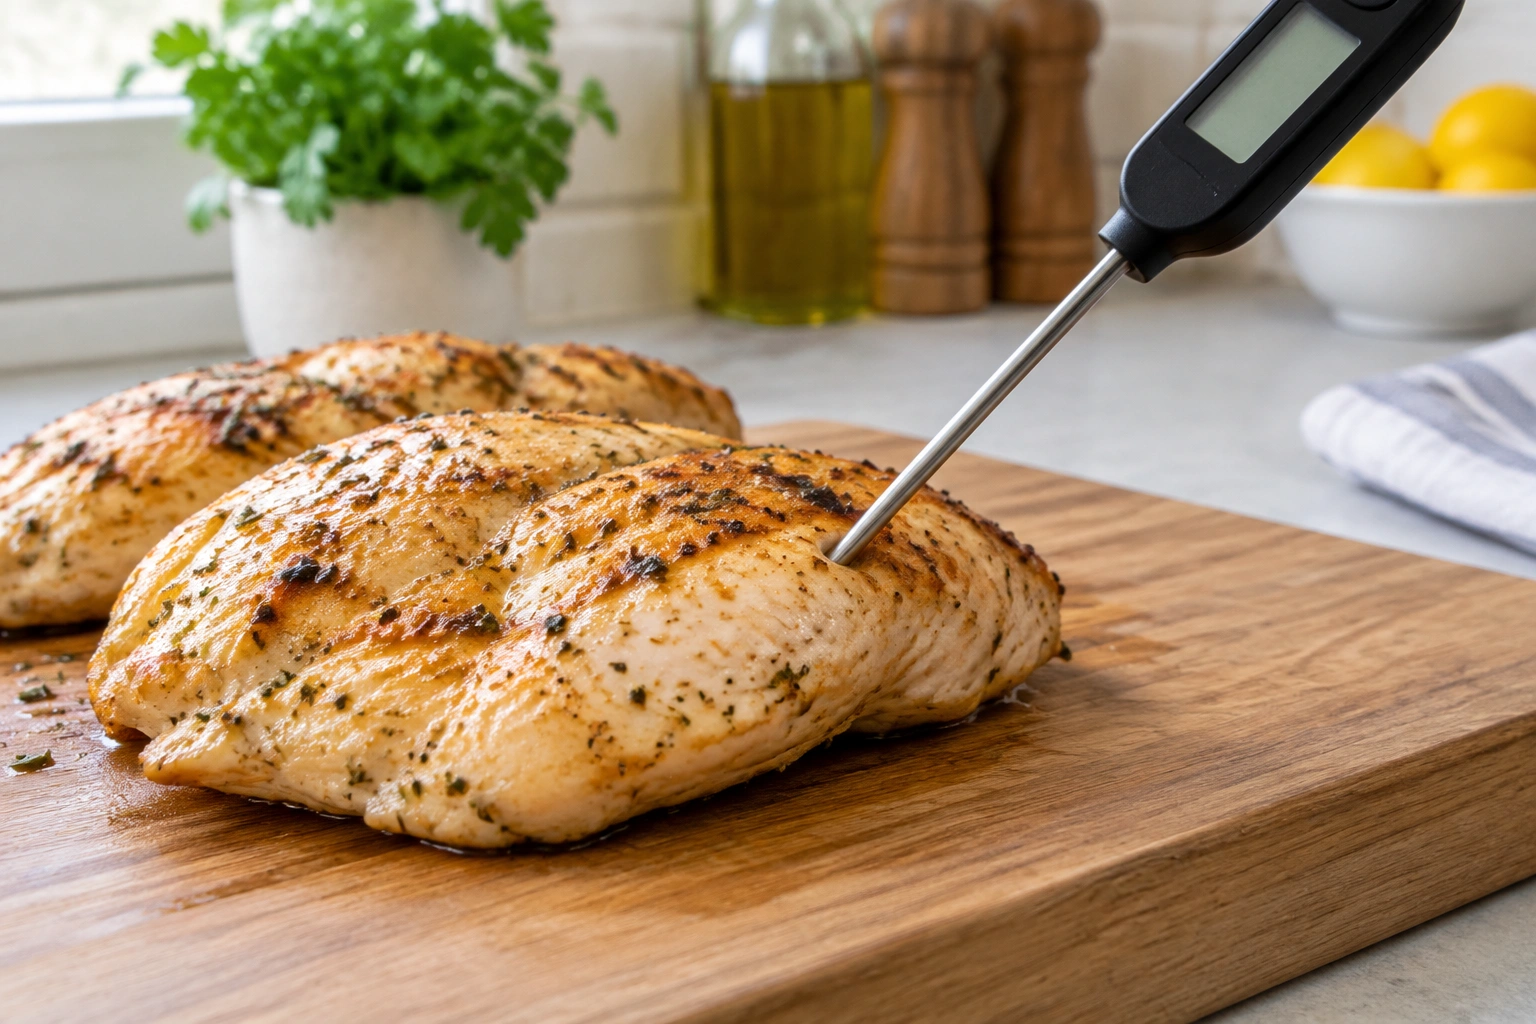
Correct probe placement helps you get a fast, accurate reading. -
Read quickly and remove it.
The goal is to check temperature with minimal heat loss. -
Check more than one spot if the food is uneven.
This matters for large cuts, casseroles, and mixed dishes.
A helpful mental rule: the thermometer gives you the truth only if the tip is in the right place. The number itself is not enough if the probe is touching a bone or sitting against the pan.
Where to Insert the Probe for Different Foods
This is the part most people want spelled out clearly. The right insertion point changes with the food.
Chicken and other poultry
Insert the probe into the thickest part of the meat, usually the breast or the meatiest part of the thigh, depending on the cut. Keep it away from bone. For bone-in chicken pieces, aim for the thickest meaty area near the center of the piece, not right next to the bone.
Beef and pork
For steaks, chops, and roasts, aim for the center of the thickest section. If the cut has bone, keep the tip away from it. For thin chops, insert the thermometer sideways from the edge so the tip reaches the center without hitting the pan. For a roast, use the deepest thick area that represents the center of the meat, not a fatty edge.
Burgers
A burger is one of the easiest foods to test incorrectly because the center is small. Insert the probe sideways from the edge so the tip reaches the middle of the patty. This avoids punching straight down and missing the true center.
Fish
Fish cooks quickly and can overcook fast, so use a gentle insertion into the thickest part of the fillet. Do not push all the way through to the pan.
Casseroles
For casseroles and similar baked dishes, insert the probe into the side or down into the thickest area, below the surface and away from the container. For a large casserole, check more than one spot because the center may cook differently from the edges.
Thin cuts
If the food is too thin to probe from the top without touching the pan, insert the thermometer sideways. This is often the best method for thin steaks, cutlets, and small patties.
Mixed dishes and leftovers
For soups, stews, and reheated leftovers, stir first if appropriate, then check the thickest or coldest-looking section. For casseroles, test at least two spots if the dish is large or uneven.
Safe Minimum Internal Temperatures for Common Foods
Temperature targets are the decision point. If the food has not reached the safe minimum internal temperature, it needs more cooking.
Here is a practical reference table with exact safe minimum internal temperatures for common foods.
| Food | Safe minimum internal temperature |
|---|---|
| Poultry, including chicken and turkey | 165°F |
| Ground meats, including burgers and meatballs | 160°F |
| Whole cuts of beef, pork, veal, and lamb | 145°F, then rest 3 minutes |
| Fish and shellfish | 145°F |
| Leftovers | 165°F |
| Casseroles and reheated foods | 165°F |
Because temperature recommendations can vary by food type and preparation, the safest habit is to use a current USDA chart when in doubt. That is especially important for ground meat, poultry, and reheated leftovers.
How to Avoid False Readings and Common Mistakes
Most thermometer problems are placement problems, not tool problems.
Avoid these errors:
- Touching bone. Bone can give a misleading reading, especially in bone-in chicken and chops.
- Hitting fat or gristle. These areas do not represent the true center of the food.
- Touching the pan, tray, or grill. That can make the number look higher than the food really is.
- Reading too early. A moving display is not a final reading.
- Checking only one spot in uneven food. One hot area does not prove the whole dish is done.
If you are checking a roast or large casserole, take a few readings in different spots and use the lowest accurate reading as your decision point. That is usually the safest approach because the coolest spot is the one most likely to be undercooked.
Thin Cuts, Irregular Pieces, and Mixed Dishes
Some foods are awkward to test, and that is where technique matters most.
Thin foods
Use a sideways insertion when the food is too thin for a top-down reading. This keeps the probe tip in the center instead of against the pan.
Irregular cuts
With chicken thighs, uneven chops, or oddly shaped roasts, do not assume the visual center is the best spot. Find the thickest meaty section and test there first, then verify with a second spot if the shape is uneven.
Mixed dishes
Casseroles, baked pasta, and similar foods often cook unevenly because the edges heat faster than the middle. Insert the probe into the thickest section and, if the pan is large, check another spot before serving.
Liquids
For soups or sauces, stir first if the recipe allows it, then check the temperature in the thickest part of the liquid. This gives you a better sense of the overall temperature than skimming the surface.
Carryover Cooking: Why Food Keeps Rising After You Remove It
Carryover cooking is the temperature increase that happens after food comes off the heat. This matters most with larger cuts of meat and poultry. If you wait until the food is fully “done” on the stove or in the oven, it may overshoot by the time it rests.
The practical fix is simple: check the temperature near the end of cooking, then let the food rest if the recipe calls for it. Resting helps juices settle and gives the temperature time to stabilize. For meal prep, this is one of the easiest ways to avoid dry chicken breasts or overcooked pork.
The key decision is not “Should I always cook longer?” It is “How close am I to the target, and will resting finish the job?” That is a much more reliable way to cook.
How to Clean, Sanitize, and Store the Thermometer
A food thermometer touches raw food, so cleaning matters.
After use:
- Wipe the probe clean right away with a clean paper towel or cloth.
- Wash the probe tip with warm water and dish soap if the manufacturer says it is washable.
- If the probe is listed as waterproof or water-resistant, follow the manufacturer’s guidance for how much of the tool can be rinsed or submerged.
- If the thermometer is only wipe-clean, do not submerge the handle, display, or battery compartment.
- Sanitize the probe if it touched raw meat, poultry, or fish and you plan to use it again during the same cooking session.
- Dry it before storing.
Storage habits that help:
- Keep the probe protected so it does not bend or dull.
- Store it where it will not roll into a drawer full of utensils.
- Do not leave it damp in a closed container.
This is not just about cleanliness. A clean probe helps reduce the risk of cross-contamination from raw food to cooked food.
How to Check Accuracy and Calibrate Your Thermometer
If your thermometer seems inconsistent, test it before trusting it with dinner.
The University of California ANR guide says that if a thermometer reads 32°F in an ice-water mixture, it is correctly calibrated, and it also notes that for a digital instant-read thermometer you should follow the manufacturer’s instructions. That is the safest place to begin. UC ANR guide on thermometer calibration
Simple accuracy check:
- Fill a glass with ice and a little water.
- Let it sit so the water is very cold and slushy.
- Insert the probe without touching the sides or bottom.
- Wait for the reading to settle.
If your thermometer has a calibration function, follow the manufacturer’s steps to adjust it. If the reading is only slightly off, that adjustment is often enough. If it cannot be adjusted, note the offset and keep it in mind when using the thermometer, if the manufacturer allows that approach. If the readings are unreliable, inconsistent, or drifting, replacement is usually the practical answer.
Instant-Read Thermometer vs Leave-In Probe Thermometer
Here is the simplest way to choose.
| Feature | Instant-read thermometer | Leave-in probe thermometer |
|---|---|---|
| Best use | Quick spot checks | Continuous monitoring |
| Speed | Fast reading | Slower to set up, then hands-off |
| Convenience | Easy for everyday cooking | Better for long cooks |
| Good for | Chicken, burgers, fish, casseroles, leftovers | Roasts, smokers, long oven cooks |
If you cook mostly weeknight meals, an instant-read thermometer is usually the more useful tool. If you routinely make large roasts or long-simmered dishes, a leave-in probe adds value. Many kitchens benefit from having both, but if you are buying only one, choose based on the kind of cooking you actually do.
When to Ask a Food Safety Expert
Ask for help if your thermometer is damaged, cannot be calibrated, or gives inconsistent readings even after you check it in ice water. The same goes for situations where you are unsure about a food’s safe minimum internal temperature or you are adapting a recipe for a large batch, special diet, or unusual ingredient.
If your goal is safe, efficient home cooking, an instant-read thermometer is one of the most useful tools you can own. Use it in the thickest part, avoid bone and pan contact, trust the stabilized reading, and verify accuracy when results seem off. That small habit can save food, money, and a lot of second-guessing.
FAQ
How long does an instant-read thermometer take to give a reading?
Most digital instant-read thermometers give a usable reading in a few seconds. Wait until the number stops changing before you record it.
What is the safest temperature for chicken?
Chicken and other poultry should reach 165°F in the thickest part.
Do I need to calibrate an instant-read thermometer?
Not always, but it is smart to check accuracy if readings seem inconsistent. Some models can be adjusted; others are not calibration-capable.
Can I wash the probe with soap and water?
Usually yes if the manufacturer says the probe is washable or waterproof. If the thermometer is only wipe-clean, do not submerge it.