
Tangzhong Milk Bread: A Step-by-Step Guide to an Extra-Soft, Fluffy Loaf

If you’ve ever wanted bread that slices cleanly, tears into soft strands, and stays tender longer than a standard loaf, tangzhong is the technique worth learning. In this method, a small portion of the flour is cooked with liquid first, then added back into the dough. That simple extra step changes how the bread holds moisture and how the crumb bakes up.
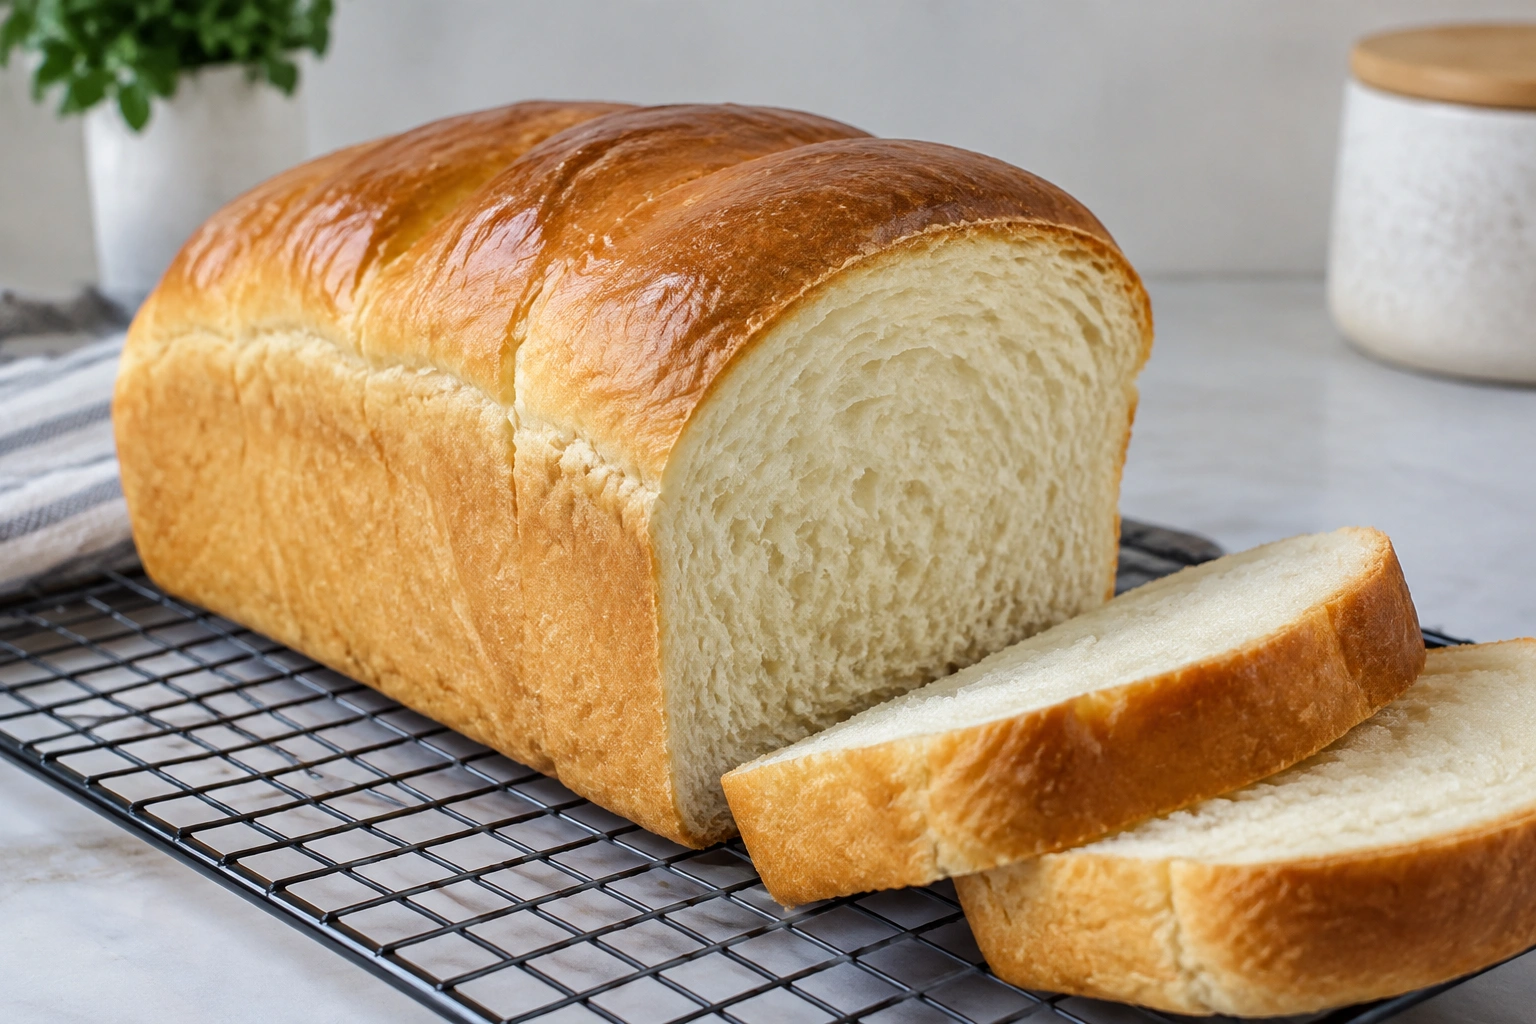
The result is a loaf that feels plush rather than dry, with a fine, even texture that works beautifully for toast, sandwiches, or just warm slices with butter. And while the bread looks bakery-level, the process is very manageable at home once you understand what each stage should look and feel like.
What Tangzhong Milk Bread Is and Why It Stays So Soft
Tangzhong is often called a water roux, though milk can also be used in part or in full. The basic idea is to cook flour with liquid before mixing it into the dough. Tangzhong is closely related to yudane, also called yukone, but the methods are not identical: tangzhong uses a cooked flour-and-liquid paste, while yudane/yukone typically uses boiling water poured over flour, then rested before mixing. In practice, tangzhong is often preferred when you want a more controlled, smooth paste and a method that fits neatly into a standard bread workflow, while yudane/yukone is a good choice when you want a simpler, no-cook scald-style prep. According to King Arthur Baking, tangzhong has roots in Japan’s yukone, or yudane, and was popularized across Asia by Taiwanese cookbook author Yvonne Chen. They also note that heating the flour and liquid to 65°C (149°F) pre-gelatinizes the starches, helping them retain more liquid and improving softness and shelf life. King Arthur Baking’s Japanese milk bread guide explains the science clearly.
In plain English: the flour in the tangzhong absorbs more water than it normally could. That extra water is then locked into the dough, so the bread bakes up softer and tends to stay pleasant for longer.
That said, tangzhong is not magic on its own. The dough still needs enough gluten development, proper proofing, and careful baking. If any of those are off, you can still end up with a dense loaf. The technique gives you an advantage, but it doesn’t replace good bread-making habits.
Tangzhong vs. a Standard Milk Bread Dough
A regular enriched dough can still make a nice loaf, but tangzhong gives you a few practical benefits:
- More moisture retention: the crumb feels softer and less dry.
- Finer texture: the loaf often slices more cleanly.
- Better keeping quality: the bread usually resists staling better than a comparable non-tangzhong loaf.
The trade-off is that the dough can feel a little stickier and more delicate at first. That’s normal. Resist the urge to dump in extra flour too early, because that often works against the softness you’re trying to create.
Ingredients and Tools You’ll Need
Here’s a reliable home-kitchen formula for one standard loaf in a 9 x 5-inch pan.
Tangzhong
- 25 g bread flour
- 125 g milk or water
Dough
- 375 g bread flour
- 50 g sugar
- 7 g instant yeast
- 7 g salt
- 1 large egg
- 150 g milk, lukewarm
- 45 g unsalted butter, softened
For finishing
- Optional egg wash for a glossy top
This recipe is intentionally balanced for softness without becoming cakey. The sugar and butter enrich the dough, while the egg adds tenderness and structure. The flour choice matters too: bread flour usually gives the loaf more height and chew, while all-purpose flour can make a slightly softer but less lofty loaf. If you want the most dependable structure, bread flour is the safer choice.
Bread Flour vs. All-Purpose Flour
| Choice | What You Gain | Trade-Off | Best For |
|---|---|---|---|
| Bread flour | Better gluten strength, taller loaf, more structure | Slightly chewier crumb | Classic shokupan-style loaf |
| All-purpose flour | Softer bite, easier to find in most kitchens | Less rise, weaker structure | A softer, more delicate loaf |
If you’re new to enriched dough, bread flour gives you more margin for error.
Instant Yeast vs. Active Dry Yeast
| Choice | What You Gain | Trade-Off | Best For |
|---|---|---|---|
| Instant yeast | Faster mixing, simpler process | Less need to bloom separately | Convenience and consistency |
| Active dry yeast | Works well if that’s what you have | May need a brief bloom and can start a bit slower | Bakers comfortable adjusting timing |
If you use active dry yeast, dissolve it in a small portion of the lukewarm milk with a pinch of sugar first, then let it foam before mixing.
Essential Tools
- Small saucepan
- Whisk or silicone spatula
- Mixing bowl
- Stand mixer with dough hook, or a sturdy hand-mixing setup
- 9 x 5-inch loaf pan
- Kitchen scale, if possible
- Plastic wrap or a damp towel
A scale makes this recipe much more repeatable. In enriched doughs, small changes in flour or liquid can noticeably affect the final texture.
How to Make the Tangzhong
The tangzhong should be smooth, thick, and glossy—not dry, stiff, or lumpy.
- Whisk the flour and milk in a small saucepan until completely smooth.
- Cook over medium-low heat, stirring constantly.
- After 3 to 5 minutes, the mixture should thicken into a soft paste.
- When the whisk leaves visible lines in the mixture and the tangzhong reaches about 65°C / 149°F, remove it from the heat.
- Transfer it to a clean bowl and let it cool to room temperature before mixing it into the dough.
Food52’s Hokkaido milk bread method gives a very practical cue: cook the mixture until it reaches a gel-like consistency, then cool it before use. That cooling step matters because hot tangzhong can interfere with the yeast and make the dough feel greasy or difficult to knead.
What the Right Tangzhong Looks Like
Use this visual checklist:
– Smooth, with no dry flour pockets
– Thick enough to hold shape briefly on a spoon
– Spreadable, not rubbery
– Cool to the touch before adding to dough
Common Tangzhong Mistakes
- Too hot: can weaken yeast performance
- Too thick: may create a gummy or overly tight dough
- Undercooked: won’t hold enough water and may not give the softness you want
- Lumpy: usually caused by not whisking enough at the start
If you’re unsure, err on the side of slightly looser rather than overcooked. The tangzhong will continue to thicken a bit as it cools.
Mixing and Kneading the Dough
Once the tangzhong has cooled, the dough comes together quickly.
- In a large bowl, combine the flour, sugar, yeast, and salt.
- Add the egg, milk, and cooled tangzhong.
- Mix until a shaggy dough forms.
- Add the softened butter and continue mixing until absorbed.
- Knead until the dough becomes smoother and more elastic.
If You’re Using a Stand Mixer
Mix on low speed until the dough gathers, then knead on medium-low. Enriched dough can climb the hook or warm up quickly, so don’t blast it at high speed. You’re aiming for a dough that is soft and slightly tacky, not wet and soupy.
If You’re Kneading by Hand
Use a push-fold-turn motion on a lightly floured surface. Because this dough is enriched, it may feel sticky at first. Give it time. After several minutes, the dough should become more cohesive and easier to handle.
The Windowpane Test
A better judge than time alone is the windowpane test. Stretch a small piece of dough gently between your fingers. If it stretches thin enough to let light through without tearing immediately, the gluten is developed enough. If it tears quickly, keep kneading.
For this dough, that test is especially useful because tangzhong and butter can make the dough feel soft before the gluten is truly ready.
First Proof: How to Tell When the Dough Is Ready
Place the dough in a lightly greased bowl, cover it, and let it rise until roughly doubled.
The exact timing depends on room temperature and yeast activity, so don’t treat the clock as the final authority. As a rough guide, expect about 60 to 90 minutes in a warm room around 75°F to 80°F (24°C to 27°C), or about 90 to 120 minutes in a cooler room around 68°F to 72°F (20°C to 22°C). If your dough starts warm from kneading, it may move a little faster; if it’s cool, it may need more time.
Signs the First Proof Is Ready
- The dough has visibly expanded to about double
- It feels lighter and airier when lifted
- A finger pressed gently into the dough leaves an indentation that fills back slowly
If the dough is underproofed, it will feel tight and resistant during shaping. If it’s overproofed, it may look very puffy but feel fragile and collapse easily when handled.
Shaping the Loaf or Rolls
For a loaf, the goal is surface tension. That tension helps the bread rise upward instead of spreading sideways.
- Gently deflate the dough.
- Divide it into equal portions if you’re making a pull-apart style loaf, or keep it whole for a simpler loaf.
- Shape each piece into a tight ball or log.
- Place seam-side down in the loaf pan.
If you want rolls instead, divide the dough into equal pieces and shape each one into a smooth ball. Rolls bake faster and are easier to portion, but they lose the tall sandwich-loaf look. A loaf is better if you want slices; rolls are better if you want individual servings.
Loaf vs. Rolls
| Format | Advantage | Trade-Off | Best For |
|---|---|---|---|
| Loaf | Classic slices, sandwich-friendly, impressive height | Longer bake, needs a loaf pan | Toast and sliced bread |
| Rolls | Faster bake, easy portioning | Less dramatic rise, more shaping pieces | Dinner rolls or small buns |
Scaling the Dough for Different Pans
This formula is sized for a standard 9 x 5-inch loaf pan. If you use a smaller pan, the loaf may dome more and need a little more bake time; a larger pan may produce a flatter loaf unless you increase the dough quantity. As a general rule, use about the same dough for one standard loaf pan, divide it into 8 to 12 pieces for rolls, or scale the dough up if you want a taller pull-apart style loaf in a larger pan. If you change pan size, watch the dough height rather than relying only on the timer.
Second Proof and Final Readiness Checks
After shaping, let the dough rise again until it looks puffy and nearly fills the pan.
This proof is where many bakers get tripped up by the clock. A cool room can slow the rise considerably, while a warm kitchen can speed it up. Look for the dough to rise visibly and feel airy, not dense. As a rough guide, the second proof may take about 45 to 75 minutes in a warm kitchen, or about 60 to 90 minutes if the room is cooler. If the dough is already warm from handling, it may finish sooner.
Poke-Test Style Cues
Press the dough gently with a fingertip:
– Springs back quickly: underproofed
– Leaves a slight indentation that returns slowly: ready to bake
– Doesn’t spring back and feels fragile: likely overproofed
For a loaf pan, the dough is usually ready when it crowns just above the rim or sits close to it, depending on the pan and shaping style.
Bake the Bread: Temperature, Time, and Doneness Cues
Bake the loaf in a preheated oven at 350°F (175°C) until the top is deep golden and the loaf sounds hollow when tapped.
For a standard 9 x 5-inch loaf, a common bake range is about 30 to 35 minutes, but your oven and pan can shift that slightly. If the top browns too quickly, tent it loosely with foil during the last part of baking.
How to Know It’s Fully Baked
- The crust is evenly golden brown
- The loaf feels set and light for its size
- The center is no longer doughy
- A thermometer inserted into the center should read about 190°F to 200°F
That internal range is especially useful for enriched bread, since the soft crumb can make visual doneness harder to judge.
Cool, Slice, and Store for Maximum Softness
Let the loaf cool in the pan for a few minutes, then turn it out onto a rack. Wait until it is fully cool before slicing.
That cooling step is not optional if you want the best texture. Cutting too early can make the crumb seem gummy, even when the bread is technically baked through.
Storage Tips
- Keep the cooled loaf in an airtight container or bag.
- Store at room temperature for the shortest practical time if you want the softest crumb.
- Freeze slices or the whole loaf if you won’t finish it soon.
If you freeze the bread, wrap it well to protect against freezer burn. Reheat slices in a toaster or warm the loaf briefly in the oven after thawing. The goal is to bring back softness without drying out the crumb.
Common Mistakes and How to Fix Them
My loaf turned out dense
Most often, this means one of three things:
– the dough was under-kneaded,
– the first or second proof was too short,
– or too much flour was added during kneading.
Fix: knead until the dough passes a windowpane test, then proof by volume and feel rather than time alone.
My dough was too sticky
A slightly tacky dough is normal. Truly unmanageable stickiness usually comes from excess liquid, under-kneading, or warm butter that made the dough greasy.
Fix: knead longer before adding more flour. Add flour only in tiny amounts if the dough is actually unworkable.
The bread didn’t rise well
This can happen if the yeast is old, the tangzhong was too hot, or the dough was proofed in a very cool spot.
Fix: check yeast freshness, cool the tangzhong fully, and give the dough more time in a warmer environment.
The top collapsed
That usually points to overproofing or a dough that was too weak to hold its structure.
Fix: shorten the final proof next time and make sure the dough is fully developed before shaping.
The crumb feels dry
This is often a baking issue, not a tangzhong issue.
Fix: avoid overbaking and store the loaf airtight once cooled. If you use all-purpose flour instead of bread flour, expect a slightly less lofty result but not necessarily a dry one unless the loaf was baked too long.
Substitutions, Variations, and Make-Ahead Options
Milk Tangzhong vs. Water Tangzhong
Water is the traditional base for tangzhong, and milk adds extra richness. If you want a slightly more tender, dairy-forward loaf, milk works well. If you prefer a lighter flavor or need a simpler formula, water is perfectly acceptable. In general, use milk when you want a softer, richer flavor profile and water when you want the method to stay neutral and flexible.
Bread Flour vs. All-Purpose Flour
Bread flour gives you stronger gluten and a better rise. All-purpose flour can still work, but the loaf may be a little less tall and less chewy. If you make that swap, watch the dough rather than expecting the exact same structure.
Make-Ahead Strategy
You can make the tangzhong ahead and refrigerate it briefly, but bring it back to room temperature before mixing. For the finished loaf, freezing slices is often more practical than storing the whole loaf for too long. If you want to prep ahead, you can also shape the loaf, cover it well, and refrigerate it briefly before the final proof, then let it come back to puffy readiness before baking.
Filling Ideas Without Ruining the Dough
If you want to add a filling, keep it dry and light. Heavy or wet fillings can interfere with shaping and weaken the rise. Think in terms of restraint: the bread should still be the star.
Practical Example: A Standard Shokupan-Style Loaf
Here’s how this can look in a real home kitchen.
You cook the tangzhong first and let it cool while you measure the rest of the ingredients. The dough comes together in the mixer and looks rough at first, then gradually turns smooth and elastic. After the first proof, it has doubled and feels airy but still structured.
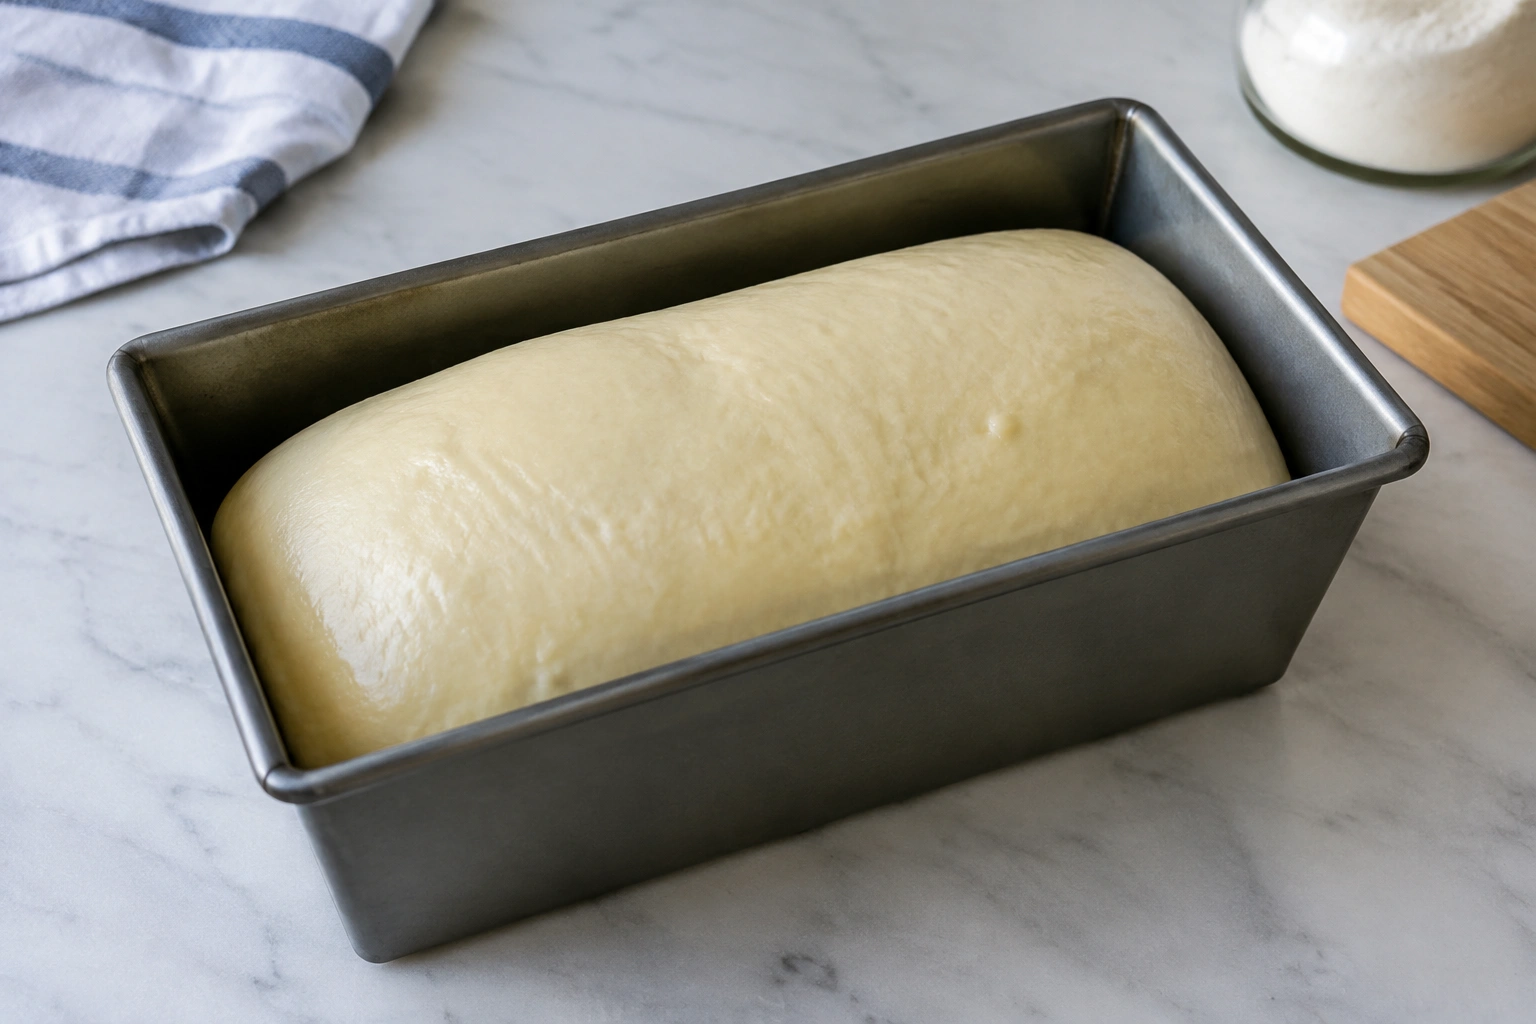
You shape it into a loaf, place it seam-side down in the pan, and let it rise again until it looks puffy and nearly reaches the top. The dough feels light when gently tapped, and a finger press returns slowly. After baking, the top is golden, the loaf sounds hollow, and the center is fully set.
Once cooled, the crumb slices cleanly into soft, even pieces. That’s the payoff of tangzhong: not just softness, but softness with structure.
Practical Troubleshooting Tips
If your loaf keeps missing the mark, focus on these three checkpoints before changing the recipe:
- Dough temperature: very warm dough can proof too fast and become slack.
- Proofing height: aim for puffy and airy, not just “waited long enough.”
- Bake color and internal temperature: a pale loaf can be underbaked even if it looks risen.
If you only change one thing at a time, it becomes much easier to see what actually fixed the problem.
FAQ
Can I make tangzhong milk bread with all-purpose flour?
Yes, but the loaf may be a bit less tall and less chewy than one made with bread flour. If you want the most reliable structure, bread flour is the better choice.
How thick should tangzhong be before using it?
It should be like a soft pudding or thick gel. If it’s stiff and rubbery, it was likely cooked too long. A good endpoint is around 65°C / 149°F.
Can I use active dry yeast instead of instant yeast?
Yes. Active dry yeast works well, though it may need to be dissolved first and can rise a little more slowly.
Why is my tangzhong milk bread dense?
The most common causes are under-kneading, underproofing, or adding too much flour while shaping. Dense bread usually comes from structure problems, not from the tangzhong itself.
Can this dough be shaped into rolls?
Absolutely. The same dough works well for rolls or buns. Just shorten the bake time and watch for even browning.
How long does tangzhong milk bread stay soft?
It generally stays soft longer than a standard loaf, but freshness still depends on your ingredients, baking time, and storage. Airtight storage helps preserve the texture.
Should I cool the tangzhong before adding it to the dough?
Yes. It should be at room temperature before mixing so it doesn’t interfere with the yeast or alter the dough temperature too much.
Is tangzhong better with milk or water?
Milk adds richness and a slightly fuller flavor, while water keeps the method simpler. Both work; choose based on the texture and flavor you want.
How do I scale this recipe for a different pan?
For a smaller loaf pan, use slightly less dough or expect a taller crown and a bit more bake time. For a larger pan, increase the dough if you want the loaf to fill the pan properly. For rolls, divide the dough into 8 to 12 equal pieces and shorten the bake time.