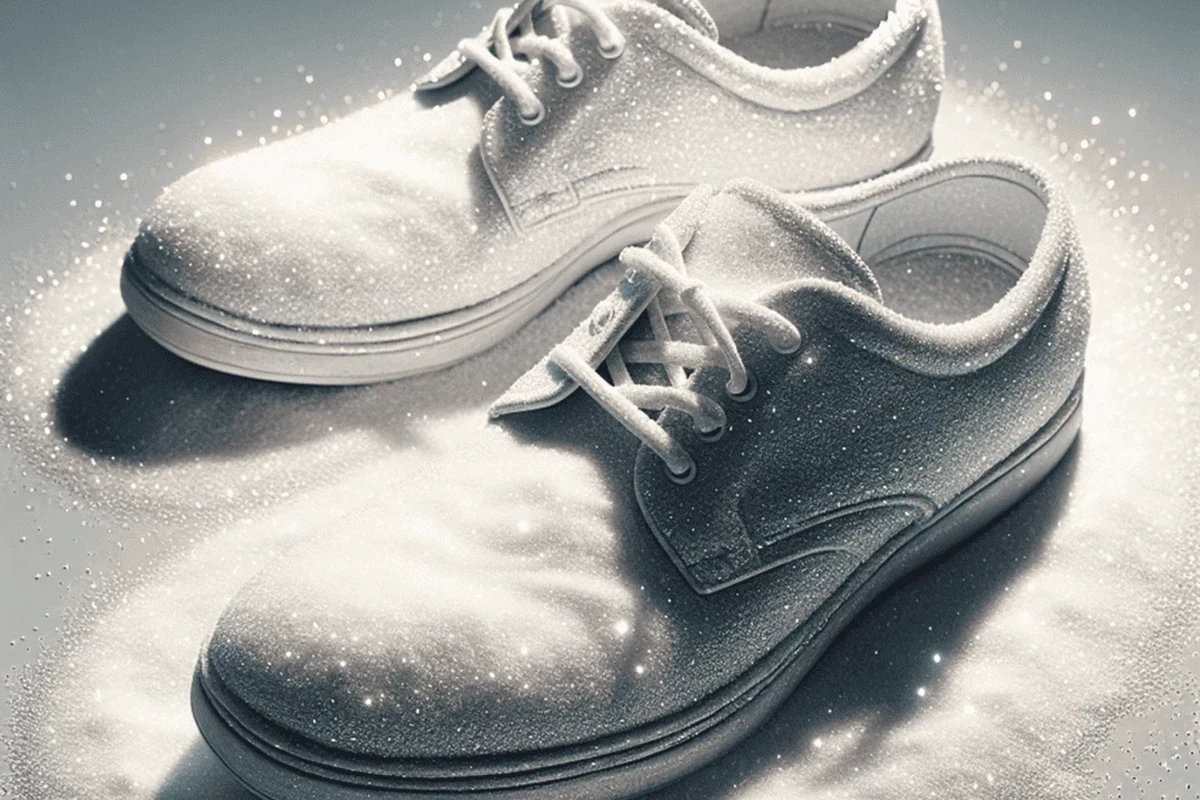
Baking soda can clean sneakers well when you use a thin paste, light brushing, and careful drying. It works best on canvas, knit, mesh, and rubber, but not on suede or delicate specialty finishes.
Cleaning sneakers with baking soda is a simple, low-cost way to handle everyday dirt, light stains, and odors. Used the right way, it can freshen shoes without soaking the materials or leaving them stiff and chalky.
- Best use: Baking soda is ideal for light stains, surface dirt, and odor control.
- Material check: Canvas, knit, mesh, and rubber usually respond better than suede or leather.
- Technique matters: Use a thin paste, gentle brushing, and minimal water.
- Drying is essential: Air-dry fully to prevent residue, odor, and shape damage.
Why Baking Soda Works for Cleaning Sneakers
Baking soda is mildly abrasive, mildly alkaline, and good at absorbing odors. That combination makes it useful for lifting surface grime, loosening some stains, and helping shoes smell fresher after a long day.
For sneaker care, the main advantage is control. You can make a paste, use it as a dry deodorizer, or pair it with a small amount of water so you clean the surface without flooding the shoe.
How baking soda lifts stains, odors, and surface grime
On sneakers, many marks are not deep stains but a mix of dust, sweat, skin oils, and outdoor debris. Baking soda helps break up that buildup so it can be brushed or wiped away more easily.
It also helps with odor because it can absorb some of the smell-causing moisture trapped inside shoes. If you are also interested in how baking soda handles other household messes, our guide to baking soda in laundry explains why it is often used for freshening fabrics.
Which sneaker materials respond best to baking soda cleaning
Baking soda works best on canvas, knit, mesh, rubber, and many synthetic sneaker parts. These materials usually tolerate gentle brushing and light moisture better than delicate finishes.
It is less reliable on suede, untreated leather, shiny coatings, or specialty materials that can show residue or texture changes. When in doubt, check the manufacturer’s care instructions first, because shoe brands often have specific cleaning limits.
Use baking soda as a spot cleaner, not a soak. A small amount of paste is usually enough for visible marks and odor control.
What You Need Before You Start
A good sneaker-cleaning setup is simple. You want just enough tools to remove dirt without over-wetting the shoe or grinding grit deeper into the fabric.
Basic supplies for a safe sneaker-cleaning setup
Keep the water amount small and add it gradually. A thick paste is easier to control than a runny mixture, especially on knit uppers and glued seams.
When to add soft brushes, microfiber cloths, or mild soap
A soft brush helps lift dirt from textured surfaces and rubber edges. A microfiber cloth is useful for wiping away paste without leaving lint behind.
If the shoes have oily marks or heavy buildup, a tiny amount of mild soap can help, but do not overdo it. If you want a broader cleaning method for tougher household residue, our article on baking soda vinegar cleaning ovens shows how careful paste application matters in another cleaning context.
- Remove loose dirt with a dry brush.
- Test the paste on a hidden area first.
- Take out laces and insoles if possible.
- Work in a well-ventilated area.
Step-by-Step Method for Cleaning Sneakers with Baking Soda
The safest method is to dry brush first, then use a controlled paste, then wipe and air-dry. That sequence keeps grit from turning into muddy residue and helps prevent water spots.
Dry brushing and spot removal before mixing a paste
Tap the soles together outside, then use a soft brush to remove dust, dried mud, and sand from the uppers and tread.
Focus on scuffs, toe-box marks, and stained edges before you wet the shoe. Dry removal first keeps the paste cleaner and more effective.
This prep step matters because wet grit can smear across the fabric. That is one of the most common reasons sneakers look dull after cleaning instead of brighter.
How to apply baking soda paste without over-wetting shoes
Mix baking soda with a small amount of water until it forms a spreadable paste. You want it thick enough to stay where you place it, especially on canvas or mesh.
Apply a thin layer to the dirty area with your fingers, a soft brush, or a cloth. Avoid soaking the shoe, since too much moisture can weaken adhesives, leave rings, or push residue deeper into the material.
Baking soda is often used as a gentle abrasive because its fine texture can help loosen surface soil without the harsh scraping that can damage delicate sneaker finishes.
Brushing, wiping, and rinsing for a clean finish
Let the paste sit briefly, then brush in small circles with light pressure. If you scrub too hard, you can fuzz knit fibers, rough up canvas, or leave a patchy finish.
Wipe away the paste with a damp microfiber cloth, then repeat only where needed. If residue remains, use a second clean cloth with plain water to remove the last traces, but keep the shoe as dry as possible.
Even though this is a cleaning task, the same rule applies as in baking prep: use clean tools and avoid cross-contamination. Do not use a cloth that also handles food surfaces.
How to Clean Different Sneaker Parts Without Damaging Them
Different sneaker parts need different pressure and moisture levels. The upper, sole, laces, and tongue can all react differently, so treat them as separate cleaning zones.
Canvas and knit uppers
Canvas and knit usually respond well to a gentle baking soda paste. Use a soft brush or cloth and work in small sections so the fabric does not stay wet too long.
For knit uppers, lighter pressure is better than repeated hard scrubbing. If the fabric starts to pill or look fuzzy, stop and switch to blotting instead of brushing.
Rubber soles and midsoles
Rubber soles and midsoles are often the easiest parts to clean with baking soda. Their sturdier surface can handle a little more brushing, especially around the edge where dirt collects.
Still, avoid abrasive scrubbing pads that can dull the finish. A soft brush and a slightly thicker paste usually give a cleaner result with less risk of scuffing.
Laces, insoles, and tongue areas
Laces can be cleaned separately in a bowl with a little baking soda and water, then rinsed well. Insoles need extra caution because too much moisture can trap odor and slow drying.
The tongue area often hides sweat and dust near seams. Use a lightly damp cloth rather than a wet brush, especially if the lining is thin or glued.
If your sneakers have removable insoles, let them dry completely before putting them back. A shoe that feels only slightly damp can still hold enough moisture to create odor later.
Common Mistakes That Leave Sneakers Looking Worse
Most sneaker-cleaning problems come from using too much product, too much water, or too much force. The goal is to lift grime, not to scrub the shoe into a different texture.
Using too much baking soda or scrubbing too hard
A heavy layer of baking soda can leave a chalky film if it is not fully removed. The same goes for aggressive scrubbing, which can push residue into seams and make the shoe look cloudy.
Use a thin paste and stop as soon as the stain lifts. If a mark does not budge, repeated heavy scrubbing is usually a sign that you need a different cleaner, not more pressure.
Cleaning suede, leather, or specialty finishes the wrong way
Suede and many leather finishes do not behave like canvas. Baking soda can dry out the surface, leave visible residue, or change the nap on suede.
For those materials, follow the shoe maker’s care guide or use a product made for that finish. If you are comparing cleaners, the same caution applies when people ask whether one ingredient can replace another, as in our article on using baking soda instead of baking powder safely: the right choice depends on the job.
Skipping the drying step and causing residue or odor
Drying is not optional. If you store sneakers while they are still damp, residue can set in and odor can return quickly.
Air-dry the shoes fully before wearing them again. For odor-heavy pairs, you can sprinkle a small amount of baking soda inside after cleaning, then shake it out later once the shoes are dry.
Do not put wet sneakers near direct heat, radiators, or very hot dryers unless the manufacturer specifically allows it. High heat can warp soles, weaken glue, and shrink some fabrics.
Safety, Drying, and Storage Tips After Cleaning
After cleaning, the final step is protecting the shape of the shoe and preventing moisture from lingering in the lining. Good drying habits matter as much as the cleaner itself.
Air-drying methods that help shoes keep their shape
Set sneakers in a shaded, airy spot with the tongue open and the laces loosened. You can stuff them lightly with clean paper towels or plain white paper to help absorb moisture and support the shape.
Replace the paper if it gets damp. This is especially helpful for thicker shoes that hold water in the toe box and collar.
How to avoid moisture buildup, discoloration, and lingering paste
Make sure no white residue stays in stitching or around the sole edge. A final wipe with a barely damp cloth can help remove the last dusting of baking soda.
Store shoes only after they feel fully dry inside and out. If they are put away too soon, trapped moisture can create odor and may darken some fabrics over time.
- Air-dry in a ventilated area.
- Use light pressure and small amounts of paste.
- Check seams and seams edges for leftover residue.
- Using direct heat or a hot dryer.
- Leaving paste on too long without wiping.
- Storing shoes while they are still damp.
When Baking Soda Is Enough and When You Need Another Cleaner
Baking soda is a strong choice for everyday maintenance, but it is not a cure-all. Knowing its limits helps you protect the shoe and choose the right cleaner faster.
Best use cases for everyday dirt, odor, and light stains
Use baking soda for light scuffs, dusty buildup, freshness between wears, and routine spot cleaning. It is especially useful when the shoe just needs a refresh, not a full restoration.
It is also a practical option when you want a low-odor, simple cleaner for a quick touch-up. For stubborn odor issues, you can pair cleaning with a dry deodorizing routine, similar to how baking soda is used for smoke odors in other settings.
Situations that call for stain removers or professional care
If the stain is deep, oily, set-in, or on a delicate material, a different cleaner may be safer and more effective. Specialty finishes, glued trims, and expensive limited-edition sneakers are worth extra caution.
When the manufacturer recommends a specific product, follow that first. For valuable shoes, professional cleaning can be the better choice if you are unsure how the material will react.
Final Recommendation: The Best Way to Keep Sneakers Looking Fresh
The best routine is simple: brush off dry dirt, use a small baking soda paste for spots, wipe carefully, and air-dry completely. That approach gives you the benefits of baking soda without the most common side effects, like residue, stiffness, or over-wetting.
Practical routine for regular maintenance and spot cleaning
For everyday care, check your sneakers after wear, especially around the toe, midsole, and collar. A quick dry brush and a light spot treatment often prevent bigger cleaning jobs later.
If you keep a small cleaning kit ready, the process takes less time and feels less like a project. That is usually the easiest way to keep sneakers looking fresh between deeper cleanings.
What to remember before using baking soda on your favorite pair
Match the method to the material, keep moisture low, and always dry the shoes fully. Those three habits do more to protect sneakers than any single cleaning ingredient.
When used carefully, cleaning sneakers baking soda is a practical option for beginners and experienced shoe owners alike. It is simple, effective for light cleaning, and best when you respect the material and avoid overdoing it.
Frequently Asked Questions
Yes, baking soda can help clean many white sneakers when used as a thin paste and wiped off carefully. It works best on canvas, mesh, knit, and rubber, but always test a hidden spot first.
Keep it on only long enough to loosen dirt, then wipe it away before it dries into a heavy residue. The exact time depends on the material and how dirty the shoe is.
It is usually not the best choice for suede because it can leave residue and change the texture. Use a cleaner made for suede or follow the shoe maker’s care instructions.
Wipe the area with a clean damp microfiber cloth, then follow with a second cloth lightly moistened with plain water if needed. Avoid soaking the shoe, because too much water can create new stains.
Baking soda can help absorb some odor, especially after the shoes are cleaned and dried. For strong or persistent odor, you may need repeated drying, fresh insoles, or a different deodorizing method.
No, laces and insoles should be treated more gently and dried completely before reuse. Insoles in particular should not stay wet for long, since trapped moisture can lead to odor.
