Baking soda works well for cleaning grout with light dirt, soap scum, and everyday buildup. Use a thick paste, a soft brush, and gentle rinsing, but switch methods if the grout is damaged or deeply stained.
Cleaning grout with baking soda is one of the simplest ways to brighten tile without reaching for a harsh cleaner first. It works best on everyday dirt, soap scum, and light staining, as long as you use the right paste, the right brush, and a gentle touch.
- Best use: Great for routine grout cleaning and light surface staining.
- Key method: Use a thick paste, short dwell time, and soft scrubbing.
- Main limit: Deep stains, mildew, and damaged grout may need another solution.
- Safety first: Test colored or old grout and avoid harsh brush pressure.
Why Baking Soda Works for Cleaning Grout in 2026
Baking soda is mildly alkaline and slightly abrasive, which makes it useful for loosening greasy residue and lifting stuck-on grime from grout lines. In a kitchen or bathroom, that matters because grout is porous and tends to hold onto soil, soap film, and moisture more than glazed tile does.
It also helps neutralize some odors, which is useful in damp shower areas and around sinks. For a broader look at how this pantry staple behaves in cleaning tasks, you may also like our guide to baking soda and vinegar reaction explained simply.
What baking soda does to lift grime, stains, and soap scum
When you make a paste, baking soda clings to the grout instead of sliding off like plain water. That gives the cleaner more contact time, so the mild scrubbing action can break up film and surface discoloration.
On soap scum, baking soda helps by softening the residue so it can be brushed away in layers. On greasy kitchen grout, it can help absorb and loosen the oily coating before you wipe it clean.
Grout is usually more porous than tile, so stains often sit below the surface instead of just on top. That is why a paste and a short dwell time often work better than a quick wipe.
When baking soda is enough on its own and when it is not
Baking soda is often enough for light buildup, fresh splashes, and routine maintenance cleaning. It is a sensible first step when the grout looks dull but not deeply damaged.
If the grout is blackened by mildew, permanently yellowed, cracked, or missing sealant, baking soda may improve the surface but not fully restore it. In those cases, you may need a different cleaner, resealing, or repair.
What You Need Before You Start
Good grout cleaning depends more on the tools than on force. A soft brush, a simple paste, and patience usually do more than heavy scrubbing.
Essential supplies: baking soda, water, brush, cloth, and optional vinegar
You only need baking soda and water for the basic method. A cloth helps remove residue after scrubbing, and a small bowl makes it easy to control the paste thickness.
Vinegar is optional, not required. It can help with some mineral film, but it should be used carefully and only when the surface material can handle it; never assume it is safe for every stone or sealant.
Choosing the right brush and tools for tile joints without damage
A narrow grout brush is usually the safest choice because it fits into the joint without scraping the tile face. An old toothbrush can work too, especially for smaller areas.
Avoid stiff wire brushes and abrasive pads on glazed tile. They can scratch the surface or wear the grout edge down over time, which makes future cleaning harder.
Safety basics for sealed, unsealed, colored, and older grout
Check whether the grout is sealed before you begin. Sealed grout is easier to clean, while unsealed grout can absorb liquid faster and may need a lighter hand.
For colored grout, test a small hidden spot first. Older grout can be brittle, so if you see crumbling, cracking, or loose sections, cleaning should stay gentle and repair may be a better next step.
Do not mix baking soda with bleach or other strong cleaners. If you are unsure about a previous product on the surface, rinse thoroughly and let the area dry before you begin.
Step-by-Step Method for Cleaning Grout with Baking Soda
This method works best when you move slowly and give the paste time to sit. The goal is to loosen soil, not to grind the grout down.
Start with baking soda and a small amount of water until you get a spreadable paste. For heavier buildup, keep it thicker so it stays on the grout line instead of running off.
Spread the paste directly onto the grout line with your finger, a small spoon, or the brush itself. Cover only the area you can clean before the paste dries out.
Allow the paste to rest for several minutes so it can soften residue. Do not let it harden completely, especially on older grout.
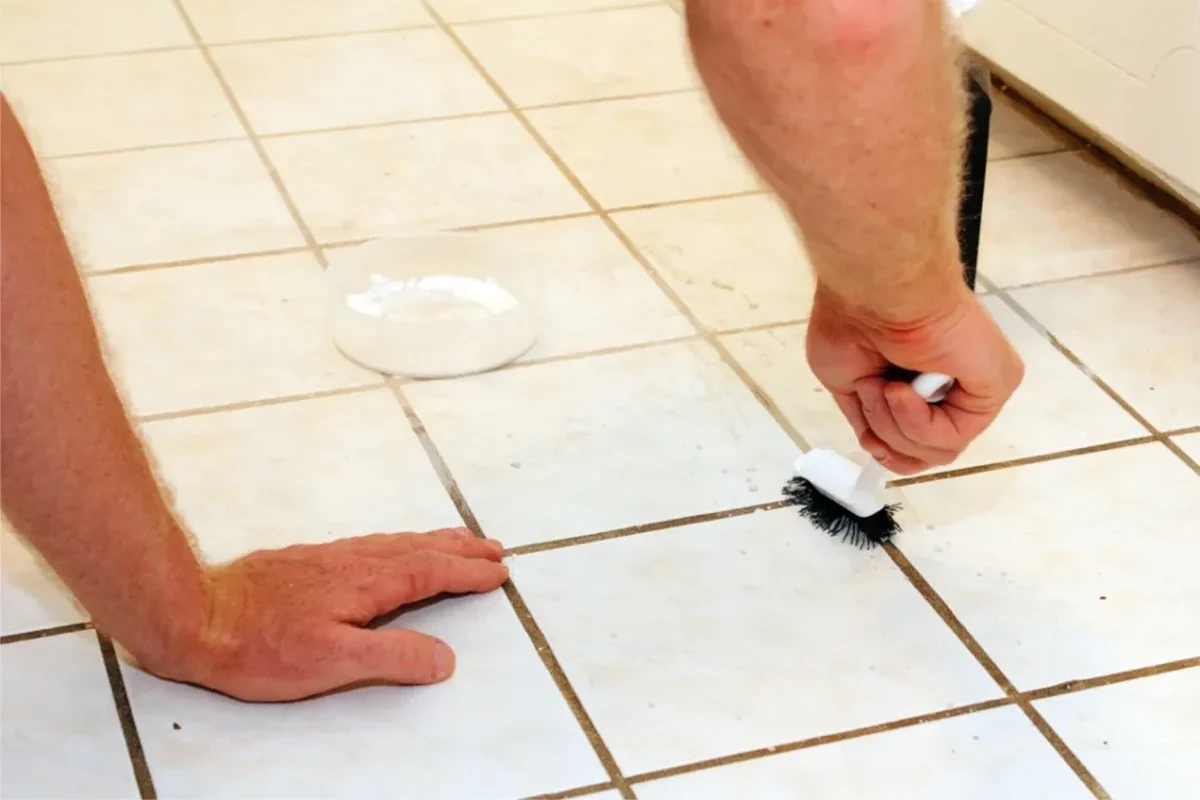
Use short back-and-forth strokes along the grout line. Let the brush do the work; pressing too hard can wear away the joint.
Wipe away the residue with a damp cloth, then dry the area well. Check whether the grout looks brighter or whether one more pass is needed.
How to mix the paste for different grout conditions
For routine cleaning, aim for a thick paste that holds its shape. If the area is slightly damp already, you may need less water than you expect.
For vertical shower walls, a thicker paste is especially helpful because it stays in place longer. For floor grout, a slightly looser paste can be easier to spread across larger sections.
How to apply the paste and let it sit for best results
Work in small sections so the paste does not dry before you scrub it. That is especially important in warm rooms or near windows where moisture evaporates quickly.
If you are also dealing with a mild vinegar-safe surface and want to understand the chemistry of combining cleaners, review our guide to baking soda vinegar cleaning ovens before trying any combination on tile.
How to scrub effectively without scratching tile
Use steady pressure, not speed. The best motion is usually small and repetitive, following the grout line rather than crossing over the tile face.
If the brush starts to squeak or the grout begins to look fuzzy, ease up. That is often a sign that you are scrubbing too aggressively or that the stain needs a different treatment.
How to rinse, dry, and inspect the grout after cleaning
Wipe away all powdery residue with a clean damp cloth, then follow with a dry towel. Leftover baking soda can leave a chalky film if it is not removed fully.
After drying, inspect the grout in good light. Sometimes the surface looks cleaner only after it dries completely, because moisture can temporarily darken the lines.
If you are cleaning a large tiled area, break the job into sections. That keeps the paste from drying too fast and helps you spot spots that need extra attention.
Best Uses: Kitchen, Bathroom, Floor, and Shower Grout
Baking soda is most useful on regular household grime, not on severe damage. It is a practical maintenance cleaner for busy homes where grout gets dirty from daily use.
Where baking soda works best on everyday buildup
Kitchen backsplash grout often responds well because it usually collects light grease, steam residue, and splashes. Bathroom sink areas and shower corners also benefit because they gather soap film and body oils.
Floor grout in entryways can improve too, especially when the discoloration is from dust and tracked-in soil. If you want a simple way to understand why this kind of residue behaves differently in cleaning jobs, see our article on clean drains with vinegar baking soda fast and easy for another example of controlled household cleaning.
How to handle grease, mildew, hard-water film, and traffic stains
For grease, a thicker paste and a second pass may help. For hard-water film, baking soda may improve the look, but mineral deposits sometimes need a different approach.
Mildew is trickier because staining and growth are not the same thing. If you suspect active mold or mildew, follow recognized cleaning and ventilation guidance and do not rely on baking soda alone to solve the problem.
Practical examples of before-and-after cleaning scenarios
A lightly dulled kitchen grout line may brighten after one short scrub and rinse. That is the kind of result baking soda handles well.
A shower corner with dark, old discoloration may look better but still show shadows after cleaning. In that case, the improvement is real, but the grout may need sealing or repair to look fully uniform.
Common Mistakes That Make Grout Cleaning Less Effective
Most grout-cleaning problems come from too much moisture, too much force, or using the wrong product on the wrong surface. A careful method is usually more effective than a harsh one.
Using too much water or making the paste too thin
A watery mix runs off grout and spreads residue onto the tile. It also reduces the paste’s contact time, which makes the cleaning weaker.
Use just enough water to form a paste that sticks. If it slides, it is too thin.
Scrubbing too hard and wearing down grout lines
Grout is softer than tile, so aggressive scrubbing can erase the top layer. Over time, that can make the joint look uneven and hold dirt even faster.
If you need to scrub harder than expected, stop and reassess. The stain may be set deeper than a baking soda paste can handle.
Always ventilate the room when using any cleaner, even a mild one. Good airflow helps surfaces dry faster and reduces the chance of lingering odors or irritation.
Mixing baking soda with the wrong cleaners or sealants
Do not combine cleaners unless the surface and product directions clearly allow it. Some sealants and specialty tiles can react badly to acidic or abrasive treatments.
If you are unsure, test in a hidden spot first and read the product label. That is especially important for natural stone, where the wrong cleaner can dull the finish.
Ignoring discoloration that needs repair, resealing, or replacement
Sometimes grout looks dirty when it is actually damaged. If the line stays dark after repeated cleaning, the issue may be below the surface.
Cracks, missing chunks, and recurring stains often mean the grout needs resealing or replacement. Cleaning can improve appearance, but it cannot rebuild a worn joint.
How to Tackle Stubborn Stains and Discolored Grout Safely
For stubborn areas, the safest approach is usually to repeat the baking soda method once or twice before switching strategies. That gives you a chance to improve the result without overworking the grout.
When to repeat the baking soda method versus switch techniques
Repeat the method if the grout is cleaner but still slightly dull. Stop if the surface looks rough, the joint is thinning, or the stain does not change after two careful passes.
At that point, a different cleaner, a grout-specific product, or professional repair may be the better option. The right choice depends on whether you are dealing with surface soil or permanent discoloration.
Spot-treating problem areas without spreading residue
Use a cotton swab, small brush, or folded cloth corner for isolated spots. That keeps the cleaner where it is needed and prevents excess paste from drying on nearby tile.
After spot treatment, wipe the area clean right away. Residue left behind can make the grout look hazy instead of bright.
Signs mold, damage, or etching need a different solution
Dark spots that return quickly after cleaning may point to moisture issues rather than simple dirt. If grout stays damp, the source of the moisture should be addressed first.
Etching, pitting, and soft crumbly grout are signs of wear, not just staining. Those conditions usually call for repair or replacement rather than more scrubbing.
Aftercare: Drying, Sealing, and Keeping Grout Bright Longer
Cleaning is only part of the job. Drying and routine upkeep are what help grout stay brighter between deep cleans.
How to dry grout properly after cleaning
Use a dry microfiber cloth or towel to remove moisture from the joints and tile edges. In bathrooms, leaving the room ventilated after cleaning helps the grout dry more evenly.
Do not let standing water sit in corners or along baseboards. Moisture that lingers can feed new buildup and make the next cleaning harder.
When resealing grout helps protect against future stains
If your grout is porous or frequently exposed to spills, resealing can help reduce how quickly stains soak in. The timing depends on the grout type, the sealer used, and how much wear the area gets.
Check the grout manufacturer or sealer instructions for guidance. If water no longer beads on the surface, resealing may be due.
Simple maintenance habits to reduce buildup between deep cleans
Wipe splashes early, especially in kitchens and showers. Small cleanup habits prevent residue from becoming a thick film that takes more effort later.
Use a gentle weekly wipe-down for high-traffic spots, and reserve deeper scrubbing for when the grout actually needs it. That approach keeps the tile looking brighter without wearing out the joints.
- Test a hidden area first
- Use a thick paste and a soft brush
- Dry the grout after cleaning
- Flooding the grout with water
- Scrubbing with harsh pads or wire tools
- Assuming stains are always removable
Final Verdict: Is Cleaning Grout with Baking Soda Worth It?
Yes, cleaning grout with baking soda is worth trying for everyday dirt, soap scum, and light kitchen or bathroom buildup. It is inexpensive, easy to mix, and gentle enough for many routine jobs when used correctly.
Who should use this method and who should consider another cleaner
This method is a good fit for beginners, renters, and anyone doing regular maintenance on tile floors, backsplashes, or shower grout. It is also a smart first step before moving to stronger products.
If the grout is stained deeply, mold-damaged, cracked, or in need of resealing, another cleaner or a repair solution may be more effective. In those cases, baking soda can help at the surface but will not fix the underlying problem.
Recap of the safest, most effective approach for bright tile
The best results come from a thick paste, a soft brush, short dwell time, and careful rinsing. Keep the area ventilated, test first if the grout is colored or old, and stop before you wear down the joint.
Used this way, baking soda is a practical, low-risk way to keep tile looking fresher between deeper cleanings. For more everyday baking soda guidance, browse our other cleaning articles and compare which method fits the surface before you start.
Frequently Asked Questions
Yes, baking soda is usually fine for sealed grout when used as a gentle paste. Test a hidden spot first, especially if the sealer is old or the grout is colored.
A few minutes is usually enough for light buildup. Do not let it dry completely on the surface, especially on older or more porous grout.
It may improve surface staining, but active mildew or mold often needs a different cleaning approach and better ventilation. If the problem keeps returning, check for moisture issues.
You can, but it is not always the best choice and it is not safe for every surface. Follow product directions and avoid using it on natural stone or unknown sealants.
Dry the area after cleaning, wipe spills quickly, and keep up with light maintenance. Resealing grout can also help slow future staining if the material is porous.
If the grout is cracking, crumbling, or staying dark after repeated careful cleaning, repair may be the better option. Cleaning cannot restore damaged grout joints.
