
Vinegar and Baking Soda Volcano Fun Science Experiment

A vinegar and baking soda volcano demonstrates a fast acid-base reaction that releases carbon dioxide and creates foam. With a tray, a narrow container, and careful measuring, it is a reliable low-cost science activity for home or classroom use.
A vinegar and baking soda volcano is a simple way to show a fast acid-base reaction, gas formation, and foam. It is popular because it is low-cost, easy to set up, and easy to connect to real chemistry lessons in a home kitchen or classroom.
- Science focus: The reaction makes carbon dioxide gas that pushes foam upward.
- Best setup: Use a narrow container, a tray, and pre-measured ingredients.
- Stronger eruption: Dish soap and a steady pour usually improve the visual effect.
- Common issue: Too much baking soda or too little vinegar can weaken the reaction.
- Safety first: Keep the activity away from eyes, electronics, and unstable surfaces.
What a Vinegar and Baking Soda Volcano Actually Demonstrates in a 2026 Classroom or Kitchen
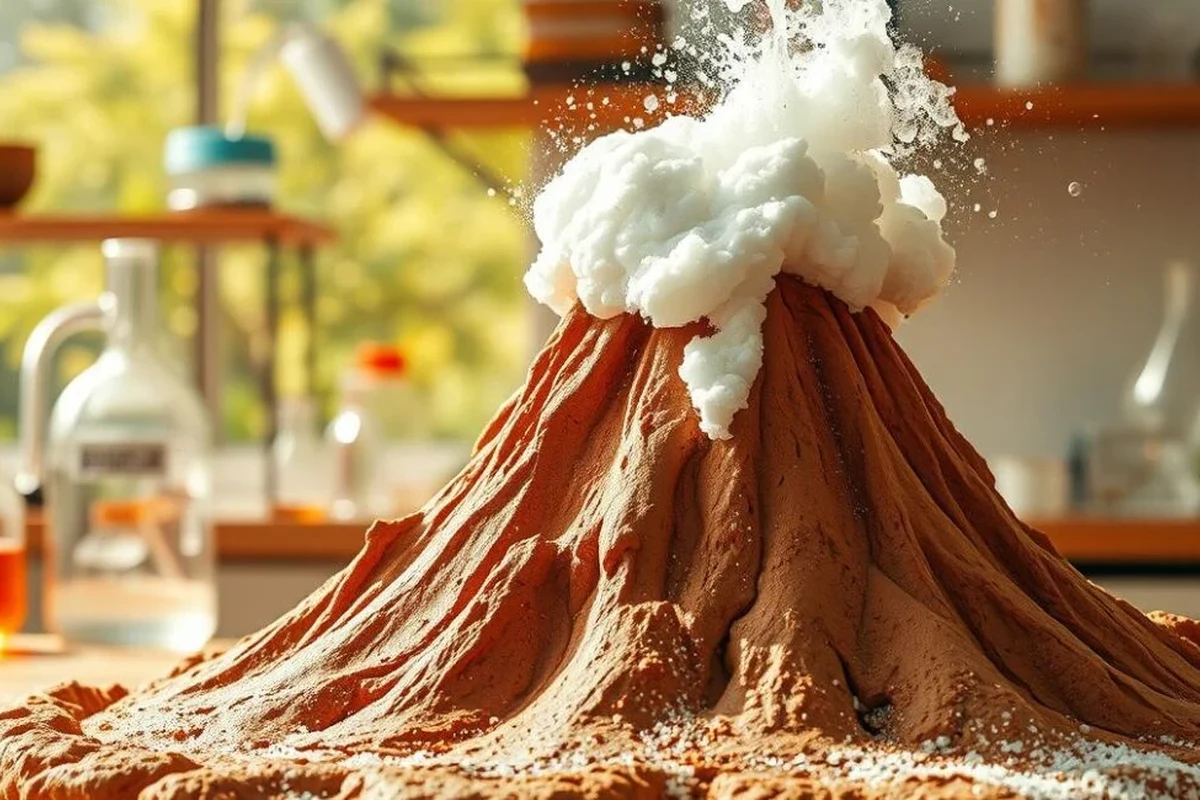
The classic volcano is less about lava and more about chemistry you can see. When vinegar meets baking soda, the acid in the vinegar reacts with the sodium bicarbonate and releases carbon dioxide gas, which pushes liquid and foam upward. If you want a plain-language breakdown of the chemistry, our baking soda and vinegar reaction explained simply article is a helpful companion.
The science behind the eruption: acid-base reaction, carbon dioxide, and foam
Vinegar is a dilute acid, and baking soda is a base. Their reaction produces carbon dioxide, water, and a salt called sodium acetate. The “eruption” happens because the gas forms quickly and gets trapped in liquid, soap, or both, creating a rising foam that spills over the container.
The volcano effect is usually stronger when dish soap is added, because soap helps trap gas bubbles and makes the foam look larger and last longer.
Why this experiment remains popular for baking soda learning activities
This experiment stays popular because it is visual, quick, and forgiving. A small measurement mistake usually changes the size of the eruption instead of ruining the whole activity. It also connects well to other baking soda lessons, like how leavening works in baked goods or why baking soda must be used with the right acid.
What learners should observe versus what they should not expect
Learners should watch for bubbling, foaming, and a clear change in volume. They should not expect a dangerous blast, smoke, or anything like real volcanic lava. The reaction is dramatic enough to teach, but it is still a mild kitchen science activity, not an explosive one.
Materials, Ratios, and Setup for a Reliable Vinegar and Baking Soda Volcano
Good results come from a simple setup and reasonable ratios, not from using huge amounts of ingredients. The exact size of the eruption depends on vinegar strength, container shape, and whether you add soap. If you are comparing this with other baking soda uses, such as using baking soda instead of baking powder safely, the key idea is the same: ingredient balance matters.
Choosing the right vinegar strength, baking soda amount, and container size
Standard household vinegar is usually enough for a classroom volcano. A small to medium container often works better than a very large one because the foam has less distance to travel before it spills over visibly. Too much baking soda can leave a paste at the bottom, while too little can make the reaction look weak.
Optional add-ins for color, texture, and visual effect
Food coloring makes the foam easier to see, especially in a group setting. Dish soap creates a thicker, longer-lasting eruption. Sand, clay, paper pulp, or a molded base can make the project look more like a volcano, but they are decorative rather than chemically necessary.
For the cleanest visual effect, add the coloring to the vinegar before the baking soda goes in. That helps the color spread through the foam more evenly.
Safe workspace setup for home, classroom, and group demonstrations
Set the volcano in a tray, rimmed pan, or washable surface so the foam stays contained. Keep towels nearby and avoid placing the setup near electronics, open flames, or anything that can be damaged by moisture. In a classroom, it helps to give each group a defined work area before starting.
Keep the experiment away from faces and eyes, especially when children are pouring ingredients. Even though the reaction is mild, splashes can still sting and can make cleanup harder.
Step-by-Step Volcano Method That Produces a Stronger Eruption
A stronger eruption usually comes from better structure, not just more ingredients. A narrow opening can help force foam upward, while a stable base keeps the volcano from tipping during the reaction.
Building the volcano base with common household or classroom materials
Use a small bottle, cup, or jar as the inner chamber. Then build a volcano shape around it with clay, papier-mâché, cardboard, or even a simple mound of modeling material. The outer shell should be stable, but it should not block the opening or make it hard to pour ingredients in.
Measuring and combining ingredients in the correct order
Place the bottle or cup on a tray and make sure it will not wobble. Add the volcano shell around it if you are using one.
Put a small amount of baking soda into the container. If the opening is narrow, a funnel or folded paper can help.
Mix vinegar with a little dish soap and food coloring in a separate cup if you want a fuller foam effect.
Pour the liquid into the container in one steady motion and step back. The eruption should begin almost immediately.
How to repeat the experiment for multiple eruptions or side-by-side comparisons
If you want several eruptions, reset the container each time and measure fresh ingredients. For side-by-side comparisons, keep the container size, liquid amount, and soap amount the same, then change only one variable at a time. That makes the results easier to interpret, especially for older students.
For a more controlled classroom demo, pre-measure all ingredients into separate cups. That reduces spills and makes it easier to compare one volcano to another.
How to Make the Eruption Bigger, Slower, or More Controlled
There is no single best ratio for every setup. The best choice depends on whether you want a short burst, a tall foam column, or a slower reaction that students can watch closely.
Adjusting ingredient ratios for different foam heights
More vinegar generally means more reaction time, while more baking soda can create a faster initial burst if enough acid is present. If the goal is a tall foam cap, a little dish soap often helps more than simply adding extra baking soda. If the mixture looks thick and pasty instead of foamy, the ratio is probably too heavy on the dry side.
- Change one ingredient at a time when testing different eruptions.
- Use the same cup or bottle for comparisons.
- Keep the setup on a tray for easier cleanup.
- Dumping in large amounts of both ingredients at once.
- Using a very wide bowl if you want a dramatic overflow.
- Overpacking the base so the foam cannot rise cleanly.
Using warm versus room-temperature liquids for visible effects
Warmer liquids can make the reaction seem a little faster because warmer water and vinegar help molecules move more quickly. Room-temperature ingredients are usually easier to handle and are fine for most classroom use. If you warm anything, keep it only slightly warm and never hot.
Practical examples for preschool, elementary, and older student demonstrations
For preschoolers, use a very small setup with close adult supervision and focus on watching bubbles and foam. For elementary students, add a prediction step and ask them to describe what changed after the ingredients mixed. For older students, compare different vinegar strengths, container shapes, or soap levels and record the results in simple notes.
Common Mistakes That Weaken the Volcano Reaction
Most weak eruptions come from small setup problems, not from the science itself. The reaction is dependable, but it needs the ingredients to meet in the right proportions and in a container that allows foam to rise.
Using too little vinegar, too much baking soda, or the wrong container
Too little vinegar means the baking soda cannot fully react, so the foam may stop early. Too much baking soda can leave residue at the bottom and make the mixture look muddy instead of lively. A container that is too wide can spread the foam out rather than sending it upward.
The eruption looks flat, short, or weak.
Use a narrower container, add more vinegar in the next trial, and reduce the baking soda if the mix is turning pasty before foaming well.
Why packed baking soda, weak vinegar, or poor timing can reduce the eruption
Packed baking soda can clump and react unevenly, especially if it is damp. Weak vinegar lowers the amount of acid available, which can reduce the amount of carbon dioxide produced. Timing matters too: if the ingredients sit too long before mixing, the reaction starts before the “eruption” moment and loses impact.
Cleanup problems caused by overfilling, unstable bases, or indoor spills
Overfilling is the most common reason for messy results. If the container tips or the shell is unstable, the foam can spill sideways and reach more surfaces than expected. Use a tray with a raised edge when possible, especially indoors or on carpeted floors.
Safety, Supervision, and Cleanup for Home and School Use
This is a mild science activity, but it still deserves normal kitchen and classroom safety habits. The biggest risks are spills, eye contact, slips, and broken structures that can topple during the reaction.
Protecting surfaces, clothing, and eyes during the experiment
Cover the work area with a tray, newspaper, parchment, or another washable barrier. Keep sleeves rolled up if needed, and avoid leaning directly over the volcano. Safety glasses are a smart choice in group demonstrations, especially when students are pouring from a height.
Do not let young children handle the setup alone. Use close adult supervision, and follow school or household rules for any protective gear or cleanup chemicals used afterward.
Child-safe handling tips for classrooms and family science activities
Pre-portion ingredients for younger children so they can focus on observing rather than measuring. Assign one person to pour, one to watch, and one to record results if the group is large. Clear roles help prevent crowding around the container at the moment of eruption.
Simple cleanup and disposal after the reaction ends
Once the reaction is over, the leftover mixture is usually mostly water, diluted vinegar, and dissolved salts. Wipe or rinse surfaces with plenty of water, then dry the area so it does not stay slippery. If you need more background on how baking soda is used around the home, our baking soda vinegar cleaning ovens guide explains a related cleaning use, though that is a different purpose from the volcano experiment.
Teaching Moments, Variations, and Real-World Connections for Baking Soda Science
The best part of this activity is that it opens the door to broader chemistry ideas. It can lead naturally into lessons about gas, pressure, measurement, and why some reactions are fast while others are slow.
Linking the volcano to gas formation, pressure, and everyday chemistry
The carbon dioxide in the volcano is the same kind of gas that helps fizzy drinks bubble and helps some baked goods rise. In baking, the gas must be controlled so it expands inside batter or dough instead of escaping right away. That is one reason baking soda behaves differently depending on the recipe and the acid present.
Easy variations with dish soap, food coloring, or different acids
Dish soap makes the eruption look larger because it traps bubbles. Food coloring improves visibility. You can also compare vinegar with other mild acids, but any substitution should be handled carefully and only with age-appropriate supervision. If you are exploring related ingredient choices, our apple cider vinegar and baking soda benefits and uses article covers another common vinegar variation.
Best when you want a dramatic visual without extra decorative materials.
Best when students are learning how one variable changes the result.
Best when the project also needs a presentation-ready look.
How educators can use the experiment to compare predictions, observations, and results
Ask students to predict which setup will foam highest, then have them describe what they actually saw and why they think it happened. The value is not just in the eruption itself, but in the comparison between expectation and evidence. That makes the activity useful for science process skills, not only for entertainment.
- Low-cost and easy to source
- Fast visual reaction for demonstrations
- Useful for teaching measurement and observation
- Can get messy without a tray
- Not suitable as a “big explosion” style activity
- Results vary with container shape and ingredient strength
Final Verdict: When a Vinegar and Baking Soda Volcano Is Worth Doing
This experiment is worth doing when you want a safe, inexpensive, and visually clear science activity that works well in a kitchen or classroom. It is especially useful when the goal is to teach reaction basics, observation, and simple variable testing rather than to create a perfect model volcano.
Best use cases for fun, low-cost science learning in 2026
It works best for family science nights, elementary lessons, homeschool demonstrations, and short STEM stations. It is also a strong choice when you need an activity that uses common ingredients and does not require specialized equipment.
Who will benefit most from this experiment and who may want a different activity
Beginners, younger students, and visual learners usually benefit most. Older students may still enjoy it, but they may want a more advanced chemistry activity if they already understand acid-base reactions and gas release. If you want a simple, repeatable demo with clear cause and effect, this is a good fit.
Recap of the most effective setup choices for a memorable eruption
Use a narrow container, a tray underneath, standard vinegar, a measured amount of baking soda, and a little dish soap for better foam. Keep the ingredients prepped, pour in one steady motion, and supervise closely. For a memorable result, the best approach is usually controlled measurement, not oversized quantities.
The vinegar and baking soda volcano is still one of the easiest ways to teach basic chemistry with a strong visual payoff. With the right container, sensible ratios, and good cleanup habits, it remains a practical and worthwhile experiment for 2026.
Frequently Asked Questions
There is no single perfect ratio because container size and vinegar strength change the result. Start small, then adjust one ingredient at a time until you get the foam height you want.
Yes, apple cider vinegar can work because it is still acidic. The eruption may look a little different depending on the vinegar’s strength and color.
Common causes include too little vinegar, too much baking soda, a wide container, or weak vinegar. Packed or damp baking soda can also reduce the reaction.
No, but dish soap helps make the foam thicker and more visible. Without it, you will still get bubbling, but the eruption may look smaller.
Wipe up the foam, then rinse the area with plenty of water and dry it well. A tray or washable surface makes cleanup much easier.
It is generally a mild activity when supervised, but it can still cause splashes and messy spills. Keep it away from eyes, use adult supervision, and follow normal classroom or home safety rules.