
Baked Chicken Wings with Baking Soda for Crispy Skin
Baking soda can help baked chicken wings get crispier by raising the skin’s surface pH and speeding browning. Use a light amount, dry the wings well, and bake them hot on a rack for the best result.
Baking soda can help baked chicken wings turn out crisper, especially when you want oven-baked skin with less effort than deep frying. Used in the right amount, it changes the surface chemistry of the skin so it browns faster and dries more efficiently.
- Use a light hand: Too much baking soda can leave an alkaline or soapy taste.
- Dry first: Patting wings dry is essential for crisp skin.
- Airflow matters: A wire rack and spaced-out wings help prevent steaming.
- Check temperature: Chicken wings should reach 165°F in the thickest part.
Why Baking Soda Makes Baked Chicken Wings Crispier
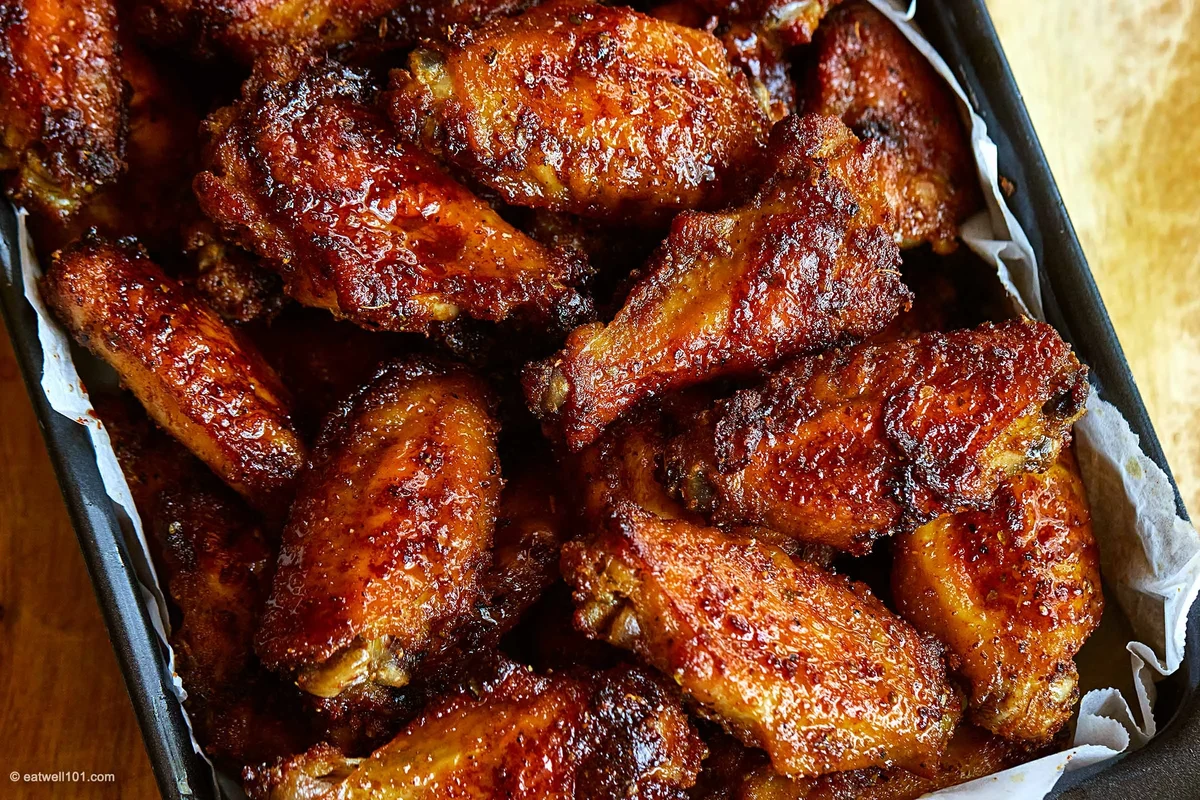
Baking soda works because it is alkaline. When it touches the chicken skin, it raises the surface pH slightly, which helps proteins break down and encourages faster browning in the oven. That matters because crisp skin depends on moisture leaving the surface before the meat overcooks underneath.
The science behind pH, moisture loss, and faster browning
Chicken skin turns crisp when the outer layer dries, the fat under the skin renders, and the surface browns. A higher pH can speed up Maillard browning, which is the reaction that creates deep color and roasted flavor. In practical terms, baking soda can make the skin look golden sooner, which helps it feel drier and crunchier.
The effect is strongest when the wings are already patted dry and baked on a setup that allows hot air to move around them. If the skin starts wet, baking soda cannot fully fix that. Moisture still has to evaporate before crispness can develop.
Why baking soda is different from baking powder or flour coatings
Baking soda is not the same as baking powder. Baking powder contains acid and starch, so it is designed to create lift in batters and baked goods, not to raise the pH of chicken skin in a simple dry coating. If you want to understand the difference more deeply, see our guide on baking soda and baking powder.
Flour coatings work differently too. Flour can create a crust, but it also adds a layer that may stay pasty if the wings are crowded or underbaked. Baking soda does not form a breading; it mainly changes the surface so the skin dries and browns more effectively.
Many crisp-wing methods rely on the same basic idea: remove surface moisture first, then use hot, moving air to render fat and brown the skin.
How Much Baking Soda to Use and How It Works in Real-World Wing Prep
The right amount is important. Too little may do almost nothing, while too much can leave a bitter or soapy taste. For most home cooks, a light dusting or a small measured amount mixed with salt is enough.
Recommended measurement ranges for small and large batches
For a small batch of wings, many cooks use about 1/2 teaspoon of baking soda per pound of chicken. For a larger batch, keep the ratio modest and scale carefully rather than adding it by eye. The goal is a thin coating, not a visible layer of powder.
If you are making a seasoning mix, keep the baking soda low and let salt and spices carry most of the flavor. Because wing sizes vary, a very large batch may need a little more total seasoning, but not a much higher baking soda ratio.
How to avoid an alkaline taste or soapy finish
The most common reason for off-flavor is using too much baking soda. Another cause is leaving clumps on the skin, which can bake into harsh spots. Mix it thoroughly with salt and seasonings so it disappears into the surface rather than sitting in patches.
It also helps to avoid wet marinades when you are using this method. A wet coating can spread the baking soda unevenly and make the skin harder to dry. If you want a more classic dry-brine approach, compare it with other crisping methods before choosing one for your kitchen.
When baking soda is helpful versus when it is unnecessary
Baking soda is most useful when you are baking wings only in the oven and want extra crispness without frying. It can also help when the chicken skin is naturally a little damp or when you are cooking a bigger batch for guests. If you already have excellent airflow, very dry skin, and enough time to rest the wings uncovered, the method may be optional rather than essential.
For readers comparing oven methods, our guide on whether air fryers need to preheat explains why hot airflow matters so much for crisp results. The same principle applies in the oven: movement of hot air helps moisture escape.
Step-by-Step Wing Prep for Crisp Skin Without Deep Frying
The prep stage matters as much as the oven. If the wings go into the oven wet, crowded, or unevenly coated, the skin is much more likely to steam than crisp. A few simple steps can make the difference between rubbery and crisp.
Drying, trimming, and separating flats and drumettes
Start by patting the wings very dry with paper towels. If there is excess moisture on the skin, remove it before seasoning. Trim any loose skin or extra fat if needed, and separate the flats from the drumettes if that is how you prefer to serve them.
Drying is not a decorative step. It is one of the main reasons the skin can brown instead of steaming. If you are working with a very moist package of wings, let them air-dry in the refrigerator for a short time before seasoning.
Coating methods: direct toss, dry rub, and baking soda with salt
The simplest method is a direct toss with a small amount of baking soda, salt, and dry seasonings. Another option is a dry rub with spices added after the baking soda is evenly distributed. For most home kitchens, a light salt-and-baking-soda mix is the most reliable because it keeps the coating thin.
Do not use baking soda as the only seasoning. It is a technique ingredient, not a flavor base. Salt helps draw out a little surface moisture and seasons the meat, while spices add the flavor profile you want.
Pat the wings dry on all sides and remove visible moisture from the skin.
Toss with salt, a small amount of baking soda, and any dry spices you want to use.
Let the wings sit uncovered or loosely arranged so the surface can dry further.
Resting time before baking and why airflow matters
A short rest before baking gives the salt time to season the meat and gives the surface a chance to dry. Even 15 to 30 minutes can help, though longer uncovered rest in the refrigerator can improve the skin further. Airflow matters because still air traps moisture around the wings and slows crisping.
Note
If you are using a refrigerator rest, keep the chicken covered loosely or on a rack so it stays cold and safe while the surface dries.
Baking Temperature, Rack Setup, and Pan Choices That Affect Crispness
Oven setup is just as important as seasoning. Wings need enough heat to render fat and enough airflow to keep the skin from sitting in its own steam. The pan and rack you use can change the final texture more than many cooks expect.
Best oven temperature ranges for skin rendering and browning
Most baked wing methods work well in a fairly hot oven, often around 400°F to 450°F, depending on your oven and the size of the wings. A hotter oven helps the skin brown and the fat render, but very hot ovens can overbrown the outside before the inside is done. Because ovens vary, it is wise to know your own oven’s hot spots and calibration.
If your oven runs cool, you may need a little more time. If it runs hot, start checking early so the skin does not darken too fast.
Wire rack, sheet pan, and foil setup comparisons
A wire rack set over a sheet pan is usually the best choice for crisp baked wings because air can circulate underneath them. A bare sheet pan can still work, but the underside may not crisp as evenly. Foil can make cleanup easier, but it does not improve browning by itself.
- Wire rack improves airflow and even crisping
- Sheet pan catches drips and makes handling easier
- Foil can simplify cleanup
- Rack cleaning takes a little more effort
- Covered pans can trap steam if overused
- Foil alone does not create crisp skin
Convection oven adjustments and what to do if your oven runs hot or cool
If you use convection, the moving fan air can improve browning, so you may need to reduce the temperature slightly or shorten the cooking time according to your oven manual. If your oven runs hot, lower the rack position or check the wings earlier. If it runs cool, give the wings a little more time and do not rely on color alone.
Important
Always follow your oven manufacturer’s guidance for convection settings and rack placement. Oven performance varies by model, age, and calibration.
How to Know the Wings Are Done: Color, Texture, and Safe Internal Temperature
Done wings should look deeply golden, feel crisp on the outside, and show rendered fat around the skin. The skin may blister slightly, and the joints should move more easily when the wings are ready. Color helps, but temperature is the safer final check.
Visual cues for crisp skin and rendered fat
Look for skin that is dry to the eye, not shiny with pooled moisture. The edges should be browned, and some spots may be deeper amber or mahogany depending on seasoning. If the skin still looks pale and soft, the wings probably need more time.
Rendered fat is a good sign because it means the skin has had enough heat to tighten and crisp. If the wings are browning unevenly, rotate the pan once during baking if your oven has hot spots.
Safe doneness targets and where to check temperature
For poultry safety, use a food thermometer and follow USDA guidance for safe internal temperature. Insert the thermometer into the thickest part of the wing without touching bone. A safe target for chicken is 165°F, though many cooks find wings feel more tender when they are slightly above that point.
Hot pans, wing fat, and oven steam can burn quickly. Use oven mitts, keep hands clear when checking the rack, and let the pan cool before moving it to the sink.
Why overbaking dries out wings even when the skin looks good
Wings can look crisp before the meat reaches its best texture. If they stay in the oven too long, the skin may still be appealing while the meat becomes dry and stringy. This is why it helps to check both color and internal temperature instead of judging by appearance alone.
Dry the wings, season lightly with baking soda and salt, and let them rest so the surface dries.
Use a hot oven with a rack setup that allows airflow, and check for browning and doneness near the end.
Rest briefly so the surface stays crisp and the juices settle before saucing or serving.
Common Mistakes That Prevent Crispy Baked Wings
Most problems come from too much moisture, too much baking soda, or too little space in the pan. The good news is that each of these issues is easy to avoid once you know what to watch for.
Using too much baking soda or skipping the drying step
Too much baking soda can leave a metallic or soapy taste. Skipping the drying step can leave you with skin that never truly crisps, no matter how long you bake it. If you want a reliable result, keep the coating light and start with dry skin.
The wings taste slightly bitter or have a strange alkaline finish.
Use less baking soda next time, mix it evenly with salt, and avoid clumps on the skin.
Overcrowding the pan and trapping steam
When wings are packed too close together, they steam each other. That trapped moisture softens the skin and slows browning. Use a larger pan or cook in batches if needed so each wing has room around it.
Baking Tip
If you are baking a big batch, choose two pans instead of forcing everything onto one crowded tray. More space usually means better browning.
Adding wet sauces too early and softening the skin
Wet sauces are one of the fastest ways to lose crispness. If you want sauced wings, bake them until fully crisp first, then toss them in sauce just before serving. For extra protection, serve some wings plain and sauce only the portion that will be eaten right away.
If you want to keep the skin from softening, remember that even a great baked wing can lose texture after sitting in sauce. That is normal, and it is why many cooks sauce at the end rather than before baking.
Storage, Reheating, and Food Safety for Leftover Wings
Leftover wings can still be enjoyable if they are cooled and stored properly. The main goals are to keep the chicken out of the danger zone too long, refrigerate it promptly, and reheat it in a way that restores texture without burning the skin.
How long baked wings keep in the refrigerator
For food safety, follow recognized guidance for cooked poultry storage and refrigerate leftovers promptly in shallow containers. In general, cooked chicken is commonly kept for a few days in the refrigerator, but exact timing depends on how quickly it was cooled and how cold your refrigerator runs. When in doubt, use the safest storage habits and discard any chicken that smells off or sat too long at room temperature.
Best reheating methods to restore texture without burning
The oven or air fryer is usually better than the microwave if you want crisp skin again. Reheat on a rack or open tray so air can circulate, and use moderate heat so the outside does not burn before the center warms through. If you are interested in how hot-air cooking affects chicken texture, our article on whether air fryers dry out chicken explains why overcooking is the main risk.
Microwaves are faster, but they soften the skin. If convenience matters more than crispness, that may be acceptable for lunch leftovers.
Safe handling tips for raw chicken, baking surfaces, and leftovers
Wash hands after handling raw chicken, and clean cutting boards, knives, and counters with hot soapy water. Keep raw poultry separate from ready-to-eat foods to avoid cross-contamination. If you want to understand safe oven cleaning and residue removal for greasy pans, our guide to cleaning ovens with baking soda and vinegar may help with post-cook cleanup.
Important
Do not rinse raw chicken in the sink, since splashing can spread bacteria around the kitchen. Safe handling and thorough cooking matter more than any seasoning method.
When the Baking Soda Method Is Worth Using and When to Choose Another Approach
Baking soda is a useful tool, but it is not mandatory for every wing recipe. The best choice depends on your oven, your schedule, and the texture you want.
Best use cases for game day, meal prep, and oven-only cooking
This method is especially helpful for game day snacks, larger batches, and oven-only kitchens where deep frying is not practical. It gives home cooks a straightforward way to improve crispness without special equipment. If you need wings that can be baked in advance and reheated later, the baking soda approach can help the skin start out drier and sturdier.
When dry brining, baking powder, or air frying may be a better fit
Dry brining with salt alone may be a better fit if you want a more subtle, classic chicken flavor and do not want the slight risk of an alkaline note. Baking powder is sometimes used for crisp skin in other recipes, but it behaves differently because of its acid content. Air frying can also be a strong option if you want faster browning and your appliance has enough room for the wings to sit in a single layer.
For cooks comparing methods, it helps to think about the goal. Baking soda is mainly a surface-treatment trick for crisping, while air frying is a cooking system that uses concentrated hot air. If you are curious about how that system performs, our air fryer guides can help you compare options more clearly.
Final practical recommendation for home cooks in 2026
For most home cooks, baked chicken wings with baking soda are worth trying when you want crisp skin from the oven with minimal fuss. Use a light hand, dry the wings well, and bake them hot on a rack so the skin can render instead of steam. That combination gives the method its best chance to work.
In short, the baking soda method is a smart technique, not a magic shortcut. If you keep the coating thin, the pan uncrowded, and the oven hot enough, you can get very good baked wings without deep frying.
- Pat wings dry before seasoning
- Use a small, even amount of baking soda
- Bake on a rack for airflow
- Check for 165°F in the thickest part
- Using too much baking soda
- Overcrowding the pan
- Adding sauce before baking is done
- Judging doneness by color alone
Baking soda can be a useful crisping aid for oven-baked chicken wings when it is used lightly and paired with dry skin, hot heat, and good airflow. For the best result, treat it as one part of the method, not the whole recipe.
Frequently Asked Questions
A light amount is best, often around 1/2 teaspoon per pound of wings as a general home-cooking guideline. Keep the coating thin and even so the skin does not taste alkaline.
Baking powder works differently because it contains acid and starch, so it is not the same technique. It may help with browning in some recipes, but it is not a direct substitute for baking soda.
The most common reasons are wet skin, too much crowding on the pan, or too low an oven temperature. A wire rack and a hot oven usually improve crispness.
A short uncovered rest in the refrigerator can help dry the skin, but it is not required for every batch. Drying the wings well and using good oven airflow are the most important steps.
Use a food thermometer and check the thickest part of the wing. Chicken should reach 165°F for safe eating, following USDA guidance.
The oven or air fryer usually works better than the microwave for restoring texture. Reheat on a rack or open tray so hot air can circulate around the wings.
