
Internal Temperature of Bread: The Clear Guide to Knowing When Your Loaf Is Done

If you want one dependable way to judge bread doneness, learn to read the internal temperature of bread. Crust color, aroma, and the hollow-sounding tap test can all help, but they can also mislead you—especially with enriched doughs, dense rye loaves, or breads that brown faster than they bake through.
The most common doneness range for bread is roughly 190°F to 210°F, but the right target depends on the bread type. Lean yeast breads often finish near the lower end of that range, while richer, denser, or higher-hydration loaves usually need a higher temperature.
The good news is that temperature gives you a practical decision rule: measure the center of the loaf near the end of baking, compare it with the target for that bread style, and use the result alongside the loaf’s appearance. That combination is far more reliable than guessing from color alone.
What Internal Temperature Means for Bread Doneness
The internal temperature is simply the temperature at the center of the loaf when it has finished baking. That center matters because the middle is the last part to set. If the crust looks finished but the center is still too cool, the crumb can stay gummy or collapse as it cools.
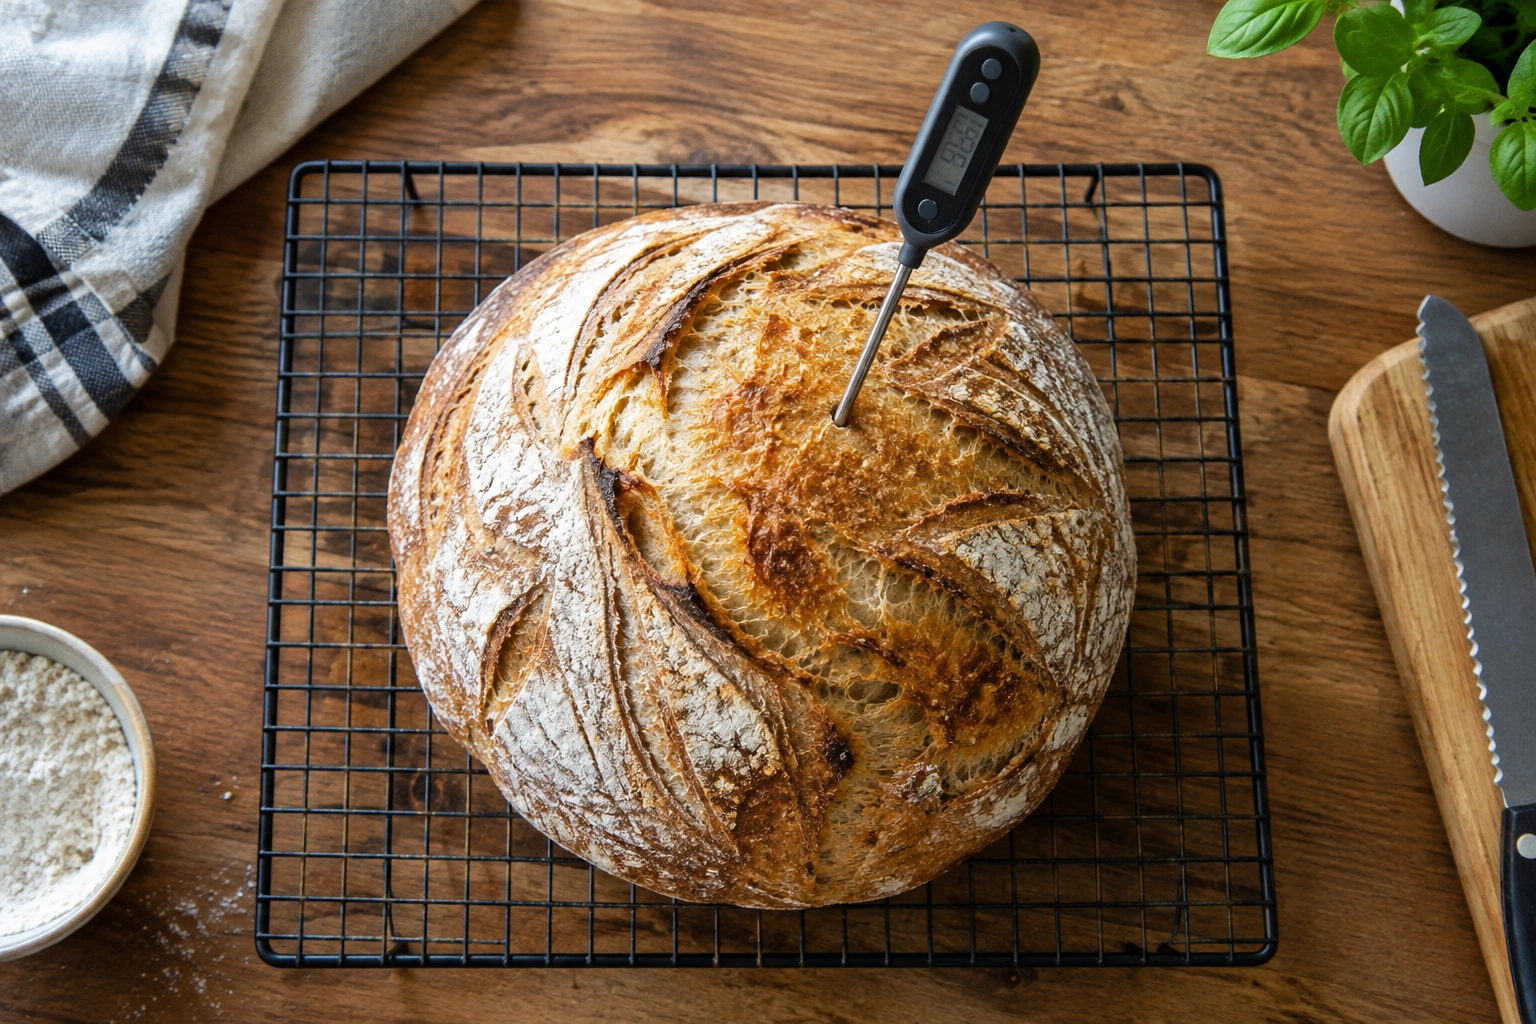
This is why temperature is so useful for bread. It turns “I think it’s done” into a measurable check. Many baking guides treat it as one of the easiest and most reliable ways to know when bread is ready to come out of the oven, and I agree with that approach in practice.
There is one important caveat: bread is not a single category. A lean sandwich loaf, a rich brioche, and a dense rye loaf do not all finish at exactly the same temperature. So the real decision rule is not “all bread is done at one number.” It is “use the right target for the style you’re baking.”
A useful mental model is this:
- If the loaf is under the target, keep baking.
- If it has reached the target, remove it and let residual heat finish the job.
- If the crust is browning too fast before the center is ready, protect the crust and continue baking the interior.
Target Internal Temperature for Different Types of Bread
Here is the practical part most bakers want first: the target temperature changes with the bread.
| Category | Bread type | Typical target internal temperature | Notes |
|---|---|---|---|
| General benchmark | Most lean yeast breads and rolls | about 190°F | A common benchmark for many standard loaves and rolls, according to King Arthur Baking |
| General benchmark | Most breads in general | above 200°F | A useful broad guideline, especially for many artisan-style loaves |
| Style-specific target | Enriched breads | around 194°F | Often finished a little earlier to keep the crumb tender |
| Style-specific target | Soft enriched rolls and loaves | about 198°F | A good target when the goal is softness and fluffiness |
| Style-specific target | Rye bread | 205°F to 210°F | Rye tends toward extra moistness and usually needs a higher finish temperature |
| Style-specific target | Gluten-free yeast bread | 205°F | Helpful for setting structure in breads without gluten |
| Style-specific target | Dense or high-hydration whole wheat breads | closer to 210°F | These often need more time for the crumb to fully set |
A few reputable baking sources line up closely on these ranges. King Arthur Baking notes that many yeast breads and rolls are done around 190°F, while rye bread and gluten-free yeast bread often need 205°F to 210°F. The Perfect Loaf gives a broader range for many breads at 206°F to 208°F, with enriched doughs sometimes fully baked around 194°F. ChainBaker similarly places many breads above 200°F, with enriched breads a little lower and dense rye or higher-hydration whole wheat breads closer to 210°F. See King Arthur Baking’s thermometer guide and The Perfect Loaf’s bread dough guide for the underlying benchmarks.
The trade-off here is simple: a lower target can preserve softness in enriched doughs, while a higher target helps dense or moist breads finish properly. If you bake the same way regardless of dough style, you’ll eventually overbake some loaves and underbake others.
A quick decision framework
Use this rule of thumb:
- Lean sandwich loaf or standard rolls: aim near 190°F to 200°F
- Enriched doughs like brioche or milk bread: often finish a bit lower, around 194°F to 198°F
- Rye, gluten-free yeast bread, and dense whole-grain loaves: look for 205°F to 210°F
If your recipe gives a specific target, follow that first. If it does not, use the style of bread as your guide.
Tools You Need to Check Bread Temperature Accurately
You do not need a complicated setup. You do need a thermometer that gives a fast, believable reading.
Instant-read thermometer
This is the most practical tool for most home bakers. It gives a quick reading when you open the oven and check the loaf near the end of baking. That speed matters because every second the oven door is open lets heat escape.
Best use: quick spot checks on loaves that are nearly done.
Strengths:
– Fast
– Easy to use
– Affordable in many cases
– Great for learning how your oven behaves
Trade-off:
– You only get a snapshot, not a live reading
Digital probe thermometer
A probe thermometer can stay in the loaf while it bakes, which is useful if you want to monitor temperature continuously. That can be especially helpful for larger loaves or if you are baking several breads at once.
Best use: longer bakes, larger loaves, or situations where you want to watch the temperature climb.
Strengths:
– Continuous monitoring
– Less guesswork
– Helpful for training your eye and timing
Trade-off:
– More setup
– The probe wire can be awkward in some ovens or with some loaf shapes
How to trust the reading
A thermometer is only as useful as its accuracy. If your readings seem inconsistent, check the thermometer against a known reference point, such as ice water, and follow the manufacturer’s calibration instructions if it has them. If the tool is off, every doneness decision built on it will be off too.
What else helps
- Oven mitts
- A timer
- A cooling rack
- Your recipe’s recommended finish temperature, if it has one
If you are choosing only one thermometer, I would pick a fast instant-read model first. It is the most flexible tool for everyday bread baking.
When to Start Checking Bread Temperature
Do not start probing too early. If you check repeatedly in the first part of baking, you lose heat and interrupt oven spring.
A better approach is to wait until the loaf is clearly in the final stage of baking. That usually means the crust has set, the loaf has risen well, and the recipe’s estimated bake time is nearing its end. Then begin checking.
A practical rule: start checking when the loaf looks mostly baked, not when it merely looks puffed.
That matters because temperature changes gradually as baking progresses. Bread can seem to move slowly at first, then rise more quickly later as the crumb sets and the interior heats up. In other words, the last part of baking often does the most important work.
If you are baking a pan loaf, you may want to check a little earlier than with a small roll or thin artisan loaf because the shape affects how heat moves through the bread. But even then, resist the urge to open the oven every few minutes.
How to Measure the Internal Temperature of Bread Step by Step
Here is the method I use and teach.
-
Wait until the loaf is close to finished.
The crust should already have color, and the loaf should look set. -
Open the oven briefly and work quickly.
Heat loss is real, so be ready before you open the door. -
Insert the thermometer into the center of the loaf.
KitchenAid recommends going an inch or two into the middle of the bread for the reading. If possible, insert from the side or at a slight angle so the hole is less visible later. For a pan loaf, that often means coming in from the side of the loaf rather than straight down from the top. For a free-form loaf, aim from the side or from the bottom edge if that gives you a clearer path to the center. That advice is especially useful for irregular artisan loaves. You can read more in KitchenAid’s bread doneness guide. -
Avoid the pan, crust, and bottom edge.
Those areas can give a false reading. You want the center of the crumb, not a hot spot near metal or crust. -
Read the temperature quickly.
A fast thermometer reduces the time the oven is open and gives you a more accurate snapshot. -
Compare the reading with the target for that bread type.
If it is below target, return the loaf to the oven and check again later. -
Let the loaf cool on a rack after baking.
Cooling finishes the setting process and prevents a damp bottom crust.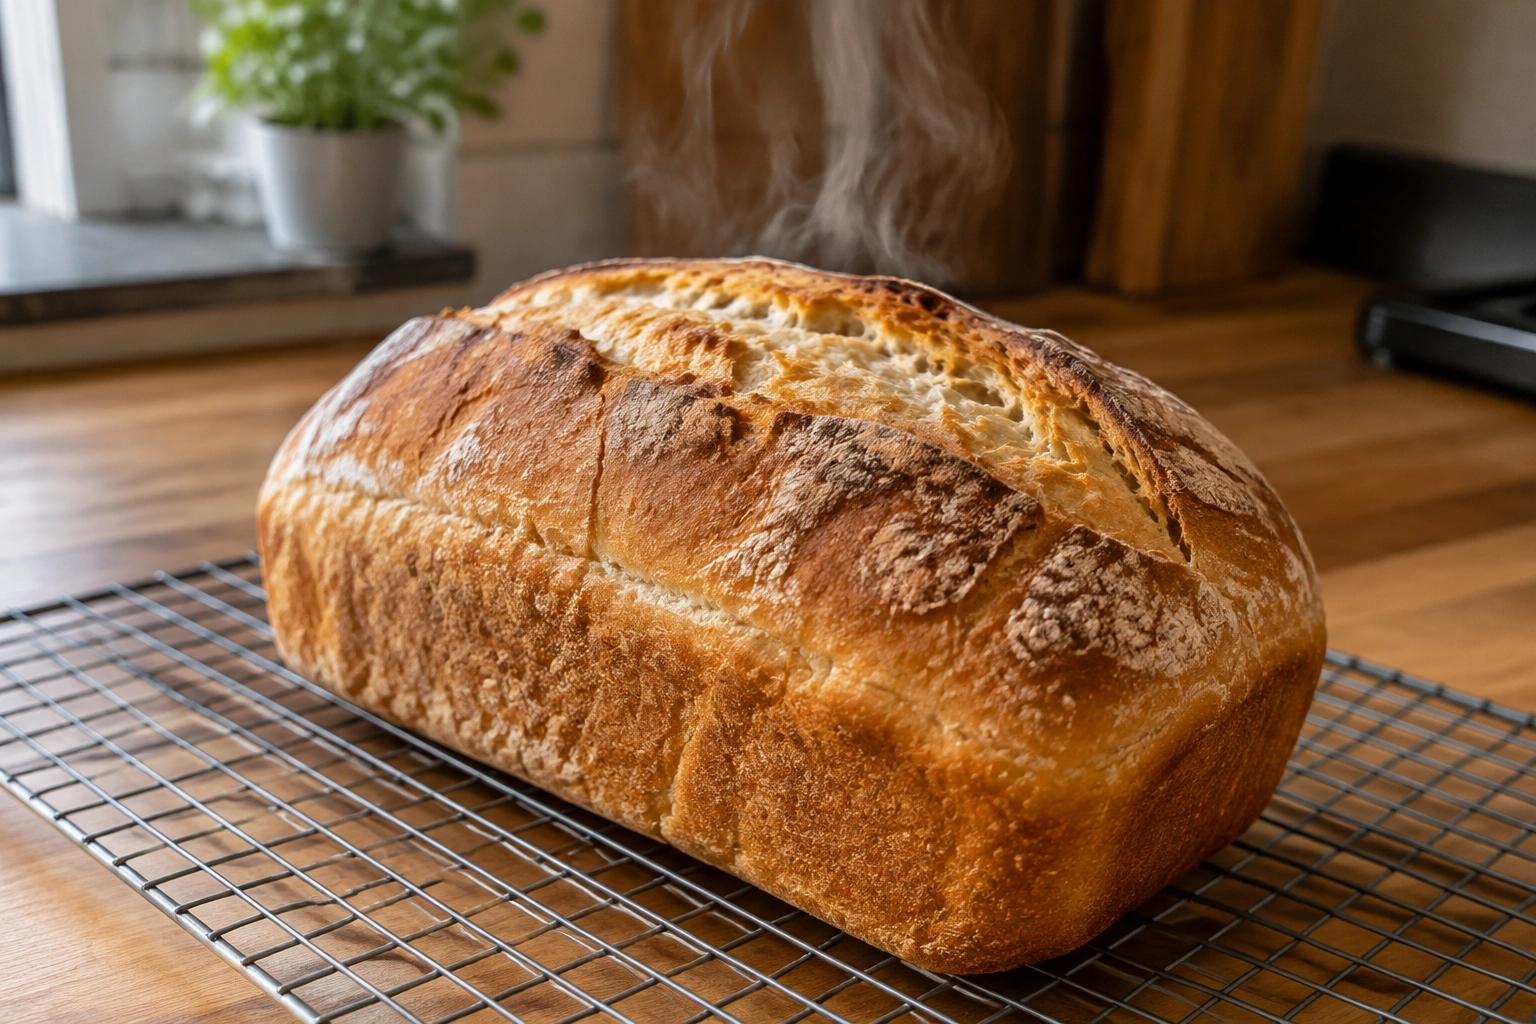
Cooling on a rack lets the crumb finish setting.
One detail worth remembering: the center of the loaf is the key measurement point. If you measure too close to the edge, you may think the bread is done when the middle still needs more time.
How to Tell If Bread Is Done Without Relying on Color Alone
Color helps, but it is not enough.
A loaf can look deeply browned and still be underbaked inside, especially if the oven runs hot or the bread has sugar, milk, or eggs that brown quickly. That is why the tap test and color should be treated as supporting clues, not the final verdict.
Visual clues that help
- The crust is fully set and no longer looks wet
- The loaf has good volume
- The sides may pull slightly from the pan in some pan loaves
Why the tap test can mislead
The familiar “hollow sound” is not useless, but it is less precise than temperature. It works best after you have baked many loaves and already know how a properly baked loaf sounds in your own oven. For newer bakers, it is easy to mistake “sounds hollow” for “is fully baked.”
Why temperature wins
Temperature gives you a number tied to the center of the loaf, which is where underbaking usually hides. That is why temperature is the stronger test when you need confidence.
The best practice is to use both: temperature first, appearance second. If the loaf is at target and the crust looks right, you are probably in good shape. If the crust looks right but the center is still low, trust the thermometer.
How Loaf Size and Shape Affect Doneness
Loaf shape changes the baking story more than many home bakers expect.
Pan loaves
Pan loaves often bake more evenly than very large free-form loaves, but they can also brown on top before the center is finished. If the top is getting dark too quickly, tent it loosely with foil and keep baking until the center reaches the correct temperature.
Free-form artisan loaves
These often develop thicker crusts and can give a convincing hollow sound before the crumb is truly set. That is one reason artisan bakers lean heavily on temperature checks.
Small loaves and rolls
Small breads finish faster because heat reaches the center more quickly. If you use the same bake time as a larger loaf, you may overbake them before you notice.
Larger loaves
Larger loaves need more patience. They may look ready on the outside while the center is still climbing toward target temperature. In those cases, temperature is especially valuable because the crust can fool you.
The decision rule here is straightforward: the larger or denser the loaf, the more you should trust temperature over appearance alone.
Common Mistakes When Checking Bread Doneness
These are the errors that cause the most frustration.
Probing the wrong spot
If the thermometer touches the pan, crust, or a hot edge, the reading can be falsely high. Always aim for the center of the crumb.
Checking too early and too often
Every oven opening steals heat. Check near the end, not throughout the bake.
Using a slow thermometer
A sluggish thermometer can tempt you to leave the oven open too long while waiting for a reading. A fast-reading tool is worth it.
Pulling the loaf because it looks brown
Browning is not the same as doneness. Enriched breads are especially prone to this problem.
Slicing too soon
Even when the loaf is baked through, the crumb continues to set as it cools. Cutting too early can make the inside seem gummy even if the bake was nearly correct.
Troubleshooting a Gummy Center, Overbrowned Crust, or Underbaked Loaf
If the bread looks finished but the crumb is still wet, here is how I would diagnose it.
Gummy center
Possible causes:
– The loaf was removed before reaching target temperature
– The bread was sliced too soon
– The dough was very high in hydration and needed more bake time
– The loaf was underproofed, so the crumb structure never fully settled
What to do next time:
– Check temperature at the center, not the crust
– Let the loaf cool fully before slicing
– Give dense or wet doughs a little more time in the oven
If the loaf reaches the target temperature but still seems gummy after cooling, the issue may be formula or structure rather than doneness alone. In that case, review hydration, proofing, and whether the bread needed a longer cooling period before judging the crumb.
Overbrowned crust, underdone interior
This is common with enriched breads or loaves with sugar. The outside can color early while the middle lags behind.
What to do:
– Tent the loaf loosely with foil once the crust is the color you want
– Keep baking until the center reaches the proper target
Bread that seems done but still feels heavy
That can happen when the loaf is not fully baked or when it has not cooled long enough for the crumb to set. Temperature tells you whether the bake is finished; cooling tells you whether the crumb has finished stabilizing.
Carryover Cooking and When to Remove Bread from the Oven
Once you remove bread from the oven, the internal temperature can still rise a little from residual heat. That is carryover cooking.
This matters because you do not always need to wait until the loaf is at the exact top of the range before removing it. If the bread is already at its target and the crust is where you want it, it is usually time to take it out and let it finish on the rack.
For many bakers, the practical rule is this: remove the loaf when the center has reached the correct target for that bread style and the crust looks properly set. Waiting too long can dry out the crumb and darken the crust more than you intended.
Wordloaf notes that the interior of a loaf cannot exceed 212°F, since that is the boiling point of water, and in practice it does not go beyond about 210°F. That is a useful reminder that bread has a natural temperature ceiling during baking, which is one reason the final few degrees matter so much.
Practical Examples of Checking Bread by Temperature
A standard sandwich loaf
You bake a pan loaf that is golden on top but still feels soft in the middle. The recipe does not give a target temperature. In that case, check the center near the end of baking and look for something around the standard lean-bread range, often near 190°F. If it is below that, keep baking in short intervals.
A brioche loaf
Brioche browns quickly because of the butter, eggs, and sugar. The crust may look finished before the crumb is set. Here, temperature is your best friend. An enriched loaf may be done around 194°F to 198°F, depending on the recipe and desired texture.
A rustic artisan loaf
A free-form loaf may sound hollow before it is truly baked through. If the crust looks right but the crumb still seems dense, check the center. Many artisan loaves finish above 200°F, and some bakers aim in the 206°F to 208°F range.
A rye loaf
Rye holds moisture differently and often needs a higher finish temperature. If you pull it too early, the crumb can stay tacky. A target around 205°F to 210°F is a more realistic finishing range.
When to Consult a Master Baker
If you are consistently hitting the right temperature but still getting poor results, the issue may not be doneness alone. A master baker can help you look at the larger picture: dough hydration, proofing, pan size, oven calibration, and how your specific flour behaves.
That is especially useful if:
– your oven browns unevenly
– your loaves are done on the outside but dense inside
– your bread keeps turning out gummy even when the thermometer says it should be ready
Sometimes the temperature reading is correct, but the formula or process needs adjustment.
Final Takeaway
If you remember only one thing, make it this: bread is done when the center reaches the right internal temperature for that specific loaf. Use the thermometer as your primary test, then confirm with color and structure. That approach helps you avoid pulling bread too early or leaving it in too long.