
Slap and Fold for Bread Dough: A Practical Guide to Stronger, Smoother Gluten

If you’ve ever stared at a sticky, shaggy dough and wondered whether it was supposed to feel that way, you’re in good company. The slap and fold method is one of the most useful tools in artisan bread making because it helps turn weak, wet dough into something smoother, stronger, and more elastic.
I’m Ethan Baker, and I think of this technique as a hands-on way to teach dough how to behave. You’re not just mixing ingredients—you’re building structure. That matters especially with high-hydration doughs, which can feel unruly at first but often reward a little patience and the right touch.
The good news: slap and fold is not complicated. The challenge is learning when to use it, how hard to work the dough, and when to stop.
What slap and fold means, and why bakers use it
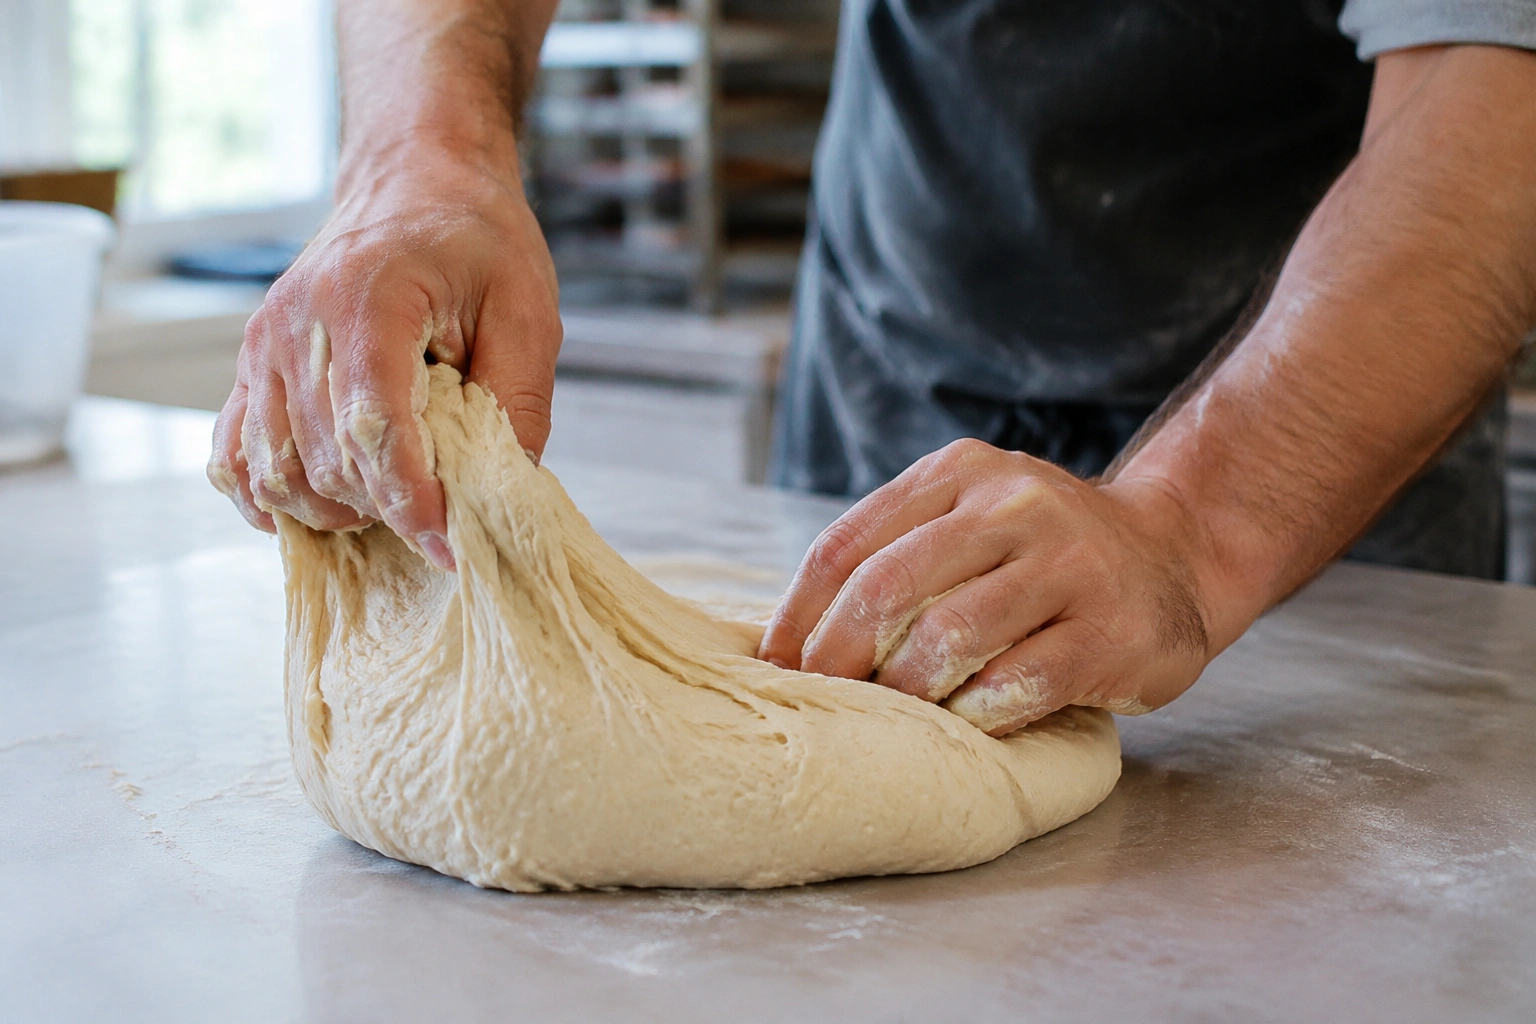
Slap and fold is a dough-handling technique where you lift part of the dough, slap it onto the bench, and fold it back over itself in a repeating rhythm. Bakers also call it the French fold. The goal is to strengthen gluten, which improves dough structure and elasticity and can make the dough less sticky as it develops.
That last part is important. Sticky dough is not always a sign that something is wrong. Sometimes it simply needs more development. Slap and fold helps organize the dough so it can hold gas better later in fermentation and bake into a loaf with better shape and oven spring.
This method is especially useful when the dough is too wet or slack to knead comfortably by hand. It’s a simple way to build gluten strength in doughs that are harder to work with because they have high hydration. Challenger Breadware’s guide to slap and fold
Beginner decision guide: is your dough wet enough for slap and fold?
Use this quick rule:
- Use slap and fold if the dough is sticky, loose, and hard to knead, but still cohesive enough to pick up and fold without immediately flowing like batter.
- Use kneading if the dough is moderate in hydration and can be handled in a more traditional way without smearing badly.
- Use stretch-and-fold or coil folds if the dough is already mixed well enough to rest, then strengthen gently during bulk fermentation.
A practical test: if you can lift the dough and it stretches rather than instantly pouring off your hands, slap and fold is usually a good fit. If it feels firm enough to knead normally, traditional kneading may be easier. If it’s already developed enough to hold together but still needs strength, folds during bulk fermentation are often the better choice.
Why it works so well on wet dough
Wet dough tends to smear and stick instead of behaving like a firm ball. Slap and fold gives it a more forceful stretch-and-align motion than gentle kneading alone. That repeated stretching helps gluten strands line up and gain strength.
The dough becomes more cohesive, less puddly, and easier to handle later.
When to use slap and fold instead of kneading or stretch and fold
Here’s the simplest decision rule I use:
- Choose slap and fold when the dough is wet, sticky, and weak at the beginning of mixing.
- Choose traditional kneading when the dough is moderate in hydration and can be handled without turning into paste.
- Choose stretch and folds or coil folds when the dough already has some strength and you want gentler development during bulk fermentation.
That doesn’t mean one method is always better. It means each one fits a different stage of dough development.
Quick comparison table
| Method | Best for | Timing in dough process | Effort level | Main advantage | Main trade-off |
|---|---|---|---|---|---|
| Slap and fold | High-hydration, sticky dough | Early mixing or early bulk, depending on formula | Medium to high | Builds strength quickly | Messier and more hands-on |
| Traditional kneading | Medium-hydration dough | Early mixing | Medium | Familiar and steady | Harder to use on very wet dough |
| Stretch and fold | Dough with some initial strength | Bulk fermentation | Low to medium | Gentle and easy to repeat | Slower to build strength |
| Coil folds | Wet dough needing gentle reinforcement | Bulk fermentation | Low | Good for preserving air and structure | Less aggressive than slap and fold |
If you’re working with a dough that already feels reasonably cohesive, stretch and fold may be the smarter choice. If it’s still loose and sticky enough that it won’t hold together, slap and fold is often the better first move.
For a deeper look at the gentler side of dough strengthening, you may also want my guide to the stretch and fold method.
What you need before you start
You don’t need special equipment, but you do need a setup that makes the motion efficient and safe.
Have these ready
- A clean, stable bench or countertop
- A bench scraper, which is optional for small, well-behaved doughs but strongly recommended for very wet or sticky dough
- A bowl or container for the mixed dough
- Lightly damp hands or the smallest practical amount of flour
- Enough open space so the dough can be slapped without hitting tools or edges
Bench setup matters more than people think
A slippery or cluttered surface makes the technique frustrating. If the dough is sticking too much, the first instinct is often to add flour. That can work in a pinch, but too much flour changes the dough’s hydration and can interfere with the final texture.
I prefer a lightly dampened bench or lightly damp hands over a heavy dusting of flour. That keeps the dough closer to its intended formula.
How to do slap and fold step by step
The motion is easier to understand once you break it into parts.
1) Lift the dough with both hands
Slide both hands under the dough and lift one end of it off the bench. Keep enough of the dough in contact with the surface that you can control it. Your hands should support the dough, not pinch it.
2) Let the lifted end slap the bench
Bring the lifted portion down so it hits the bench with enough force to stretch the dough, not so much force that it tears. Think of a firm, controlled drop rather than a violent throw. The dough should land and spread slightly, not splatter apart.
3) Fold the far end back over the center
As the dough lands, fold the far end back toward you over the middle. This creates layering, which helps align the gluten network.
4) Rotate and repeat
Turn the dough slightly and repeat the motion. After a few repetitions, you’ll notice the dough starting to hold together better.
5) Work in short rounds
Instead of trying to force the dough into shape all at once, use short rounds and pause if needed. A brief rest can make a huge difference if the dough is very sticky.
If the dough starts tearing, shorten the lift, soften the motion, or stop and rest it for a few minutes before continuing. That rhythm—lift, slap, fold, repeat—is the whole technique.
How long to continue and when to stop
There’s no single magic number of slaps that works for every dough, because flour type, hydration, temperature, and mixing stage all matter. So instead of chasing a fixed time, watch the dough.
For beginners, a useful starting point is a few rounds at a time—often just a minute or two per set—followed by a rest. Then reassess and repeat if needed. Some doughs need only a couple of sets; others benefit from more. The exact amount depends on the formula.
Stop when you see these changes
- The dough looks smoother
- It feels more elastic and less slack
- It releases from the bench more cleanly
- It holds together instead of smearing apart
- It begins to resist in a springy way rather than a sticky one
If the dough starts tearing, fighting back hard, or feeling overly tight, stop and let it rest. That pause gives the gluten time to relax and often makes the next round more effective.
A short burst of slap and fold, followed by a rest, is usually better than one long aggressive session.
What properly developed dough looks and feels like
This is where many bakers get stuck: they know the method, but they’re not sure what “done” looks like.
Visual cues
Properly developed dough usually appears:
- smoother on the surface
- less ragged at the edges
- more cohesive when lifted
- capable of holding its shape for a moment on the bench
Tactile cues
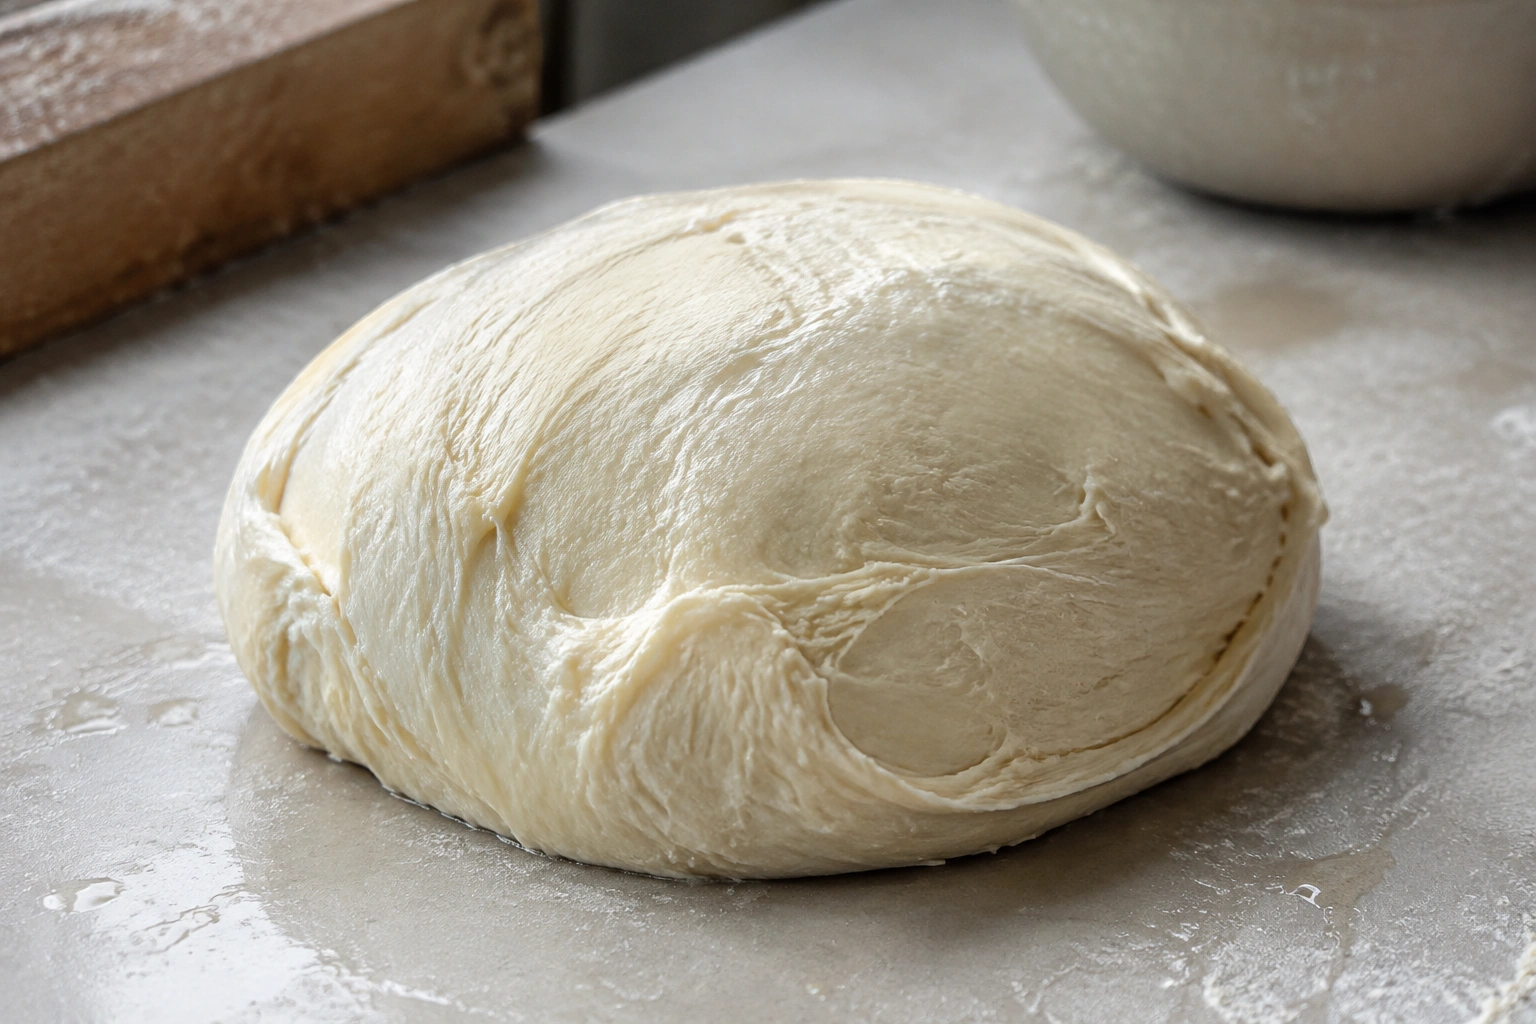
When you touch it, the dough should feel:
- stronger
- more elastic
- less gluey
- easier to gather
A windowpane test can help
A small piece of dough should stretch thin enough to let light through without tearing immediately. That doesn’t mean the dough must be perfectly translucent in every case, but it should stretch more cleanly than when you started.
The windowpane test is useful, but I wouldn’t rely on it alone. A dough can technically pass the test and still feel overworked or too tight. Texture and behavior matter just as much as appearance.
How to handle very sticky or high-hydration dough
High-hydration dough is exactly where slap and fold earns its keep. But it’s also where bakers make the most mistakes.
If the dough is sticking badly
Try these adjustments:
- Wet your hands lightly instead of dusting heavily with flour
- Give the dough a brief rest before the next round
- Use a bench scraper to help gather the dough
- Keep the bench clean so the dough doesn’t smear into dry patches
If the dough tears
That usually means one of two things: the dough is too dry for this method, or it needs a rest. Slapping harder is not the answer. Back off, let the dough relax, then return to it more gently.
If the dough still feels sticky after several rounds
Very wet dough can remain tacky even when it has enough strength to proceed. The question is not, “Is it perfectly dry?” The question is, “Has it become elastic enough to handle the next stage?”
That distinction matters in artisan bread. A well-developed dough can still feel slightly sticky and be perfectly usable.
Common mistakes and how to fix them
Using too much flour on the bench
This is the quickest way to change the dough’s hydration and lose the very qualities you’re trying to preserve. If the dough is sticking, try damp hands or a brief rest before reaching for more flour.
Slapping too hard too early
Aggressive handling can tear weak dough. Early on, the motion should be controlled and deliberate. If the dough is still very loose, keep the movements shorter and gentler.
Stopping too soon
A dough that looks slightly better is not always ready. If it’s still smearing, collapsing, or refusing to hold together, it probably needs a little more work or another rest.
Using slap and fold on the wrong dough
A drier, stiffer dough often does better with regular kneading. Slap and fold shines when the dough is sticky and slack. If you use it on the wrong dough type, the motion can feel awkward without giving you any real benefit.
How slap and fold fits into sourdough and artisan bread workflows
Slap and fold is usually most helpful early in the process—right after mixing, or after a short autolyse/rest if your formula includes one. In other words, some doughs benefit from immediate slap and fold, while others are easier to handle after a brief rest that helps the flour hydrate first.
That makes it a strong fit for:
- sourdough formulas
- lean artisan breads
- baguette-style doughs
- pizza doughs with higher hydration
In most formulas, slap and fold is followed by rest, then stretch-and-folds or coil folds during bulk fermentation. The first stage builds initial strength; the later folds help maintain and refine it without overworking the dough.
That combination gives you the best of both worlds: an energetic start, then gentler maintenance.
Practical examples you can picture
A wet sourdough that feels impossible to knead
You mix a high-hydration sourdough and it looks shaggy and sticky. Instead of adding flour, you use a few short rounds of slap and fold. After a rest, the dough becomes smoother and easier to pick up. Later in bulk fermentation, you switch to folds to preserve the structure you’ve built.
A baguette dough that needs early strength
Baguette dough often benefits from strong gluten development without becoming too tight. Slap and fold gives it an early boost, then gentle folds during bulk fermentation help maintain the structure.
A pizza dough that starts weak
If the dough spreads quickly and feels loose, a few rounds of slap and fold can help it gather itself. You’re looking for a dough that can be stretched later without tearing too easily.
When to consult a master baker
If your dough keeps tearing no matter how gently you handle it, or if it feels too wet, too tight, or strangely resistant even after rest periods, it may be worth getting a second set of experienced eyes on the formula and process. Sometimes the issue is not the technique at all—it’s flour strength, hydration balance, fermentation timing, or dough temperature.
Final thoughts
Slap and fold is one of those techniques that feels dramatic the first time you use it, then becomes wonderfully practical once you understand it. It’s not about brute force. It’s about giving sticky, weak dough the structure it needs to become smooth, elastic, and workable.
If you remember only one thing, make it this: watch the dough, not the clock. When it starts to feel cohesive, springy, and easier to handle, you’re on the right track.
Frequently Asked Questions
Is slap and fold the same as French fold?
Yes. Bakers often use the terms interchangeably.
Can I use slap and fold for sourdough?
Absolutely. It’s especially helpful for high-hydration sourdoughs that need early gluten development.
How do I know when to stop?
Stop when the dough is smoother, more elastic, and less sticky, and when it begins to hold together cleanly on the bench.
Why is my dough still sticky after slap and fold?
Very wet dough can remain tacky even when it’s strengthening. If it’s more elastic and cohesive, that may be exactly where it should be.
Is slap and fold better than stretch and fold?
Not always. Slap and fold is usually stronger and more immediate early on, while stretch and fold is gentler and often better later in bulk fermentation.