
How to Proof Dough in an Air Fryer Without Ruining the Rise

If you’ve ever wished your air fryer could do more than crisp fries and reheat leftovers, proofing dough may be the surprise use case worth trying. Yes, an air fryer can work as a proofing environment for yeast dough — but only if it runs low and steady enough. That’s the real test. Too much heat can speed fermentation in a good way, or push the dough into the danger zone where yeast weakens, the surface dries, or the edges start to cook.
The good news: when the temperature is controlled, proofing in an air fryer can be a practical shortcut for home bakers and culinary students who want a warm, contained spot for dough to rise. A useful target range is about 80–100°F. If your air fryer chamber is climbing above 110°F, it is generally too hot for safe proofing and can start to damage the dough. That range is a useful benchmark even if your appliance doesn’t have a dedicated proof mode.
The key is to treat the air fryer as a warm chamber, not a mini oven. If you can keep the dough protected from direct hot air and avoid temperatures that climb too high, it can be a convenient way to get a steady rise.
Can an Air Fryer Really Proof Dough?
Yes — with a few caveats.
Proofing is simply the final rise of yeast dough before baking. Yeast likes warmth, but not heat. A warm environment helps fermentation move at a useful pace; excessive heat can damage the yeast and make the dough behave strangely. In practical terms, an air fryer can work if it has:
- a proof setting
- a keep-warm setting that stays genuinely low
- a manual temperature control low enough to stay in a safe proofing range
If your air fryer has only a basket light or light-only mode, that is usually not enough by itself to count as proofing. A light may add a little warmth, but it does not reliably create the controlled 80–100°F environment dough needs. Use it only if you have confirmed, with a thermometer, that the chamber stays in range.
The biggest variable is the appliance itself. Air fryers are built to circulate hot air aggressively, so some models can run hotter than the label suggests. That’s why a “warm” label is not automatically proof-safe.
So here’s the decision rule:
- If your air fryer has a proof mode: use it first.
- If it has only keep-warm: test it carefully with a thermometer or a short trial run.
- If it only has standard cooking settings: it may be too hot for proofing unless you can set it very low and monitor closely.
- If it has no proof or warm mode and only cooks hot: skip air fryer proofing and use a countertop, oven-light, or proof box method instead.
For bakers who want a broader foundation in rise behavior, this pairs well with a more general guide to proofing bread dough.
What You Need Before You Start
Before you put dough in the basket or drawer, gather a few simple tools. The setup matters more than people expect, because the wrong container or cover can turn a useful warm space into a dry, uneven one.
Basic setup
- Yeast dough that has been mixed and kneaded properly
- A heat-safe bowl or oven-safe dish that fits comfortably inside
- A cover: plastic wrap, a lid, or a damp towel
- A little oil for the bowl if your dough tends to stick
- An instant-read thermometer if you’re unsure how hot your air fryer runs
Best container choices
A medium bowl with enough room for expansion is usually easier than a very shallow dish. A covered bowl helps trap moisture and reduces surface crusting. That matters because moving air can dry the top of the dough faster than a still countertop environment.
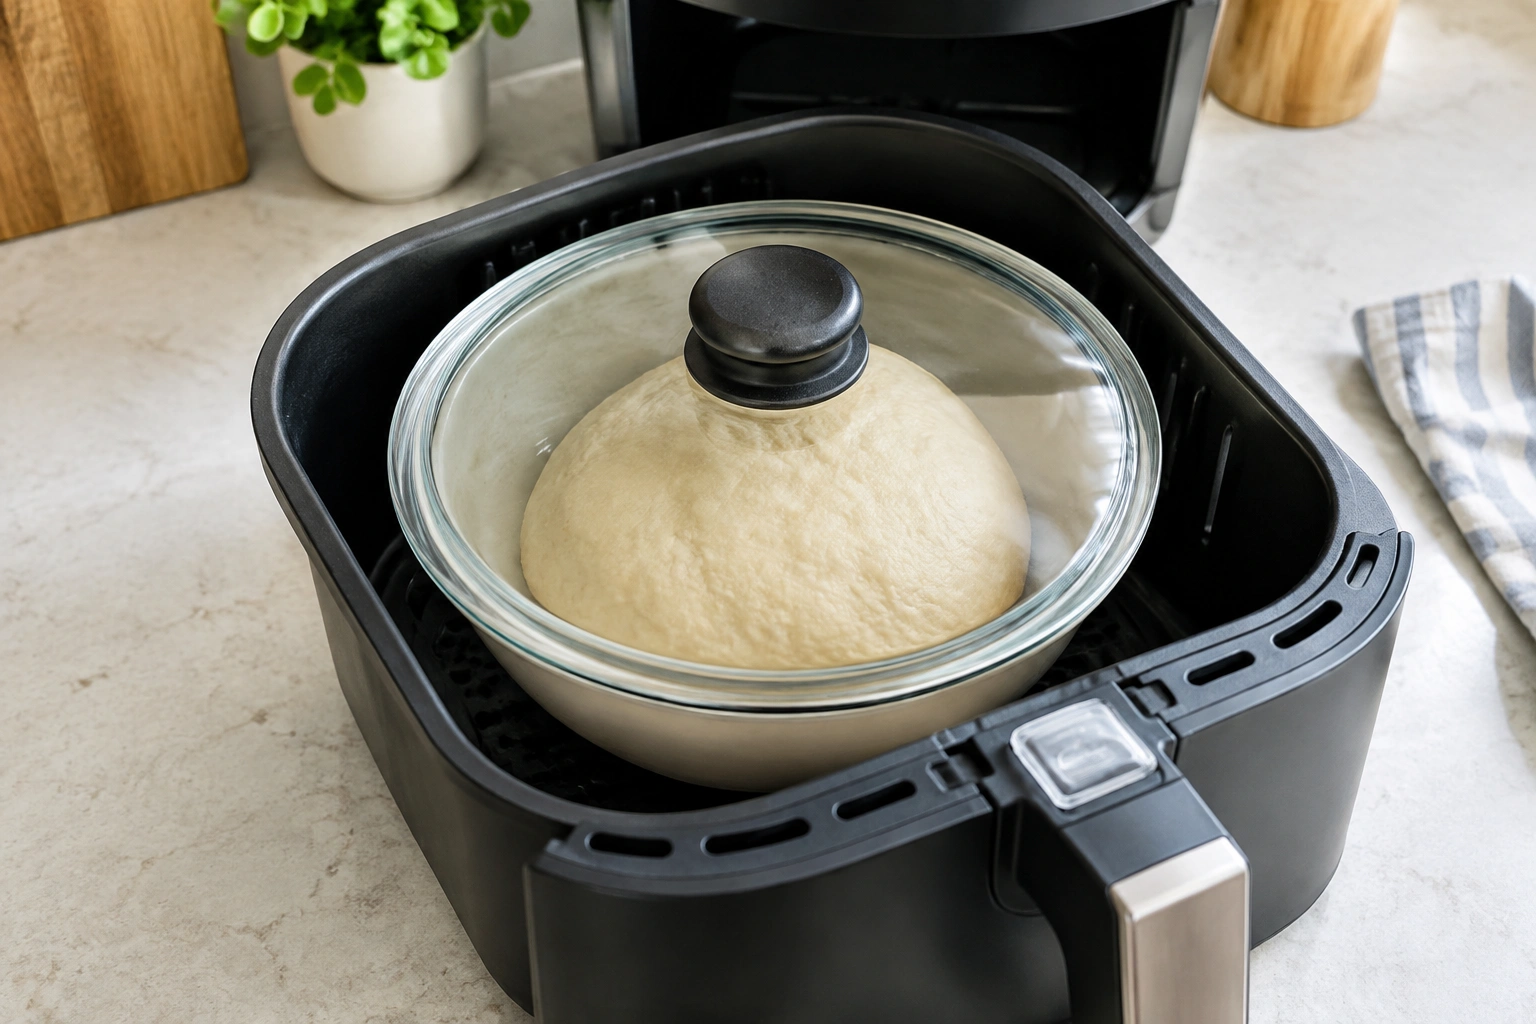
If you’re using a basket-style air fryer, make sure the bowl sits flat and stable. If it rocks, tips, or blocks the drawer from closing properly, it’s the wrong container.
A practical moisture rule
If you can see the dough surface exposed directly to moving air, cover it. WebstaurantStore’s bread proofing guidance recommends covering dough during proofing to prevent drying out, and that advice is especially relevant in an air fryer.
Best Air Fryer Settings for Proofing Dough
This is where most of the judgment comes in. Not every air fryer can hold a gentle proofing temperature, and not every “warm” setting behaves the same way.
| Air fryer setting | Best use | Approximate target | Trade-off |
|---|---|---|---|
| Dedicated proof mode | Most reliable if your appliance has one | 80–100°F | Easiest, but not available on every model |
| Keep-warm setting | Worth trying if it stays truly low | Low enough that dough feels warm, not hot | Can vary a lot by model |
| Low manual setting | Backup option only | As close as possible to proof range | Requires monitoring; some units run too hot |
The most useful target is 80–100°F. If your air fryer chamber stays in that range, you’re in the right zone. If it climbs above 110°F, it is too hot for proofing and can start to overheat the dough.
Warm setting vs. low manual setting
If both are available, I’d favor the proof or warm setting first, because the goal is gentle heat, not active cooking. A low manual setting can work, but only if you know the appliance does not overshoot. Some units cycle hotter than the display suggests, so test before trusting it with a full batch of dough.
Should you preheat?
Usually, no aggressive preheating is needed for proofing. The goal is stability, not heat shock. If your air fryer has a proof mode, follow the manual. If you’re improvising with a warm setting, a long preheat can create a hot spot that is too intense for the dough.
How to Proof Dough in an Air Fryer: Step by Step
Here’s the simplest reliable method.
1. Prepare the dough first
Shape or place the dough in the stage it should be proofed. If it’s a first rise, put the mixed dough into a lightly oiled bowl. If it’s shaped loaves or rolls, arrange them in their final proofing container.
2. Check the actual chamber temperature first
Before placing the dough inside, let the air fryer run on its proof, warm, or lowest setting for a few minutes, then check the chamber temperature with an instant-read thermometer if you have one. You want the space to stay around 80–100°F. If it is above 110°F, it is too hot to use safely for proofing.
3. Choose a container that fits with breathing room
Use a bowl or dish that leaves space around the dough and doesn’t touch the heating elements or fan path. A container that’s too large can block airflow; one that’s too small can crowd the dough.
4. Cover the dough
Use plastic wrap, a lid, or a damp towel. The cover protects the surface from drying out and forming a skin. In a circulating-air appliance, this step is not optional.
5. Set the air fryer to proof mode, warm mode, or the lowest safe setting
If your air fryer has proof mode, use it. If not, choose the gentlest setting available and confirm it doesn’t climb too high.
6. Place the dough inside and close the drawer or door
Keep the setup simple. The less you open and close the appliance, the more stable the temperature stays.
7. Check progress before the clock says it should be done
Dough can move faster or slower depending on the recipe and the actual heat level. Check early, then keep watching in short intervals rather than trusting the timer alone.
8. Remove the dough as soon as it is ready
Do not leave it in “just in case.” Proofing is a stage where overdoing it can flatten structure quickly. Once the dough looks expanded and passes the poke test, move on.
How to Tell When the Dough Is Properly Proofed
Time is only a rough guide. The dough itself has the final say.
Look for these signs
- The dough has increased noticeably in volume
- The surface looks smoother and slightly domed
- It feels airy and elastic, not tight and dense
- It jiggles a little when the bowl is moved
Use the poke test
Press a floured fingertip gently into the dough:
– Springs back immediately: underproofed
– Springs back slowly and leaves a slight indentation: ready
– Collapses or feels fragile: likely overproofed
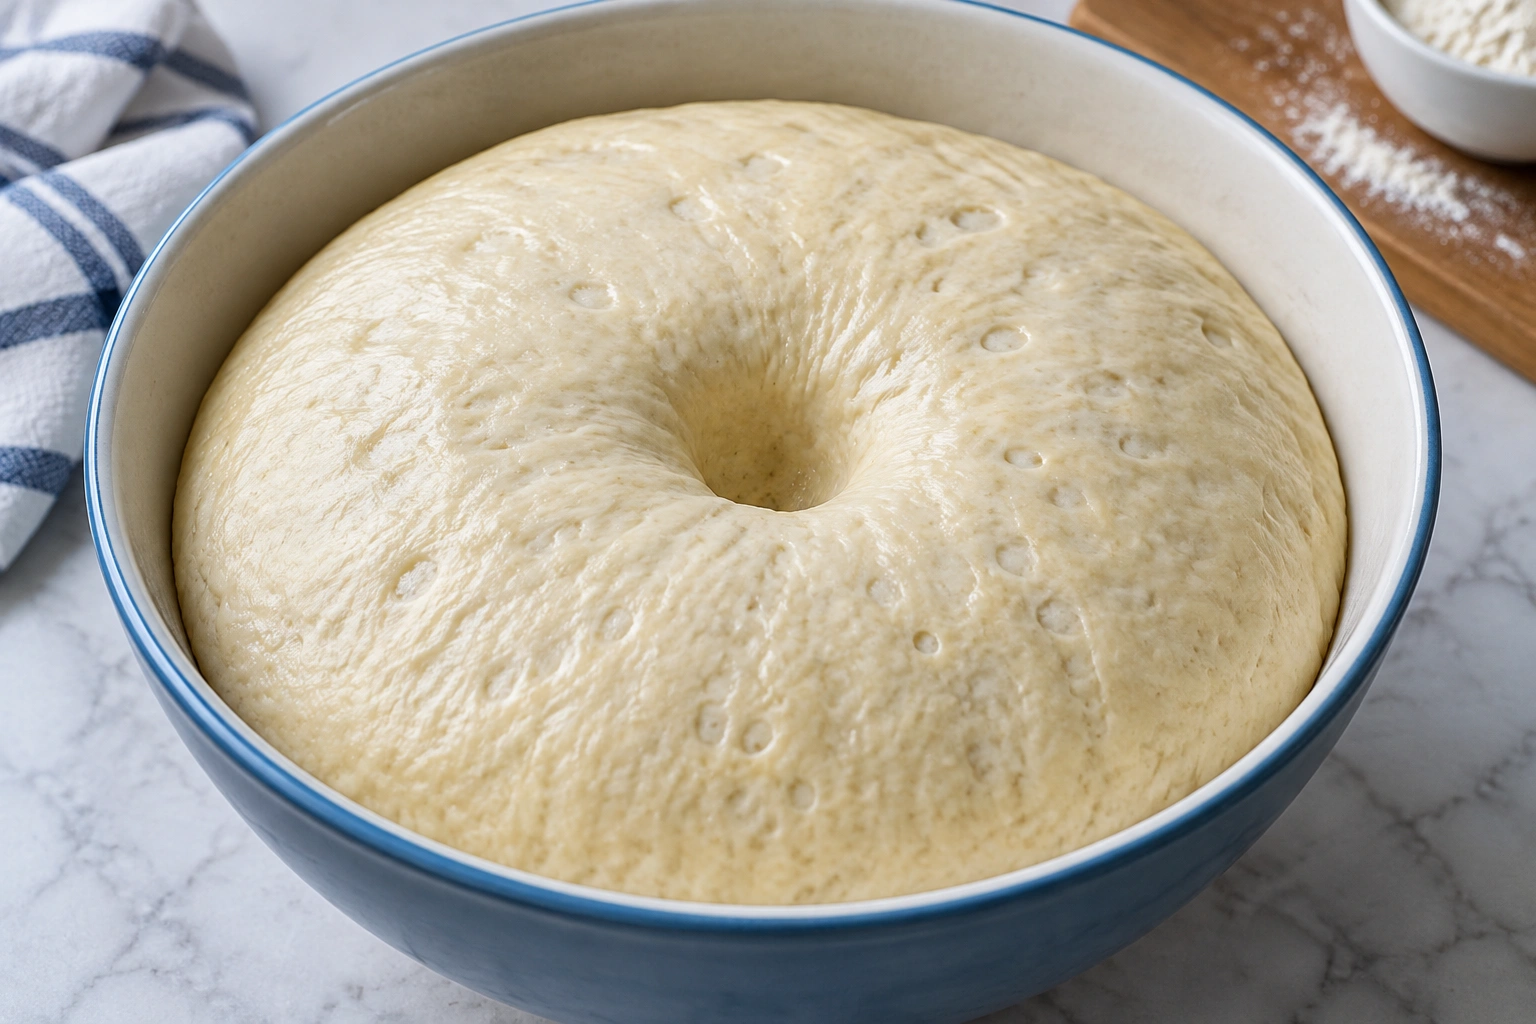
That one test is especially useful in an air fryer because the rise can move faster than expected once the warm environment gets going.
Don’t chase “double in size” blindly
“Double” is a rough benchmark, not a law. Some doughs are ready before that, especially enriched doughs. Others should not be pushed too far because too much expansion weakens structure before baking.
Which Types of Dough Work Best?
Not all doughs behave the same way in a warm appliance.
Lean bread dough
Lean doughs — think basic sandwich loaves or crusty bread doughs with little fat or sugar — usually proof well in a controlled warm environment. They are sturdy enough to handle a little speed, as long as the temperature stays gentle.
Pizza dough
Pizza dough is often a good candidate because it’s relatively forgiving and usually proofed in a covered, oiled bowl anyway. The main risk is surface drying if the bowl is uncovered or the air fryer runs hot.
Enriched dough
Brioche, dinner rolls, and other enriched doughs often benefit from warmth, but they can be more delicate. The added fat and sugar can make the dough feel softer and more vulnerable to overproofing if the environment gets too warm.
Very soft or high-hydration doughs
These can proof in an air fryer, but they need extra moisture protection and a stable container. If the dough is already slack, don’t rush it just because the appliance is warm.
Common Mistakes to Avoid
These are the missteps that cause most air fryer proofing failures.
Running the air fryer too hot
This is the biggest one. If the appliance behaves like a cooking device rather than a proofing chamber, the dough may warm unevenly or begin to set at the surface.
Leaving the dough uncovered
Circulating air can dry the top quickly. Once a skin forms, the dough can resist expansion and bake unevenly later.
Using the wrong container
A flimsy dish, a bowl that doesn’t fit, or a container that blocks airflow can all create problems. Heat-safe and stable matters more than fancy.
Proofing by the clock alone
A dough that looks ready in 25 minutes may need 45. Another dough may be ready sooner. Read the dough, not just the timer.
Forgetting that every air fryer is different
Two models with the same label can behave very differently. Some run cool and steady; others overshoot. That’s why a thermometer check is worth the effort.
Troubleshooting Air Fryer Proofing Problems
If the dough is underproofed
Give it more time in the warm environment, but check every 10 to 15 minutes rather than walking away. Underproofed dough usually looks tight, feels dense, and springs back too quickly.
If the dough is overproofed
You may notice collapse, excessive softness, or a fragile surface. If it’s only slightly over, you can often reshape and re-proof briefly. If it has collapsed badly, the final loaf may be denser.
If the surface is drying out
Cover it more effectively. A lid or plastic wrap usually works better than a loose towel in an air fryer. You can also lightly oil the dough surface if the recipe allows.
If the air fryer runs too hot
Use the lowest setting, shorten the check interval, and place the dough in a well-covered bowl. If possible, move the bowl to a lower rack position or farther from the heating element. If the unit still overshoots above the safe range, stop using it for proofing and switch to a more stable environment.
If the heat is uneven
Try a smaller, covered container so the dough sits in a more protected space. A compact setup can sometimes create a more stable mini-environment than a large, open bowl. If the appliance still heats unevenly, it is better to abandon the method than to keep fighting the temperature.
Air Fryer Proofing vs Other Proofing Methods
Compared with countertop proofing
Countertop proofing is slower but usually gentler and more forgiving. Air fryer proofing is faster and more contained, but less forgiving if the temperature drifts.
Compared with oven proofing
An oven with the light on or a very low proof setting can be steadier than an air fryer, especially for larger doughs. The air fryer wins on speed and convenience, but the oven often gives you more room and less airflow drying.
Compared with a proofing box or proofing drawer
A proofing box is the most controlled option. If you bake frequently or need consistency for classwork or production-style practice, it’s the better tool. The air fryer is a smart backup when you want to use equipment already in the kitchen.
For bakers who are comparing methods, this article on proofing bread dough in a cold kitchen can help you weigh warm-spot options beyond the air fryer.
Practical Example Setups
Example 1: Bread dough in a proof-mode air fryer
Use a lightly oiled bowl, cover it tightly, and set the appliance to proof. Check the dough around the 30-minute mark, then continue only if it still feels tight.
Example 2: Pizza dough in a keep-warm air fryer
Place the dough in a covered bowl, keep the temperature as low as possible, and check earlier than you think. Pizza dough is often ready once it looks relaxed and expanded, not necessarily doubled.
Example 3: Enriched dough in a tricky air fryer
If your air fryer tends to run hot, shorten the proofing window and keep the dough well covered. Enriched dough can move from “nearly ready” to overproofed quickly in a warm appliance.
If you also want to use the same appliance for the bake itself, this related guide on baking bread in an air fryer will help you connect the proofing stage to the final loaf.
When to Consult a Master Baker
If your dough repeatedly overproofs in the air fryer, or if the appliance temperatures seem erratic even on the lowest setting, it may be worth stepping back and using a more stable proofing method while you diagnose the issue. A master baker would look first at dough temperature, room temperature, and the appliance’s actual heat behavior before changing the formula.
That’s the real lesson here: proofing in an air fryer can work well, but only when you treat it like a controlled environment rather than a shortcut that can be left unattended. Keep the heat gentle, cover the dough, and judge readiness by feel as much as by time. Do that, and the air fryer becomes a useful tool in your bread-making toolkit instead of a gamble.
FAQ
Can you proof dough in an air fryer without a proof setting?
Yes, if the appliance can hold a safe proofing range of about 80–100°F. If it runs above 110°F, it is too hot to use safely for proofing.
Is the air fryer basket light enough for proofing dough?
Usually no. A light-only mode may add a little warmth, but it does not reliably create a stable proofing environment on its own. Use a thermometer to confirm the actual chamber temperature.
What should I do if my air fryer has no warm or proof mode?
If it only has standard cooking temperatures and cannot stay below the safe proofing range, do not use it for proofing. Use a countertop, oven-light, or proof box method instead.
How long does dough take to proof in an air fryer?
It depends on the dough and the actual temperature, so time is only a rough guide. Check the dough early and use the poke test rather than relying on the clock.
What if the dough starts drying out?
Cover it more tightly and use a bowl or container that shields the surface from moving air. If the appliance still dries the dough, it is probably not a good proofing setup.
Can all doughs be proofed in an air fryer?
No. Some doughs are too delicate for an appliance that cycles hot or dries the surface quickly. If you cannot keep the chamber in a safe proofing range, skip the method.