
How to Proof Bread Dough Like a Pro: A Practical Guide for Home Bakers

Proofing is one of those bread skills that looks simple until you miss it by 20 minutes and the loaf tells on you. Too short, and the dough bakes up tight and underdeveloped. Too long, and it can lose strength, spread, or collapse. The good news is that once you learn what proofed dough looks and feels like, the process becomes much easier to control.
In bread baking, proofing is the final rise before baking, or in some recipes, the rise that happens after shaping. It’s the stage where yeast keeps producing gas, gluten relaxes, and the dough becomes airy enough to expand well in the oven. That expansion matters because it sets up the structure of the crumb and helps create good oven spring.
If you want a broader foundation on dough handling, it also helps to understand bread dough hydration and how water changes dough strength and extensibility. Those factors affect proofing more than many beginners realize.
What It Means to Proof Bread Dough
Proofing is the period when yeast dough is left to rise before baking. The term comes from the idea that the rise “proves” the yeast is active. In everyday bread talk, people sometimes use “rising,” “fermenting,” and “proofing” as if they mean the same thing. They overlap, but they are not identical.
Here’s the simplest way to separate them:
- Bulk fermentation is the first long rise after mixing and kneading, usually before shaping.
- Final proof is the last rise after the dough has been shaped and is ready for the oven.
- Proofing is the general umbrella term for the rise stage, but in practical home baking it often means the final proof.
That distinction matters because dough behaves differently before and after shaping. During bulk fermentation, the dough is developing strength and gas at the same time. During final proof, the shaped loaf is filling with gas while trying not to lose the structure you just built.
A shaped loaf that is fully proofed should look lighter, puffier, and more relaxed than when it first went into the pan or basket. It should hold its shape without feeling dense or stiff.
What You Need Before You Start
You do not need fancy equipment to proof bread well, but a few basics make the process much more predictable:
- A covered bowl, loaf pan, or proofing basket, depending on the recipe
- A clean kitchen towel or plastic wrap to prevent drying out
- A thermometer if you want to monitor a warm proofing spot
- A warm, draft-free place in your kitchen
- Optional: a baker’s scale for precise mixing and repeatable results
A light coating of oil on the bowl can help the dough release cleanly and reduce sticking. It can also help keep the surface from drying out, especially if your kitchen air is dry. Use a thin film, not a heavy layer.
If your dough is already sticky, be careful not to add extra flour just because it feels soft. That can change the dough’s balance and make proofing less predictable. If you’re unsure whether the dough is truly too wet, this guide on bread dough too sticky can help you decide before you adjust anything.
How to Proof Bread Dough Step by Step
1) Finish mixing, kneading, and shaping first
Proofing happens after the dough has enough strength to hold gas. If the dough is still rough, torn, or underdeveloped, it will not proof well. For a final proof, shape it the way your recipe calls for first, then place it in the pan or basket. Once the dough is shaped, you are ready to move directly into proofing.
2) Put the dough in a container that supports its shape
A loaf pan supports sandwich bread. A banneton or proofing basket supports free-form loaves. A bowl works for many enriched doughs and simple yeast doughs. The goal is not just containment; it’s to help the dough rise upward instead of spreading sideways.
3) Cover it
Covering matters more than many beginners think. Dough left uncovered can form a dry skin, and that skin can restrict expansion or leave ugly seams after baking. A towel works for short proofing periods. Plastic wrap is more airtight and helpful in dry kitchens.
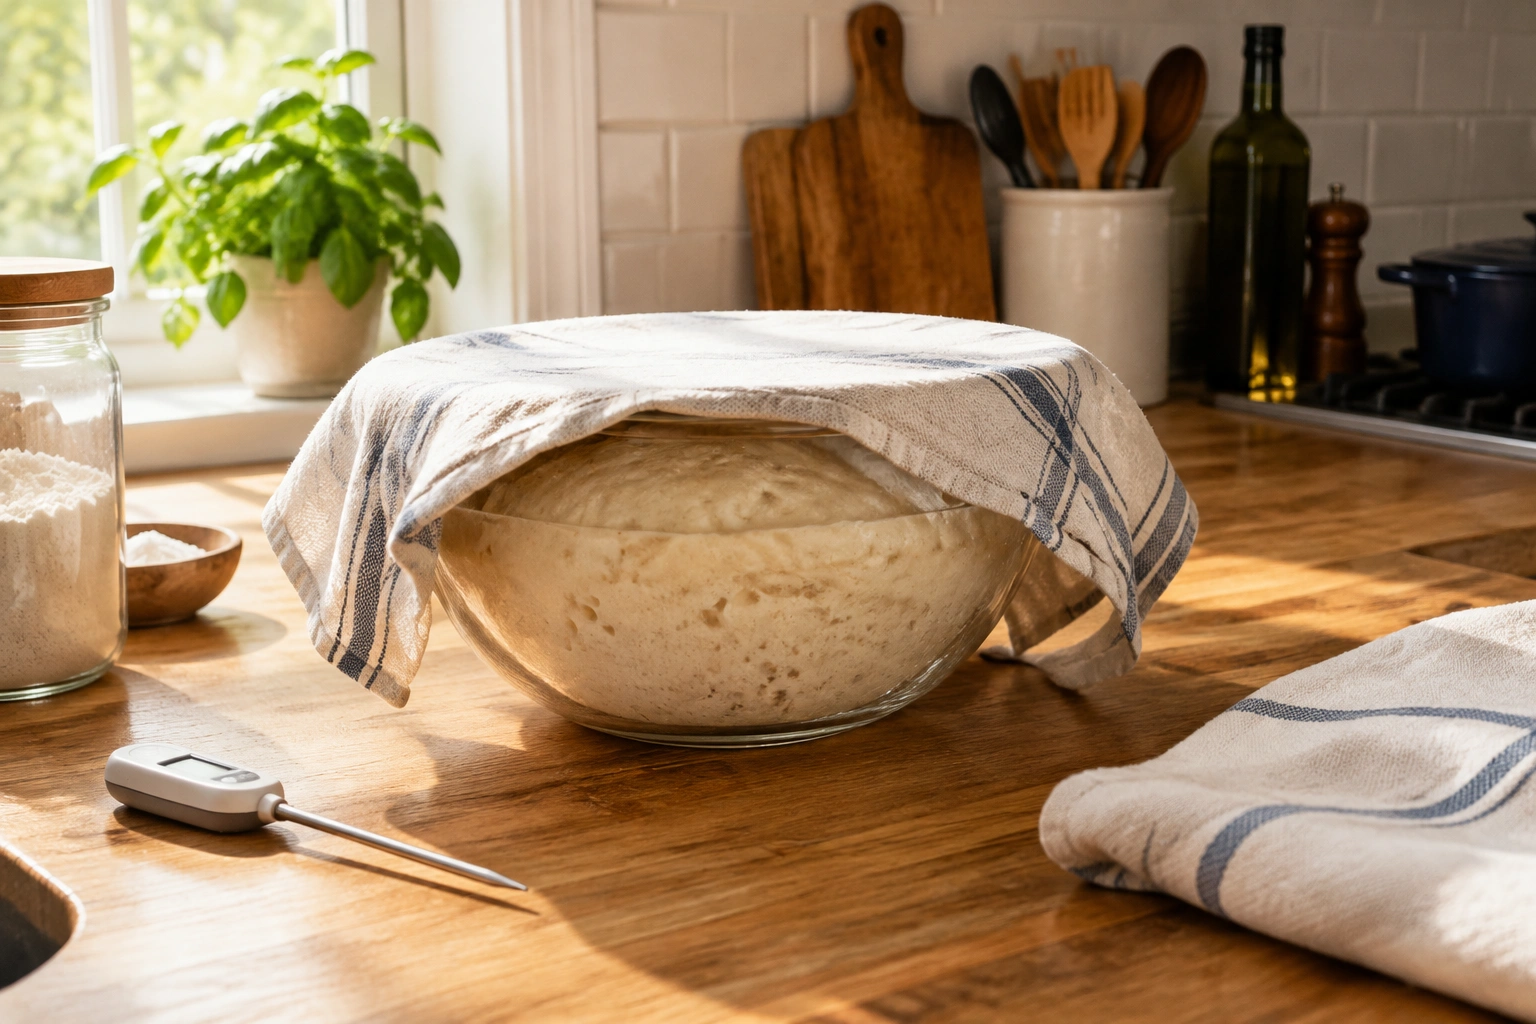
4) Choose the proofing environment
Place the dough in a spot that matches the recipe and your kitchen conditions. A normal room-temperature counter may be enough if the room is warm. If your kitchen is cool, a slightly warmer environment can help the dough rise on schedule.
A simple rule of thumb:
- Cool kitchen: use a warmer proofing spot, such as an oven with the light on or a proofing box
- Moderate room temperature: start on the counter and watch the dough closely
- Warm kitchen: room temperature is often enough, and extra heat may be unnecessary
The goal is gentle warmth, not a hot environment. If the spot feels noticeably warm to your hand, check it with a thermometer before leaving dough there for a long stretch.
5) Watch the dough, not just the clock
Time is only a rough guide. Check the dough for volume, softness, and elasticity. A loaf may be ready sooner on a warm day and much later in a cold kitchen.
6) Bake when it is ready
Once the dough looks airy and passes the readiness checks, move it to the oven promptly. Waiting too long after full proof can weaken the dough and reduce oven spring.
How to Tell When Dough Is Properly Proofed
This is the part that separates guessing from baking.
A properly proofed dough usually shows three things:
- It looks puffed and noticeably larger
- It feels lighter and more delicate when handled
- It responds to a gentle poke in a useful way
Many bakers look for roughly doubled volume, and that is a practical benchmark for many yeast doughs. But “double in size” is not a universal law. Some enriched doughs, shaped loaves, and high-hydration doughs may look ready before they hit a perfect double. Others may need a little more time depending on the recipe.
Use the poke test
The poke test is one of the most useful readiness checks. Gently press a floured fingertip into the dough surface and watch how it responds:
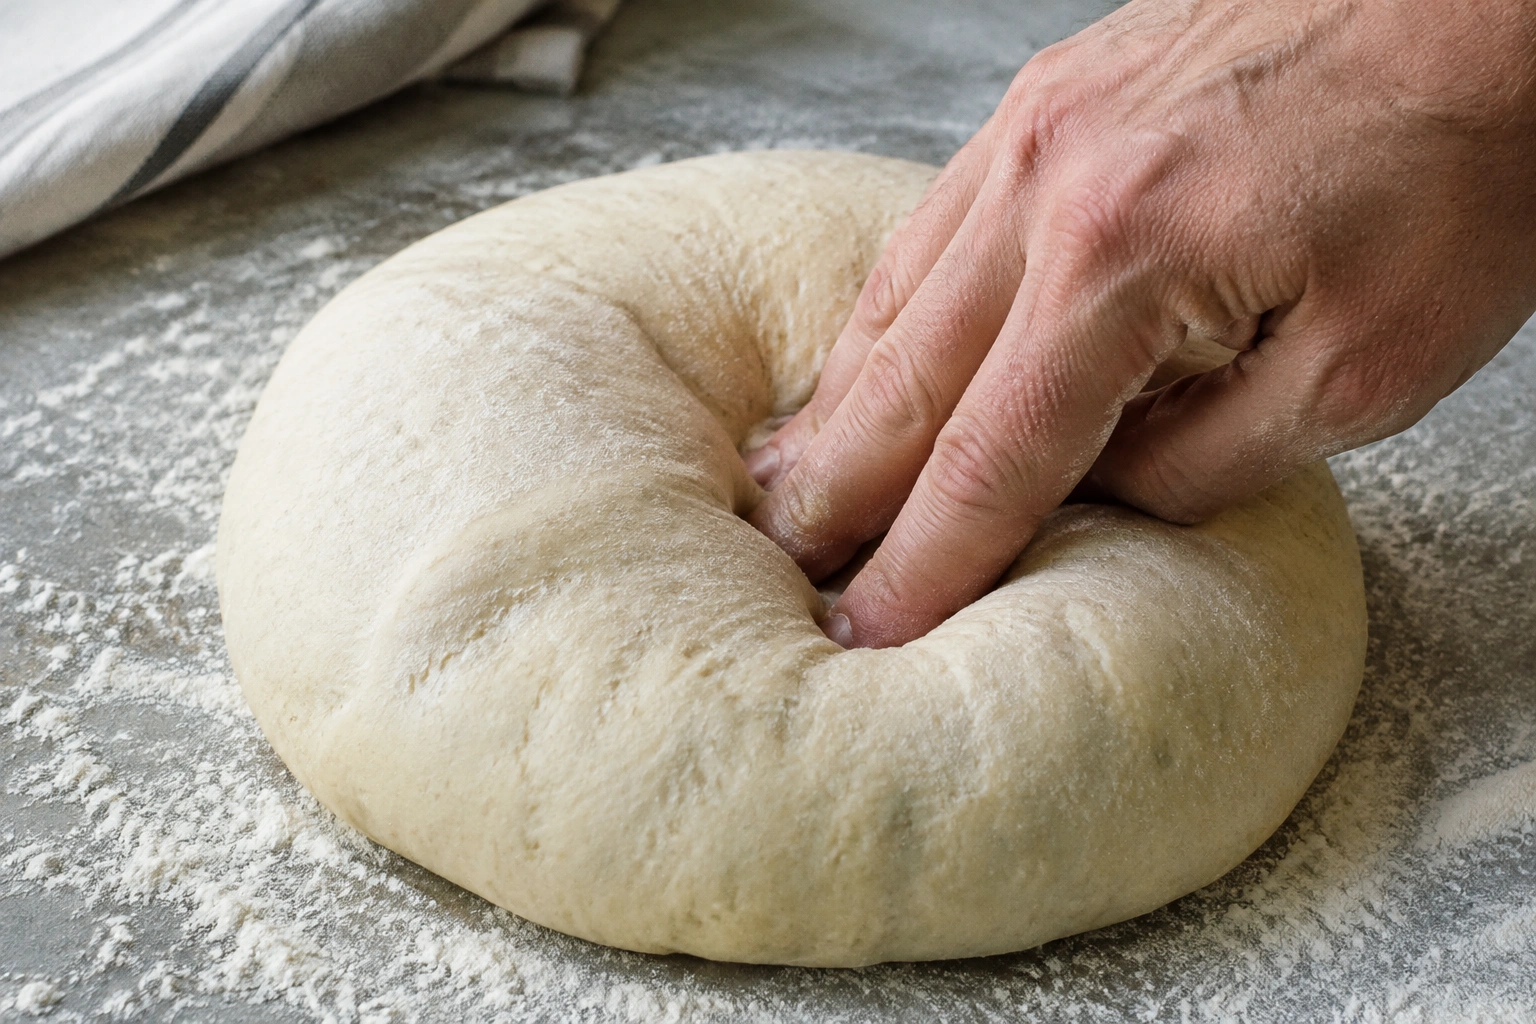
- Springs back quickly: likely underproofed
- Springs back slowly and partly leaves a dent: usually ready
- Does not spring back much and feels fragile: likely overproofed
The poke test works best when you combine it with visual cues. A dough that feels airy but still rebounds strongly probably needs more time. A dough that barely holds its shape may have gone too far.
Read the surface and the container
A ready dough often looks smooth, rounded, and slightly domed. In a bowl or pan, it may rise to just below or above the rim, depending on the recipe. One practical trick is to mark the starting level on the bowl with tape so you can compare the rise without guessing.
Best Proofing Environments for Home Bakers
Different kitchens call for different setups. Here’s a quick comparison to help you choose.
| Method | Best for | Typical conditions | Pros | Trade-offs |
|---|---|---|---|---|
| Room-temperature counter | Mild, steady kitchens | Comfortable indoor room | Simple, no extra equipment | Can be slow in cool weather |
| Oven with light on | Cooler kitchens | Warm, insulated oven space | Often faster and easy to improvise | Must monitor temperature so it doesn’t get too hot |
| Proofing box/proofer | Consistent results | Controlled warmth | Very reliable for repeat baking | Extra cost and counter space |
| Refrigerator | Flexible scheduling | Slow, cold rise | Good for timing and flavor development | Takes planning and more total time |
A warm oven with only the light on can create a cozy proofing space, but the exact temperature can vary, so it’s smart to check it rather than assume it is gentle. The key is to keep the dough in a warm but not hot environment.
A proofing box is the most controlled option if you bake often. A moderate, steady setting is often useful for many breads, but the best choice is the one that keeps your dough in a consistent, comfortable range for the recipe you are making. Temperature matters throughout the process, including the temperature of the water or liquid used in mixing, because the dough’s starting temperature affects how quickly proofing begins.
Refrigerated proofing, often called cold proofing or retarding, slows yeast activity. It’s useful when you want to fit baking into your schedule or develop flavor more gradually. It is especially common after shaping, and it can be used for several hours or overnight depending on the recipe.
Simple decision guide
Use this quick guide if you are unsure where to proof:
- Kitchen feels warm and comfortable: proof at room temperature
- Kitchen feels cool or drafty: use a warmer spot, such as an oven with the light on or a proofing box
- You need a slower schedule: refrigerate the dough for a cold proof
- You are baking often and want repeatable results: a proofing box is the most consistent option
How Long Bread Dough Usually Takes to Proof
There is no single correct proofing time because dough, temperature, yeast activity, and recipe style all change the pace.
A better rule of thumb is to use both dough temperature and kitchen temperature as your guide:
- Warm dough in a warm kitchen may proof relatively quickly
- Cool dough in a cool kitchen will usually take much longer
- If the dough is around room temperature and the kitchen is moderate, many breads will fall somewhere in the middle
A few realistic examples:
- A simple white sandwich dough may proof in about 1 to 2 hours in a warm room
- A cooler kitchen can stretch that much longer
- Enriched doughs with butter, eggs, or sugar may rise more slowly
- Refrigerated dough may need several hours or overnight
Those are broad ranges, not promises. A practical rule is to expect proofing to move faster in a warm, draft-free environment and slower when the dough or room is cool. The best move is to treat time as a checkpoint, not a verdict.
What changes proofing speed?
Temperature is the biggest factor. Warmer dough rises faster, cooler dough rises slower. But too much heat is not a shortcut worth chasing. If the environment gets excessively warm, yeast performance and dough structure can suffer.
Recipe style matters too. Lean doughs like basic white bread often proof faster than enriched doughs. Sugar, fat, and eggs can slow fermentation because they change how yeast and gluten behave.
Dough size and shape also matter. A large batch in a deep bowl may retain heat differently than a small shaped roll. A loaf in a pan may rise more predictably than a free-form boule.
Common Mistakes to Avoid
Letting the dough dry out
This is one of the easiest mistakes to make and one of the most annoying to fix. A dry skin can stop the surface from expanding evenly. Cover the dough every time unless your recipe specifically says otherwise.
Proofing in a space that is too hot
A warm environment can help, but too much heat is a problem. It can push the dough past its sweet spot and make it harder to handle. If your oven light or improvised setup feels very warm to your hand, check it with a thermometer.
Baking too early
Underproofed dough may still spring in the oven, but the crumb often ends up tight or uneven. If the dough still feels tense and bounces back quickly when poked, it usually needs more time.
Waiting too long
Overproofed dough can become fragile, overly gassy, and weak. It may spread instead of rising, and the loaf can collapse or bake with poor volume.
Confusing bulk fermentation with final proof
A dough that has risen once in the bowl is not automatically ready to bake. After shaping, it often needs another proofing stage. That second rise is what gives the loaf its final structure before it enters the oven.
Troubleshooting Proofing Problems
If the dough is underproofed
If it feels dense, springs back too fast, and looks underexpanded, give it more time. Move it to a slightly warmer spot if the kitchen is cold. Be patient, but keep checking every 15 to 20 minutes once it starts getting close.
If the dough is overproofed
If the dough feels fragile, loses shape easily, and barely springs back, it may be overproofed. The next step depends on how far it has gone:
- Mildly overproofed: you can sometimes gently reshape it once, then let it proof again for a shorter time. This is not ideal for every dough, but it can help if the dough still has some strength.
- Severely overproofed: bake it right away if it still has enough structure to hold together. If it has collapsed badly and feels extremely weak, reshaping usually will not restore the dough well, and the loaf may be better used in a different form if the recipe allows.
If the dough is rising too slowly
A cold kitchen is often the culprit. Move the dough to a warmer environment, such as an oven with the light on, a proofing box, or another gentle warm spot. Avoid aggressive heat. You want steady warmth, not a hot surface that cooks the outside.
If the dough has a dry skin
Lightly misting the surface is not always necessary, but if the skin has already formed, gently re-cover the dough and give it a little time. In some cases, you can work around a thin skin, but a thick dried layer usually means the dough was left uncovered too long.
Practical Examples From Real Kitchens
A beginner making sandwich bread in a cool kitchen often runs into slow proofing. In that case, a simple oven-with-light-on setup can be enough to get the dough moving without buying extra equipment. The key is to check the temperature and not assume the oven is automatically safe just because it feels warm.
A home baker who wants to bake the next morning may shape the dough in the evening and refrigerate it overnight. That slow rise gives more scheduling flexibility and can improve flavor development. The dough should be covered so it does not dry out in the fridge.
A student learning loaf timing might compare three shaped doughs: one underproofed, one ready, and one overproofed. The underproofed one springs back quickly under a finger. The ready one rebounds slowly. The overproofed one leaves a deep dent and feels fragile. That side-by-side comparison is one of the fastest ways to train your eye.
What to Do After Proofing and When to Bake
When the dough is ready, handle it gently. Sudden rough movement can knock out too much gas and reduce the lift you worked for. Move it to the oven if it is already in a pan or on a tray, or score it if the recipe calls for scoring before baking.
A well-proofed loaf usually feels lighter in the hands and looks full of life. It should not wobble like liquid, but it should not feel tight and resistant either. That middle ground is what you are after.
If you are unsure, use the same decision sequence every time:
- Check the size and surface appearance
- Feel the dough for softness and airiness
- Do the poke test
- Bake when the response is slow and partial, not springy or collapsed
That habit will teach you more than any timer ever will.
Frequently Asked Questions
What does proofing bread dough mean?
It means allowing yeast dough to rise before baking. In practical baking, it usually refers to the final rise after shaping.
How do I know when dough is fully proofed?
Look for a puffed, expanded appearance and use the poke test. Properly proofed dough springs back slowly and only partly.
Can I proof dough in the oven with the light on?
Yes, that is a common home method. Just monitor the temperature so the dough does not get too warm.
Should bread dough be covered while it proofs?
Yes. Covering helps prevent a dry skin from forming on the surface.
Can I refrigerate dough during proofing?
Yes. Refrigerated proofing slows yeast activity and is often used for schedule flexibility and flavor development.
What happens if dough is overproofed?
It may lose strength, spread, or collapse, and the baked loaf can have poor volume.
How long should bread dough proof?
It varies widely by recipe, temperature, and dough type. Use the dough’s appearance and feel, not the clock alone.
When to Consult a Master Baker
If your dough repeatedly proofes unevenly, collapses even when the timing seems right, or behaves differently from batch to batch despite careful measuring, it may be time to get a second set of eyes on your process. A master baker can help you evaluate dough strength, fermentation pace, and shaping issues that are easy to miss from the recipe alone.
Proofing is not just waiting. It is reading the dough, giving it the right environment, and knowing when to stop. Once you learn those cues, bread baking becomes far more consistent—and a lot more satisfying.