
How to Make Pita Bread at Home That Puffs Beautifully

Pita bread looks simple, but the difference between a flat round and a pocketed pita usually comes down to a few precise choices: flour, dough strength, rolling thickness, and heat. Once you understand those moving parts, the process becomes very repeatable.
I’ve always liked pita as a teaching bread because it shows you whether your dough is doing its job. If the dough is too dry, too slack, rolled unevenly, or baked on a surface that isn’t hot enough, it tells on you immediately. The good news is that those problems are easy to diagnose once you know what to watch for.
What You Need to Make Pita Bread
Here’s a practical home-kitchen setup for pita dough:
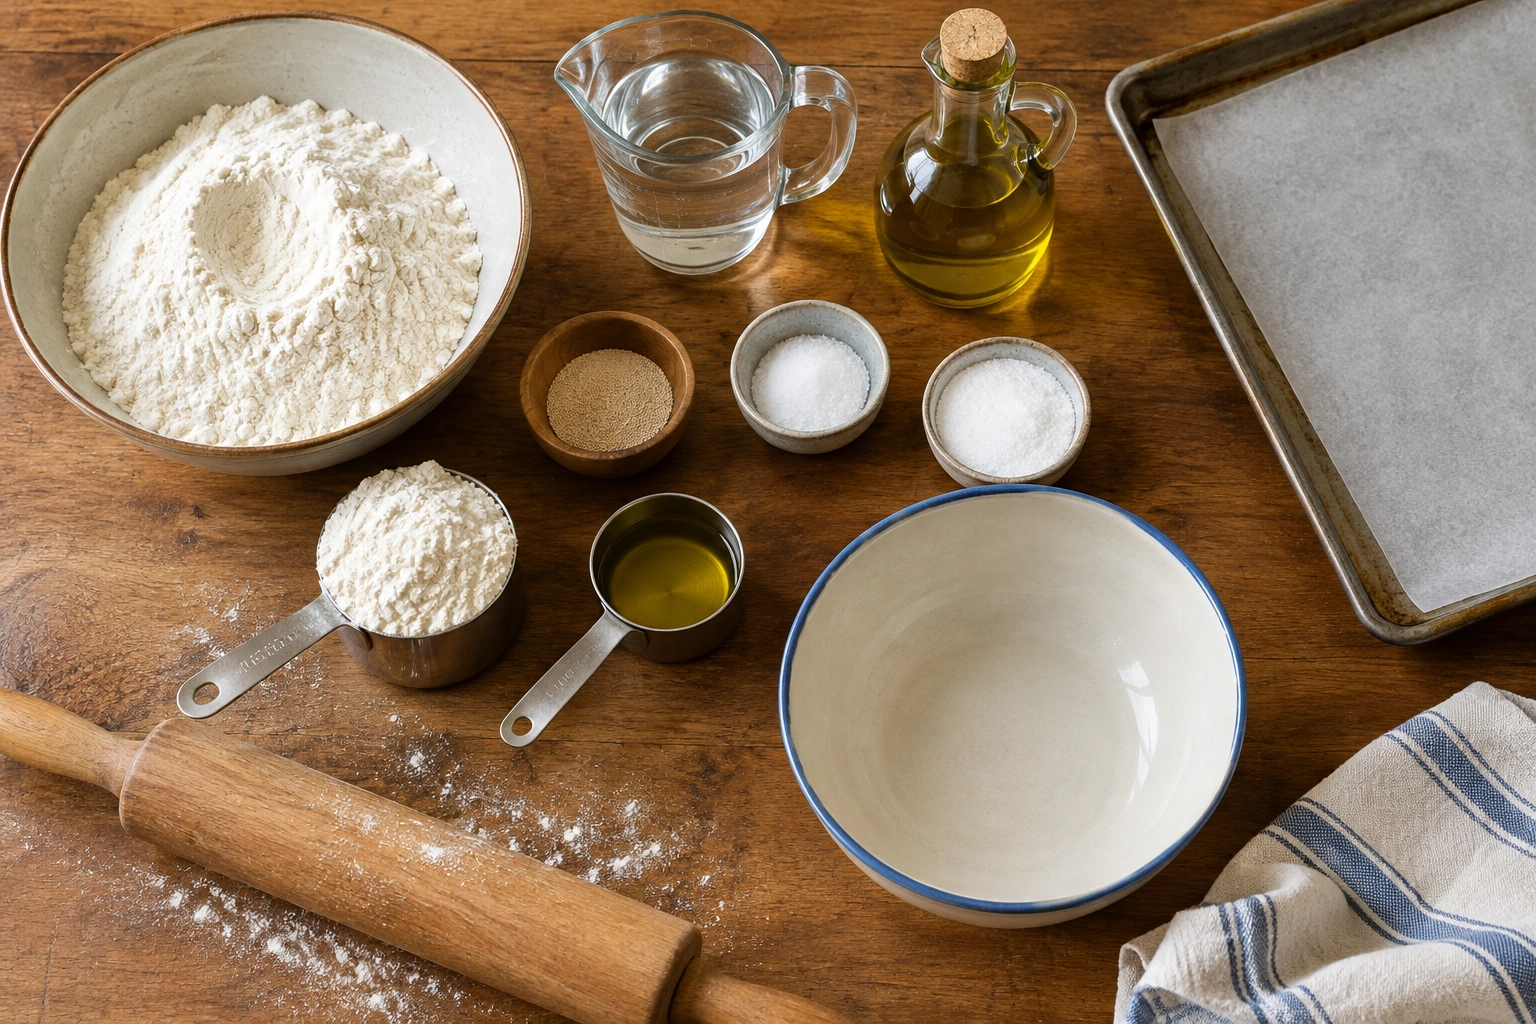
Ingredients
- 3 cups all-purpose flour, plus more for dusting
- 1 tablespoon sugar
- 2 1/4 teaspoons instant yeast or active dry yeast
- 1 1/4 teaspoons fine salt
- 1 cup warm water, about 105 to 110°F
- 2 tablespoons olive oil
You’ll also want
- A large mixing bowl
- A spoon or dough whisk
- A stand mixer with dough hook, if you have one
- A rolling pin
- A baking stone, baking steel, baking sheet, or skillet
- Parchment paper, if you prefer it for transfer
- A clean towel for covering finished bread
If you want a quick way to see how the flour choice changes the final bread, think of it this way: all-purpose flour usually gives a softer, more tender pita, while bread flour tends to make a slightly chewier dough with a bit more structure. For most home bakers, either works. If your goal is a very soft pita for sandwiches, all-purpose is the friendlier starting point.
Choosing the Best Flour, Yeast, and Baking Method
Before you mix anything, it helps to make three decisions.
| Decision | Best for | Trade-off |
|---|---|---|
| All-purpose flour | Softer, lighter pita | Slightly less chew and structure |
| Bread flour | More chew and stronger gluten | Can feel a little firmer |
| Instant yeast | Fast, convenient mixing | Less obvious activation check |
| Active dry yeast | Common pantry yeast, easy to find | Usually benefits from proofing first |
| Pizza stone or baking steel | Strong bottom heat and better puffing | Requires preheating and careful handling |
| Baking sheet | Easiest equipment option | Less intense heat transfer |
| Skillet or griddle | Fast stovetop control | You bake one or two at a time |
Flour choice: all-purpose vs bread flour
If you’re new to pita, all-purpose flour is a sensible place to begin. It tends to make dough that is easier to roll and less resistant when you shape it. Bread flour can be excellent too, especially if you like a slightly chewier result and a dough that feels a little more elastic.
The main trade-off is texture versus strength. Bread flour can help the dough hold together well during puffing, but if you overwork it or roll it too thick, the extra strength won’t save the pocket. Technique still matters more than the flour label.
Yeast choice: instant vs active dry
Instant yeast is convenient because it can usually be mixed directly with the dry ingredients. Active dry yeast often gets dissolved in warm water first, which gives you a quick check that it’s alive. That extra step is useful if you’re unsure about the yeast in your pantry.
A practical rule: use instant yeast when you want the simplest path, and use active dry yeast when you want a little extra reassurance that the yeast is active before you commit to the dough.
Baking surface: stone, steel, sheet pan, or skillet
A pizza stone or baking steel gives you the strongest heat transfer in the oven, which helps the pita balloon quickly. A steel usually responds faster than a stone, but both can work well if they are fully preheated.
A baking sheet is the most accessible option, and it can absolutely make decent pita. The difference is that it often gives you a little less dramatic puff unless the oven is very hot and the pan is properly heated.
A skillet or griddle is the most hands-on method. It can be a smart choice if you want direct control and don’t own a stone or steel. It also lets you see the bread puff in front of you, which is useful for learning.
How Pita Bread Puffs: The Technique That Creates the Pocket
Pita puffs because steam gets trapped inside the dough and forces the layers apart. For that to happen, the dough needs a few things working together:
- Enough gluten development to create a flexible shell.
- Even rolling so no weak spot tears early.
- A hot enough surface to create rapid steam expansion.
- Dough that is rested, not tight and springy.
- A surface that is not so dry or floured that it prevents the layers from sealing properly.
Think of the pocket like a balloon with a little structural memory. The outer surfaces set quickly in the heat, while the interior moisture flashes to steam. If the dough is too thick, the center may not heat fast enough. If it’s too thin or uneven, it can tear before the pocket forms.
That’s why pita is such a good bread for students to study: puffing is not random. It’s a chain of small decisions.
Make the Dough
A simple pita dough is straightforward, but the feel matters more than the exact mixing method.
Basic mixing method
- Combine the warm water, yeast, and sugar in a bowl.
- Stir and let it sit for about 5 to 10 minutes, until the mixture looks foamy or bubbly.
- Add the flour and salt.
- Mix until a shaggy dough forms.
- Add the olive oil and continue mixing until the dough comes together.
- Knead by hand or with a dough hook until the dough is smooth and elastic, about 6 to 8 minutes by mixer or 8 to 10 minutes by hand.
If you’re using a stand mixer, a dough hook can handle the kneading for you. Hand-kneading works fine too; it just asks for a little more patience.
What the dough should feel like
For pita, you want dough that is smooth, elastic, and slightly tacky, but not sticky enough to coat your hands. If it feels dry and stiff, it will be harder to roll thinly later. If it feels loose and sticky, it may spread too much and bake unevenly.
A useful test: press the dough lightly with a fingertip. It should feel supple and spring back slowly, not snap tight like rubber.
Kneading: why it matters
Kneading builds the gluten network that helps the dough trap steam. You do not need to chase a perfectly polished dough ball, but you do need enough structure so the pita can inflate instead of collapsing.
The dough is ready when it looks smooth, feels elastic, and can be stretched a little without tearing immediately.
Let the Dough Rise and Rest
After kneading, lightly oil the dough and place it in a bowl. Cover it and let it rise in a warm place until it looks puffy and expanded, usually about 45 minutes to 1 1/2 hours depending on room temperature.
That last part matters. Pita dough does not need a marathon proof to work. You want enough fermentation for flavor and extensibility, but not so much that the dough becomes fragile and overexpanded.
What to look for
A ready dough usually:
- Looks smoother and slightly inflated
- Feels softer and more extensible
- Springs back gently when pressed
- No longer fights the rolling pin as much
If the dough is still tight and resistant, give it a little more rest. If it has spread out and feels weak or overly gassy, it may be overproofed.
Divide, Shape, and Roll the Pita Rounds
This stage is where many home bakers lose the pocket. The goal is even thickness, not just a nice circle.
A reliable approach is to divide the dough into equal pieces, shape each into a ball, and let the pieces rest briefly before rolling. One recipe divides the dough into seven small pieces and rolls each round to about 15 to 17 cm, or 6 to 7 inches across. That’s a useful size for home ovens because it’s large enough to split but still manageable on a stone or skillet.
How to shape them well
- Divide the dough into equal portions.
- Shape each piece into a smooth ball by tucking the edges underneath.
- Cover the dough balls so they don’t dry out.
- Rest them for 10 to 15 minutes so the gluten relaxes.
- Roll each ball into a round of even thickness.
How thin should you roll pita dough?
Thin enough that the bread can puff quickly, but not so thin that it tears. In practice, that means a round that feels like a soft, even sheet rather than a stretched membrane. If the center is thicker than the edges, the pocket is less likely to form evenly.
Here’s the visual cue I trust most: hold the round up to the light. If one area is much thinner than the rest, that’s where it will likely split or overbrown first.
Bake or Cook the Pita
Now the fun part. The dough is ready, and the heat does the rest.
Oven method
Preheat your oven to 475 to 500°F for at least 30 minutes, with your stone, steel, or baking sheet inside so it can fully heat up. The baking surface needs time to absorb heat; a half-warm pan won’t give you the puff you want.
Carefully transfer the rolled dough to the hot surface and bake until it inflates. On a stone or steel, pita often takes about 2 to 4 minutes total. On a hot baking sheet, it may take about 2 to 3 minutes. Another verified recipe says that after about 2 minutes on a hot baking sheet, the dough should be nicely puffed, then it should be turned and baked 1 minute more. Another notes that the pita should be pale, with only a few brown speckles.
That pale color is useful to remember. If you wait for deep browning, you often lose softness.
Skillet method
A skillet or griddle works well for smaller batches. Heat the pan over medium-high heat until it is very hot but not smoking heavily, then cook each round for about 30 to 60 seconds on the first side until bubbles form and the bread begins to puff. Flip and cook the second side for about 30 to 60 seconds more.
The skillet gives you more control, but it also demands your attention. It’s a great method when you want to watch the process closely and learn what a good puff looks like.
Stone vs steel vs sheet pan
If your goal is the best puffing support in the oven, a baking steel is often the strongest choice because it transfers heat quickly. A stone is also excellent if it’s fully preheated. A sheet pan is the easiest to use, but it usually gives you less intense bottom heat.
If you only bake pita occasionally, use the equipment you already own. If you’re practicing often, a steel or stone is worth considering.
If your oven doesn’t heat evenly or doesn’t have convection, rotate the pita or the pan once during baking if needed, especially on a sheet pan. Keep the oven door open only as briefly as possible so you don’t lose too much heat.
How to Tell When Pita Is Done
A finished pita should be:
- Puffy or fully inflated
- Pale with a few brown speckles
- Soft, not crisp
- Set enough to lift cleanly from the surface
If the pita puffs but stays pale, it may actually be done already; for pita, the goal is usually a soft, lightly colored bread, not a deeply browned one. If it puffs unevenly, the round may have been rolled unevenly, or one part of the oven or pan may be hotter than another.
If the pita is browning too fast before it puffs, your oven or pan may be too hot in the wrong way, or the dough may be too thin in spots. If it stays flat and pale, the heat is probably too low or the dough is not structured enough.
Common Mistakes That Keep Pita from Puffing
Here are the failures I see most often, along with the reason each one matters.
1. Inactive yeast
If the yeast is dead, the dough won’t develop the gas it needs. If you’re proofing yeast and nothing bubbles, replace it.
2. Dough that is too dry
Dry dough resists rolling and can crack before the pocket forms. A little more hydration usually helps more than extra flour dusting.
3. Not enough kneading
Without enough gluten, the dough can’t trap steam well. The bread may bake up dense instead of hollow.
4. Uneven rolling
Thicker spots heat more slowly; thinner spots overcook. Either way, puffing becomes inconsistent.
5. Underheated surface
Pita needs immediate heat to create steam fast enough. A cool pan is one of the quickest ways to get flat bread.
6. Overproofing
If the dough gets too airy and fragile, it may not have the strength to balloon. You want relaxed dough, not exhausted dough.
7. Letting the rounds dry out
A dry skin on the surface can interfere with expansion. Keep the rounds covered while you work.
Troubleshooting Flat, Dense, or Uneven Pita
If your first batch disappoints, don’t throw out the whole method. Use the clues.
Flat pita with no pocket
Check the oven temperature first, then the dough thickness. If the oven or pan wasn’t fully preheated, the dough may set too slowly. If it was rolled unevenly, the steam path may have leaked out.
Dense pita
This usually points to under-kneading, underproofing, or dough that was too dry. Next time, give the dough a little more rest and aim for a slightly more supple feel.
Uneven puffing
That often means the rounds weren’t rolled evenly or the dough pieces were not rested long enough before rolling. A short rest after dividing can make a noticeable difference.
Tough pita
Toughness usually comes from too much flour during shaping, overbaking, or flour with stronger protein than you expected. A softer hand with the rolling pin helps.
How to Keep Pita Soft After Baking
The best way to keep pita soft is to trap a little steam after baking. One verified recipe recommends transferring warm pita to a napkin-lined basket and covering it so the bread stays soft.
That simple step works because the residual warmth keeps the bread flexible while the cloth prevents the crust from drying out too quickly.
For storage:
- Cool the pita just enough that it’s no longer piping hot
- Stack and wrap it in a towel or place it in a sealed bag
- Reheat briefly before serving if needed
If you leave pita exposed to air, it will firm up faster than you’d like.
Make-Ahead, Refrigerating, and Freezing Options
Pita dough is forgiving enough for planning ahead.
Refrigerating dough
You can make the dough earlier in the day or the night before, then chill it after the first rise. Cold dough is a little firmer, so let it warm and relax for 20 to 30 minutes before rolling.
Freezing dough balls
For the most flexible make-ahead option, freeze the shaped dough balls after the first rise. Place them on a tray until firm, then transfer to a freezer bag. Freeze for up to 1 month. Thaw overnight in the refrigerator, then let them sit at room temperature until pliable before rolling.
Freezing rolled rounds
You can also freeze the rolled rounds if you want to do the shaping work in advance. Place parchment between rounds so they don’t stick, then freeze them flat. Thaw just until flexible, cover them so they don’t dry out, and bake soon after.
Freezing baked pita
Baked pita freezes well too. Let it cool completely, stack it with parchment if needed, seal it in a freezer bag, and freeze for up to 2 months. Reheat from thawed or frozen in a warm oven, toaster oven, or skillet until soft and warmed through.
Bake later vs bake now
- Bake now if you want the easiest puff and the softest texture
- Chill or freeze if you want better scheduling and less last-minute work
The trade-off is simple: fresh dough usually gives the easiest shaping and puffing, while make-ahead dough gives you flexibility.
Practical Example: A Beginner-Friendly Pita Workflow
Here’s a realistic home-kitchen sequence:
- Mix warm water, yeast, and sugar.
- Wait until the yeast looks foamy.
- Add flour, salt, and olive oil.
- Knead until smooth and elastic.
- Let the dough rise until puffy.
- Divide into equal pieces and cover them.
- Rest briefly, then roll each piece evenly.
- Preheat your oven with a stone, steel, or sheet pan.
- Bake each round until it puffs and stays pale with a few speckles.
- Stack and cover the finished pita so it stays soft.
That’s the whole method in one line: build a supple dough, roll it evenly, and give it intense heat quickly.

If you want to keep building your bread skills after this, you may also like How to Make Bread Dough From Scratch for Beginners or How to Make Baguettes at Home. For a yeast-free comparison, see Can You Make Bread Without Yeast?.
Frequently Asked Questions
Why didn’t my pita puff up?
The most common reasons are inactive yeast, dough that was rolled unevenly, a surface that wasn’t fully preheated, or dough that was too dry or overproofed.
Can I make pita bread without a pizza stone or baking steel?
Yes. A baking sheet or skillet can work well. You may need to pay closer attention to heat and transfer speed.
Is oven-baked pita better than skillet-cooked pita?
Oven baking is usually better for batch cooking and consistency. A skillet is excellent for smaller batches and gives you more direct control.
How do I know if my yeast is active?
If you dissolve it in warm water with a little sugar, it should look frothy or bubbly after about 5 to 10 minutes. If nothing happens, replace it.
How thin should I roll the dough?
Thin enough for quick puffing, but even enough that it won’t tear. Uneven thickness is one of the biggest reasons pita fails to pocket.
Can I make the dough ahead of time?
Yes. Refrigerating or freezing is practical, especially if you want to bake fresh pita later. Just allow the dough to become workable again before rolling.
What’s the difference between pita bread and flatbread?
Pita is designed to puff and form a pocket. Flatbread is a broader category and may be intentionally cooked without a pocket.
How do I keep pita soft after baking?
Stack it while warm and cover it. That helps trap moisture and keeps the bread tender.
Should pita be browned a lot?
No. A pale pita with a few brown speckles is usually a better sign than deep browning, especially if you want softness.
Can I use whole wheat flour?
You can, but the article’s core method is built around all-purpose or bread flour. Whole wheat changes hydration and texture, so it usually needs adjustment.
When to Consult a Master Baker
If you’ve tried the method several times and your pita still won’t puff, the issue may be in the details of your flour, oven calibration, or dough handling. At that point, it helps to work with an experienced baker who can assess your dough feel, rolling technique, and baking setup in person.