
How to Make Rye Bread at Home: A Clear Guide for Better Flavor, Rise, and Texture

Rye bread has a personality all its own. It can be earthy, aromatic, slightly sweet, and deeply satisfying—but it also asks you to bake a little differently than wheat bread. If you treat rye dough like a standard sandwich dough, it often pushes back with stickiness, a tighter crumb, or a loaf that seems underbaked even when it’s not.
That’s not a failure. It’s rye being rye.
In this guide, I’ll walk you through how to make rye bread in a way that makes sense for a home kitchen. We’ll look at flour choices, dough handling, proofing, baking, and the small decisions that change the final loaf more than most people realize. If you’re a home baker or culinary student trying to get a reliable rye loaf on the table, this is the roadmap I’d want you to have.
What Makes Rye Bread Different from Wheat Bread
Rye flour behaves differently because it forms structure differently. Wheat dough relies heavily on gluten development for stretch and strength. Rye has less of that familiar gluten behavior, so the loaf depends more on flour blend, hydration, fermentation, and pan support.
In practical terms, that changes how rye behaves in the bowl, in the oven, and in the crumb. Rye dough often feels sticky and pasty rather than elastic. It can spread more easily, rise less dramatically, and bake into a tighter, finer crumb than wheat bread. It also holds onto moisture differently, which is one reason rye can seem “done” on the outside before the center has fully set.
That’s why rye dough often feels sticky, heavy, or even paste-like compared with wheat dough. It may also produce a finer, tighter crumb. If you’re expecting the open, airy texture of a baguette or country loaf, rye will feel more compact by design.
A helpful way to think about it:
- More wheat flour gives you easier handling and more rise.
- More rye flour gives you deeper rye flavor and a denser crumb.
- A loaf pan helps weak dough keep its shape.
- A free-form loaf is more rustic, but it asks more of the dough.
This is also why many beginner rye breads use a blend instead of 100% rye. You get the flavor of rye without asking the dough to do all the structural work on its own.
Choose Your Rye Bread Style
Before you mix anything, decide what kind of rye bread you want. That choice shapes the whole process.
In practical baking terms, “light rye” and “dark rye” are usually about flour choice and formulation, not just color. Light rye typically uses a smaller amount of rye flour blended with white bread flour or all-purpose flour, which keeps the loaf milder, lighter in color, and easier to handle. Dark rye usually uses more rye flour and may include ingredients like molasses, cocoa, coffee, or caramel coloring in some formulations, which deepen the color and flavor. The exact formula varies, but the general pattern is: lighter rye means more wheat and a milder loaf; darker rye means more rye and a stronger, darker loaf.
| Style | Best For | Texture | Flavor | Difficulty |
|---|---|---|---|---|
| Light rye | Beginners, sandwiches | Lighter, softer, more open | Mild rye flavor | Easiest |
| Dark rye | Stronger flavor, heartier slices | Denser, darker crumb | More robust, often with molasses | Moderate |
| 100% rye | Traditional, very rye-forward loaves | Tight, compact, often pan-baked | Deep rye flavor | Hardest |
| Mixed rye-wheat | Most home bakers | Balanced and manageable | Clearly rye, but not overpowering | Beginner-friendly |
If this is your first rye loaf, a mixed rye-wheat bread is the safest place to begin. Here are some practical rye-to-wheat ratio options:
- 25% rye / 75% wheat: Mild rye flavor, easiest handling, closest to standard bread dough
- 50% rye / 50% wheat: Good balance of flavor and structure; a strong beginner choice
- 75% rye / 25% wheat: Very rye-forward and best baked in a loaf pan
- 100% rye: Dense, compact, and usually the most challenging for beginners
A ratio around half rye and half wheat is a practical sweet spot: enough rye flavor to matter, enough wheat to keep the dough workable.
If you want a more traditional, dense loaf, you can move toward higher rye percentages later. Just know that the handling changes quickly as rye increases.
Ingredients and Tools You’ll Need
A simple rye loaf usually needs only a few ingredients:
- Rye flour
- Bread flour or all-purpose flour
- Yeast
- Salt
- Water
- Optional sweetener such as honey or molasses
- Optional caraway seeds
- Optional oil or butter
Some recipes use only yeast, while others combine rye flour with sourdough starter for more flavor. Commercial yeast is the easier choice if you want predictable timing. Sourdough takes longer and adds complexity, but it can deepen the flavor and give the bread a more layered character.
A few tools make the process easier:
- Large mixing bowl
- Measuring cups or, better yet, a scale
- Loaf pan for structure
- Bench scraper or spatula
- Tea towel or plastic wrap
- Wire rack
- Instant-read thermometer
If you’re working through bread fundamentals, it also helps to keep your mixing bowl, dough scraper, and loaf pan nearby before you begin. Rye dough moves quickly from “manageable” to “messy,” so setup matters.
A Beginner-Friendly Rye Bread Formula
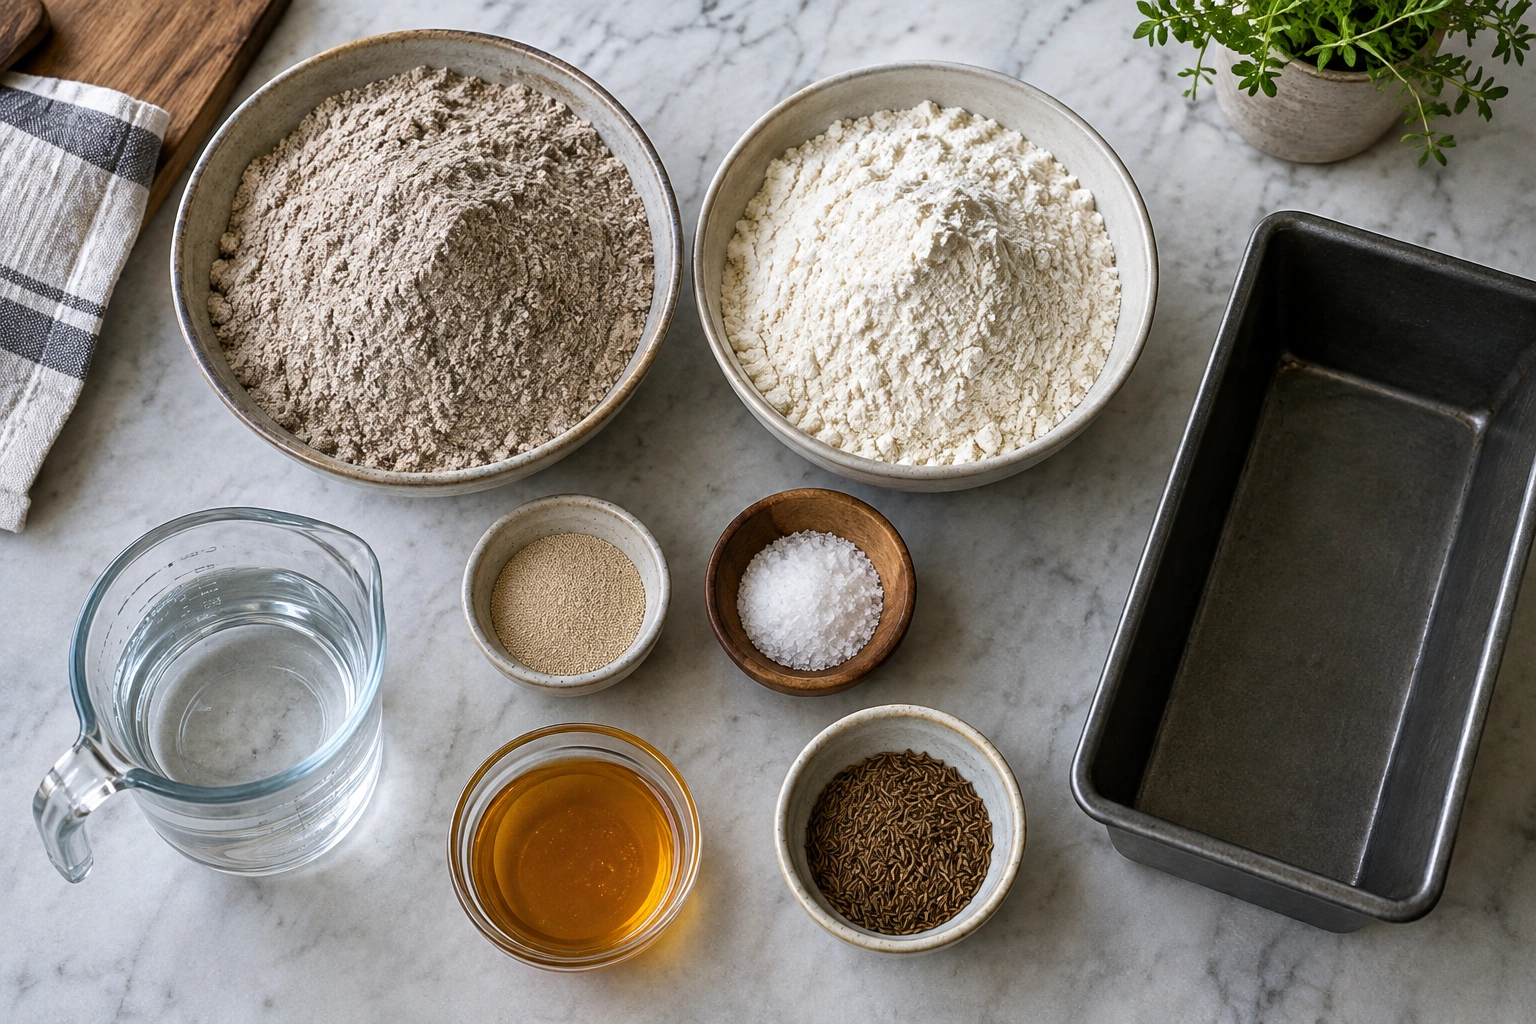
For a home baker, the easiest rye bread formula is a mixed loaf rather than a 100% rye dough. Here is a complete beginner-friendly recipe you can follow from start to finish.
Beginner Rye Bread Recipe
Makes: 1 loaf
Pan size: 8 1/2 x 4 1/2-inch loaf pan or 9 x 5-inch loaf pan
Yield: 1 medium loaf
Ingredients
- 240 g rye flour
- 240 g bread flour
- 7 g active dry yeast
- 10 g salt
- 15 to 30 g honey or molasses
- 360 g warm water, plus 15 to 30 g more if needed
- 15 g oil or softened butter, optional
- 3 to 6 g caraway seeds, optional
Expected dough texture
The dough should be soft, sticky, and tacky, but it should still hold together as a single mass. It will not feel like a smooth wheat dough. It may look slightly rough and feel damp to the touch, but it should not pour like batter.
Step-by-step method
- Mix the dry ingredients. In a large bowl, combine the rye flour, bread flour, yeast, salt, and caraway seeds if using.
- Add the wet ingredients. Stir in the honey or molasses, then add the warm water and oil or butter if using.
- Mix until combined. Use a spatula or spoon to mix until no dry flour remains. The dough should be very sticky but cohesive.
- Adjust if needed. If the dough seems too stiff or dry, add a small splash of water. If it seems loose enough to slump heavily, add a little bread flour.
- Rest the dough. Cover and let it rest for 10 to 15 minutes. This helps the rye absorb water.
- Mix again briefly. Stir or fold once more until the dough looks uniform.
- First rise. Cover and let the dough rise until it has increased by about 50% to nearly doubled, depending on temperature and rye percentage.
- Shape the loaf. Gently deflate the dough and place it in a greased loaf pan.
- Final proof. Let it rise until the dough crowns about 1 inch above the rim of the pan, or until it looks puffy and slightly springy to a fingertip touch.
- Bake. Bake until the crust is deep brown and the internal temperature reaches the target range below.
- Cool fully. Remove from the pan and cool completely before slicing.
That range matters because rye flour absorbs liquid differently depending on the grind and brand. You’re not aiming for a stiff, dry bread dough. You’re aiming for a soft, sticky dough that can still hold together.
Some rye formulas mix the flour with water first and let it rest before adding the remaining ingredients. That rest gives the rye time to absorb liquid and makes the dough easier to handle later. In practice, that pause can make the difference between a dough that feels impossible and one that just feels very sticky.
How to Mix Rye Dough
Rye dough is usually mixed, not aggressively kneaded. That’s one of the biggest mindset shifts for bakers coming from wheat bread.
A simple mixing method
- Combine the dry ingredients in a large bowl: rye flour, bread flour, yeast, salt, and caraway if you’re using it.
- Add the water gradually, along with honey or molasses if your recipe includes them.
- Stir with a spatula or spoon until no dry flour remains.
- If the dough feels extremely stiff, add a little more water. If it feels soupy, add a bit more wheat flour.
- Let it rest.
What should it look like? For many mixed rye breads, the dough will be very sticky and soft, but not runny. Some versions are closer to a thick batter than a classic kneadable dough. That’s normal. At the end of mixing, you want a dough that clings to the bowl, looks rough and hydrated, and can be gathered into a loose mound without spreading like pancake batter.
If you’re using a stand mixer, use the dough hook only long enough to combine the ingredients and build a little strength. Rye dough does not benefit from long, hard kneading the way wheat dough does. Too much mixing can make the dough feel gummy and hard to judge.
Bulk Fermentation and First Rise
Once mixed, cover the bowl and let the dough rise until it has visibly expanded. The exact timing depends on yeast amount, room temperature, and how much rye you used.
Same-day yeast dough
For a yeast-raised rye loaf, a 1 to 2 hour bulk rise is common in a room around 70 to 75°F. In a warmer kitchen, it may be closer to 45 to 90 minutes. In a cooler room, it can take longer. The dough should look puffier and slightly aerated, but it does not need to fully double before shaping.
Overnight or sourdough-style fermentation
If you’re using an overnight method or sourdough starter, the timing is different and should be followed as its own method rather than blended into a same-day recipe. Overnight rye doughs are often mixed, covered, and left to ferment for several hours or overnight, usually in a cooler environment or with less yeast than a same-day dough. Sourdough rye also tends to move more slowly and needs to be judged by expansion and feel rather than by a fixed clock.
The key cue is not the clock alone. Look for:
- Clear increase in volume
- A surface that looks slightly domed or aerated
- Dough that feels lighter and less dense when touched
If the dough has barely moved after the expected rise time, your room may be cool or the yeast may be sluggish. If it has risen and then started to collapse, it may have gone too far.
For rye, overproofing is especially risky because the dough doesn’t have the same structural reserve as a wheat loaf. Once it loses gas, it may not recover well.
Shape the Dough and Choose Pan vs. Free-Form
This is one of the most useful decisions you can make.
Choose a loaf pan if:
- Your dough feels very sticky or soft
- You’re using a high rye percentage
- You want a more reliable shape
- You’re new to rye baking
Choose a free-form loaf if:
- The dough has enough wheat flour to hold shape
- You want a rustic crust and shape
- You’re comfortable handling sticky dough
For most beginners, the loaf pan is the better trade-off. It supports the dough, helps prevent spreading, and makes the loaf easier to slice evenly.
To shape a pan loaf, gently deflate the dough, then pat it into a rough rectangle. Roll or fold it into a log and place it seam-side down in a greased loaf pan. Don’t chase perfection here. With rye, gentle handling often beats overworking the dough.
If you’re shaping a free-form loaf, keep the shape modest. A tall, ambitious boule with a high rye percentage often spreads more than it rises.
Proof the Loaf Properly
Proofing rye bread is about watching the dough, not forcing it to look like wheat dough.
For a same-day loaf, the final proof often takes 30 to 75 minutes at about 70 to 75°F, and longer if your kitchen is cool. A higher-rye dough may need the full window, while a lighter rye-wheat loaf may move more quickly. If the room is warmer, check earlier; if it’s cooler, expect a slower rise.
A practical cue is that the loaf should look visibly puffed and slightly risen above the pan edge. If you press the dough gently with a fingertip, the dent should spring back slowly and not fill in instantly. If it rebounds too quickly, it likely needs more time. If it collapses under a gentle touch, it may be overproofed.
Rye loaves often proof faster than bakers expect, especially in a warm kitchen. Keep an eye on the dough rather than assuming a fixed time. A loaf pan makes this easier because it gives you a clear visual reference for how much the dough has expanded.
Bake the Rye Bread
Most home rye breads bake well in a moderately hot oven. A practical starting point is 375°F for a pan loaf or 400°F for a more free-form loaf, though the exact temperature depends on the recipe style and loaf size. If you’re unsure which end of the range to choose, start with the lower temperature for a pan loaf and the higher temperature for a leaner, freer loaf. Pan loaves often bake at the lower end of the range, while hearth-style loaves may use a hotter oven for stronger oven spring.
Steam can help early in the bake, especially for a free-form loaf, because it delays crust setting and supports expansion. If you’re using a loaf pan, steam matters a little less, but a well-heated oven still matters a lot.
Doneness cues you can trust
The most reliable sign is internal temperature. For rye bread, a good doneness target is 195°F to 205°F in the center of the loaf. Rye can look done before it truly is, which is why underbaked rye is such a common problem.
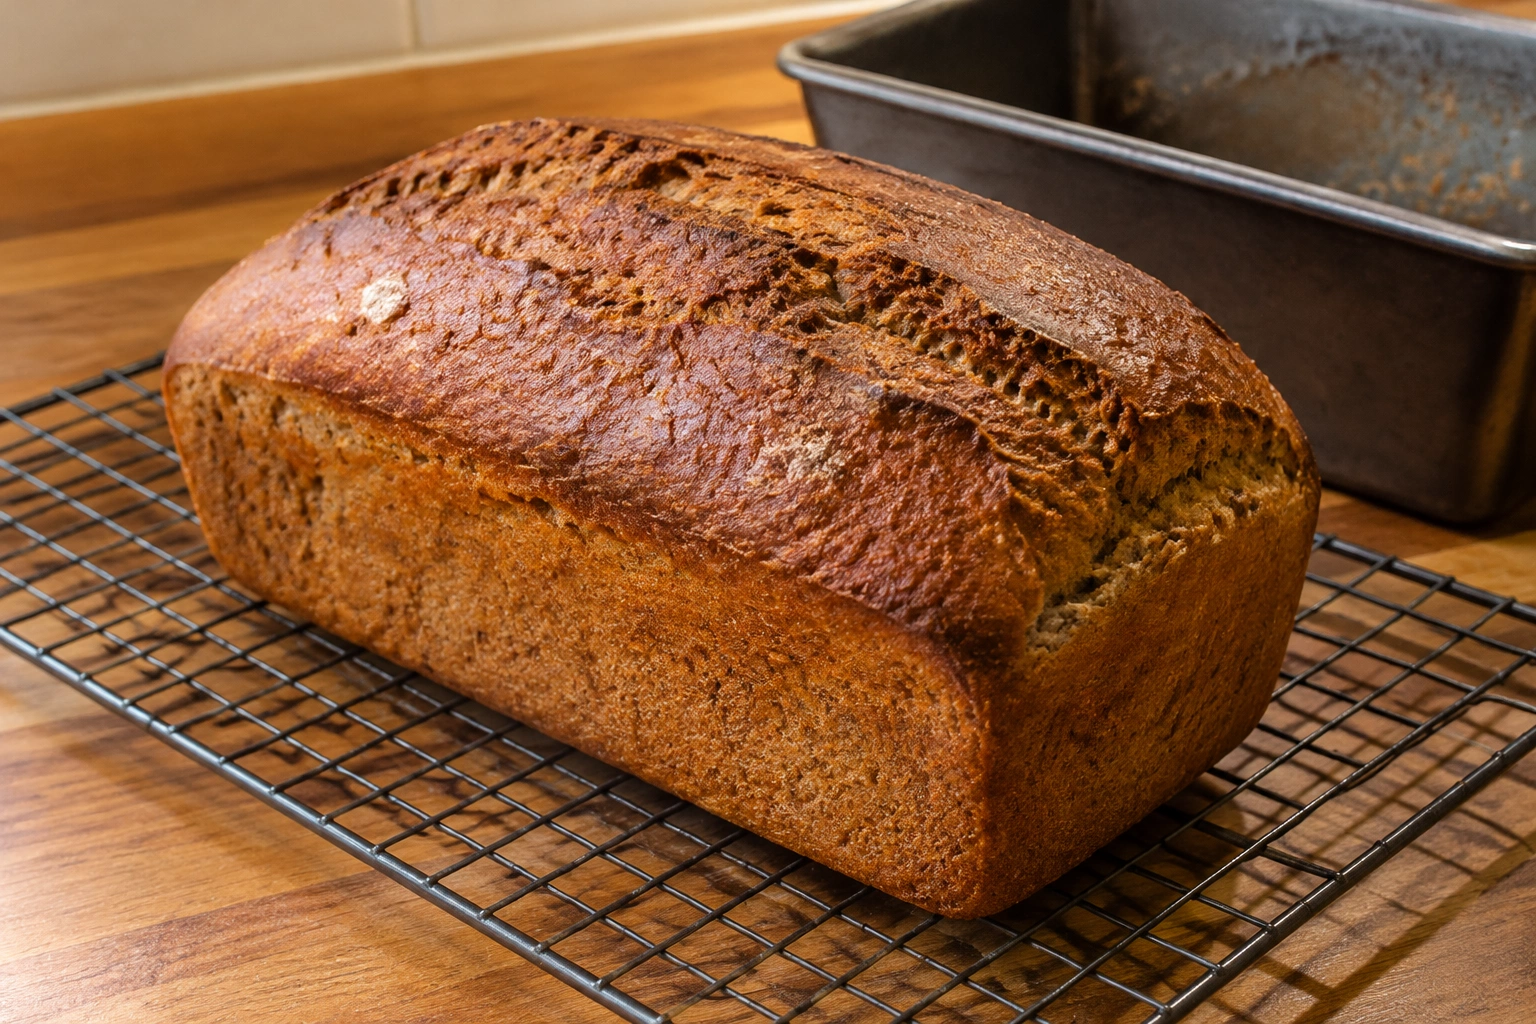
Other cues:
– The crust is deeply colored
– The loaf sounds hollow when tapped on the bottom
– The loaf feels lighter when lifted out of the pan
If the crust looks finished but the internal temperature is still below the target range, keep baking in 5-minute increments and check again. Rye loaves can brown early, especially if they contain honey or molasses.
Cool, Slice, and Store Rye Bread
Cooling matters more with rye than many bakers realize. If you slice too soon, the crumb can seem gummy even when the bread is technically baked through.
Let the loaf cool completely on a wire rack before slicing. For a pan loaf, that usually means at least 1 to 2 hours, and longer for a dense loaf. That resting period allows the structure to set and the moisture to redistribute. If you cut early, the knife can compress the crumb and make the center seem underdone.
For storage:
– Keep the loaf wrapped or in a bread bag at room temperature for short-term use
– Slice only what you need
– Freeze extra slices for longer storage
At room temperature, a well-wrapped rye loaf usually keeps well for a few days. Slicing the whole loaf right away can dry it out faster, so if you want the best freshness over several days, slice as needed instead of all at once. Refrigeration is usually not the best first choice for bread texture, because it can dry the crumb faster than room-temperature storage. If you need to keep it longer, freezing is the better option.
Common Mistakes and How to Fix Them
1. The loaf is dense
Usually, this comes from too much rye, too little rise, or too much flour added during mixing.
Fix: Use a higher wheat blend next time, and resist the urge to make the dough dry and tidy. Rye dough should be sticky.
2. The crumb is gummy
This is often a baking or cooling problem, not just a dough problem.
Fix: Bake longer and check the center with an instant-read thermometer. Aim for 195°F to 205°F in the middle of the loaf. Then let the bread cool completely before slicing. If you cut it while warm, the crumb can look underbaked even if the loaf was technically close.
3. The center is underbaked
Rye bread can brown on the outside before the inside is fully set, especially in a dark pan or with sweeteners like molasses.
Fix: If the crust is getting too dark before the center reaches the target temperature, tent the loaf loosely with foil and continue baking until the internal temperature is in range. If the loaf is already sliced and still gummy, there’s no real fix for that loaf, but you can toast the slices to improve the texture.
4. The dough won’t hold shape
That usually means the flour blend is too rye-heavy for a free-form loaf.
Fix: Bake in a loaf pan, or increase the wheat flour portion.
5. The rise is weak
This can happen if the dough is overproofed, underproofed, or simply too heavy with rye.
Fix: Watch the dough instead of the clock alone, and use a more balanced rye-wheat formula for your first attempts.
6. The dough feels impossibly sticky
That’s normal to a point. Rye dough is often tacky and soft.
Fix: Use lightly wet hands or a bench scraper, and avoid over-flouring the surface. Too much extra flour can make the finished loaf heavy.
Practical Rye Bread Variations
Once you’ve made a plain rye loaf successfully, small flavor changes can take it in different directions.
Caraway rye
Caraway is the classic deli-style flavor. Use a teaspoon or two if you want the bread to taste unmistakably “rye” in a traditional sense.
Honey rye
Honey softens the flavor and adds a gentle sweetness. It’s especially useful if you want a loaf that works well for sandwiches.
Molasses rye
Molasses deepens the color and gives the bread a darker, more robust profile. It pairs well with a higher rye percentage.
Sourdough rye
If you already maintain a starter, sourdough can bring more complexity and a tangier finish. It usually asks for more time and attention, but many bakers love the flavor payoff.
If you’re deciding between yeast and sourdough, think about your goal: yeast gives you predictability, while sourdough gives you more flavor development and a longer process.
When to Consult a Master Baker
If your rye bread keeps collapsing, stays gummy despite longer baking, or behaves unpredictably even when you follow the formula closely, it may be time to study the dough more deeply with a skilled baker or instructor. Rye can be wonderfully rewarding, but it is less forgiving than many wheat breads, especially at high percentages.
A good teacher can help you read fermentation, judge hydration, and understand whether the issue is flour choice, proofing, or baking time. That kind of feedback shortens the learning curve fast.
For more bread fundamentals, you may also find it useful to explore how to make bread dough from scratch for beginners and our guide to making bread without yeast.
FAQ
Can you make rye bread without a bread machine?
Yes. Rye bread can absolutely be made without a bread machine, and hand mixing is sufficient for most home recipes. A bowl, spoon or spatula, and loaf pan are enough for many beginner-friendly loaves.
How much rye flour should a beginner use?
A good starting point is 25% to 50% rye. If you want a stronger rye flavor and are comfortable with stickier dough, you can move up to 75% rye. 100% rye is possible, but it is the most challenging and usually works best in a pan.
How long should rye bread proof?
For a same-day yeast loaf, a common proofing window is 30 to 75 minutes at about 70 to 75°F. Cooler rooms take longer, and warmer rooms take less time. Sourdough or overnight methods follow a different schedule and should be judged by dough expansion rather than a fixed clock.
What internal temperature means rye bread is done?
A good target is 195°F to 205°F in the center of the loaf. If the loaf looks done on the outside but the center is below that range, keep baking.
How long does rye bread stay fresh?
At room temperature, a well-wrapped rye loaf usually keeps well for a few days. For longer storage, freeze slices or the whole loaf. Slicing the loaf only as needed can help it stay fresh longer.
Rye bread rewards patience and observation. Once you understand that it wants a gentler hand, a little more support, and a close eye on fermentation, it becomes much easier to bake well. And when it comes out right, the flavor is worth every bit of attention.