
First Rise vs Second Rise in Bread Dough: How to Tell, Time, and Trust Each Stage

If you’ve ever stared at a bowl of dough and wondered whether it was ready for shaping, you’re in good company. The difference between the first rise and second rise is one of those bread fundamentals that sounds simple until you’re the one holding the dough and deciding what to do next.
Here’s the short version: the first rise builds flavor and strength in the unshaped dough, while the second rise fine-tunes the loaf after shaping so it bakes with better volume and texture. Both matter, but they do not behave the same way. The first rise gives you more wiggle room. The second rise asks for more precision.
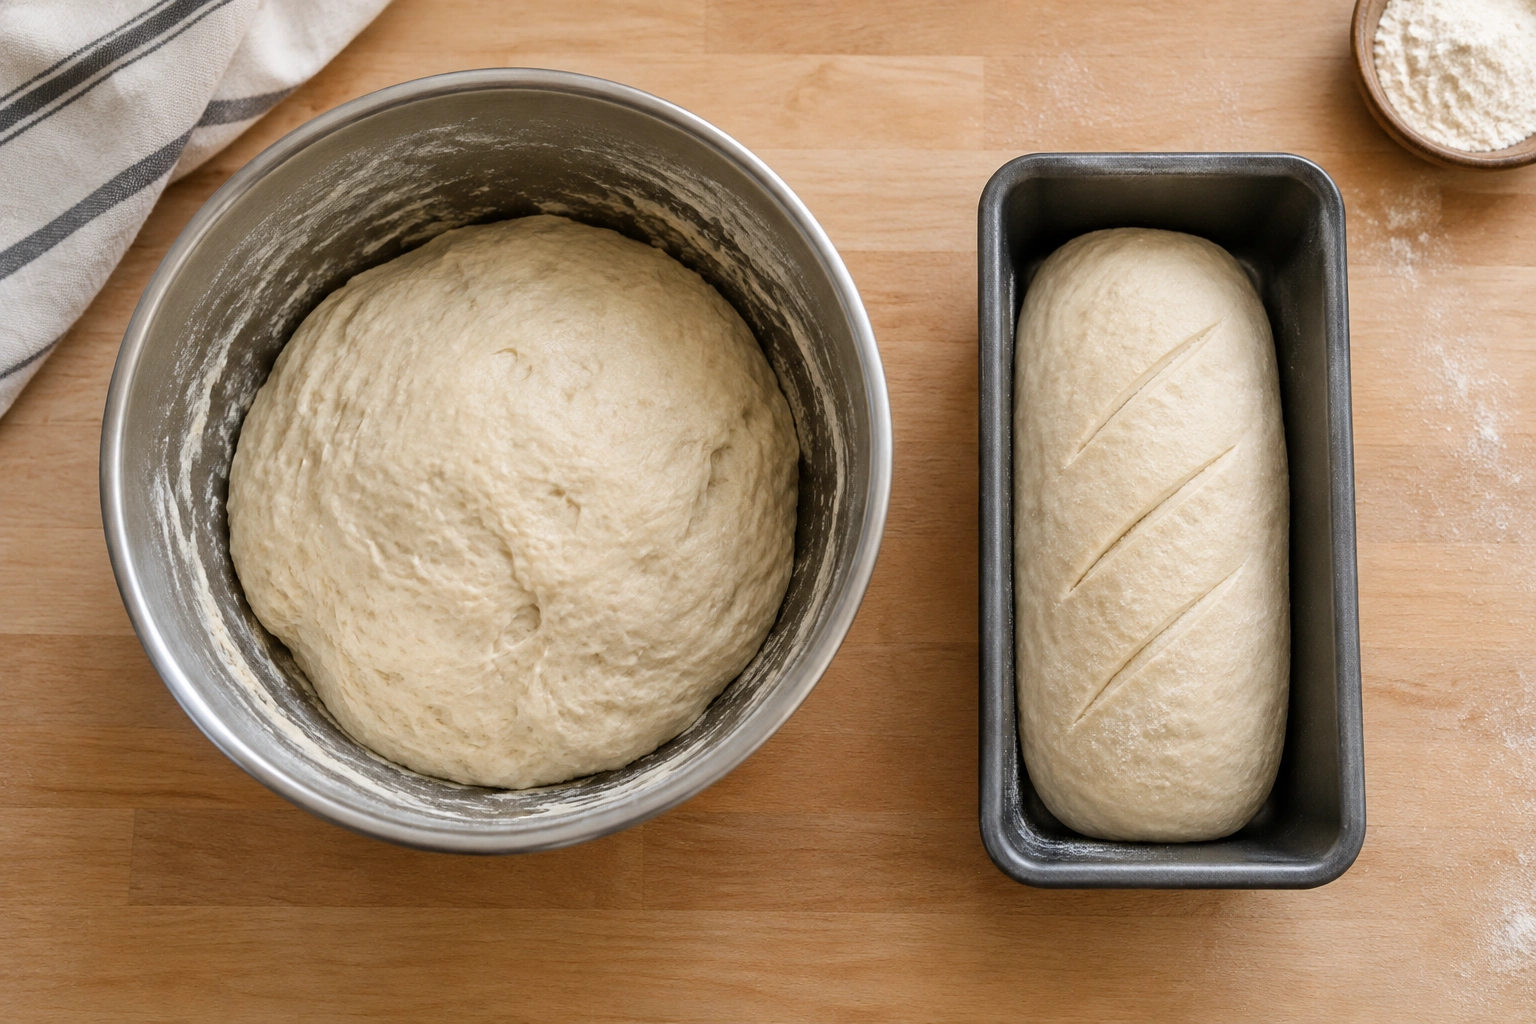
That difference is why bread can look perfect in the bowl and still bake up dense, squat, or gummy if the second rise is rushed. It’s also why a dough that seems “slow” may simply need more time, not more yeast panic.
First Rise vs Second Rise: What Each One Means
In most bread recipes, the first rise happens after mixing and kneading, before shaping. Bakers often call this bulk fermentation because the dough rises as one mass in the bowl or tub.
The second rise happens after shaping. This stage is usually called final proof or proofing. The dough has been divided, shaped, and put into its final form—like a loaf pan, boule, or rolls—before it goes into the oven.
Think of the first rise as the dough’s “development phase” and the second rise as its “final adjustment.” During the first rise, the dough builds flavor and structure. During the second rise, it settles into shape and collects the last bit of lift it needs for baking.
A useful rule of thumb from King Arthur Baking is that the first rise usually offers more forgiveness, while the second rise needs to be judged more carefully for a full, well-shaped loaf.
First rise vs second rise at a glance
| Stage | Common name | What it does | When it happens | What you’re watching for | Main risk |
|---|---|---|---|---|---|
| First rise | Bulk fermentation | Builds flavor, gas, and dough strength | After mixing/kneading, before shaping | Dough expansion, elasticity, and readiness to shape | Shaping too early or letting it go too far |
| Second rise | Final proof | Prepares shaped dough for baking | After shaping, before baking | Size, spring-back, and surface feel | Underproofing or overproofing more easily |
What You Need Before You Start
You don’t need fancy equipment to judge rise stages well, but a few basics make the process much easier:
- A clear bowl or container so you can see volume changes
- A cover such as plastic wrap, a lid, or a damp towel
- A timer so you can track fermentation without guessing
- A thermometer if you want to check room temperature or dough temperature
- Your recipe’s target dough so you know whether it’s lean, enriched, or high-hydration
The bowl matters more than people think. If the sides are opaque, it’s easy to miss how much the dough has expanded. A marked container or a bowl with a visible starting level helps you make a decision based on actual movement, not just memory.
How the First Rise Works
During the first rise, yeast keeps producing gas while the dough’s gluten network relaxes and strengthens. This is where bread starts to gain personality. The dough becomes more extensible, more flavorful, and easier to shape later.
This stage is not just about getting bigger. It’s about creating a dough that can hold gas without tearing. If you’ve kneaded properly, the gluten network should already be developing. The first rise lets that structure mature while fermentation adds flavor.
A dough that has fermented well in the first rise usually feels smoother, lighter, and a little puffy when you touch it. It should not feel tight and raw, but it also should not be so fragile that it collapses at the slightest nudge.
If you want a deeper refresher on gluten development before fermentation even begins, our guide on how to knead bread dough connects the kneading stage to what you’ll see during the rise.
How to Tell the First Rise Is Done
The first rise is best judged by a combination of volume, feel, and dough behavior.
1. Watch for visible expansion
Many recipes aim for a noticeable increase in size, often around doubled dough, though the exact target depends on the recipe. Don’t treat “double” as a law for every dough style, especially enriched or very airy doughs. Use it as a reference point, not a stopwatch replacement.
2. Check the texture
A properly fermented dough often looks domed, slightly elastic, and airy underneath the surface. It may have bubbles near the sides or top if the container is clear.
3. Use the windowpane test if needed
A small piece of dough should stretch into a thin membrane without tearing immediately. That tells you the gluten network is developed enough to trap gas and survive shaping. If it tears too soon, the dough may need more kneading or more resting time before shaping.
4. Notice how it handles
When you press the dough gently, it should feel alive and springy, not dense and stiff. If it still feels tight and resistant, the first rise may not be complete.
A practical decision rule: if the dough has expanded well, feels airy, and stretches without shredding too easily, it is usually ready to shape. If it looks active but still feels dense, give it more time.
Shaping and Preparing for the Second Rise
Shaping is the bridge between the two rises. This step redistributes the dough’s structure, tightens the outer surface, and creates the final form of the loaf.
That means shaping changes how the second rise behaves. A loosely shaped loaf may spread instead of rise upward. An overhandled dough may lose too much gas and need extra time to recover. A well-shaped loaf, by contrast, holds its structure and expands in a controlled way.
This is also why bakers often “punch down” dough gently, not aggressively. The goal is not to destroy every bubble. It’s to redistribute the gas so the dough can be shaped evenly. Too much rough handling can leave you with a loaf that feels tight and uneven later.
How the Second Rise Works
The second rise is the dough’s final proof before baking. Once shaped, the dough needs time to relax, expand, and become bake-ready.
This stage is usually less forgiving than the first rise because the dough is now committed to its final shape. If it underproofs, the loaf may burst unpredictably in the oven or bake up dense. If it overproofs, it can collapse, spread, or lose oven spring.
That is why the second rise matters so much for loaf shape. The dough has already been divided and formed, so the final proof determines how well it holds that shape in the oven.
According to King Arthur Baking, baking too soon or too late can lead to collapse and a dense, gummy center. That’s the consequence of missing the sweet spot.
How to Tell the Second Rise Is Done
For the second rise, the best cues are tactile and visual, not just time-based.
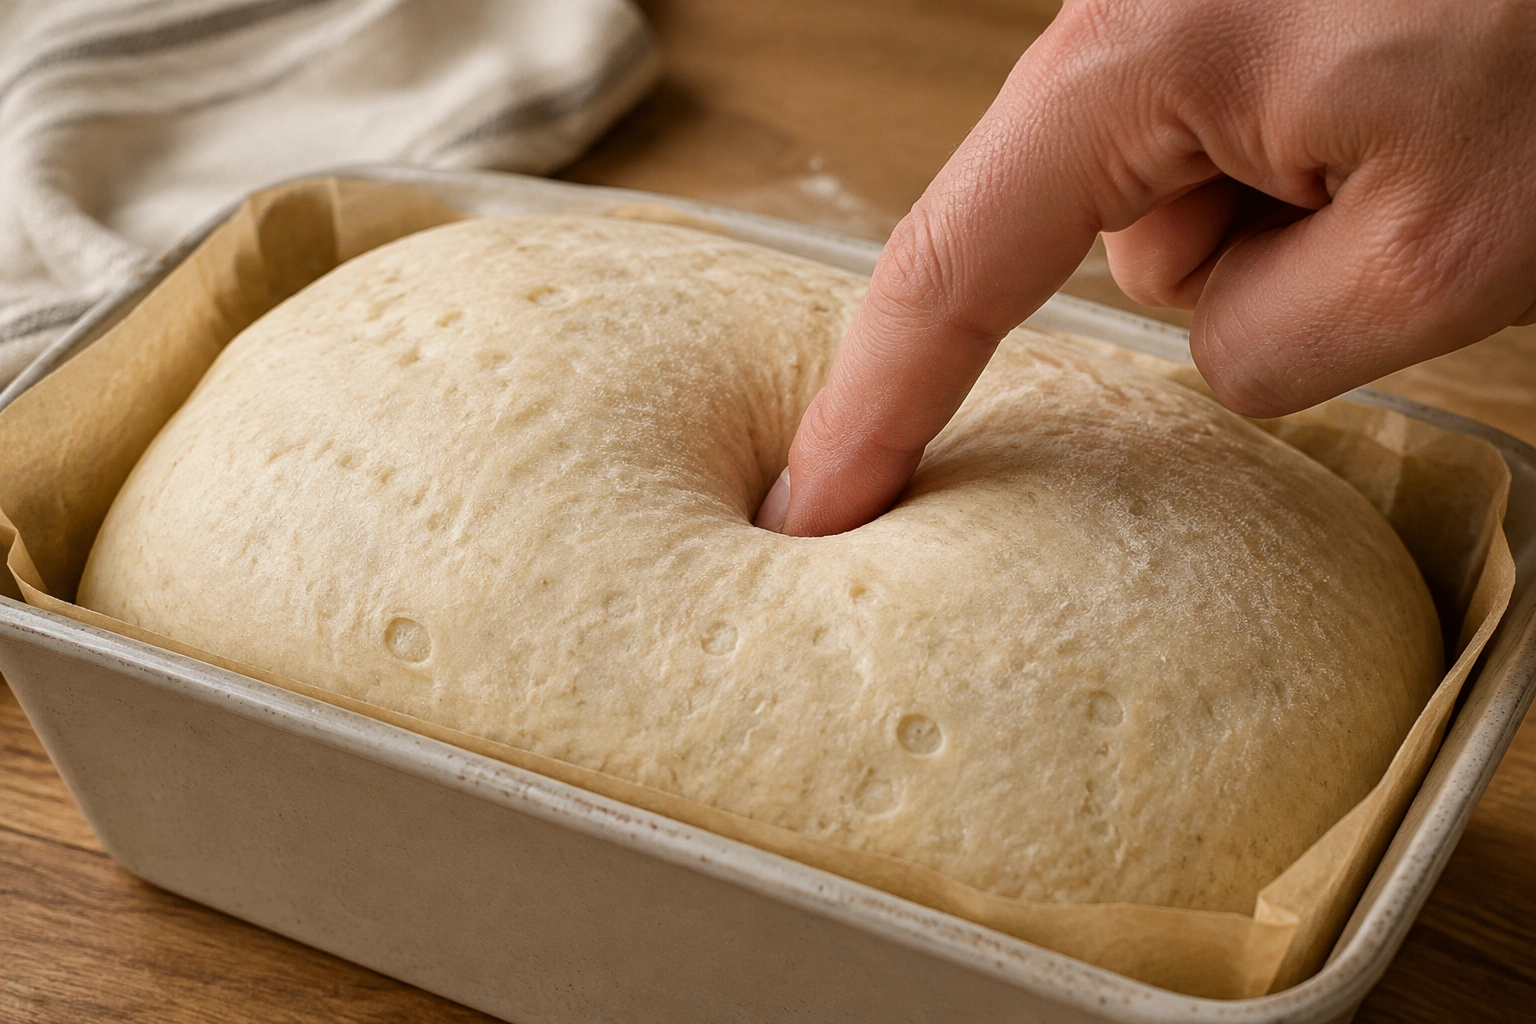
The poke test
Gently press a floured finger into the dough.
- Springs back quickly: likely underproofed
- Springs back slowly and leaves a slight impression: usually ready
- Barely springs back or collapses: likely overproofed
Look at the loaf shape
For pan loaves, the dough often rises near or just above the pan rim, depending on the recipe. For free-form loaves, it should look puffy and expanded, but still firm enough to hold its shape.
Observe the surface
Ready dough often has a smooth, slightly domed surface. If the dough looks fragile, wrinkled, or overly slack, it may be past its best proofing window.
A helpful mindset here: the second rise is not about making the dough as big as possible. It’s about baking at the moment when the dough still has enough strength to expand well in the oven.
First Rise vs Second Rise: Side-by-Side Comparison
The easiest way to separate the two is to think about purpose and precision.
- First rise: builds fermentation, flavor, and dough strength
- Second rise: prepares the shaped loaf for the oven
The first rise can usually tolerate a little more flexibility. If the dough goes a bit longer, you may still save it by shaping carefully. The second rise is more exacting because the loaf shape is already set.
A simple way to remember it:
– If the dough is in a bowl, you’re usually in the first rise.
– If the dough is shaped and waiting to bake, you’re in the second rise.
How Long Each Rise Usually Takes
There is no universal clock that works for every dough. Rise time changes with temperature, yeast activity, flour type, hydration, and enrichment.
For many home bakers at typical room temperature, a first rise often takes about 1 to 2 hours, though it can be shorter or longer depending on the dough. A second rise is often a bit shorter, commonly around 30 to 90 minutes. Cooler doughs, richer doughs, or very lean doughs can take longer, while warm kitchens and active yeast can shorten both stages.
What speeds things up
- A warm kitchen
- Active yeast
- Higher hydration doughs
- Some enriched doughs, depending on formula and handling
What slows things down
- A cool kitchen
- Refrigeration
- Lean doughs that ferment more slowly
- Doughs with more fat or sugar, which can change yeast behavior and gluten development
That’s why time alone is a weak guide. A recipe may say “an hour,” but your dough may need less or more depending on your kitchen. The better habit is to use time as a starting estimate, then check the dough itself.
Common Mistakes That Affect Both Rises
Using the clock instead of the dough
This is the biggest trap. A room-temperature dough in a warm kitchen does not follow the same schedule as one in a cool kitchen.
Shaping too early
If the first rise is cut short, the dough may feel tight and resist shaping. That often leads to a dense crumb later.
Letting the second rise go too far
Overproofed dough can look puffy but bake weakly. It may collapse when moved or fail to spring in the oven.
Assuming every dough behaves the same
A sandwich loaf, brioche, and pizza dough do not follow identical rise rules. Dough style changes the schedule.
Handling the dough too roughly after bulk fermentation
You want to preserve enough gas to support the second rise, not crush the dough into a dead mass.
Troubleshooting: When Dough Rises Too Slow, Too Fast, or Not Enough
If the dough is rising too slowly
Check the room temperature first. Cool kitchens often stretch out the schedule. Weak or inactive yeast is another common cause, especially if the yeast is old, expired, or was stored poorly. Dough temperature matters too: if the dough starts out too cold, fermentation can crawl even in a normal room.
Salt, sugar, and fat can also slow rise. Salt tightens the dough and slows yeast activity; sugar and fat can make fermentation more sluggish in enriched doughs, especially if the formula is heavy on both. Under-kneading can contribute as well, because a weak gluten network may not hold gas efficiently even when the yeast is active.
If the dough is rising too quickly
A warm kitchen can push dough ahead faster than expected. In that case, shape earlier or move the dough to a cooler spot. For some recipes, refrigeration can help slow things down and improve scheduling.
If the dough barely rises
The issue may be weak yeast, dough temperature, or a formula that naturally rises more slowly. If the dough feels dense and lifeless, give it more time before assuming it has failed. If it still doesn’t move after a reasonable wait, the problem may be with the yeast, the mixing stage, or a dough that never warmed up enough to ferment well.
If the loaf looks good but bakes dense
That often points to proofing problems. Underproofed dough may not have had enough time to expand, while overproofed dough may have lost the strength to hold gas in the oven.
When a Recipe Uses One Rise, Two Rises, or Refrigerated Proofing
Most traditional yeast breads use two rises, but not every dough follows that script.
Some doughs are designed for a single rise because of their formula or shape. Pizza dough is a common example: it is usually baked flat, so it often does not need the same second rise that a loaf does.
Other doughs use cold fermentation or a refrigerated second rise. BBC Good Food notes that many doughs can be put in the fridge for the second rise and left overnight. That approach can help with convenience and flavor, but the dough still needs to come back to room temperature and finish rising before baking.
That trade-off is useful for home bakers: refrigeration buys flexibility, but it does not eliminate the need to judge readiness before the oven.
Practical Examples of Readiness in Real Bread Dough
Sandwich bread in a loaf pan
After the first rise, the dough should feel airy and elastic enough to shape cleanly. After shaping, the second rise is ready when the dough looks puffy and passes a gentle poke test with a slow spring-back.
Brioche or enriched dough
These doughs often behave differently because fat and sugar change the way they rise. They may need more patience and a sharper eye for tactile cues rather than fixed timing.
Refrigerated dough
If you shape at night and chill the dough, it may rise slowly in the fridge and then need time at room temperature before baking. Don’t bake it straight from the refrigerator unless the recipe specifically says to.
Quick Recap: How to Judge Readiness With Confidence
The first rise and second rise are related, but they are not interchangeable.
Use the first rise to build flavor, gas, and structure. Move on when the dough has expanded, feels lively, and can stretch without tearing too easily.
Use the second rise to prepare the shaped loaf for the oven. Bake when the dough looks puffy, holds its shape, and springs back slowly under a gentle poke.
If you remember nothing else, remember this: the first rise gives you time to learn the dough, and the second rise asks you to listen to it closely. That habit alone will improve your bread more than chasing a perfect clock ever will.
Frequently Asked Questions
Is the first rise the same as bulk fermentation?
Yes. In most bread recipes, the first rise is the bulk fermentation stage, when the dough rises as one mass before shaping.
Is the second rise the same as proofing?
Yes. The second rise is commonly called final proof or proofing, and it happens after shaping.
Do all bread recipes need two rises?
No. Many do, but some breads and dough styles use a different fermentation method or only one rise.
What happens if I skip the second rise?
The loaf will usually bake with less volume and a tighter crumb. It may also split unpredictably or feel dense.
Can I refrigerate dough for the second rise?
Yes, many doughs can be refrigerated for the second rise. You usually still need to let the dough finish rising before baking.
Which rise matters more?
Both matter, but the second rise is usually less forgiving because the loaf shape is already set.
How do I know if my dough is overproofed?
It may feel fragile, lose spring, or collapse easily when touched. In the oven, it may spread instead of rising well.
Why does my dough rise slowly in winter?
Cooler kitchens slow fermentation. The dough may simply need more time than the recipe suggests.
Can I use the same timing for every bread?
Not reliably. Dough type, room temperature, hydration, and yeast activity all affect rise time.
What if my dough rises too fast?
Shape it sooner or move it to a cooler spot. If the second rise is racing ahead, refrigeration can help slow it down.
When should I consult a master baker?
If your dough repeatedly collapses, refuses to rise, or bakes dense despite careful timing, a more experienced baker can help you diagnose the formula, mixing, and fermentation balance.