
How to Knead Bread Dough for Better Texture, Rise, and Crumb

If you’ve ever mixed a dough that looked shaggy, sticky, or a little stubborn, kneading is the moment where it starts to become bread.
Kneading is not just “working the dough.” It helps align and strengthen gluten so the dough can trap gas, rise properly, and bake into a loaf with better structure. The goal is not to beat the dough into submission; it’s to develop enough strength for the style of bread you’re making while keeping the dough supple.
That balance matters. A sandwich loaf usually wants a smooth, elastic dough that can hold an even crumb. A wetter artisan dough may need gentler handling and a different method altogether. Once you learn to read the dough instead of chasing a timer, kneading becomes much easier to judge.
What Kneading Does to Bread Dough
When flour and water meet, proteins begin forming gluten. Kneading encourages that network to organize and strengthen. In practical terms, that means the dough becomes more elastic, more cohesive, and better able to hold the carbon dioxide produced during fermentation.
That is why kneading affects both rise and crumb. Underdeveloped dough often tears easily and can bake up dense or uneven. Properly kneaded dough usually feels smoother, stretches more readily, and has enough strength to support proofing without collapsing.
A useful way to think about kneading is this: the dough should become both stretchy and resilient. It should stretch without immediately ripping, but it should also have enough tension to spring back a little when pressed.
Before You Start: Tools, Ingredients, and Dough Readiness
You do not need much equipment to knead by hand, but a few things make the job cleaner and more predictable:
- A mixing bowl
- A work surface or counter
- A bench knife or dough scraper for sticky dough
- Light flour for dusting, used sparingly
- Clean hands
- Optional: a stand mixer with a dough hook
Just as important is what stage the dough is in. Most doughs are kneaded after the ingredients are mixed into a rough mass. If your recipe includes a rest or autolyse, let that happen first. Resting gives flour time to hydrate, which can make the dough less resistant and easier to knead.
A quick decision rule helps here:
- If the dough is stiff, shaggy, and tearing as you try to bring it together, it probably needs more mixing or a short rest before hard kneading.
- If the dough is already cohesive but rough, kneading can begin right away.
- If it is very wet and slack, traditional kneading may not be the best method. A folding approach may work better.
For hydration-specific guidance, it helps to understand how water changes dough behavior. If you want a deeper look at that trade-off, see how bread dough hydration changes handling and crumb.
How to Knead Bread Dough by Hand
Hand kneading gives you the best tactile feedback. You feel the dough tightening, smoothing, and changing under your palms, which is valuable when you are learning what “ready” actually feels like.
A standard hand-kneading motion follows a simple pattern: push, fold, turn, repeat.
1. Turn the dough out onto the counter
Place the dough on a clean work surface. A light dusting of flour can prevent sticking, but use only enough to keep the dough manageable. Too much flour dries the outside and can make the dough feel finished before it really is.
If the dough is very shaggy, shape it into a rough ball first. That gives you a more stable starting point.
2. Press the dough away with the heel of your hand
Use the heel of one palm to push the dough forward and away from you. This stretches the dough and begins developing gluten. You are not smashing it flat; you are lengthening it.
3. Fold the far edge back toward you
Lift the edge farthest from you and fold it over the center. This creates layers and helps organize the dough’s structure.
4. Rotate the dough about a quarter turn
Turn the dough roughly 90 degrees and repeat the same motion in the same direction. That rotation keeps the kneading even and prevents you from only working one side.
5. Repeat until the dough changes character
As you continue, the dough should move from rough and sticky to smoother and more elastic. If it clings to the counter too aggressively, lightly dust the surface or your hands. If it feels dry and tight, pause before adding more flour; sometimes a short rest is enough.
A practical cue: if the dough is still tearing when you fold it, keep kneading or let it rest briefly. If it stretches more cleanly and starts to feel satiny, you’re getting close.
A quick tactile checklist
At the start, kneaded dough often feels rough, shaggy, and uneven, with sticky spots or dry patches still showing.
In the middle, it should begin to feel more cohesive and elastic, though it may still tug back, feel a little lumpy, or cling lightly to your hands.
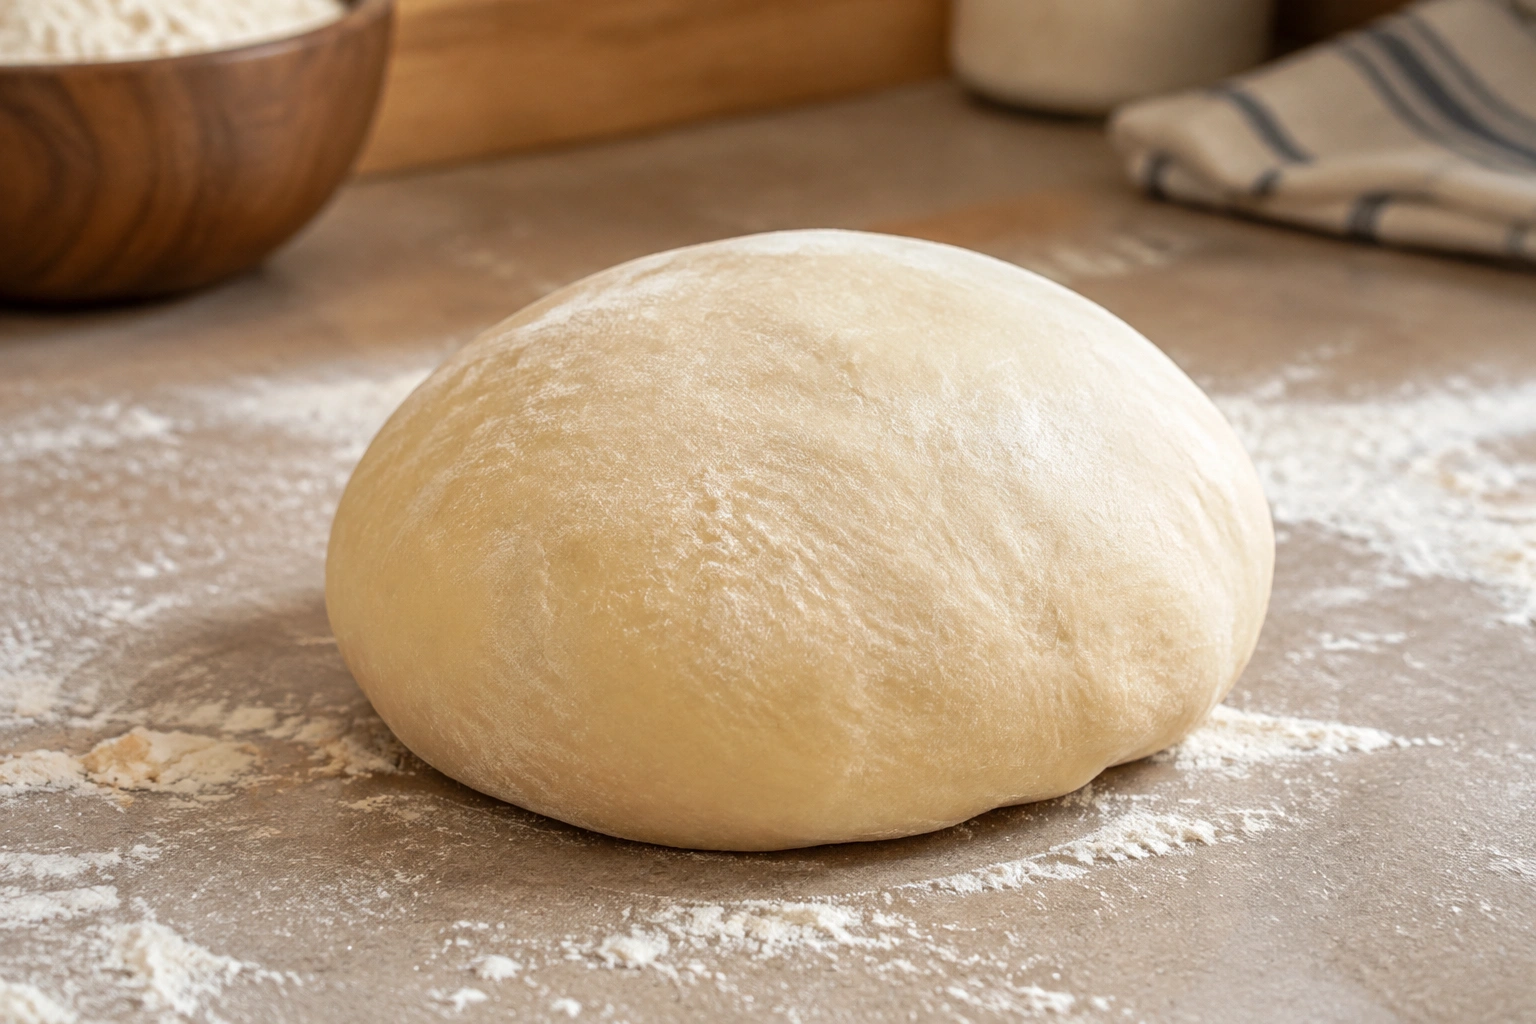
At the finish, properly kneaded dough should feel smooth, supple, and springy, with a slight tackiness rather than a wet, gluey feel.
For many standard doughs, this process takes as long as needed for the dough to change from rough and sticky to smooth and elastic. Exact timing varies by recipe, flour, hydration, and kneading method.
How to Knead Bread Dough with a Stand Mixer
A stand mixer can save your hands, especially with a stiffer dough or a larger batch. It is also useful when you want more consistency and less physical effort.
Use the dough hook on low to medium speed. Keep the mixer running only as long as needed to develop the dough, and watch the dough rather than the clock. If the dough climbs too far up the hook, stop the mixer and let it settle back down.
A mixer is a good choice when:
- Your dough is firm and difficult to knead by hand
- You are making a larger batch
- Your hands are getting tired
- You want steady, even kneading with less manual effort
The trade-off is that a mixer can make it easier to overwork the dough if you walk away. It also gives you less tactile feedback than hand kneading, so you need to rely more on visual cues and stretch tests.
Keep safety in mind: keep hands and tools clear of the hook while the mixer is running, and avoid leaving it on for long stretches if the dough is very stiff. If the mixer seems to struggle, stop and let both the dough and motor rest.
How to Tell When Dough Is Properly Kneaded
This is the part many beginners want most: how do you know when to stop?
The safest answer is not to rely on time alone. The dough’s feel and appearance are more reliable than the clock.
Properly kneaded dough usually has three traits:
- It looks smoother than when you started
- It feels elastic and slightly tacky, not wet and gluey
- It stretches without tearing immediately
A good properly kneaded dough often feels alive in your hands. It should be soft, resilient, and a little springy. If you press a finger into it, the impression should ease back somewhat.
The windowpane test
The windowpane test is a simple confirmation. Pinch off a small piece of dough and gently stretch it between your fingers. If it stretches thin enough to let light through without tearing quickly, the gluten is developed well enough for many bread doughs.
Beginners should expect different results depending on the dough. A lean dough, like a basic sandwich dough, should usually form a stronger, more elastic windowpane. Enriched doughs may feel softer and can take a little longer to develop. Wet or high-hydration doughs may stretch more easily but can also seem delicate, so a slightly weaker-looking windowpane is not always a failure if the dough otherwise feels strong and cohesive.
If it tears immediately, the dough likely needs more kneading. If it stretches a bit but feels tight and snaps back strongly, it may need a little more time or a short rest before the next round of kneading.
For a more detailed readiness check beyond kneading alone, this guide to knowing when bread dough is ready can help you connect kneading cues with proofing cues.
How Kneading Time Changes by Dough Type
Different doughs need different treatment. That is one reason “knead for X minutes” is only a rough starting point.
Standard lean doughs
Basic sandwich breads and similar lean doughs usually knead fairly predictably. They often become smooth and elastic with moderate hand kneading or a short mixer session.
Enriched doughs
Doughs with butter, eggs, milk, or sugar often take longer to develop because fat and sugar change how gluten forms. These doughs may start out softer and more resistant to structure-building. A mixer can be helpful here, especially if the dough feels greasy or slack before it comes together.
Wet or high-hydration doughs
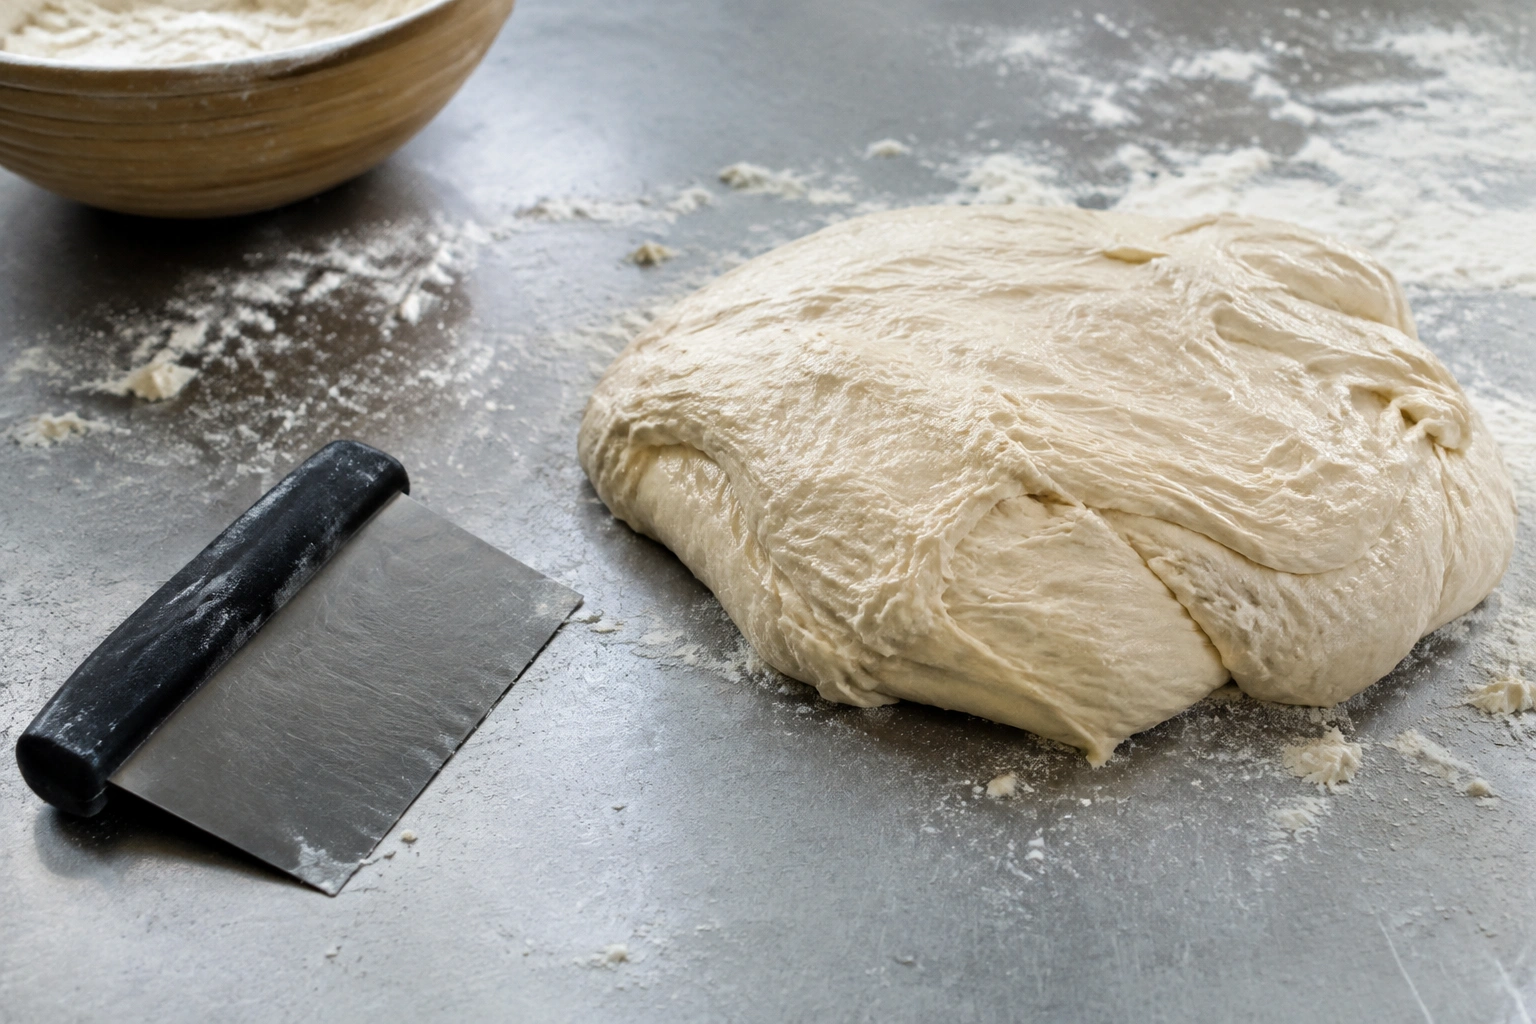
Very wet doughs are a different case. Regular kneading on the counter can be frustrating because the dough may smear rather than gather. In those situations, folding methods or stretch-and-fold techniques are often more practical than prolonged hand kneading.
King Arthur Baking describes a wet-dough approach that uses a bench knife or dough scraper to cut the dough into strips, mound it up again, and repeat before moving into a slap-and-fold style method. That is a useful reminder that not every dough wants the same handling. You can read more in their guide to kneading wet dough by hand.
Sticky Dough, Dry Dough, and Other Kneading Fixes
Most kneading problems fall into a few familiar categories. The good news is that they are usually fixable.
If the dough is too sticky
First, check whether it is truly too sticky or simply underdeveloped. Many doughs feel sticky at the beginning and improve as gluten builds.
If it is still unmanageable after a bit of kneading:
- Dust the counter lightly with flour
- Dust your hands sparingly
- Use a bench knife to lift and fold the dough instead of dragging it
The key is restraint. Adding too much flour can make the dough dry, dense, and harder to hydrate later. A slightly tacky dough is often preferable to a dry one.
If the dough is too dry
Dry dough often feels rough, stiff, and reluctant to come together. If it is only slightly dry, a small amount of water can help. Add it gradually and knead until absorbed rather than pouring in a large splash all at once.
A dry dough may also benefit from a short rest. Sometimes the flour simply needs a few minutes to fully hydrate before the dough feels workable.
If the dough tears easily
Tearing usually means the gluten network is underdeveloped, the dough is too dry, or it needs a rest. Keep kneading if the dough is still rough. If it tightens but still tears, let it rest for a few minutes and try again.
That pause can make a surprising difference because dough relaxes as it hydrates and settles.
Common Kneading Mistakes to Avoid
Beginners often run into the same problems, and they are easy to correct once you know what to watch for.
Judging by time alone
A timer is helpful, but it should not be the only judge. Dough temperature, flour type, hydration, and mixing method all affect kneading time.
Adding too much flour
This is one of the most common mistakes. A heavily floured dough may become easier to handle, but it can also turn stiff and dry. Use flour as a tool, not a crutch.
Stopping before gluten is developed
A dough that still tears and looks rough is not ready to rise just because it has been handled for a few minutes. If it has not become smoother and more elastic, it likely needs more work.
Overworking the dough in a mixer
A mixer can be efficient, but it can also push dough too far if left running too long. Watch for a dough that becomes very tight or starts climbing the hook aggressively.
Using the wrong method for the dough
A very wet dough is often better handled with folds than with traditional kneading. Trying to force a regular kneading motion on it can make the process messy and unproductive.
Kneading vs. Folding and Resting: When to Use Each Method
Kneading, folding, and resting all support gluten development, but they do it in different ways.
- Hand kneading works well for standard doughs and gives strong tactile feedback.
- Stand mixer kneading is useful when you want to save effort or work with a firmer dough.
- Stretch-and-fold or slap-and-fold methods are often better for wetter doughs that do not behave well on a dry counter.
- Resting or autolyse reduces resistance and can make kneading easier by letting flour hydrate before more handling.
The trade-off is simple: more active kneading gives you direct control, while more resting reduces effort but takes more time overall. In practice, many bakers use a mix of both.
Practical Examples of Kneaded Dough at Different Stages
A few real-world examples make the feel easier to recognize.
Sandwich bread dough
After several minutes of kneading, a sandwich bread dough should look smoother and feel elastic enough to stretch without immediately tearing. This is the kind of dough that often responds well to a classic push-fold-turn rhythm.
Enriched dough
A dough with butter or eggs may feel softer and less cooperative at first. It usually needs more patience, and sometimes a mixer helps bring it together more evenly before the final kneading stage.
Wet artisan dough
A very wet dough may never feel like a traditional kneaded ball on the counter. Instead, it may become stronger through rests and folds. If you can lift it and feel it gaining body without adding a lot of flour, that is progress.
When to Consult a Master Baker
If your dough repeatedly tears, never smooths out, or behaves wildly differently from the recipe description, it may be worth getting a second set of experienced eyes. That is especially true with enriched formulas, very wet doughs, or recipes that combine kneading with folds and rests in a specific sequence. A master baker can help you diagnose whether the issue is hydration, mixing, flour strength, or technique.
FAQs
How long should I knead bread dough?
There is no universal number. Some sandwich-style doughs may take only several minutes, while denser, wetter, or enriched doughs can take longer. Use the dough’s feel and stretchability as your main guide.
Can I knead bread dough without a stand mixer?
Yes. Hand kneading works very well for many doughs and gives you excellent control. It is often the best way to learn what properly developed dough feels like.
What should kneaded dough feel like?
It should feel smooth, elastic, and slightly tacky. It should stretch without tearing right away and should hold together as a cohesive mass.
Should I add more flour if the dough sticks to my hands?
Only a little, and only if needed. A small dusting can help, but too much flour can dry out the dough and make the loaf dense.
Is sticky dough always a problem?
Not always. Some doughs are supposed to be tacky or wet. The question is whether the dough is sticky because it is high-hydration or because it still needs more kneading and time.
What happens if I under-knead dough?
Under-kneaded dough may tear easily, feel rough, and fail to trap gas well. That can lead to poor rise and a tighter crumb.
What if I over-knead dough?
Over-kneading is less common by hand but can happen in a mixer. The dough can become overly tight, hard to shape, or start losing its smooth structure.
Can resting replace kneading?
Not completely, but resting can reduce how much kneading you need. Autolyse and short rests help flour hydrate and make the dough easier to work with.
What is the best method for wet dough?
For very wet doughs, folding methods or a slap-and-fold approach are often more practical than traditional kneading on the counter.
How do I know when to stop kneading?
Stop when the dough looks smoother, feels elastic, and passes a basic stretch test without tearing too quickly. If it still feels rough or breaks apart, give it more time.