
How to Bake Bread in a Dutch Oven for a Crisp, Artisan-Style Loaf

If you’ve ever wanted that bakery-style crust at home, a Dutch oven is one of the most reliable tools you can use. It gives bread the two things it craves most in the first part of baking: strong heat and trapped steam. Those conditions help the loaf rise higher, open up along the score, and brown into a crackly crust instead of drying out too early.
I’m Ethan Baker, and when I teach this method, I like to frame it as a simple trade: the pot does some of the work for you, but it asks for a little care in return. You need the right dough, a safe transfer, and a clear plan for covered versus uncovered baking. Once those pieces click, the method becomes wonderfully repeatable.
Why a Dutch Oven Works So Well for Bread
A Dutch oven acts like a tiny steam chamber. In the first stage of baking, the lid traps moisture released by the dough itself. That moisture keeps the surface flexible long enough for the loaf to expand, which is why Dutch oven bread often gets better oven spring than bread baked open on a tray or stone.
The heavy pot also stores heat well. That stored heat blasts the dough from all sides, not just from below, which helps the loaf rise evenly. Then, when the lid comes off, the surface dries out and browns quickly.
That’s the basic magic here:
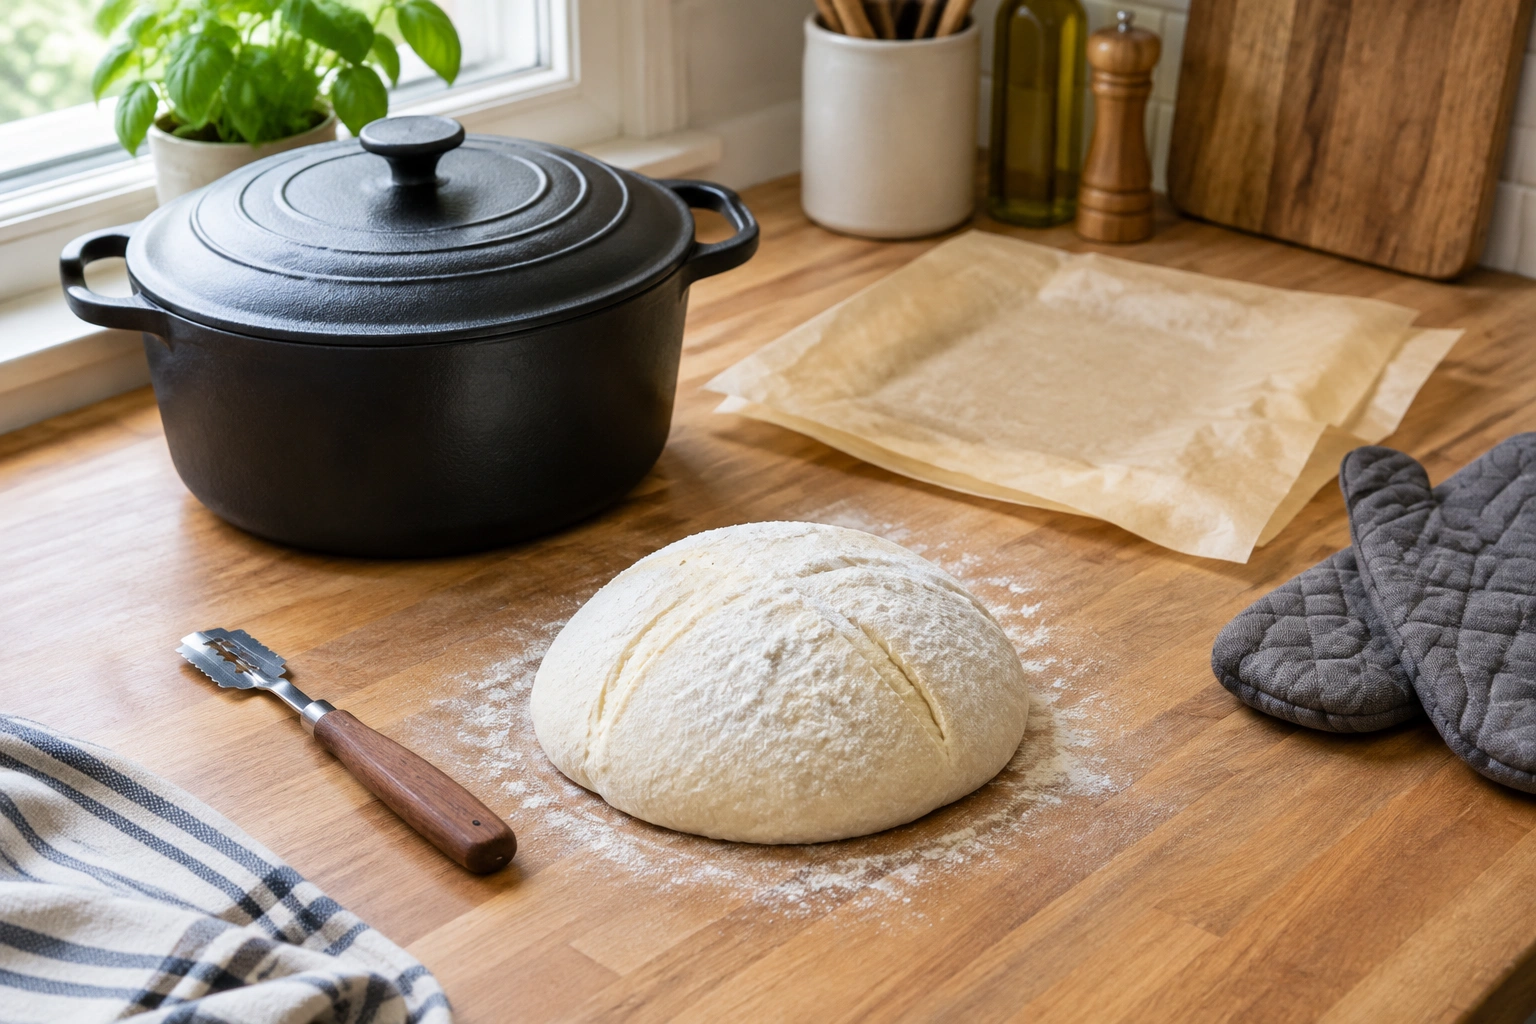
- Covered phase: steam + heat = expansion and lift
- Uncovered phase: dry heat = color, crispness, and a fully baked crust
For home bakers, the real advantage is convenience: a Dutch oven creates a strong steam-retaining environment without extra steam pans, spritzing, or a complicated setup.
What You Need Before You Start
You do not need a fancy setup, but a few choices matter.
Best Dutch oven size
For a standard round loaf, a 4- to 6-quart Dutch oven is the most practical range. That size gives the dough enough room to expand without spreading too thin. If the pot is too small, the loaf can touch the lid or crowd the sides. If it’s much larger, the bread may spread more before it rises upward.
Material: enameled cast iron vs bare cast iron
Both can work.
- Enameled cast iron is easier to clean and usually more beginner-friendly.
- Bare cast iron is durable and excellent at heat retention, but it may need a little more care to keep it seasoned.
If you’re new to bread baking, enameled cast iron is often the easier starting point.
Helpful tools
- Parchment paper
- Oven mitts or heat-resistant gloves
- Sharp blade, lame, or very sharp knife for scoring
- Cooling rack
- Bowl or banneton for proofing
Do you need parchment paper? Not always, but it is strongly recommended for beginners because it makes transfer easier and helps prevent sticking. If you don’t have parchment, a well-floured towel, a lightly floured peel, or a dusting of cornmeal can work as a backup for some doughs.
If you want a broader refresher on dough structure before shaping, this guide on what bread dough is made of is a useful companion.
Choose the Right Dough for the Method
Dutch oven baking works best with doughs that can hold shape while still expanding well in the oven.
Good candidates include:
- No-knead dough
- Sourdough boules
- Simple artisan lean doughs
- Many whole wheat doughs, as long as they are not too heavy or tight
Lean doughs—those with flour, water, yeast or starter, and salt—tend to shine here because they brown well and develop a crisp crust. Enriched doughs with lots of butter, milk, eggs, or sugar can still be baked in a Dutch oven, but they brown faster and may need a lower temperature or shorter uncovered finish.
If you’re still learning how dough should feel before baking, it helps to review the basics first. This beginner guide to making bread dough from scratch can make the shaping stage much less mysterious.
Prepare and Proof the Dough
The loaf should be shaped and proofed before it goes into the pot. For round loaves, a banneton is helpful because it supports the dough and helps it keep a neat form. A bowl lined with a floured towel works too.
What matters most is not the container itself, but the dough’s readiness:
- It should look airy and slightly puffy.
- It should hold its shape when turned out, not collapse into a puddle.
- When gently poked, the dent should spring back slowly rather than snapping back immediately.
That last part is a practical clue. If the dough springs back very fast, it likely needs more proofing. If it barely springs back and feels fragile, it may be overproofed.
Handle it gently, but not delicately to the point of fear. The goal is to preserve the gas already in the dough, not to treat it like wet cement.
Preheat the Dutch Oven Safely
Many bread bakers preheat the Dutch oven before loading the dough. One commonly used method is to preheat the oven to 450°F (230°C) with the empty Dutch oven and its lid inside for 30 to 45 minutes. Some bread guides use 500°F instead, especially for certain artisan loaves, but that higher heat can brown the crust more aggressively.
Here’s the decision rule I use:
- 450°F is a solid all-purpose starting point.
- 500°F can work well if your loaf tends to bake pale or if your oven runs cool.
- If your bottom crust burns easily, stay closer to 450°F and move the rack higher in the oven.
Safety matters here. The pot, lid, and handles will all be extremely hot. Use dry oven mitts, open the oven carefully, and set the lid and pot on heat-safe surfaces only when you need to separate them. When loading the dough, lift the hot lid off first, set it down safely, then lower the dough into the hot pot. Keep your face back, and work quickly but calmly.
A quick note on cold-start methods
Some bakers place the Dutch oven in a cold oven and let everything heat together. That can reduce handling stress and is common in some recipes, but a fully preheated pot usually gives stronger initial oven spring. If your priority is easier handling, the cold-start method has appeal. If your priority is maximum lift, preheating is usually the better trade-off.
How to Transfer the Dough Into the Pot
This is the part that makes many bakers nervous, but it gets easier with a clear sequence.
A reliable transfer method is to place the proofed dough on parchment paper, then lift the paper and dough together into the hot pot. That approach is popular because it reduces sticking and keeps the loaf from deflating during the move.
Parchment paper vs direct placement
Parchment paper
– Easier for beginners
– Safer for sticky dough
– Makes lifting the loaf out simpler
– Slightly less direct contact with the hot pot surface
Direct placement
– Cleaner look underneath
– No paper to trim or manage
– Requires more confidence and a well-shaped, not-too-sticky dough
If you’re baking your first few loaves, parchment is the smarter choice. If you don’t have parchment, a floured towel, a light dusting of cornmeal, or a parchment-free sling made from a well-floured piece of baking paper substitute can help with release and transfer, as long as the dough is firm enough to hold its shape.
What about oil or cornmeal?
A little cornmeal can help with release and add a rustic finish, especially on the bottom. Oil is less commonly needed for lean artisan dough and can sometimes soften the crust where it touches. For most home bakers, parchment is the easiest and most predictable transfer aid.
Score the Dough and Load It for Baking
Scoring is not just decoration. It gives the loaf a controlled place to expand, which helps prevent random tears and improves the final shape.
A few practical guidelines:
- Use one deep slash for a round boule, or a few shorter slashes for a longer loaf.
- Score quickly and confidently.
- Aim for a cut that is clean rather than hesitant.
The exact pattern is less important than giving the dough a weak point where it can open naturally. A shallow score often fails to do its job; a confident cut gives the loaf room to bloom.
Once scored, lower the dough into the preheated Dutch oven, cover it, and move quickly so the pot doesn’t lose too much heat.
Bake Covered First, Then Uncovered
This is the heart of the method.
A common approach is to bake the loaf covered first, then finish uncovered so the crust can color fully. Several reliable bread methods use a covered bake of about 20 to 30 minutes, followed by 5 to 20 minutes uncovered, depending on loaf size, dough type, and how dark you want the crust.
Quick timing and temperature cheat sheet
| Loaf type / size | Covered bake | Uncovered bake | Doneness target |
|---|---|---|---|
| Small loaf (about 1 lb / 450 g dough) | 18–22 min | 5–10 min | 200°F–205°F |
| Standard loaf / boule (about 1.5–2 lb / 680–900 g dough) | 20–30 min | 8–15 min | 200°F–210°F |
| Larger loaf or whole wheat-heavy loaf | 25–30 min | 10–20 min | 205°F–210°F |
These are starting ranges, not hard rules. Lean doughs may finish a little lower in the range, while denser or whole wheat loaves may need the higher end.
A practical baking framework
For a standard artisan boule:
- Preheat the oven and Dutch oven.
- Transfer the scored dough into the hot pot.
- Cover and bake until the loaf has expanded and set.
- Remove the lid and continue baking until the crust is deeply browned.
If you want a simple starting point, many home bakers do well with:
– Covered: about 20 to 30 minutes
– Uncovered: about 5 to 20 minutes
The exact finish depends on your oven and the loaf itself. A smaller loaf may brown faster; a heavier whole wheat loaf may need a little longer to fully bake through.
When to remove the lid
Don’t wait too long. If the loaf is already fully set and still covered, it may stay pale and soft. Removing the lid at the right time is what turns “baked bread” into “artisan bread.”
How to Tell When the Bread Is Done
Color helps, but it is not enough by itself.
Look for these cues:
- The crust is a rich golden to deep brown color.
- The loaf feels light for its size.
- The bottom sounds hollow when tapped.
- The interior temperature is in the bread-done range, often around 200°F to 210°F for many lean loaves.
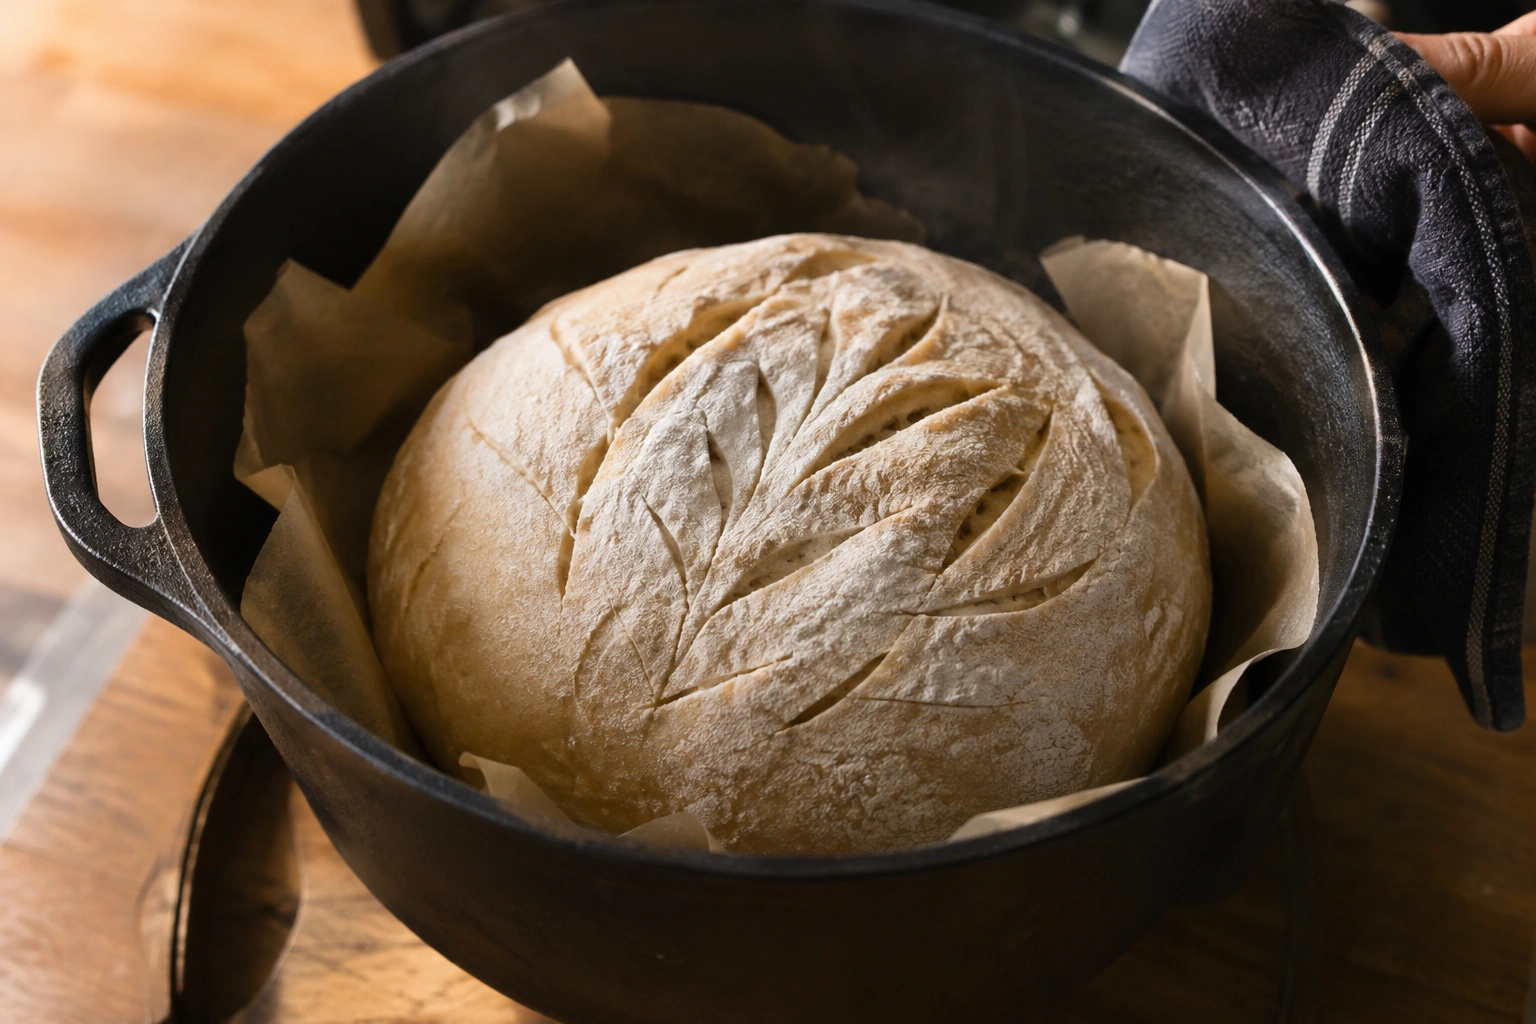
Lean bread can still be underbaked even if the crust looks finished, so don’t rely on color alone. That temperature range is a useful check when you’re learning, but it can vary slightly by dough style: enriched loaves may finish a bit differently, while denser whole wheat loaves may need the higher end of the range.
If the crust looks beautiful but the crumb is still dense or damp, give the loaf a little more time uncovered. That extra finish is often what solves the “dark outside, raw inside” problem.
Cool the Loaf Before Slicing
This part is harder than it sounds, because the bread smells incredible.
Still, cooling matters. As the loaf rests, steam redistributes inside the crumb and the structure finishes setting. If you cut too early, the interior can compress and turn gummy.
A full cool on a wire rack is the safest move for most loaves. King Arthur Baking also advises letting the loaf cool completely before slicing, and that advice holds up well in practice. If you want clean slices and a properly set crumb, patience pays off here.
Common Mistakes and How to Fix Them
Here are the problems I see most often, along with the most useful correction.
Dense crumb
Likely causes:
– Underproofed dough
– Dough handled too aggressively
– Dutch oven not hot enough
Fix:
– Let the dough proof a little longer next time
– Shape more gently
– Preheat fully before baking
Pale crust
Likely causes:
– Lid removed too late
– Oven temperature too low
– Bake finished too early
Fix:
– Uncover earlier
– Raise the temperature slightly next time
– Extend the uncovered bake until the crust deepens
Burnt bottom
Likely causes:
– Oven too hot
– Pot placed too low in the oven
– Very dark cast iron absorbing too much bottom heat
Fix:
– Move the rack up one level
– Lower the temperature a bit
– Use parchment as a buffer
Sticking
Likely causes:
– Not enough parchment or flour
– Dough overproofed and fragile
– Pot surface not prepared well
Fix:
– Use parchment for the next bake
– Make sure the loaf is supported during proofing
– Avoid trying to peel sticky dough off the counter at the last second
Troubleshooting by Symptom
If your loaf has a problem, use the symptom to narrow down the cause.
“It spread instead of rising”
Usually this points to weak shaping, overproofing, or a pot that was not hot enough to give the dough an early lift.
“The crust is hard, but the center is gummy”
That usually means the loaf needed more time, especially uncovered. A thermometer is helpful here.
“The top split in the wrong place”
The score may have been too shallow, or the dough may not have been scored at the right moment.
“It baked unevenly”
Rotate the pot only if your oven has a known hot spot and you can do so safely. Otherwise, adjust rack placement and temperature for the next bake.
Practical Examples for Different Doughs
Beginner no-knead loaf
This is the easiest place to begin. No-knead dough is usually sticky and forgiving, which makes parchment especially useful. The method gives you a strong crust with very little handling.
Sourdough loaf
Sourdough often benefits from the Dutch oven because the covered phase supports oven spring and the final uncovered phase builds color. A well-proofed sourdough boule can develop a beautiful ear if scored cleanly.
Enriched dough
For doughs with butter, milk, or sugar, watch browning closely. They may darken faster than lean dough, so the uncovered stage may need to be shorter or the temperature slightly reduced.
Whole wheat dough
Whole wheat dough can bake beautifully in a Dutch oven, but it may need a little more attention to hydration and proofing. If the loaf feels heavy, give it enough time to rise fully before baking.
A Simple Method You Can Trust
If you want the shortest practical version, here it is:
- Shape and proof the dough until puffy and ready.
- Preheat the oven and Dutch oven.
- Turn the dough onto parchment.
- Score it.
- Lower it into the hot pot.
- Bake covered first, then uncovered until deeply browned.
- Check doneness with both color and internal temperature.
- Cool completely before slicing.
That sequence is straightforward, but each step supports the next one. When you respect the heat, the steam, and the timing, the Dutch oven does exactly what it was made to do: help ordinary dough become a loaf with real crust, lift, and character. The practical takeaway is simple: preheat fully, use parchment if you’re new, and judge the loaf by both color and temperature before you pull it out.