
How to Make Dinner Rolls That Turn Out Soft, Fluffy, and Golden

Warm dinner rolls are one of those bakes that feel simple until you make them a few times. Then you realize the difference between “good enough” and truly tender rolls usually comes down to a handful of decisions: yeast choice, flour choice, dough feel, shaping, and proofing.
Complete Dinner Roll Recipe
Yield: 12 dinner rolls
Prep time: about 25 minutes
Rise time: about 1 1/2 to 2 hours total
Bake time: 18 to 22 minutes
Total time: about 2 1/2 to 3 hours
Ingredients
- 3 1/2 cups all-purpose flour, plus more for dusting
- 2 1/4 teaspoons instant yeast or active dry yeast
- 1/4 cup granulated sugar
- 1 teaspoon fine salt
- 3/4 cup warm milk, about 110 degrees Fahrenheit
- 1 large egg, room temperature
- 4 tablespoons unsalted butter, melted and slightly cooled, plus more for brushing
Recipe Card
- Combine the flour, yeast, sugar, and salt in a mixing bowl.
- Add the warm milk, egg, and melted butter.
- Mix until a shaggy dough forms, then knead until smooth and elastic.
- Let the dough rise until puffy and roughly doubled in size.
- Divide into 12 even pieces and shape into rolls.
- Proof the shaped rolls until rounded, soft, and airy.
- Bake at 350 degrees Fahrenheit until golden and the centers reach 190 to 195 degrees Fahrenheit.
- Brush with melted butter and serve warm.
I’m Ethan Baker, and in this guide I’ll walk you through the process the way I’d teach it in a bread lab or at a kitchen counter: not just what to do, but why each step matters. If you understand the dough, you’ll get better results even when your kitchen runs a little warm, your flour behaves differently, or your schedule forces a small adjustment.
What You Need Before You Begin
A classic dinner roll dough usually includes flour, yeast, milk, butter, sugar, salt, and sometimes eggs. Each ingredient has a job:
- Flour builds structure.
- Yeast makes the dough rise.
- Milk adds flavor and tenderness.
- Butter softens the crumb and enriches the dough.
- Sugar feeds yeast a little and helps with browning.
- Salt sharpens flavor and keeps the dough from tasting flat.
- Eggs add richness and a softer crumb if your recipe uses them.
For tools, a mixing bowl, measuring cups or a scale, a baking sheet or baking dish, and a clean work surface are enough. A stand mixer makes the kneading easier, but it is not required. If you want to make the rolls more tender, use a dough that leans enriched: milk, butter, and a little sugar. If you want a slightly chewier roll with more structure, reduce the enrichment a bit or use bread flour instead of all-purpose flour.
A quick ingredient decision table
| Choice | Softer result | Slightly chewier result | What to choose if… |
|---|---|---|---|
| Yeast | Instant yeast for convenience | Active dry yeast if that’s what you have | You want the simplest process |
| Flour | All-purpose flour | Bread flour | You want tender rolls vs. more structure |
| Pan | Close-set baking dish | Rimmed sheet with space between rolls | You want pull-apart softness vs. more crust |
| Finish | Butter after baking | Light egg wash before baking | You want a softer top vs. more shine |
Choose the Right Yeast, Flour, and Dough Style
The biggest early decision is yeast type.
Instant yeast is the easiest path for most home bakers. It can usually go straight into the dough, which saves a step and reduces the chance of misreading a proofing stage.
Active dry yeast is still a solid choice if that’s what’s already in your pantry. One reliable approach is to bloom it in warm milk with a little sugar first. Whisk warm milk, yeast, and 1 tablespoon of sugar together, then let it sit for 5 minutes. That small pause gives you a quick signal that the yeast is alive before you commit the rest of the ingredients.
For flour, all-purpose flour usually gives the softest, most classic dinner roll texture. Bread flour gives a bit more chew and strength because it has more protein, which means more gluten potential. If you want rolls that tear apart easily and feel pillowy, all-purpose is the better first try. If you want a little more bite and structure, bread flour is worth testing.
A useful rule:
– Choose all-purpose flour for a softer, more delicate roll.
– Choose bread flour for a slightly firmer, chewier roll that still stays tender if the dough is well enriched.
How to Make Dinner Rolls Step by Step
This is the core method. I’m keeping it beginner-friendly, but the logic matters as much as the sequence.
1. Activate the yeast if needed
If your recipe uses active dry yeast, combine it with warm milk and a little sugar. The liquid should feel warm, not hot. If it is too hot, it can damage the yeast; if it is too cool, activation slows down.
After about 5 minutes, the mixture should look foamy or at least noticeably active. If nothing happens, the yeast may be old or the liquid may have been off in temperature.
2. Mix the wet ingredients
Add the butter, sugar, salt, and egg. Then add the flour gradually. This matters because flour absorbs liquid differently depending on brand, humidity, and how it was measured.
The dough should look shaggy at first, then come together into a soft mass. Resist the urge to dump in a lot of extra flour immediately. A slightly sticky dough often bakes into a softer roll than a stiff one.
3. Knead until the dough is smooth and elastic
Kneading develops gluten, and gluten is what traps the gas produced by yeast. Without enough gluten development, the rolls can rise but still bake up dense or weak.
You can knead by hand or with a stand mixer. Hand kneading teaches you dough feel, while a mixer saves effort and handles enriched dough more easily. Use whichever method helps you work the dough until it becomes smoother, springy, and less tacky.
A practical test: press the dough lightly with a finger. It should feel elastic and bounce back gradually instead of tearing easily.
4. Let the dough rise until puffy
Place the dough in a lightly greased bowl, cover it, and let it rise until it has clearly expanded and feels airy. Many recipes call for the dough to double in size, but the real cue is visual and tactile: the dough should look fuller, smoother, and softer than when it went in.
If your kitchen is cool, this may take longer. If it is warm, it may move faster. That is why feel and appearance matter more than a clock.
For bakers who want to speed this phase up safely, a warm-proofing approach can help without overheating the dough. If you want a deeper look at that topic, see our guide to making dough rise faster without ruining texture.
5. Divide and shape the rolls
Turn the dough onto a lightly floured surface and divide it into even pieces. A digital scale makes this much easier because you can portion the dough evenly for consistent baking. Shape each piece into a tight ball by tucking the edges underneath and pinching the seam closed. Place the seam side down so the top stays smooth.
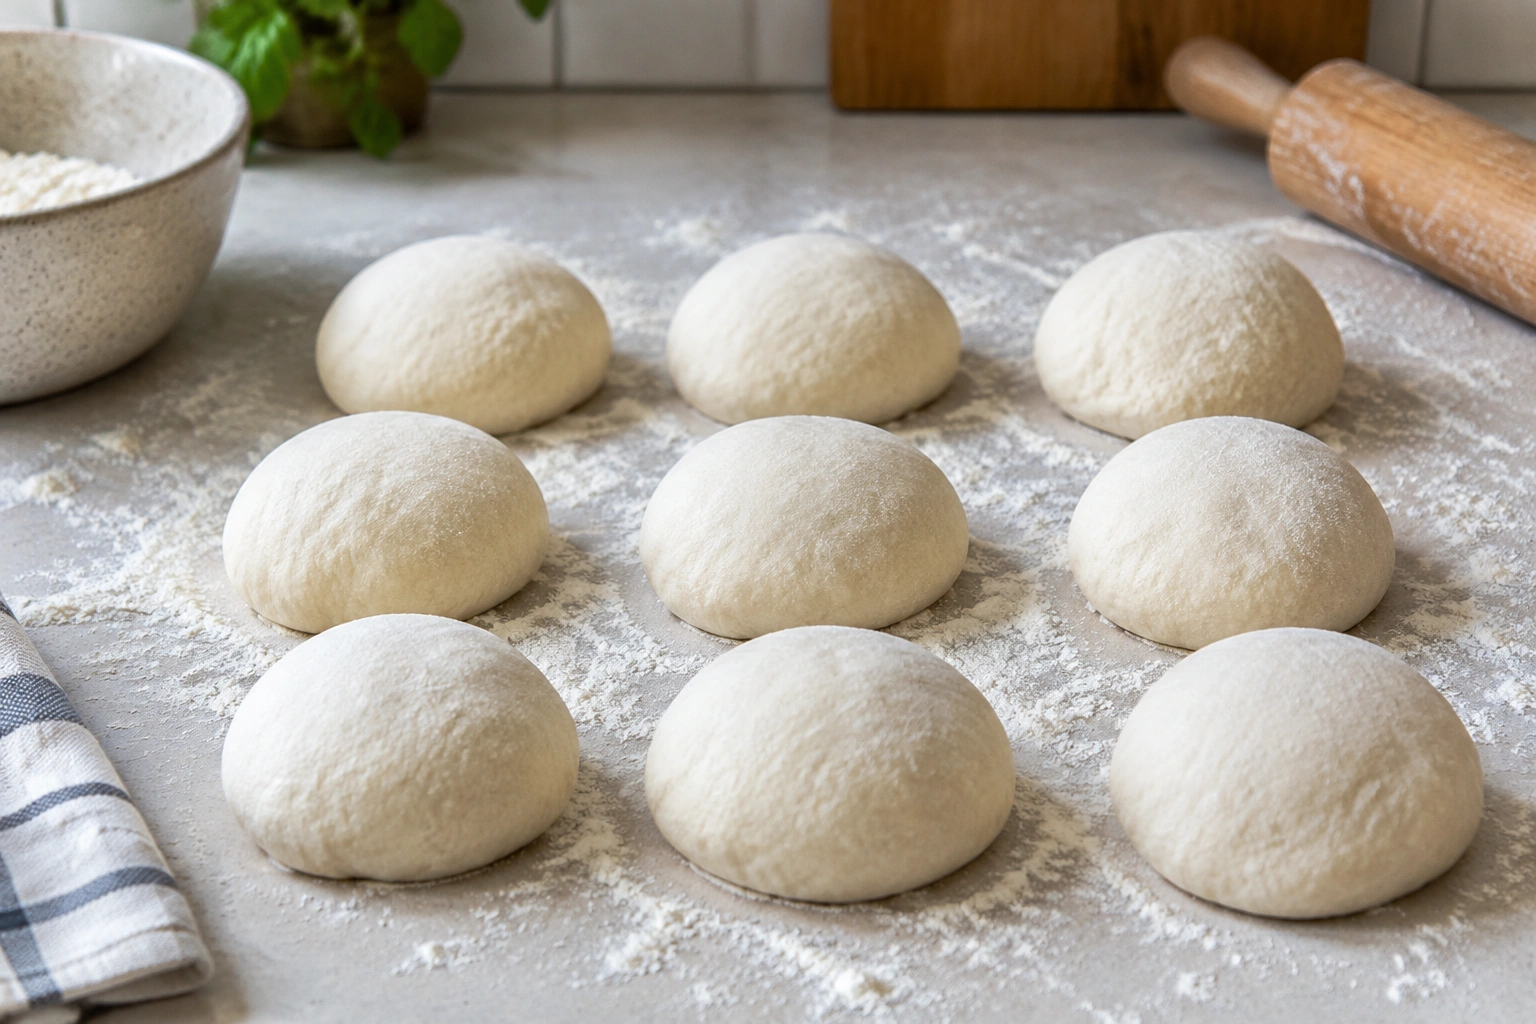
For soft, pull-apart rolls, place the shaped dough in a lightly greased 9×13-inch baking dish. For more crust and separation, use a rimmed sheet pan with space between the rolls.
6. Proof the shaped rolls
Cover the shaped rolls and let them rise again until they look rounded, soft, and visibly larger. A good proofed roll should feel airy when gently touched, and the indentation from a light finger poke should spring back slowly rather than immediately.
Overproofed rolls may look very puffy but collapse easily. Underproofed rolls can still look tight and springy, which often leads to dense bread once baked.
7. Bake until golden and set
Bake in a preheated oven at 350 degrees Fahrenheit until the tops are golden brown and the rolls feel set in the center. For this style of enriched roll, the most useful internal temperature cue is 190 to 195 degrees Fahrenheit in the center. At that point, the rolls should be baked through without drying out.
Visual cues matter too: the tops should be evenly golden, the rolls should look lifted and light, and the sides should not appear wet or doughy. If the tops brown too fast, tent loosely with foil near the end of baking.
8. Finish while warm
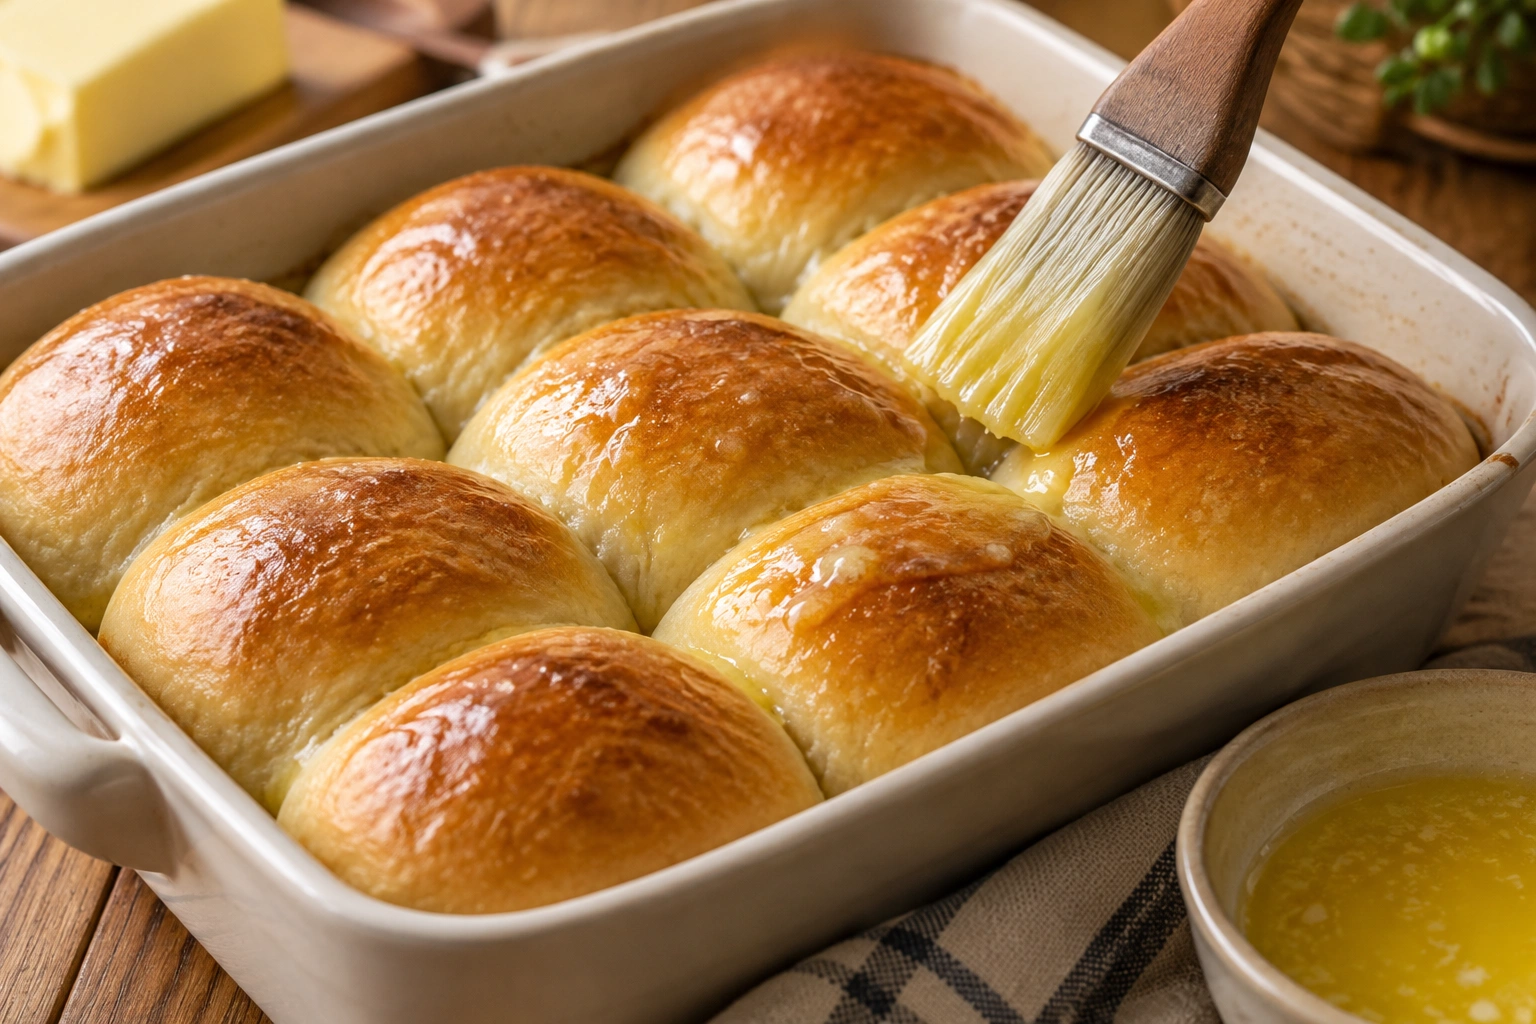
Brush the tops with melted butter as soon as they come out of the oven. That adds flavor and helps keep the crust tender. If you like a little sparkle and salt contrast, a light sprinkle of flaky salt can work too, but keep it modest so it does not overpower the bread.
How to Tell the Dough Is Ready at Each Stage
Time is useful, but dough tells you more than the clock does.
After mixing
The dough should be cohesive and slightly tacky, not dry and rough. If it looks dusty and stiff, it likely needs a little more liquid. If it smears heavily and will not hold shape at all, it may need a small amount of flour.
After kneading
The surface should look smoother and feel elastic. Tear a small piece gently: if the dough stretches a little before breaking, gluten has started to develop well.
After the first rise
Look for visible expansion and a lighter, airier feel. If you poke the dough lightly, the indentation should recover slowly.
After shaping and proofing
The rolls should look fuller and softer, with rounded tops. If they still look tight and small, they need more time. If they look overly inflated and fragile, they may be overproofed.
When baked
Golden tops are a good visual cue, but don’t rely on color alone. A roll can brown before the center is fully baked, especially if your oven runs hot. An instant-read thermometer is the most dependable check. For enriched rolls, a center temperature of 190 to 195 degrees Fahrenheit is a practical target.
Best Ways to Shape and Arrange the Rolls
Even shaping is not just about looks. It helps every roll bake at the same pace.
If you are making a family-style batch, a 9×13-inch dish gives you soft sides and pull-apart rolls. That setup encourages the rolls to rise into one another, which creates tenderness where the dough touches.
If you want more browned surface area, use a rimmed sheet pan with space between the rolls.
A simple shaping rule:
– Tight, even balls = better rise and more uniform baking.
– Loose or uneven shaping = lopsided rolls and uneven browning.
If your dough resists shaping, let it rest for a few minutes. That short pause relaxes the gluten and makes the dough easier to round smoothly.
Baking Time, Temperature, and Doneness Cues
Because ovens vary, the best approach is to combine time, color, and touch.
Bake until:
– the tops are golden brown,
– the rolls feel light when lifted,
– the sides are set, not doughy,
– and the center is cooked through.
If the tops brown too fast, tent loosely with foil near the end of baking. If the bottoms seem pale, use a lower rack or a preheated baking steel or stone if your recipe supports it.
A common mistake is pulling rolls too early because the tops look done. A roll that is underbaked in the center can collapse as it cools. On the other hand, overbaking dries out the crumb fast, especially in enriched dough that should stay soft.
How to Finish Dinner Rolls for the Softest Texture
The simplest finish is melted butter brushed over the tops right after baking. This softens the crust, adds shine, and gives the rolls that bakery-style finish people remember.
An egg wash, applied before baking, gives more shine and deeper color. It is useful if you want a more polished look, but it can create a slightly firmer top than butter alone. For the softest result, I usually prefer butter after baking.
If you want a little more flavor, you can add a tiny pinch of salt to the melted butter. Just keep the finish light so it enhances rather than masks the bread.
Common Mistakes and How to Fix Them
Dense rolls
This usually comes from one of three issues: dead yeast, too much flour, or underkneading. If your dough felt stiff and dry, it likely needed less flour. If it never became elastic, it probably needed more kneading.
Poor rise
Check yeast freshness first. Then look at your proofing environment. Dough that is too cold rises slowly; dough that is too hot can weaken. If the dough barely expands, give it more time before assuming it failed.
Sticky dough
A little stickiness is normal in enriched dough. If it is unmanageable, dust the work surface lightly and add flour in very small amounts. Too much flour is the faster route to dry rolls.
Uneven rolls
This is usually a shaping issue. Weigh the dough or divide by eye as carefully as possible. A digital scale solves a lot of problems here.
Dry rolls
Overbaking is the most common cause. The second culprit is too much flour in the dough. If your kitchen tends to run dry, watch the dough feel rather than adding flour just because it seems sticky at first.
Make-Ahead, Storage, and Reheating Tips
Dinner rolls are excellent for planning ahead.
Make-ahead options
For the easiest make-ahead method, shape the rolls and place them in the baking pan, then cover tightly and refrigerate before the second rise. They can usually rest in the refrigerator overnight, which gives you a practical window for baking the next day.
When you are ready to bake, let the shaped dough sit at room temperature until it looks puffy and relaxed again. Depending on how cold the dough is and how warm your kitchen is, this may take about 45 to 90 minutes. The goal is not a fixed clock but a visible second rise before the rolls go into the oven.
Freezing
Baked rolls freeze well once fully cooled. Wrap them tightly so they do not pick up freezer odors or dry out. Thaw at room temperature, then warm briefly before serving.
Storage
Store leftover rolls in an airtight container or bag once they are fully cool. Uncovered rolls dry out quickly.
Reheating
Warm rolls in a low oven until just heated through. If you want to preserve softness, a light wrap of foil helps. A quick brush of butter after reheating can bring the surface back to life.
Practical Dinner Roll Examples and Variations
If you are baking for a weeknight dinner, use a close-set pan and keep the shaping simple. That gives you soft, pull-apart rolls with less fuss.
If you are baking for a holiday table, shape the dough more carefully and brush the tops with butter right after baking for a richer finish.
If you want to experiment with size, make smaller rolls for a basket or larger ones for sandwiches. Just remember that size changes baking time, so keep an eye on color and doneness rather than assuming the original timing will still work.
If you are still building confidence with yeast doughs, a straightforward dinner roll batch is a great training ground. Once you can read the dough—its stickiness, elasticity, rise, and final bake—you are no longer following a recipe blindly. You are learning how bread behaves, and that is where real consistency begins.
FAQ
How long should dinner roll dough rise?
There is no single exact time that works in every kitchen. A better rule is to wait until the dough looks puffy and expanded, then proof the shaped rolls until they are rounded and airy.
Can I make dinner rolls without a stand mixer?
Yes. You can mix and knead by hand with a spoon, spatula, and your hands. It takes more effort, but it works well if you watch the dough feel carefully.
What is the best pan for soft dinner rolls?
A close-set baking dish is the best choice if you want soft sides and pull-apart texture. A sheet pan gives more crust.
Why are my dinner rolls dense?
Most dense rolls come from expired yeast, too much flour, or underkneading. In some cases, underproofing is the main issue.
How do I know when dinner rolls are done?
Look for golden tops, a set feel, and a baked-through center. Color alone is not enough.