
How to Make Naan at Home: A Reliable, Soft, Bubble-Filled Method

If you’ve ever wanted naan with those signature blistered spots, a tender bite, and enough flexibility to scoop up curry or stew without cracking, you’re in the right place. Homemade naan is absolutely doable in a home kitchen — even without a tandoor — as long as you pay attention to dough texture, heat, and timing.
What makes naan satisfying is the balance: a dough that’s soft but not soupy, enough fermentation for flavor and puff, and a cooking surface hot enough to create quick browning before the bread dries out. That’s the whole game. Get those three pieces right, and the rest becomes repeatable.
What You Need to Make Naan
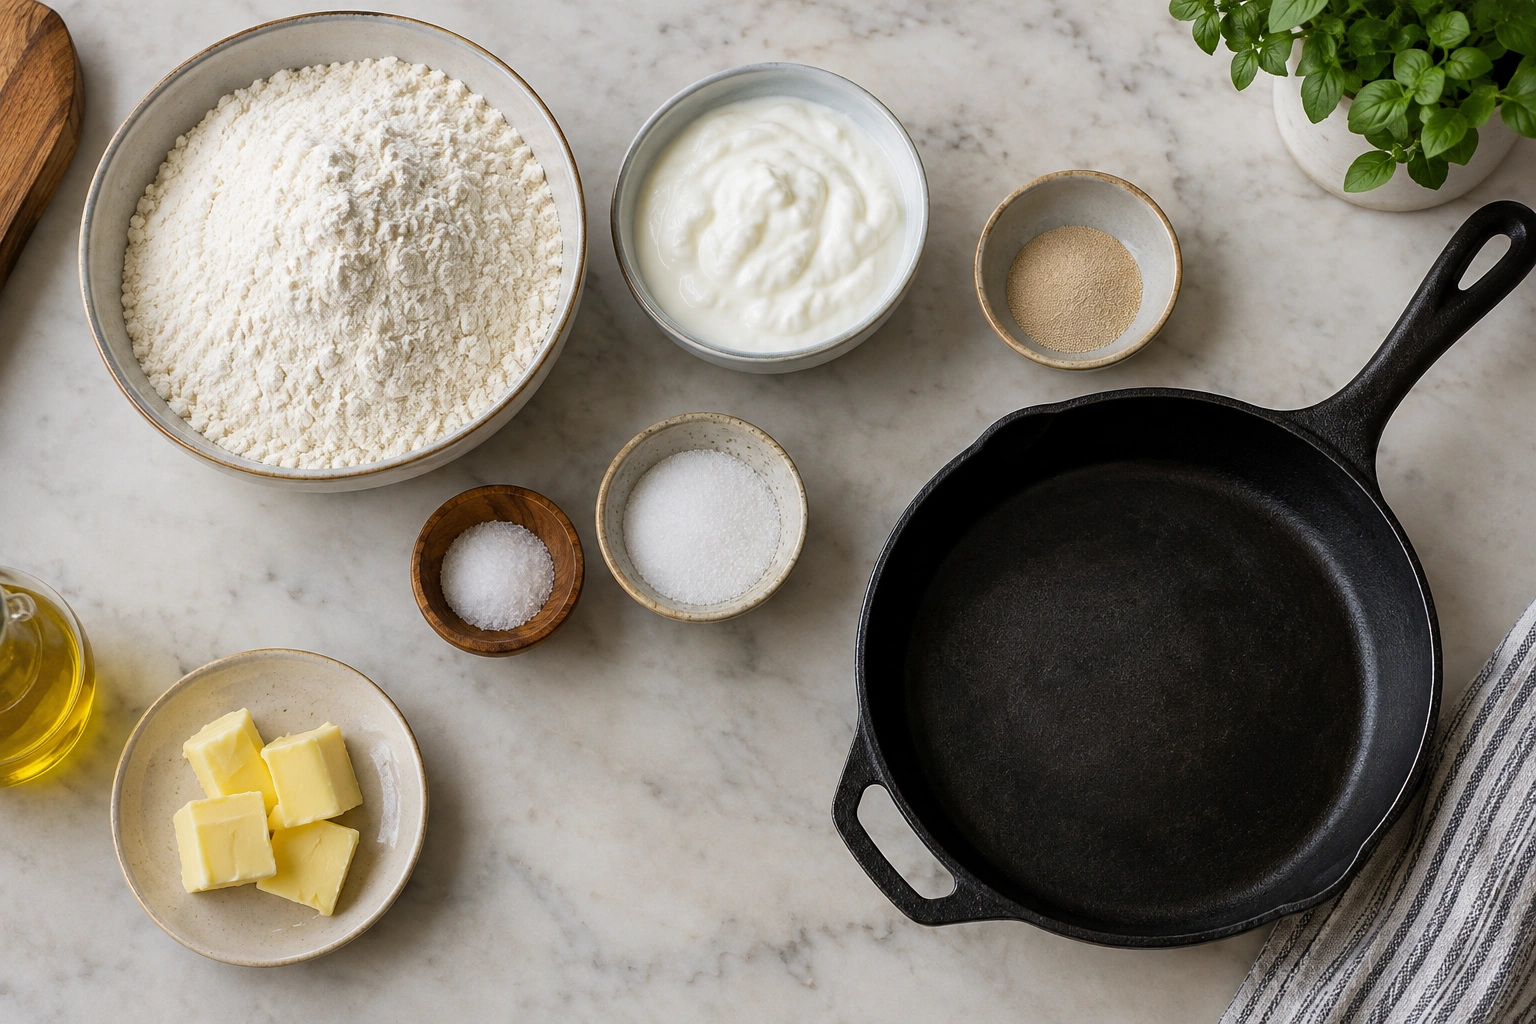
Before mixing anything, gather your ingredients and tools. Naan is simple, but each ingredient has a job.
Essential ingredients
- All-purpose flour: the most forgiving choice for a soft, tender naan
- Yeast: for rise and lightness in the classic version
- Warm water or milk: hydrates the flour and helps create a supple dough
- Greek yogurt or plain yogurt: adds tenderness and a subtle tang
- Sugar: helps feed the yeast and supports browning
- Salt: keeps the dough from tasting flat
- Ghee, butter, or oil: adds richness and keeps the bread softer
- Optional egg: some naan recipes use it for extra richness and structure, though many home versions skip it
Helpful tools
- Large mixing bowl
- Measuring cups and spoons or a kitchen scale
- Wooden spoon or spatula
- Rolling pin
- Clean kitchen towel or plastic wrap
- Cast-iron skillet or heavy frying pan
- Tongs or a spatula
- Pastry brush for butter or ghee
If you want a more structured bread-dough refresher before jumping in, this guide to making bread dough from scratch is a useful companion.
Choose Your Naan Style: Yeast or No-Yeast
This is the first decision worth making because it changes both the texture and the schedule.
| Option | Time | Texture | Best for | Trade-off |
|---|---|---|---|---|
| Yeast naan | About 1 to 1.25 hours for the first rise, often longer if cool | More classic, airy, elastic, and flavorful | Home bakers who want a more traditional result | Requires planning and proofing |
| No-yeast naan | Faster, often same-day with baking powder or soda | Softer and quicker, but usually less bouncy and less complex | Weeknights and last-minute meals | Less fermentation flavor and less of that bread-like chew |
If you want the closest thing to classic naan texture, yeast is the better choice. If speed matters more than nuance, a no-yeast version can still be delicious, especially brushed with butter or garlic after cooking. For a broader look at yeast-free doughs, see the site’s guide on bread without yeast.
My rule is simple: choose yeast if you want the best balance of flavor, puff, and stretch; choose no-yeast if dinner is happening soon and you can accept a flatter result.
How to Make the Dough
A good naan dough should feel soft, slightly tacky, and smooth enough to shape without tearing. It should not feel dry like pasta dough, and it should not be so wet that it puddles in the bowl.
A dependable home formula
For a practical batch, use:
– 2 1/2 cups all-purpose flour
– 1 teaspoon active dry yeast
– 1 teaspoon sugar
– 1 teaspoon salt
– 1/2 cup plain yogurt
– 1/2 cup warm water or warm milk
– 1 tablespoon melted butter, ghee, or oil
– Optional: 1 egg
This makes a small, manageable batch for about 6 naan, depending on how large you shape them. If the dough feels a little tight, add a teaspoon or two more warm water. If it feels too loose, dust in a little more flour, but only as needed.
Recipe approaches vary a bit, but the method is consistent: combine dry ingredients, add the liquid ingredients, and mix until a shaggy dough forms. Some versions bloom the yeast first in warm liquid, while others mix it directly into the dry ingredients.
Step-by-step mixing
- Mix the dry ingredients in a large bowl. If you’re using active dry yeast, you may bloom it first in warm water or milk with a little sugar until foamy. Many recipes do this in about 10 to 15 minutes.
- Add the wet ingredients: yogurt, melted butter or ghee, and the yeast mixture if you bloomed it separately.
- Stir until a shaggy dough forms. The dough will look rough at first. That’s fine.
- Knead briefly on a lightly floured surface or in the bowl until the dough becomes smoother.
The goal is not a super-strong baguette dough. You want enough gluten for stretch, but not so much that the naan turns chewy in a tough way.
How the dough should feel
- Too dry: add a teaspoon or two of water or milk at a time
- Too sticky: dust lightly with flour, but don’t keep adding flour until it feels “safe”
- Just right: soft, elastic, and slightly tacky
That last point matters. A slightly sticky dough usually bakes up softer than a dry one. If you overcompensate with flour, the naan can turn dense and dull.
Yogurt and milk substitutions
If you want to make naan without dairy yogurt, you have a few workable options:
– Use plain unsweetened dairy-free yogurt for the closest swap
– Use unsweetened plant milk in place of milk
– Use water plus a little extra fat if you’re avoiding both yogurt and milk, though the naan may be a bit less tender
If you skip yogurt entirely, the dough will still work, but it may be slightly less soft and less tangy. A dairy-free version is still very doable; just keep the dough supple and don’t overflour it.
How to Proof Naan Dough Properly
Proofing is where flavor and structure develop. This is also where many home bakers either rush the process or let it go too far.
The dough is ready when:
– It has roughly doubled or at least noticeably expanded
– The surface looks smoother and fuller
– A gentle poke springs back slowly, not instantly and not with collapse
Underproofed vs. overproofed
- Underproofed dough feels tight and resists shaping. It may cook up dense and less bubbly.
- Overproofed dough can lose strength, tear more easily, and puff less predictably.
A warm kitchen speeds this up; a cool one slows it down. If your room is chilly, give the dough more time rather than forcing it with high heat. Proofing is not just a clock exercise — it’s a look-and-feel test.
Divide, Rest, and Shape the Naan
Once the dough is proofed, divide it into equal pieces. Many home recipes make 6 to 8 naan from one batch, though the exact number depends on how large you want each piece.
A practical size is about 2.5 to 3 ounces per piece for medium naan. That gives you a manageable flatbread that cooks quickly and stays flexible.
Shaping workflow
- Turn the dough out gently.
- Divide into equal pieces.
- Shape each piece into a smooth ball.
- Cover the balls and let them rest for 10 to 15 minutes.
That rest is not optional if you want easy rolling. It relaxes the gluten so the dough stops snapping back.
How thick to roll naan
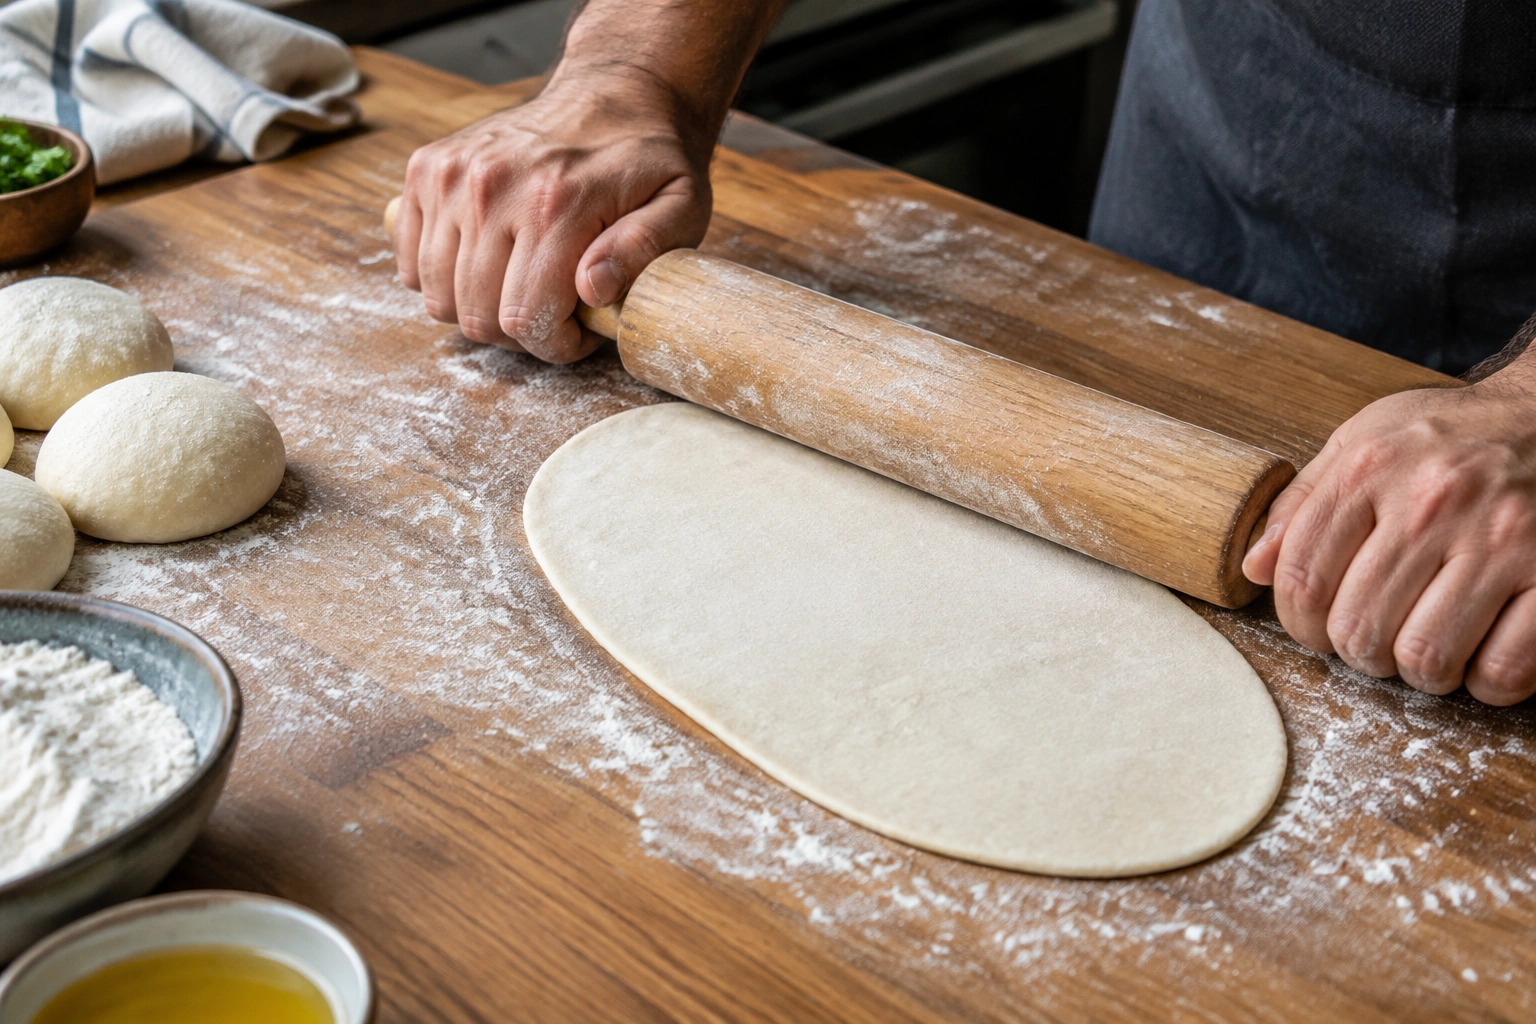
A good home target is a thin oval or teardrop shape, roughly 1/8 inch thick.
If you roll too thick, the center may stay doughy before the outside browns. If you roll too thin, the naan can dry out or cook too fast to puff properly. In other words, you want thin enough to cook quickly, but not so thin that it becomes cracker-like.
How to Cook Naan Without a Tandoor
A tandoor gives naan intense heat from all sides, but you can get very good results at home with a skillet, cast iron, or broiler.
Best stovetop method: cast iron or heavy skillet
For most home cooks, this is the most reliable method. Preheat a cast-iron skillet or heavy frying pan over medium-high heat for several minutes until it is very hot. A drop of water should sizzle immediately.
Here’s the practical approach:
1. Preheat the skillet until it is very hot.
2. Place one rolled naan in the dry pan.
3. Cook until bubbles form on the surface, usually within about a minute.
4. Flip and cook the second side until browned and cooked through.
5. If desired, flip once more briefly to finish.
A cast-iron skillet is especially useful because it holds heat well. That heat retention helps mimic the fast, intense cooking naan gets in a tandoor.
Oven or broiler method
If you need to cook multiple naan at once, the oven or broiler can help. For the closest tandoor-like effect at home, place a baking stone, baking steel, or inverted sheet pan on the upper-middle rack and preheat the oven to its highest setting, typically 475°F to 500°F, for at least 30 minutes. If you’re using the broiler, keep the rack in the top third of the oven, about 4 to 6 inches from the broiler element.
To cook:
1. Preheat the stone, steel, or sheet pan thoroughly.
2. Slide the rolled naan onto the hot surface.
3. Bake for 2 to 4 minutes, just until the dough starts to puff and the bottom shows light browning.
4. If you want more blistering, switch to the broiler for the last 30 to 90 seconds, watching closely the entire time.
5. Remove as soon as the top has browned in spots and the naan looks cooked through.
The key is to avoid overbrowning before the center is done. If the top is coloring too quickly, move the rack down one level or shorten the broiler finish. If the naan is pale on top but cooked underneath, give it a brief broiler blast rather than leaving it in the oven longer.
Which method should you pick?
- Skillet/cast iron: best for control and one or two naan at a time
- Oven/broiler: best for batch cooking and stronger top heat
- Tandoor: ideal in theory, but not necessary for good homemade naan
If you want the most practical home setup, choose cast iron first. It gives you the best mix of heat, browning, and ease.
How to Get Bubbles, Puffing, and Brown Spots
Those browned blisters and pockets of air are what make naan feel alive.
What causes the puff
The puff comes from moisture in the dough turning to steam fast enough to separate layers before the bread sets. That means three things matter most:
– The dough must be soft enough to expand
– The pan must be hot enough
– The naan must be handled gently once it hits the heat
Signs your pan is ready
A drop of water should sizzle immediately. The dough should start to bubble within about a minute. If the pan is lukewarm, the naan will dry out before it puffs.
Why naan stays flat
Usually one of these is the reason:
– Pan not hot enough
– Dough rolled too thick or too thin
– Dough was too dry
– Naan was moved too early
– Dough was underproofed
If the first naan doesn’t puff, don’t assume the recipe failed. Often the pan just needed more heat.
Finish with Butter, Ghee, Garlic, or Herbs
The finish is where naan becomes irresistible. Brush it while it is still warm so the fat melts into the surface.
Classic finishing options
- Butter: mild, familiar, and softening
- Ghee: richer and more aromatic
- Garlic butter: the most popular home variation
- Chopped herbs: cilantro or parsley for freshness
For garlic naan, brush with melted butter mixed with minced garlic right after cooking. If you want the garlic flavor to stay bright, keep the garlic fine and apply it after the naan comes off the pan rather than burning it in the skillet.
Common Mistakes and How to Fix Them
Even a good recipe can misbehave if the dough or heat is off.
Dense naan
Likely causes:
– Too much flour
– Not enough rise time
– Dough rolled too thick
Fix:
– Add less flour during shaping
– Let the dough proof until visibly expanded
– Roll to a thinner oval
Naan not puffing
Likely causes:
– Pan too cool
– Dough too dry
– Dough handled too roughly
Fix:
– Preheat the pan longer
– Keep the dough soft and slightly tacky
– Let shaped rounds rest before cooking
Tough or hard naan
Likely causes:
– Overcooking
– Too little fat in the dough or on the finish
– Excess flour during shaping
Fix:
– Cook just until browned and set
– Brush with butter or ghee immediately
– Avoid dusting the dough heavily
Tearing while rolling
Likely causes:
– Dough not rested enough
– Dough too dry
Fix:
– Rest the dough balls for 10 to 15 minutes
– Add a small splash of water or milk next time if the dough feels stiff
Make-Ahead, Storage, and Reheating Tips
Naan is best fresh, but it can absolutely be managed ahead of time.
Make-ahead options
- Refrigerate the dough after the first rise if you want to cook it later the same day or the next day.
- Refrigerate shaped dough balls for a short hold, but only if you plan to cook them soon; let them come back toward room temperature before rolling or cooking.
- For the best texture, avoid leaving shaped naan at room temperature for too long once it has been divided and rested. If the dough is sitting out, it’s best cooked within a short window rather than left to overproof.
Storing cooked naan
Once cooled, stack the naan with parchment between pieces if needed and wrap it well. Refrigeration works for short-term storage, though the bread is usually softer when eaten fresh.
Freezing
Cook the naan fully, cool it, then wrap it tightly and freeze. Reheat from frozen or thawed in a skillet, oven, or toaster-style oven until warm and flexible again.
Best reheating method
A dry skillet over medium heat is the simplest. It revives the surface without making the bread soggy. If the naan seems dry, brush it lightly with butter or a little water before reheating.
How long it stays soft when held warm
If you’re serving a batch, keep the naan wrapped in a clean kitchen towel or in a covered container as it comes off the pan. It will stay soft for a short serving window, but it’s best eaten soon after cooking. If it sits uncovered, the surface will firm up more quickly.
Practical Naan Variations and Example Workflows
Here are a few realistic ways to adapt the method.
Weeknight yeast naan
Use the yeasted dough, but keep the batch modest and cook in a hot skillet. This gives you soft, flexible naan in a practical home timeframe.
Quick no-yeast naan
If you need bread fast, use a baking powder or soda-based version with yogurt. The texture will be softer and less bread-like, but it still works well for dinner.
Garlic butter naan
Cook plain naan first, then brush with melted butter and garlic. This is the easiest way to add flavor without risking burnt garlic in the pan.
Overnight dough
Make the dough ahead, refrigerate it after the first rise, and shape it the next day. This is useful if you want fresh naan without doing all the work at dinner time. If you want to refrigerate after shaping, keep it to a shorter hold and let the dough warm up before cooking so it still rolls and puffs well.
For a broader bread-making foundation that supports recipes like this, the site’s beginner guide to bread dough basics is worth keeping nearby.
FAQs
Can I make naan without yeast?
Yes. A no-yeast version usually uses baking powder or baking soda with yogurt. It is faster, but the texture is usually less airy and less elastic than yeasted naan.
What is the best flour for naan?
All-purpose flour is the easiest choice for soft naan at home. Bread flour gives a little more chew and structure, but it can make the bread feel less tender if you overwork the dough.
How do I know when the dough is proofed enough?
It should look visibly larger, feel lighter, and spring back slowly when poked. If it barely changes size, it needs more time.
Why is my naan not puffing up?
The pan is often not hot enough, or the dough is too dry, too thick, or underproofed. Let the skillet preheat longer and keep the dough soft.
Can I cook naan in the oven instead of a skillet?
Yes. A hot oven or broiler can work well, especially if you want to cook several pieces at once. A cast-iron skillet is usually easier for beginners.
How do I keep naan soft after cooking?
Brush it with butter or ghee right away and keep it covered with a clean towel while you finish the batch. That traps steam and prevents the surface from drying out.
Can I freeze homemade naan?
Yes. Cool it completely, wrap it well, and freeze it. Reheat in a skillet or warm oven until soft again.
If you want to keep building your bread skills, the next logical step after naan is learning how dough structure changes across different bread styles. That’s where bread-making starts to feel less like following recipes and more like understanding the dough itself.