
How to Make No-Knead Bread at Home for a Crisp Crust and Open Crumb

No-knead bread has a reputation for being almost suspiciously simple, but the method makes sense once you understand what the dough is doing on its own. Instead of relying on repeated kneading to build structure, you give the dough time. During a long rest, flour hydrates, gluten forms gradually, and yeast produces gas that stretches the dough from the inside. That slow development is what can create a loaf with a crackly crust and a light, artisan-style crumb.
If you’ve ever wanted a bread recipe that fits into a busy day without sacrificing quality, this is a smart place to begin. The process is forgiving, but it still rewards attention. A dough that is too stiff, too dry, or baked before it’s ready will usually give you a dense loaf. A dough that’s mixed well, fermented long enough, and baked in a hot vessel can surprise you with how much character it develops with very little hands-on work.
What No-Knead Bread Is and Why It Works
No-knead bread is exactly what it sounds like: bread made with minimal mixing and no traditional kneading. The magic is in time and hydration. A wetter dough gives enzymes and yeast room to work, and the long fermentation period allows gluten to organize itself without aggressive handling.
That matters because kneading is only one way to develop structure. In this style of bread, the dough’s own rest does much of the job. You’re not forcing the gluten network; you’re letting it form naturally as the flour absorbs water and the yeast slowly expands the dough. The result is usually a loaf with a more open crumb than a tightly mixed sandwich bread, though the exact texture depends on flour choice, hydration, and fermentation time.
A useful way to think about it: kneaded bread is shaped by effort, while no-knead bread is shaped by patience.
Ingredients and Tools You’ll Need
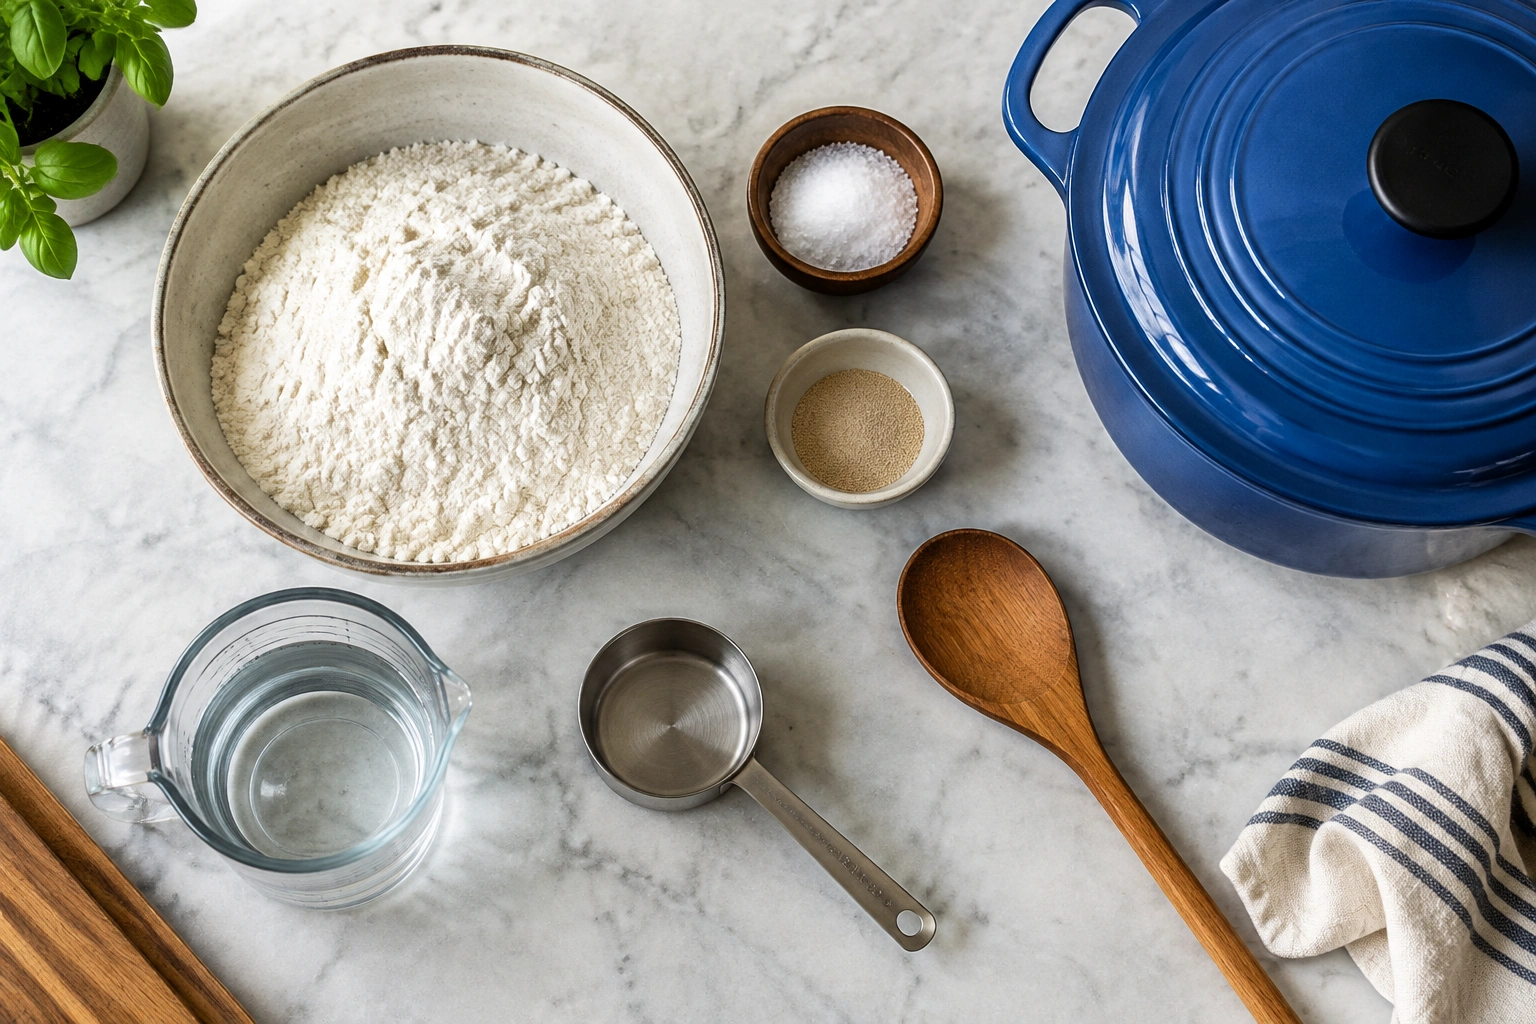
For a basic no-knead loaf, you only need a few ingredients:
- 3 cups bread flour or all-purpose flour, plus more for dusting
- 1 1/2 cups water, at room temperature
- 1 1/4 teaspoons salt
- 1/4 teaspoon instant yeast
This formula makes 1 round loaf, about 10 to 12 slices depending on how you cut it.
If you want a slightly more robust loaf, bread flour is the better choice. It usually absorbs a bit more water and gives the dough more strength, so it can support a taller loaf and chewier crumb. All-purpose flour works too, but it may need a touch less water and will usually produce a softer, slightly less chewy loaf. If you use all-purpose flour and the dough feels very loose, hold back a tablespoon or two of the water next time. If you use bread flour and the dough seems stiff, add a small splash more water.
Some formulas include a little sugar, but it is not required for the basic method. Sugar can give yeast an easy food source and slightly encourage browning, but many no-knead breads rely on flour alone for flavor and structure. If you’re aiming for a classic lean loaf, leave the sugar out.
Here’s what each ingredient does:
- Flour provides structure. Higher-protein flour generally gives the dough more strength.
- Water hydrates the flour and creates the sticky texture that makes this method work.
- Salt improves flavor and helps regulate fermentation.
- Yeast produces carbon dioxide, which inflates the dough.
You’ll also want a large bowl, a spoon or spatula, measuring cups or a scale, parchment paper if you like easy transfer, and a baking vessel that can handle high heat.
A Dutch oven is the most common choice because it traps steam and supports strong oven spring. The New York Times’ no-knead method recommends preheating a heavy covered pot in the oven, with examples including cast iron or other sturdy oven-safe covered cookware designed for high heat. That covered environment helps the loaf expand before the crust sets.
Choose Your Flour, Yeast, and Fermentation Schedule
Before you mix anything, it helps to decide what kind of loaf you want and how much time you have.
| Choice | Best if you want | Trade-off |
|---|---|---|
| Bread flour | More structure, a chewier crumb, and often a taller loaf | Slightly less tender than all-purpose in some recipes |
| All-purpose flour | A simpler pantry option and a softer bite | Usually a little less lofty and less chewy than bread flour |
| Instant yeast | The easiest mix-and-wait method | Less visible proofing stage, so you rely on the recipe and dough cues |
| Active dry yeast | Use what you already have in the pantry | May need a little more attention depending on the method |
| Room-temperature fermentation | Same-day or next-day baking with minimal planning | Timing can vary more with kitchen temperature |
| Overnight or refrigerated fermentation | Better scheduling flexibility and often deeper flavor | Requires a longer wait before baking |
If you want the most reliable structure, bread flour is the safer choice. If your pantry only has all-purpose flour, use it. Just expect a slightly softer, less chewy result, and be ready to adjust the water slightly if the dough feels too loose or too tight. That’s the biggest hydration difference to watch for: bread flour can usually handle a bit more water, while all-purpose flour may need slightly less.
For yeast, instant yeast is the simplest option because it can be mixed directly into the dry ingredients. Active dry yeast can also work in many no-knead breads, but if your recipe calls for dissolving it first, follow that method. A practical rule of thumb is to use the same amount called for in the recipe, then pay attention to the dough rather than assuming the timing will be identical. The key is consistency: use one yeast type and let the dough tell you when it’s ready.
Mix the Dough: What the Texture Should Look Like
The mixing step is intentionally low-effort. You are not developing the dough by force; you are just combining the ingredients evenly.
- Whisk the dry ingredients together in a large bowl.
- Add the water.
- Stir with a spoon, spatula, or your hand until no dry flour remains.
That last part matters. The dough should look shaggy and sticky, not smooth and polished. One verified no-knead method describes the dough as “wet and sloppy – not kneadable, but not runny like cake batter,” which is a good practical benchmark. Another common description is “loose and shaggy.” Both are useful because they tell you what not to expect: this dough is supposed to look rough at first.
If the dough seems dry and tight, add a little water. If it seems soupy enough to pour, add a little flour. Small adjustments are fine, but don’t chase a perfectly neat dough at this stage. A slightly sticky, messy mass is exactly what you want.
A dough whisk, wooden spoon, or spatula all work. Hands are fine too, especially if you don’t mind a bit of stickiness. The goal is simply to make sure every bit of flour is hydrated.
Let the Dough Rise Until It’s Ready
This is where no-knead bread earns its name and its texture.
A common room-temperature method is to cover the bowl and let the dough rest for 12 to 18 hours at a warm room temperature, around 70 degrees, as described in the New York Times recipe. Another verified overnight method recommends 12 to 18 hours at room temperature until the dough looks slightly bubbly and wet on top. A different approach uses a shorter room-temperature rise of about 3 hours or an overnight refrigerator rest.
What should you look for?
- The dough should expand noticeably.
- The surface should look bubbly or pocked.
- The dough should feel airy and jiggly when you move the bowl gently.
- It may look wetter and looser than when you first mixed it.
For a more reliable check, look at the dough in stages:
– Right after mixing: shaggy, sticky, and uneven, with no dry flour left.
– During bulk fermentation: the dough should become smoother on top, puff up, and show bubbles along the surface or edges.
– Just before shaping: it should look expanded and aerated, with a domed or slightly rounded top rather than a flat, dense mass.
If your kitchen is warm, fermentation may move faster. If it’s cool, the dough may need more time. That’s why “double in size” is a helpful checkpoint, but not the only one. A dough can be ready even if it hasn’t doubled perfectly, as long as it looks expanded, airy, and active. If you gently shake the bowl, it should wobble a little instead of feeling heavy and tight.
If you’re using the refrigerator, expect the dough to move more slowly. That can be useful when you want to fit baking around your schedule. Bring the dough closer to room temperature before baking if it has been chilled for a long time, because colder dough may need extra time in the oven to finish properly.
How to Shape Sticky No-Knead Dough
Shaping no-knead dough should be gentle. You’re trying to organize the dough into a round, not squeeze all the gas out of it.
Dust your work surface lightly with flour. Tip the dough out carefully, then use floured hands or a bench scraper to fold the dough over itself a few times. Shape it into a loose ball by tucking the edges underneath. If the dough sticks, resist the urge to bury it in flour. A little tackiness is normal, and too much flour can make the loaf dense.
A practical rule: if the dough holds together but still feels soft and slightly slack, you’re in the right zone. If it becomes firm and dry on the outside, you’ve probably over-floured it.
How much gas should you knock out? Some degassing is fine. In fact, a few gentle folds help build surface tension and make the loaf easier to score. Just avoid pressing the dough flat or squeezing it hard, because that can undo the airy structure you built during fermentation.
After shaping, let the dough rest briefly while the oven preheats. That short pause helps it relax and makes the final transfer easier. For a Dutch oven bake, a short rest of about 20 to 30 minutes is usually enough. For a baking sheet or loaf pan method, you may want a slightly longer final proof if the dough looks tight after shaping and hasn’t puffed much yet. The pre-bake cue is simple: the dough should look slightly fuller, smoother, and a little springy when gently touched, not collapsed or overly slack.
Preheat the Oven and Prepare Your Baking Vessel
Heat is a major part of the final loaf. No-knead bread depends on a hot oven and, ideally, a hot enclosed vessel to create steam.
The classic approach is to preheat a Dutch oven or other heavy covered pot in the oven. The New York Times method uses a heavy covered pot preheated as the oven heats, and a 6- to 8-quart size is one common example for a standard round loaf. That preheated surface helps the dough spring upward quickly once it goes in.
If you do not have a Dutch oven, you still have options:
- Baking sheet plus steam: Preheat a baking sheet or baking stone in the oven. Set a metal pan on the lower rack and add hot water when the loaf goes in to create steam.
- Loaf pan: This gives a more contained shape and is easier to handle, though the crust may be less dramatic.
- Covered oven-safe pot: Any heavy oven-safe covered vessel rated for high heat can work if it fits safely.
For a non-Dutch-oven bake, use this beginner-friendly path:
1. Preheat the oven to 450°F with a baking sheet or stone inside.
2. Place an empty metal pan on a lower rack while the oven heats.
3. When you load the bread, pour about 1 cup of hot water into the metal pan to create steam, then close the oven quickly.
4. Bake the loaf on the hot sheet or stone until the crust is set and browned, then remove the steam pan for the last part of the bake if needed.
The Dutch oven usually gives the most reliable crust because it traps moisture around the loaf early in the bake. Without that steam, the crust can set too soon and limit oven spring.
Bake the Bread: Timing, Steam, and Scoring
Once the oven and vessel are fully preheated, handle everything carefully. The pot will be extremely hot.
- Remove the hot vessel from the oven.
- Lift the shaped dough in on parchment, or gently place it inside if that is your method.
- Score the top with one quick slash using a sharp blade or lame.
Scoring gives the loaf a controlled place to expand. Without it, the bread may split wherever it wants. A single slash is enough for a simple loaf.
Cover the vessel and bake first with the lid on. That covered phase traps steam and supports oven spring. Later, remove the lid so the crust can brown and crisp.
A practical bake schedule for a Dutch oven is:
– Covered: about 20 to 30 minutes
– Uncovered: about 15 to 25 minutes more, until deeply browned
If you’re using a baking sheet or stone with a steam pan, plan for a similar total bake time, but expect the loaf to need a little more attention to color. Start with strong steam for the first 10 to 15 minutes, then let the loaf finish baking dry so the crust can color and crisp. If the top is browning too quickly, tent it loosely with foil for the last part of the bake.
A loaf is usually done when the crust is deeply golden brown to medium brown and the center registers about 205°F to 210°F on an instant-read thermometer. The crust color and the temperature should both be checked. If you don’t have a thermometer, the bottom should sound hollow when tapped, but that cue is best used alongside the color check, not instead of it.
How to Tell When the Loaf Is Fully Baked
Underbaking is one of the most common reasons no-knead bread turns gummy. The outside can look finished before the center has fully set, especially with a very moist dough.
Look for these signs:
- The crust is a deep golden to medium brown, not pale.
- The loaf feels light for its size.
- The center reaches about 205°F to 210°F.
- The bottom sounds hollow when tapped.
- The bread has had enough time to cool before slicing.

If the crust is still quite light, give it more time. If the loaf smells done but the interior feels heavy, it probably needs a few more minutes in the oven. A darker crust plus the right internal temperature is the most dependable combination.
Cool, Slice, and Store the Bread
Cooling is not optional if you want the crumb to finish setting. When bread comes out of the oven, its interior is still redistributing moisture and stabilizing. If you slice too early, the crumb can compress and seem gummy even if the loaf was baked long enough.
A good rule is to let the bread cool on a rack until it is no longer hot to the touch. If you’re impatient, wait at least long enough for the steam to stop pouring out of the cut surface. That steam is part of what finishes the crumb.
To store the loaf, keep it at room temperature for short-term use. For the best crust, store it cut-side down on a board or wrapped loosely rather than sealing it tightly while it is still warm. Tight wrapping softens the crust faster.
Common Mistakes and How to Fix Them
Dense crumb
Usually this means the dough was underfermented, too dry, or handled too aggressively. Before baking, give the dough more time if it still looks tight or underexpanded. If it has already been shaped, let it rest longer and watch for a puffier, lighter look before it goes in the oven. Next time, aim for a stickier dough and consider trying bread flour for more structure.
Weak rise
This often comes from a cool kitchen, tired yeast, or a dough that went into the oven before it was airy enough. Before baking, let the dough continue fermenting until it shows bubbles, expansion, and a jiggly, aerated feel. If it still seems flat and dense, it likely needs more time rather than more flour.
Overly wet dough
A wet dough is normal, but if it is truly loose enough to pour, you likely added too much water. Add flour in very small amounts only if the dough is impossible to handle. Otherwise, remember that sticky is expected.
Flat loaf
This can happen when the dough overproofs and loses strength, or when the oven and pot were not hot enough. If the dough looks collapsed before baking, reshape it gently and let it proof only briefly until it looks slightly puffed again. Bake sooner next time once the dough looks expanded and jiggly, not collapsed.
Gummy interior
The most likely cause is underbaking or slicing too soon. Give the loaf more oven time, and let it cool fully before cutting.
Troubleshooting by Symptom
Here’s a quick way to diagnose the dough:
- Too sticky to shape: Dust hands and surface lightly, then shape faster and more gently.
- Too stiff: Add a small splash of water during mixing next time.
- Not rising: Check yeast freshness and give the dough more time in a warmer spot.
- Looks puffed but collapses: It may be overproofed; bake earlier on the next round.
- Crust is pale: Extend the uncovered baking phase.
- Inside is gummy: Cool longer and bake a little more thoroughly next time.
Practical Examples for Different Schedules and Setups
If you want bread the same day, mix the dough in the morning and let it ferment at room temperature until it looks airy and expanded. If your kitchen is warm, it may move faster than expected, so check early.
If your schedule is unpredictable, mix the dough in the evening and let it rest overnight. That gives you a flexible bake window the next day and often improves flavor.
If you prefer even more flexibility, use the refrigerator for part of the fermentation. That slows the process and gives you more control, though you may need to let the dough warm slightly before baking.
And if you do not own a Dutch oven, don’t let that stop you. A hot baking sheet or loaf pan can still produce good bread if you create steam, watch the crust color, and bake until the center reaches the proper temperature.
For more basic dough technique, you may also find it helpful to read how to make bread dough from scratch for beginners and how to knead bread dough for better texture, rise, and crumb. Even though no-knead bread skips the kneading step, understanding dough structure makes the process much easier to judge.
FAQ
Can I use active dry yeast instead of instant yeast?
Yes, in many no-knead breads you can. The main difference is that active dry yeast may require a little more attention depending on the recipe method. If your formula gives specific instructions for activating it, follow those.
Do I need a Dutch oven?
No, but it is one of the most effective tools for this style of bread because it traps steam and supports oven spring. If you don’t have one, a baking sheet, loaf pan, or other heavy oven-safe vessel can still work with some adjustment.
How wet should the dough be?
It should be sticky, shaggy, and loose, not pourable like cake batter. A slightly messy dough is the normal target for no-knead bread.
Why did my bread turn out dense?
The most common reasons are underproofing, too much flour, or not enough oven heat. Dense bread usually means the dough needed more time, more hydration, or a gentler hand.
Can I make it overnight?
Yes. Overnight fermentation is a common and practical option. Many methods rely on a long room-temperature rest, while some use the refrigerator for even more flexibility.
A Final Note on Confidence
The best part of no-knead bread is that it teaches you to read dough instead of chasing perfection. Once you can recognize a shaggy mix, an active rise, a ready-to-shape dough, and a properly browned loaf with the right internal temperature, the process becomes much easier to repeat. That’s the real skill here: not memorizing a formula, but learning what the dough is telling you.