
How to Test Different Flour Types in Cookies for Better Texture and Spread
Cookies can look simple on the surface, but flour changes them in very specific ways. A small shift in protein content can change spread, chew, tenderness, thickness, and even how quickly the edges brown. If you want to understand those changes clearly, the best approach is to test one flour variable at a time in a controlled cookie bake.
This guide walks through a practical method for how to test different flour types in cookies without muddying the results. You will learn which flours to compare, how to keep the test fair, what to watch for in the dough and finished cookies, and how to decide whether a flour needs adjustment rather than a direct swap.
Why flour type changes cookie results
Flour affects cookies mainly through protein content and how much gluten can develop once the dough is mixed and hydrated. Higher-protein flours generally have more potential structure. In cookies, that can mean less spread, more chew, and a firmer bite. Lower-protein flours often produce a more tender cookie, but the dough may spread more and feel softer or more fragile.
That does not mean one flour is universally better. It means each flour pushes the cookie in a different direction.
For example:
- All-purpose flour often gives a balanced result and is a practical baseline for testing.
- Bread flour may create more chew and a thicker cookie, especially in doughs with enough moisture and sugar to support structure.
- Cake flour can make cookies more delicate and tender, but sometimes at the cost of support.
- Pastry flour sits between all-purpose and cake flour, so it can be useful when you want tenderness without losing too much structure.
- Whole wheat flour usually brings a nuttier flavor and may increase dryness or density because the bran and germ change how the dough behaves.
The useful question is not just “Which flour works?” It is “Which flour gives the texture I want in this cookie style?”
Choose a control recipe and define your test goal
A fair flour test begins with a stable control recipe. Pick a cookie recipe that already behaves predictably. A recipe with consistent spread, a clear texture, and no unusual variables is easier to compare than one that already bakes inconsistently.
A classic chocolate chip cookie, sugar cookie, or oatmeal cookie can work well. Choose the style based on what you want to learn:
- Use a chocolate chip cookie if you want to compare spread, chew, and thickness.
- Use a sugar cookie if you want to compare tenderness and structural clarity.
- Use an oatmeal cookie if you want to see how whole wheat or higher-protein flours affect moisture and density.
Before you bake, decide which test you are running:
-
True 1:1 substitution test
Keep everything the same and swap only the flour. This shows how each flour behaves in the exact same formula. -
Optimized flour test
Allow small adjustments for hydration, mixing, or bake time if a flour clearly needs them. This is better when your goal is to find the best version of each flour, not just the raw substitution behavior.
If you are learning, the true 1:1 test is usually the best first step. It makes differences easier to see.
Which flours to compare first
You do not need to test every flour in your pantry. Begin with the comparisons that reveal the most useful cookie differences.
Best first comparisons for cookie testing
-
All-purpose flour vs. bread flour
Good for studying chew, spread, and thickness. This is one of the most useful tests for chocolate chip cookies and similar doughs. -
All-purpose flour vs. cake flour
Helpful when you want to compare tenderness and delicate structure. -
All-purpose flour vs. pastry flour
Useful if you want a middle ground between tenderness and structure. -
White flour vs. whole wheat flour
Best when you want to understand flavor, density, and moisture changes.
If you are testing for recipe development, all-purpose flour makes the most practical control because it is common, familiar, and easy to compare against other flours.
A quick comparison table
| Flour type | What it may do in cookies | Best for testing | Watch for |
|---|---|---|---|
| All-purpose flour | Balanced structure and spread | Control batch | Baseline texture and browning |
| Bread flour | More chew and structure | Thick, chewy cookies | Less spread, firmer bite |
| Cake flour | More tenderness, less chew | Soft, delicate cookies | Extra spread or weak structure |
| Pastry flour | Moderate tenderness and support | Balanced soft cookies | Slightly lighter texture |
| Whole wheat flour | More flavor, denser texture | Rustic or hearty cookies | Dryness, reduced spread |
Set up a fair side-by-side cookie flour test
A fair test depends on controlling everything except the flour. If several variables change at once, you will not know which one caused the result.
Keep these variables constant
- Use the same recipe base
- Weigh ingredients instead of measuring by cups
- Use the same mixer speed and mixing time
- Use the same dough portion size
- Bake on the same type of baking sheet
- Use the same oven temperature
- Use the same rack position
- Use the same chill time, if the dough is chilled
- Bake one batch at a time or rotate batches consistently
If you need a refresher on accurate flour measurement, the guide on how to convert cups of flour to grams can help you avoid one of the most common testing errors: inconsistent flour weight.
A simple testing workflow
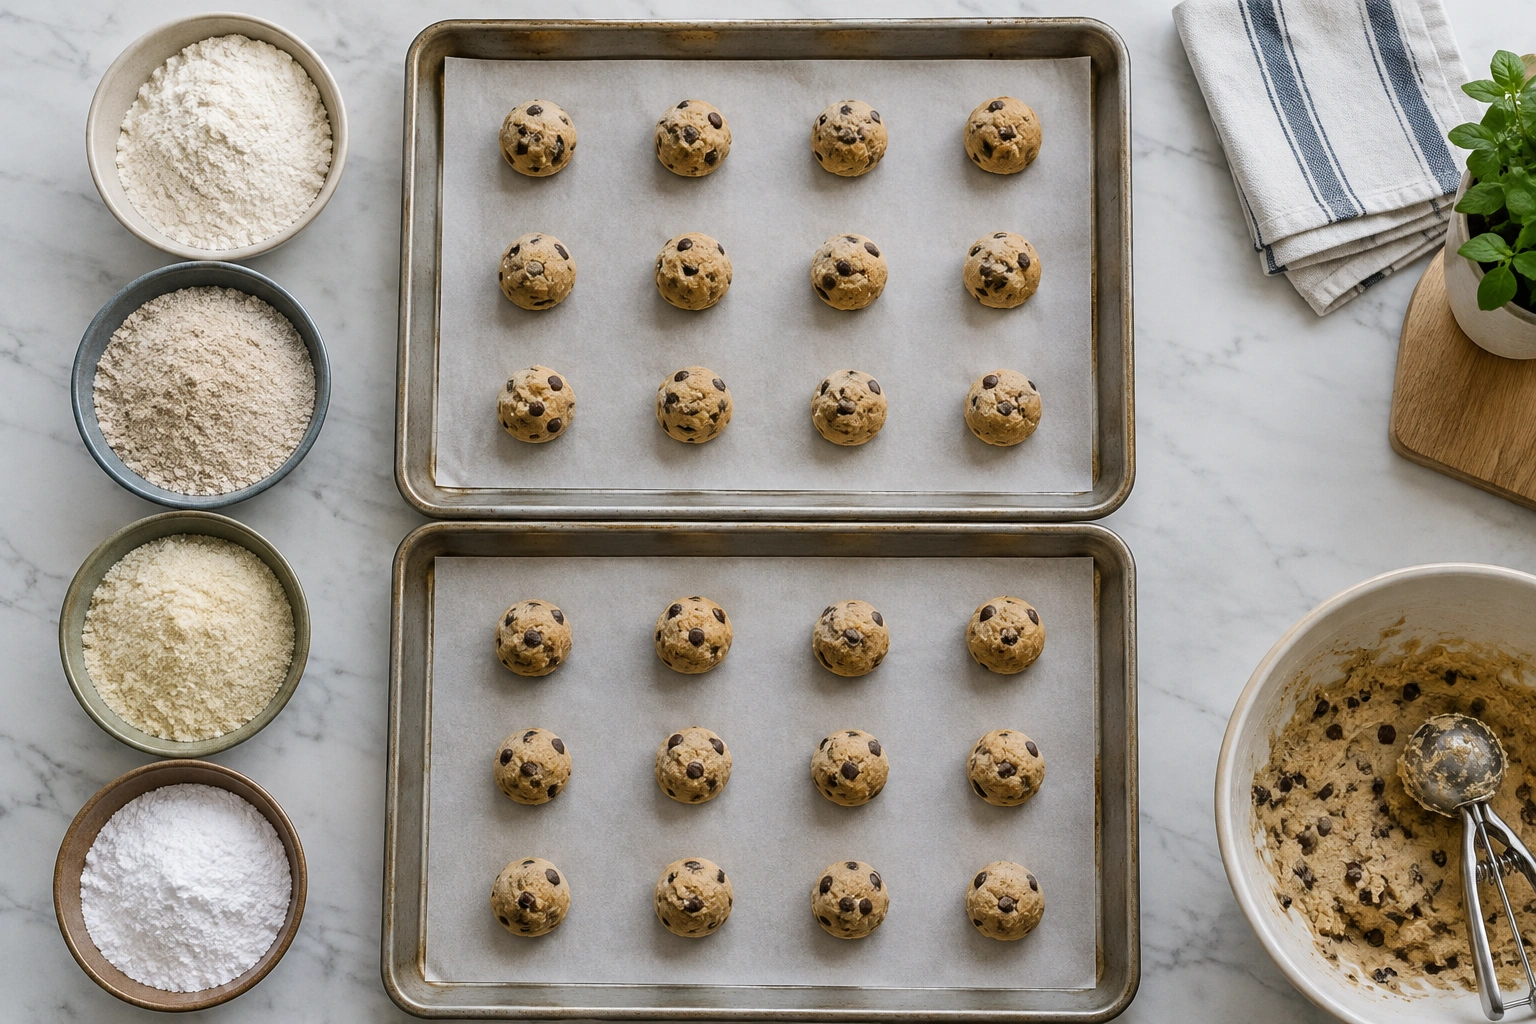
A practical side-by-side test might look like this:
- Choose one control recipe and decide which flour you are comparing against the baseline.
- Weigh identical dough portions for each batch so every cookie starts with the same amount of dough.
- Label the batches clearly with neutral codes such as A, B, and C so you can do a blind comparison later.
- Bake under identical conditions on the same pan type, at the same temperature, for the same time, and on the same rack when possible.
- Cool the cookies fully before judging texture, spread, and color.
- Score the results using the same criteria for every batch.
A controlled setup might look like this:
- Batch A: all-purpose flour
- Batch B: bread flour
- Batch C: cake flour
Make each dough the same day, portion each cookie with the same scoop or scale weight, and place them on identical pans. If you can, keep the batch labels hidden during tasting so the comparison stays blind.
This kind of setup makes the differences easier to trust. If Batch B spreads less, you can feel more confident that the flour caused it, not a warmer pan or a different scoop size.
How to handle hydration and mixing adjustments
Some flours absorb liquid differently. Whole wheat flour often behaves differently from white flour because the bran can change hydration needs. Higher-protein flours may also feel firmer or drier in a cookie dough, depending on the recipe.
For a first-round test, keep the formula unchanged so you can see the flour’s natural behavior. If the dough becomes obviously dry, crumbly, or difficult to portion, make a note rather than automatically fixing it.
Signs a flour may need adjustment
- The dough feels dry and breaks apart when scooped
- The dough seems stiff and resists shaping
- The baked cookies turn out too thick or too dense
- The flavor is good, but the texture seems under-hydrated
If that happens, run a second test with a small adjustment. In practice, that may mean a little more liquid, a slightly shorter mix, or a bit more resting time. Keep the change small so you can still tell what improved.
What to adjust first for common flour problems
Use the first test to observe the flour honestly. Use the second test to refine it.
- Dry dough
- First follow-up adjustment: add a small amount of liquid, such as a teaspoon or two at a time, or let the dough rest briefly before adding more.
- For whole wheat flour, this is often the first fix to test.
-
For bread flour, a little extra liquid may help if the dough feels tight or stiff.
-
Sticky dough
- First follow-up adjustment: chill the dough before adding more flour.
- If it is still too sticky, reduce mixing slightly in the next test instead of immediately adding a lot more flour.
-
For cake flour and some pastry flour doughs, stickiness may reflect lower structure rather than a true hydration problem.
-
Overly dense dough
- First follow-up adjustment: shorten the mixing time or reduce the amount of extra flour added during shaping.
- For bread flour, this may help if the dough becomes too tight.
- For whole wheat flour, a short rest before baking can help the flour hydrate more evenly.
Direct swap or adjusted batch?
Use a direct swap when you want to compare flours honestly in the same formula.
Use an adjusted batch when the flour clearly needs help performing well in that recipe.
That distinction matters. A flour that looks poor in a straight swap may actually be excellent once the dough is hydrated properly. On the other hand, a flour that needs heavy correction may not be the best choice if you want an easy, low-maintenance cookie formula.
What to observe in the dough before baking
The dough often tells you what the cookie will do later. Before baking, look for consistency, stickiness, dryness, and how easily the dough holds its shape.
Useful dough observations
- Soft and scoopable: often a sign of balanced hydration
- Dry or crumbly: may point to a flour that absorbs more liquid or a formula that needs more moisture
- Sticky and loose: may suggest less structure or a flour that encourages spread
- Firm and dense: may lead to thicker cookies with less spread
If one dough feels noticeably tighter than the others, that is a clue. For example, bread flour dough may feel more substantial than cake flour dough in the same recipe. Whole wheat dough may feel drier even if the ingredient list is identical.
Write down these impressions before baking. They are easy to forget once the cookies come out of the oven.
How to evaluate the baked cookies
Do not judge cookies straight from the oven. They are still setting, and the texture can change as they cool. Compare the batches only after full cooling.
What to compare after cooling
- Spread: Did the cookie spread wide or stay compact?
- Thickness: Did it bake up tall or thin?
- Edge crispness: Are the edges crisp, firm, or soft?
- Center texture: Is the center tender, chewy, or cakey?
- Browning: Did the cookies brown evenly or too quickly?
- Flavor: Did the flour add nuttiness, sweetness, or a grainier taste?
A useful example:
- If all-purpose flour gives a balanced cookie with moderate spread and a soft center, it can serve as your control.
- If bread flour produces a thicker cookie with a chewier bite, that may be a better choice for a bakery-style chocolate chip cookie.
- If cake flour makes the cookie softer but too fragile, it may work better in a more delicate style than in a sturdy drop cookie.
What each outcome looks like in practice
Use these indicators to make the comparison more precise:
- Excessive spread: the cookie spreads much wider than the control, looks thin, and may have a greasy or fragile edge.
- Underbrowning: the cookie stays pale on the edges and bottom even when the center is set, which can suggest lower browning or a shorter bake.
- Cakey texture: the crumb looks more airy and cake-like than cookie-like, with a softer, less dense bite.
- Too dense: the cookie feels heavy or compact, with little lift and a tight crumb.
- Too dry: the cookie crumbles easily or feels sandy rather than tender.
A simple scoring method
Use a 1–5 scale for each batch:
- Spread
- Thickness
- Tenderness
- Chew
- Browning
- Flavor
Then add a short note beside each score, such as:
- “Spread more than control”
- “Edges crisp, center soft”
- “Dough felt dry before baking”
- “Nutty flavor, slightly dense”
This kind of note-taking makes it easier to revisit the test later instead of relying on memory.
How to record and compare results
A basic chart is enough. You do not need a complicated spreadsheet unless you are developing recipes professionally.
| Batch | Flour | Dough feel | Spread | Texture | Browning | Notes |
|---|---|---|---|---|---|---|
| A | All-purpose | Balanced | Moderate | Soft, chewy | Even | Control batch |
| B | Bread flour | Firmer | Less | Chewier, thicker | Slightly darker edges | Good structure |
| C | Cake flour | Softer | More | Tender, delicate | Lighter | Less support |
| D | Whole wheat | Drier | Less | Denser, more rustic | Moderate | Nutty flavor |
If you repeat the test later, keep the same chart format. That makes comparisons more reliable over time.
How to interpret the results and choose the right flour
Once you see the results side by side, choose the flour based on the cookie style you want, not just the flour that “won” overall.
Practical decision rules
- Choose bread flour if you want more chew and structure in a cookie that should feel substantial.
- Choose cake flour if tenderness matters more than chew and the cookie does not need much structure.
- Choose pastry flour if you want a softer cookie without going all the way to cake-flour delicacy.
- Choose whole wheat flour if flavor and a heartier texture matter more than a light, delicate crumb.
- Choose all-purpose flour if you want a dependable baseline that works in many cookie styles.
If a flour gives the flavor you want but the texture is off, that does not mean the test failed. It means you found a flour that may need hydration, mixing, or recipe balancing before it becomes a good fit.
Common mistakes that make flour tests unreliable
A flour test only helps if the comparison is clean. These are the mistakes that blur the results:
-
Changing several variables at once
If you change flour, sugar, and baking time together, the result becomes hard to interpret. -
Measuring flour by volume instead of weight
A cup of flour can vary more than many bakers realize. Weighing gives a cleaner comparison. -
Using different pan types or pan sizes
Pan material and size can affect spread and browning. -
Baking on different oven racks without planning for it
Rack position can change heat exposure and cookie color. If you need to bake multiple trays, use a consistent rack strategy like the one in this guide on how to bake cookies on two racks evenly. -
Judging the cookies too early
Warm cookies are still setting. Cooling changes texture. -
Overbaking one batch
A dry cookie can look like a flour problem when the real issue is bake time. -
Assuming every 1:1 swap will behave the same
Some flours need hydration or process changes to show their best side.
A simple way to think about flour testing
If you want one clear rule to take away, use this: change only one flour variable at a time, keep the rest of the formula steady, and judge the cookies only after they cool.
That approach will not only tell you which flour works best in a given recipe. It will also help you understand why cookies behave the way they do. Once you can read those differences, you can choose flour with intention instead of guessing.
Frequently Asked Questions
Can I substitute one flour for another 1:1 in cookies?
Sometimes, yes for testing purposes, but not always for the best final result. A 1:1 swap is useful when you want to see the flour’s natural behavior. For an optimized cookie, a flour may need hydration or another small adjustment.
What flour makes cookies softer?
Cake flour and pastry flour often produce softer, more tender cookies than bread flour. That said, the final result also depends on sugar, fat, mixing, and bake time.
What flour makes cookies chewier?
Bread flour often increases chew and structure because of its higher protein content. It can be especially useful in cookies that should feel thick and substantial.
Why did my whole wheat cookie dough seem drier?
Whole wheat flour can absorb liquid differently than white flour and may make dough feel firmer or drier. If that happens, note the change and consider a small hydration adjustment in a second test.
Should I chill the dough for every flour test?
Yes, if the base recipe normally calls for chilling. Keep chill time the same for every batch so it does not become another variable.
What is the best flour to test first?
All-purpose flour is usually the best starting point because it gives you a practical baseline. From there, bread flour, cake flour, pastry flour, and whole wheat flour are the most useful comparisons for cookie testing.
How do I know whether the flour or the bake time caused the difference?
If only one flour changed and every other factor stayed the same, the flour is the most likely cause. If one batch was baked longer, on a different rack, or on a different pan, the result is less reliable.
Can I taste raw dough during testing?
Avoid tasting raw dough if it contains raw flour and raw eggs unless the ingredients have been treated appropriately for raw consumption. For testing, it is safer to evaluate the dough by texture and the baked cookies by flavor.
Final takeaway
Testing flour in cookies works best when you treat it like a controlled bake, not a casual swap. Use one stable recipe, weigh your ingredients, keep the process consistent, and record what each flour does to spread, chew, tenderness, and flavor. If you want a quick next step, start with a 1:1 side-by-side test using all-purpose flour as the control, then make one small adjustment in a second round only if the dough needs it. That way, the differences become clear—and the next batch becomes a choice, not a guess.

