
How to Warm Pastries in an Air Fryer Without Drying Them Out
If you want bakery-style texture back in a leftover pastry, the air fryer can do the job well—as long as you use gentle heat and keep a close eye on timing. The goal is not to “cook” the pastry again. It is to warm the interior while reviving the exterior so it tastes fresh, not brittle.
Quick Answer: Best Air Fryer Settings for Warming Pastries
A practical starting point is a lower temperature with a short check-in window. For most pastries, that means warming them gently rather than blasting them with high heat.
Use this rule of thumb:
- Choose moderate or low heat
- Preheat if your air fryer heats unevenly, if you want the most even start, or if the pastry needs only a very short warm-up
- Skip preheating for thicker pastries or when you are reheating from frozen and need more gradual warming
- Check early
- Stop as soon as the pastry is warm through and lightly crisped
That approach helps protect flaky layers, glazed tops, and filled centers. If you push the temperature too high, the outside can brown before the inside is warm, which is exactly how pastries turn dry.
Quick settings at a glance
- Croissants: 300°F for about 2 to 4 minutes
- Danishes: 300°F for about 2 to 4 minutes
- Turnovers: 320°F for about 4 to 6 minutes
- Puff pastry: 300°F for about 2 to 4 minutes
These are starting points, not fixed rules. If the pastry is refrigerated, add a little time. If it is room temperature, start on the shorter end. If it is frozen, see the frozen guide below.
What Makes Pastries Dry Out in an Air Fryer
Air fryers move hot air quickly. That circulation is useful for crisping, but it can also pull moisture from exposed surfaces if the pastry stays in too long or gets too hot.
The main texture risks are simple:
High heat
A pastry shell can brown fast while the interior is still cool. The result is often a crisp exterior with a dry, tough bite.
Overcooking
Even a few extra minutes can matter, especially with thin pastries like puff pastry or delicate glazed items.
Exposed surfaces
If the top is uncovered and the pastry is already day-old, the air fryer can make that surface feel even drier.
Crowding the basket
When pastries are packed too tightly, the hot air circulates unevenly. One pastry may overbrown while another stays soft in the center.
That is why the best reheating method usually favors gentler heat, short intervals, and a quick visual check rather than a long, fixed cook time.
Step-by-Step: How to Warm Pastries Without Drying Them
Here is the simplest repeatable method.
1. Bring the pastry into the right starting state
If the pastry has been refrigerated, let it sit out briefly while the air fryer preheats. That small head start helps the center warm more evenly.
If it is frozen, do not treat it like a refrigerated pastry. Frozen pastries usually need more time and a little more patience.
2. Preheat the air fryer if needed
A preheated basket helps the pastry start warming immediately. That is most useful when you want a quick finish on a pastry that is already close to room temperature, or when your air fryer tends to heat unevenly.

Skip preheating when you are reheating a thicker pastry, when the pastry is still cold from the fridge, or when you are starting from frozen and want a gentler ramp-up.
As a timing rule, preheating usually means you can stay near the shorter end of the range. Skipping preheat usually means adding a little more time and checking once extra.
3. Arrange the pastries in a single layer
Leave space around each piece. If the basket is crowded, the pastry may steam in spots and dry out in others.
For delicate items, place them so the best-looking side faces up. That helps protect glazes and toppings.
4. Use a liner only when it solves a problem
Parchment can make cleanup easier, and foil can protect fragile tops or edges. But both can reduce airflow if overused. Keep the liner small enough that air can still move around the pastry.
5. Warm in short intervals
Check the pastry after a brief first pass rather than setting a long timer and walking away. The outside should look revived, not deeply browned.
6. Test the center
For filled pastries, gently press near the center or open one carefully if needed. You want the middle warm, not scorching, and the layers should still feel tender rather than stiff.
Bottom line: Start low, keep the basket uncrowded, and check early; if you preheat, use the shorter end of the time range, and if you skip preheat, add a little time instead of raising the temperature.
Best Temperature and Time by Pastry Type
Different pastries behave differently in the air fryer. A croissant, a fruit danish, and a puff pastry turnover all respond to heat in slightly different ways.
The table below gives a practical starting point. Treat it as a guide, not a fixed rule.
| Pastry type | Best use case | Heat approach | Handling notes |
|---|---|---|---|
| Croissant | Day-old or refrigerated | 300°F for 2 to 4 minutes | Watch closely so the layers crisp without turning leathery |
| Danish | Glazed or filled pastry | 300°F for 2 to 4 minutes | Protect the topping if it browns too quickly |
| Turnover | Fruit-filled or savory | 320°F for 4 to 6 minutes | Check the seam so filling does not leak |
| Puff pastry | Thin, flaky bakery item | 300°F for 2 to 4 minutes | Easy to overbrown; stop as soon as it feels warm |
| Cream- or custard-filled pastry | Best warmed carefully | 275°F to 300°F for 2 to 4 minutes | Filling heats faster than the shell in some spots |
| Plain bakery pastry | Simple leftover pastry | 300°F for 2 to 5 minutes | Usually the easiest to revive |
Croissants
Croissants are one of the best candidates for air fryer reheating because the layers can regain some crispness. The risk is drying out the outer shingled layers before the center softens. Keep the heat modest and stop early.
A day-old croissant often benefits from just enough heat to make the outside crisp again while the inside stays soft and buttery.
Danishes
Danishes need a little more caution because of glaze, fruit, or cream cheese toppings. Too much heat can darken the topping or make the filling bubble out.
If the danish has a sticky glaze, watch for color change rather than relying on the full timer.
Turnovers
Turnovers are usually thicker than croissants and may contain fruit fillings that heat faster than the crust. That means the outside can look ready before the center is fully warm.
If the pastry is sealed well, it can reheat nicely. If the seam is weak, the filling may escape when it gets hot.
Puff pastry
Puff pastry is delicate. It reheats well when the goal is crisp layers, but it can go from pleasantly flaky to dry very quickly.
Use short heating intervals and check the edges first. If the edges are already deeply golden, stop sooner than you think.
Bottom line: Use 300°F for most croissants, danishes, and puff pastry, and 320°F for turnovers; start with 2 to 4 minutes for thinner pastries and 4 to 6 minutes for thicker ones.
Reheating Refrigerated vs. Room-Temperature vs. Frozen Pastries
Storage state changes the reheating plan more than many home cooks expect.
Room-temperature pastries
These need the least help. They usually just need a brief warm-up to restore texture and aroma.
Because they are already not cold in the center, they are the easiest to overdo. Keep the reheating time short.
Refrigerated pastries
Cold pastries take longer to warm through, and the chill can make the exterior seem ready before the center is.
If the pastry is from the fridge, you may want a slightly longer gentle warm-up than you would use for a room-temperature pastry. Still, avoid turning up the heat just to speed things along.
Frozen pastries
Frozen pastries are the trickiest. The outside may brown before the interior has a chance to warm. For thick or filled pastries, thawing first can lead to more even results.
Frozen pastry mini-guide
- Croissants: Thaw first if possible for the most even results; if reheating from frozen, use 300°F for about 5 to 8 minutes.
- Danishes: Thaw first when glazed or filled; from frozen, use 300°F for about 5 to 8 minutes and check early.
- Turnovers: Can go either way, but thawing first is safer for fruit-filled styles; from frozen, use 320°F for about 6 to 9 minutes.
- Puff pastry: Thaw first for best texture; from frozen, use 300°F for about 4 to 7 minutes, depending on thickness.
- Cream- or custard-filled pastries: Thaw first whenever possible; reheating from frozen can overheat the filling before the shell is ready.
If you reheat from frozen, use a cautious approach and expect the process to take longer than a refrigerated pastry. For very delicate pastries, thawing in the fridge first is often the safer path.
Bottom line: Refrigerated pastries need a little more time, room-temperature pastries need the least, and frozen pastries usually reheat best after thawing first unless the pastry is sturdy enough to handle a longer, gentler air-fryer pass.
Should You Use Parchment, Foil, or No Liner?
Each option changes the result.
No liner
This gives the best airflow and usually the best crispness. It is the simplest choice for sturdy pastries that are not sticky or fragile on top.
Use no liner when:
– the pastry is plain
– you want maximum crispness
– cleanup is not a problem
Parchment
Parchment can help with sticky bottoms, glazed surfaces, or crumbly pastries. It is useful when you want easier cleanup without completely enclosing the pastry.
Use parchment when:
– filling may leak a little
– glaze could stick
– the pastry is delicate on the bottom
Keep the sheet small enough that it does not block the basket. Lightweight parchment should not float into the heating element.
Foil
Foil is useful when you want to shield the top or edges from browning too quickly. That can help with a pastry that is already dark on top but still cool inside.
Use foil when:
– the top is browning too fast
– edges need protection
– the pastry is thick and needs a little extra time
The trade-off is that foil can soften the crisp finish if it covers too much of the surface.
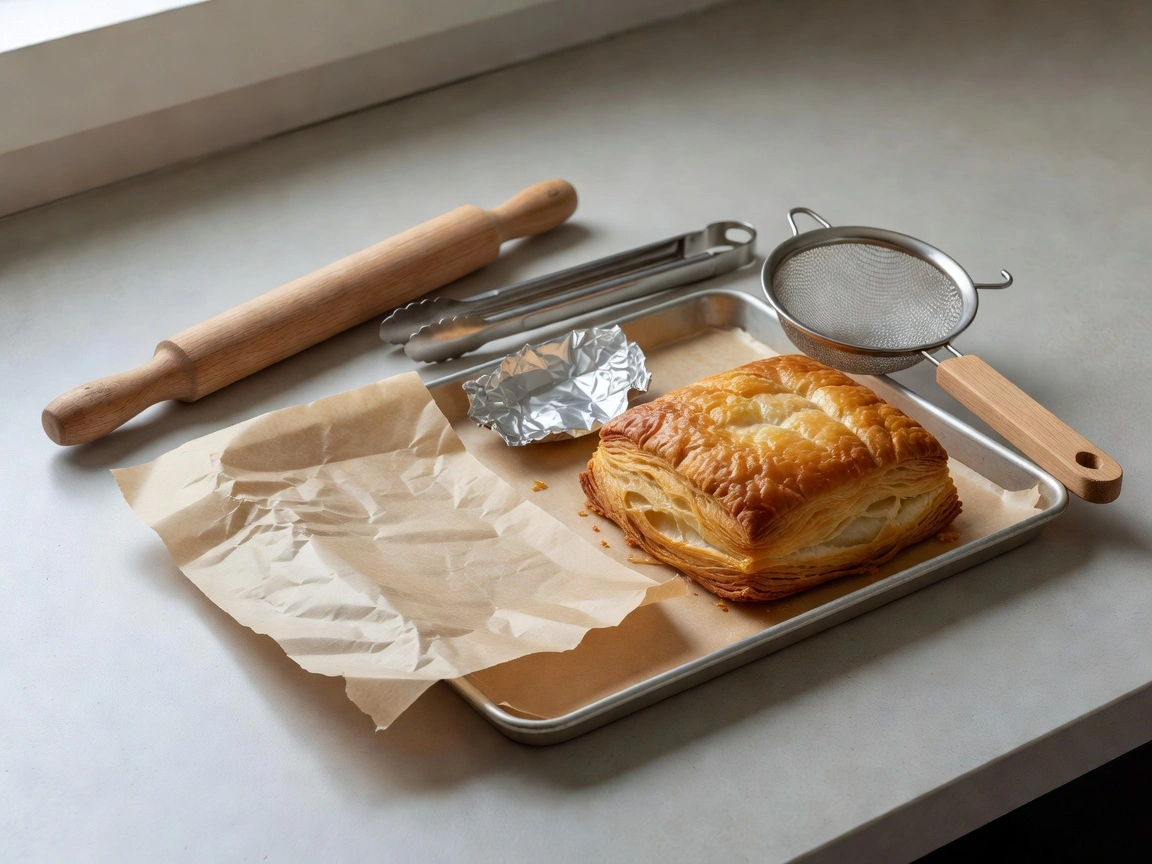
Bottom line: For most pastries, use no liner if you want the crispest result; choose parchment only for sticky or fragile bottoms, and use foil only when you need to slow browning on top.
How to Keep Filled or Glazed Pastries from Leaking or Burning
Filled pastries need more attention because the filling and crust do not always heat at the same rate.
Fruit fillings
Fruit fillings can become very hot and loose before the crust feels done. That is why a turnover may seem ready from the outside while the center is still catching up.
Cream and custard fillings
These warm unevenly and can become uncomfortable to eat if overheated. Use a gentler setting and check carefully.
Cheese fillings
Cheese-based fillings can soften quickly and sometimes ooze if the pastry is heated too aggressively.
Glazed tops
A sugar glaze or icing can melt, darken, or become tacky. If the topping is decorative, a light cover can protect it, but only if it still allows airflow.
A useful habit is to look at the filling first and the crust second. If the filling is already hot enough, stop even if the pastry shell could use a little more color.
Bottom line: For filled or glazed pastries, protect the topping only when needed, and stop as soon as the filling is warm rather than waiting for extra browning.
Common Air Fryer Mistakes That Ruin Pastry Texture
These are the errors that most often turn a promising reheated pastry into something dry or uneven.
Using too much heat
This is the fastest way to toughen flaky layers. The pastry may look done on the outside long before it is ready to eat.
Letting the basket get crowded
Crowding limits airflow, which means some parts dry out while others stay soft.
Ignoring the pastry halfway through
A quick check is often enough to catch overbrowning before it becomes a problem.
Using too much parchment or foil
A liner should help, not smother. If it covers too much of the basket, crispness suffers.
Treating every pastry the same
A croissant, a danish, and a turnover do not need identical treatment. Thickness, filling, and glaze all matter.
Bottom line: Avoid high heat, crowding, and oversized liners; those three mistakes cause most dry or uneven results.
How to Tell When the Pastry Is Warmed Through
The timer is only part of the answer. Better cues are visual and tactile.
Look for these signs:
- the pastry feels warm when gently touched
- the exterior looks revived, not deeply darkened
- the center is no longer cool or firm
- the filling is warm but not bubbling aggressively
- the layers separate slightly instead of feeling hard
If you are unsure, give the pastry a short additional interval rather than a long one. That is the safest way to protect texture.
Bottom line: Stop when the pastry is warm, lightly crisped, and no longer cool in the center; add time in small increments if needed.
Air Fryer vs. Oven: Which Is Better for Reheating Pastries?
An air fryer is often better when you want speed and a crisper finish on a small batch. It is especially useful for one or two pastries that need a quick refresh.
An oven can be better when:
– you are reheating several pastries at once
– the pastries are large or delicate
– you want more even, gentler heat over a wider space
The trade-off is simple. The air fryer is faster and often crispier, while the oven is more forgiving for larger batches. If you only need one croissant or danish, the air fryer usually wins. If you are warming a tray of pastries for guests, the oven may be the steadier choice.
For more on keeping baked goods soft instead of dry, see how to reheat homemade bread without drying it out. If you want another example of managing heat carefully in a convection-style appliance, our guide to baking brownies in an air fryer shows the same principle in a different context.
Bottom line: Use the air fryer for one to two pastries when you want speed and crispness; use the oven for larger batches or more delicate items.
A Simple Rule to Remember
If you want the best texture, think gentle heat, short intervals, and early checking. That combination gives pastries a better chance of turning warm and crisp without becoming dry or brittle.
Once you learn how your air fryer behaves, you can adjust for croissants, danishes, turnovers, and puff pastry with confidence.
FAQ
What temperature should I use to warm pastries in an air fryer?
A good starting point is 300°F for most croissants, danishes, and puff pastry. Turnovers usually do better around 320°F because they are often thicker. Keep the time short and check early.
Do I need to preheat the air fryer?
Preheating is recommended when you want the most even start, especially for smaller pastries or when your air fryer tends to heat unevenly. You can skip preheating for thicker pastries or frozen pastries, but you may need a little more time.
How long do pastries take in the air fryer?
Most pastries warm in about 2 to 4 minutes at 300°F. Thicker pastries like turnovers may need 4 to 6 minutes. Frozen pastries usually need longer.
Should I thaw frozen pastries before reheating?
For croissants, danishes, puff pastry, and cream-filled pastries, thawing first usually gives better results. Turnovers can be reheated from frozen if needed, but thawing first is still safer for even warming.
Is parchment paper or foil better?
Neither is best for every case. No liner gives the crispiest result, parchment helps with sticky bottoms or glaze, and foil is best only when you need to slow browning on top.
Can I reheat pastries in the air fryer without drying them out?
Yes. Use moderate or low heat, avoid crowding the basket, and check the pastry early. The key is to stop as soon as it is warm through and lightly crisped.

