
How to Revive a Sourdough Starter Without Starting Over

A neglected sourdough starter can look dramatic: gray liquid on top, a sour punch in the nose, maybe even a dried crust around the edges. That does not automatically mean it is dead. In many cases, it is simply hungry, cold, or both.
The trick is not to guess. You want to check for contamination first, then give the culture the right conditions to wake back up. Once you understand what you are looking at, the rescue process becomes much less mysterious.
How to Tell Whether Your Starter Can Be Saved
Before feeding anything, inspect the starter like a baker and a food-safety-minded cook.
Usually salvageable
A starter is often worth reviving if it has:
- A sour, tangy, or boozy smell
- Hooch, which is the liquid that can collect on top
- Separation into a liquid layer and thicker paste
- A few bubbles, even if it is sluggish
- A dried surface or dried edges, but no visible mold
That lines up with what baking resources describe as a living but neglected culture rather than a lost one. Breadtopia notes that a live starter is a moist ball of dough with active yeast and bacteria, and that a runny starter may not trap fermentation bubbles well enough to rise visibly. That means a starter can be alive even when it looks flat and sad.
Discard immediately
Throw the starter out if you see:
- Fuzzy mold
- Pink, orange, or salmon-colored streaks or patches
- A rotten, putrid smell
- Anything that makes you suspect contamination
Odor is only one clue. A sour or boozy smell can point to hunger, but it does not prove the starter is safe. Mold, pink/orange discoloration, or a rotten smell are the decisive discard signals. Do not scrape around mold and try to save the rest. If the culture is contaminated, the safer move is to begin again.
A simple decision rule
If it smells sour and looks neglected, try to revive it. If it looks moldy, shows pink/orange discoloration, or smells rotten, discard it.
| Starter state | Typical signs | Save or discard? | Likely next step |
|---|---|---|---|
| Hungry but alive | Hooch, sour smell, bubbles, separation | Save | Feed and warm it |
| Dormant from the fridge | Little activity, mild sour smell, thick or separated | Save | Refresh over several feedings |
| Dried scrap or chalky block | Dry, brittle, darkish residue | Often save | Rehydrate and feed regularly |
| Very runny starter | Thin, watery, poor rise | Often save | Thicken with proper feeding |
| Moldy or rotten starter | Fuzzy growth, pink/orange color, foul odor | Discard | Start over |
If you want a deeper refresher on starter readiness after revival, this guide to knowing when sourdough starter is ready to bake pairs well with this article.
What You’ll Need Before You Begin
A smooth revival goes faster when you gather everything first:
- A clean jar or container
- A kitchen scale
- Flour
- Water
- A spoon or spatula
- A rubber band or marker to track rise
- A warm spot in the kitchen
A scale matters more than most home bakers realize. Once a starter gets weak, vague cup measurements can push it too far in one direction. Weight keeps the feeding ratio repeatable, which is exactly what a recovering culture needs.
Reviving a Refrigerated Starter Step by Step
A starter that has been sitting in the fridge for weeks or months usually needs a gentle but structured reset.
1) Let it warm slightly
Take the starter out and let it sit at room temperature for a few hours if it is very cold. This gives the microbes a better chance to wake up before feeding.
2) Check for hooch and stir
If there is liquid on top, you can pour it off or stir it in. Either approach can work. If the smell is sharply alcoholic, that usually means the starter is hungry, not ruined.
3) Keep only a small amount
Do not try to revive the whole jar. Keep 20 grams of starter in a clean container and discard the rest. Keeping less starter makes the fresh flour and water more effective, and it prevents you from wasting feed after feed on a huge, tired mass.

4) Feed it at an exact ratio
For a first revival feeding, use a simple starter:flour:water ratio of 1:2:2 by weight. For example, 20 grams starter + 40 grams flour + 40 grams water.
If the starter looks especially weak, a slightly larger feed can help. In that case, use 1:3:3, such as 20 grams starter + 60 grams flour + 60 grams water.
5) Mark the level and leave it warm
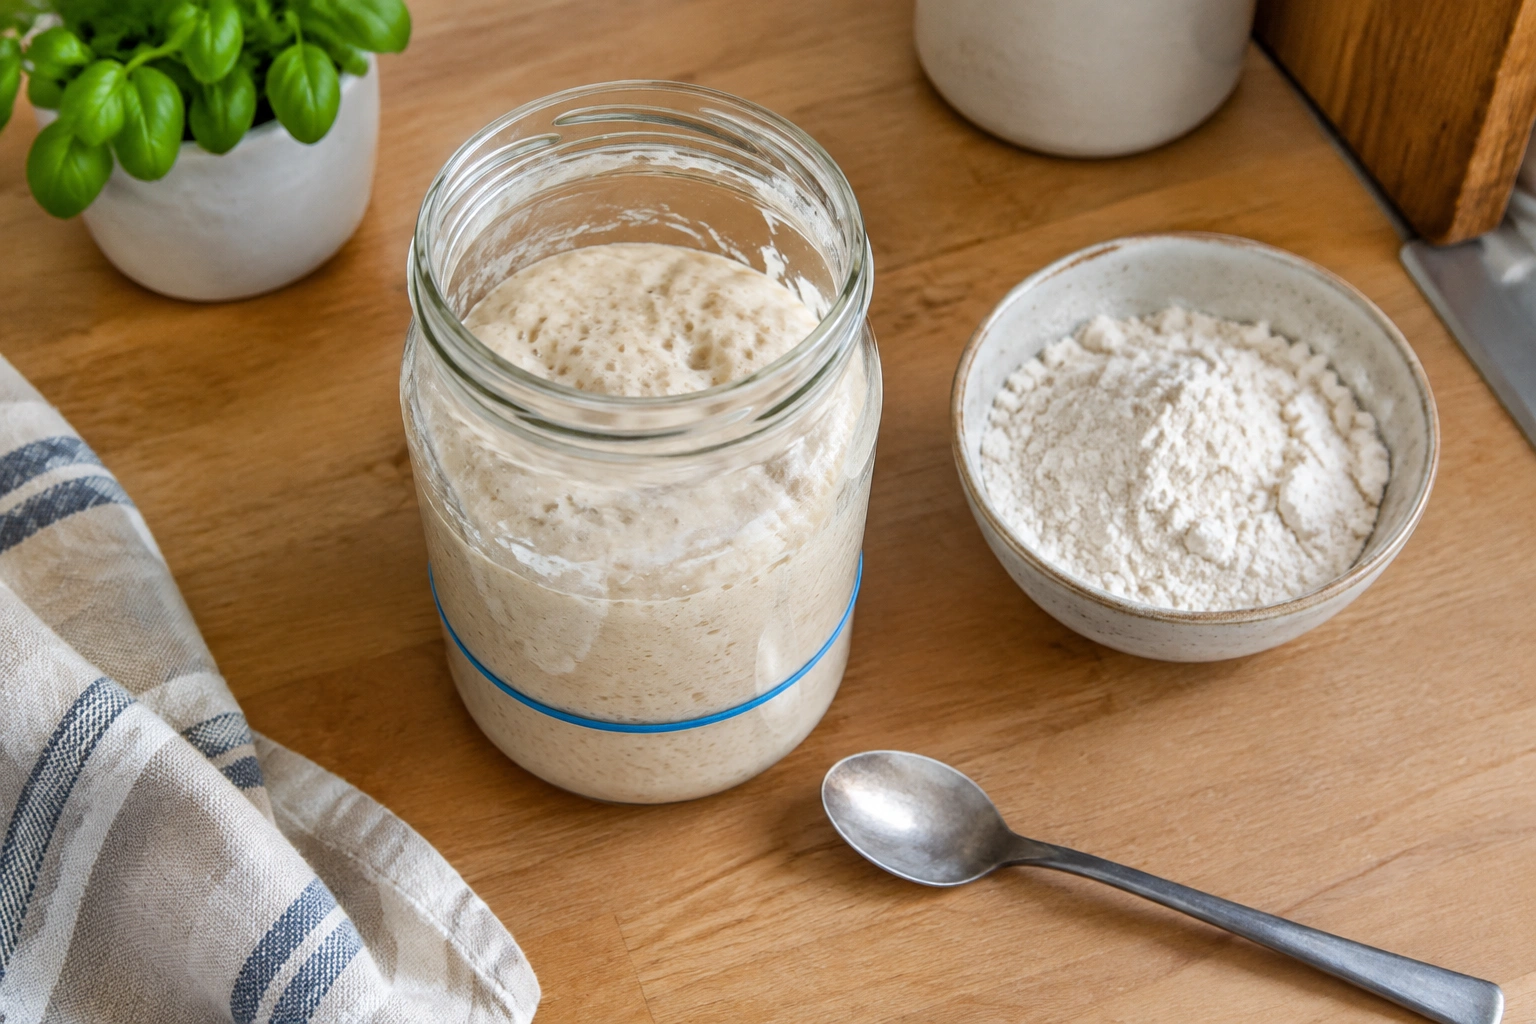
Place a rubber band at the starting level and keep the jar in a warm area. A practical room-temperature range around 70–75°F usually works well for revival, without pushing the starter too hard.
6) Watch for the first signs of life
After the first feeding, look for bubbles, a lighter texture, and some rise. It may not double right away. That is normal.
7) Repeat on a consistent schedule
If the starter is only slightly active after the first feed, keep 20 grams and feed again at the 24-hour mark using the same 1:2:2 ratio. If it is clearly weak but responding, move to a 12-hour feeding rhythm once you see some bubbles and rise.
The goal is not to make it peak instantly. The goal is to give the culture a clean, manageable environment.
Reviving a Dried or Dehydrated Starter Step by Step
Dried starter is a different rescue job. It is often more patient work than reviving a refrigerated starter, but it can still be successful.
King Arthur Baking notes that a starter dried into a darkish chalk-like block can be pulverized, mixed with water, and fed on a regular schedule. That is exactly the mindset to adopt here: rehydrate first, then rebuild.
1) Break or grind the dried starter
Crush the dried starter into smaller pieces or a powder. Smaller pieces hydrate more evenly.
2) Add water first
Mix in water and let the dried bits soften. At this stage, you are not chasing peak rise. You are simply reawakening the culture.
3) Add flour and mix thoroughly
Once the starter has loosened, add flour and stir until there are no dry pockets. A practical first feeding is 10 grams dried starter + 20 grams water + 20 grams flour, which keeps the ratio at 1:2:2 by weight once the starter is rehydrated.
4) Keep it warm and covered loosely
A loose cover protects the starter while still allowing gases to escape.
5) Feed regularly and watch for response
If there is no growth and no bubbles after three or four days of daily feedings, King Arthur Baking suggests it may be better to start over. That is a useful guideline for a dried starter that refuses to respond, not a hard cutoff for every culture.
If you do start over, they recommend stirring some of the old starter into the new one so you can preserve continuity from the old culture.
Best Feeding Ratios and Flour Choices for Recovery
This is where many bakers overcomplicate things. For revival, the best feeding ratio is the one you can repeat cleanly.
Equal parts by weight
A simple equal-weight feed is the easiest place to begin. It keeps hydration predictable and makes it easier to judge whether the starter is rising or just loosening.
Concrete ratio examples for different recovery stages
- Weak refrigerated starter: 20 grams starter + 40 grams flour + 40 grams water
- Very acidic starter: 20 grams starter + 60 grams flour + 60 grams water to dilute some of the old acidity
- Very runny starter: 20 grams starter + 50 grams flour + 35 to 40 grams water, depending on how thin it is
Slightly stronger feeds
If your starter is very acidic, sluggish, or thin, a somewhat larger flour feed can help dilute old acids and give the culture more fresh food. The trade-off is that a bigger feed may take longer to peak, so you must be patient enough to wait for the rise.
Whole wheat versus all-purpose
Whole wheat flour often helps a tired starter recover more quickly because it brings more of the grain along with it. Sunrise Flour Mill advises feeding a tired starter a few times with a white or bread blend first, and if it still is not gaining strength or looks watery, adding whole wheat or fine rye can help.
That does not mean all-purpose flour is bad. It is simply milder and more neutral. If you want a faster wake-up, whole grain flour often gives the starter more to work with. If you want a cleaner, more standard maintenance routine after recovery, all-purpose is perfectly fine.
A practical compromise is to use whole wheat or rye for the first one or two revival feedings, then switch back to your regular flour once the starter is rising more predictably.
How Often to Feed and Where to Keep It
During revival, schedule matters more than improvisation.
Keep it at room temperature
Do not put a weak starter back in the fridge while it is trying to recover. Cold storage slows fermentation and can make it look even more dormant than it is. Keep it at room temperature continuously during the revival period, except for the brief time it takes to feed and reset the jar.
Feed on a regular schedule
Sunrise Flour Mill recommends feeding every 12 hours once you are trying to rebuild strength. That rhythm works well for many weak starters because it prevents the culture from sitting too long on exhausted food.
Use the room to your advantage
A starter kept in a practical warm range, around 70–75°F, will usually show activity more clearly than one left in a chilly kitchen. If your kitchen is cool, find a warmer spot rather than feeding more often at random. Consistency beats improvisation.
24/48/72-Hour Rescue Timeline
If you want a simple rescue path, use this:
First 24 hours
- Keep 20 grams of starter
- Feed at 1:2:2, or 1:3:3 if it is very weak
- Leave it at room temperature
- Check for bubbles, smell, and any rise
- If it is only slightly active, wait until the 24-hour mark before feeding again
48 hours
- If you see bubbles or a small rise, continue with 12-hour feedings
- Keep discarding back to 20 grams each time
- If it is still sluggish but not moldy or rotten, keep going rather than changing the plan
- If the starter looks watery, switch to a slightly thicker feed
72 hours
- You should see clearer activity by now if the starter is recoverable
- If it is rising more predictably, continue feedings until it can peak consistently
- If there is still no meaningful response, the starter may be too weak, too diluted, or too damaged to rescue easily
A starter that has been in the fridge may bounce back faster than a dried scrap. A dried starter usually needs more patience because it has to be rehydrated before fermentation can really resume.
How to Know the Starter Is Coming Back to Life
Do not judge revival by bubbles alone.
Look for a cluster of signs
A recovering starter usually shows several of these at once:
- More bubbles than before
- A lighter, aerated texture
- A cleaner sour aroma
- Some rise above the marked line
- A more predictable peak and fall
Bubbles without rise
Bubbles can appear even when the starter is too thin to trap gas well. Breadtopia specifically points out that a runny starter may fail to rise because it cannot hold the bubbles that fermentation creates. So if you see bubbles but no lift, the issue may be texture, not life.
Smell matters, but it is not the only test
A revived starter usually smells pleasantly tangy, yeasty, or mildly fruity. A harsh acetone note can still mean hunger. Rotten, putrid, or moldy odors are a different story and should stop the process.
Common Problems During Revival and How to Fix Them
The starter is watery
If it looks more like batter than paste, it may not trap gas well enough to rise. Use a thicker feed next time by adding more flour relative to water.
It rises a little, then stalls
That often means the starter is alive but weak. Give it another feeding cycle instead of baking immediately.
It smells very sharp or boozy
That usually means it has run out of food. Feed it sooner and keep it warm.
It looks separated
Separation alone is not a disaster. Stir it, feed it, and watch whether the next cycle improves.
It still seems lifeless after several feedings
King Arthur Baking’s advice is useful here: if a dried or neglected starter shows no growth and no bubbles after three or four days of daily feedings, it may be time to start over.
When Your Starter Is Ready to Bake With Again
A starter is ready when it behaves predictably, not just energetically.
Look for these readiness cues:
- It rises consistently after feeding
- It doubles or triples at a reliable pace
- It smells pleasantly tangy rather than harsh
- The texture looks airy and elastic, not watery
- It reaches peak activity without collapsing immediately
It should also pass a simple rise test after feeding before you rely on it for baking. If it does not rise predictably in its jar, it is better to give it another feeding cycle than to assume it is ready because it smells active.
If it rises only a little, give it another feeding cycle. Baking with a starter that is still weak often leads to sluggish dough, even if the culture is technically alive.
For a more detailed breakdown of readiness cues, you may also want to read how to tell when your sourdough starter is ready to bake.
Common Mistakes to Avoid
The biggest revival mistakes are surprisingly simple:
- Feeding a huge amount of starter instead of keeping a small portion
- Changing flour and hydration every feeding
- Refrigerating it again before it has recovered
- Expecting one feeding to fix weeks of neglect
- Ignoring mold or suspicious discoloration
- Using a very runny mixture and then assuming it is dead because it will not rise clearly
The quiet truth of starter recovery is that patience and repeatability matter more than drama. A starter does not need to look perfect on day one. It needs a clean environment, regular food, and enough warmth to rebuild its balance.
When to Consult a Master Baker
If you are working with a valuable heritage starter, a starter that has unusual contamination concerns, or a culture that repeatedly fails to respond despite careful feedings, a master baker or experienced instructor can help you assess whether the issue is hydration, temperature, flour choice, or contamination. That is especially useful in a culinary school setting where you want to preserve a culture if it is still viable.
FAQ
Can I revive a sourdough starter after months in the fridge?
Yes, often you can. The more important question is whether it is still clean and free of mold. A long-neglected starter may need several feedings before it looks strong again.
How do I know if my starter is dead or just hungry?
If it smells sour or boozy, shows bubbles, or has hooch, it is usually hungry rather than dead. Mold, pink/orange discoloration, or a rotten smell are signs to discard it.
Should I use whole wheat flour or all-purpose flour?
Whole wheat or rye often helps a tired starter recover faster because it gives the culture more to work with. All-purpose flour is fine once the starter is active again.
Can I bake with it after one feeding?
Sometimes, but not always. A weak starter often needs multiple feedings before it can reliably double or triple and leaven dough well.
What if my starter rises a little but still seems weak?
Feed it again and keep it warm. A small rise is a good sign, but not always enough for dependable baking.
How long should I keep feeding before giving up?
If a dried or neglected starter shows no growth and no bubbles after three or four days of daily feedings, it may be better to start over.
Is hooch a bad sign?
Not usually. Hooch often means the starter is hungry. It is a signal to feed, not a reason to panic.
Should I refrigerate it again during recovery?
No. Keep it at room temperature until it is strong, active, and predictable.
Can dried starter be revived faster than refrigerated starter?
Usually not. Dried starter often takes more patience because it must be rehydrated before it can ferment normally.
What does a healthy revived starter smell like?
It should smell pleasantly tangy, yeasty, or mildly fruity. A rotten or putrid smell is not normal.
How often should I feed it after recovery?
If you keep it at room temperature, regular feedings every 12 to 24 hours are common. If you bake weekly, refrigeration becomes practical again once it is strong.
Final Thought
A sourdough starter is resilient, but it does best when you treat revival like a small fermentation project rather than a one-shot rescue. Check for safety first, feed it consistently, keep it warm, and judge progress by the full picture: smell, bubbles, texture, and rise. That is how a neglected jar turns back into a working baking culture.