
How to Store Sourdough Starter in the Fridge Without Weakening It

If you bake sourdough only once in a while, the refrigerator is your best friend. It slows fermentation enough to give your starter a long pause without forcing you to feed it every day. The key is to chill it in a way that keeps the culture healthy, easy to revive, and ready when you are.
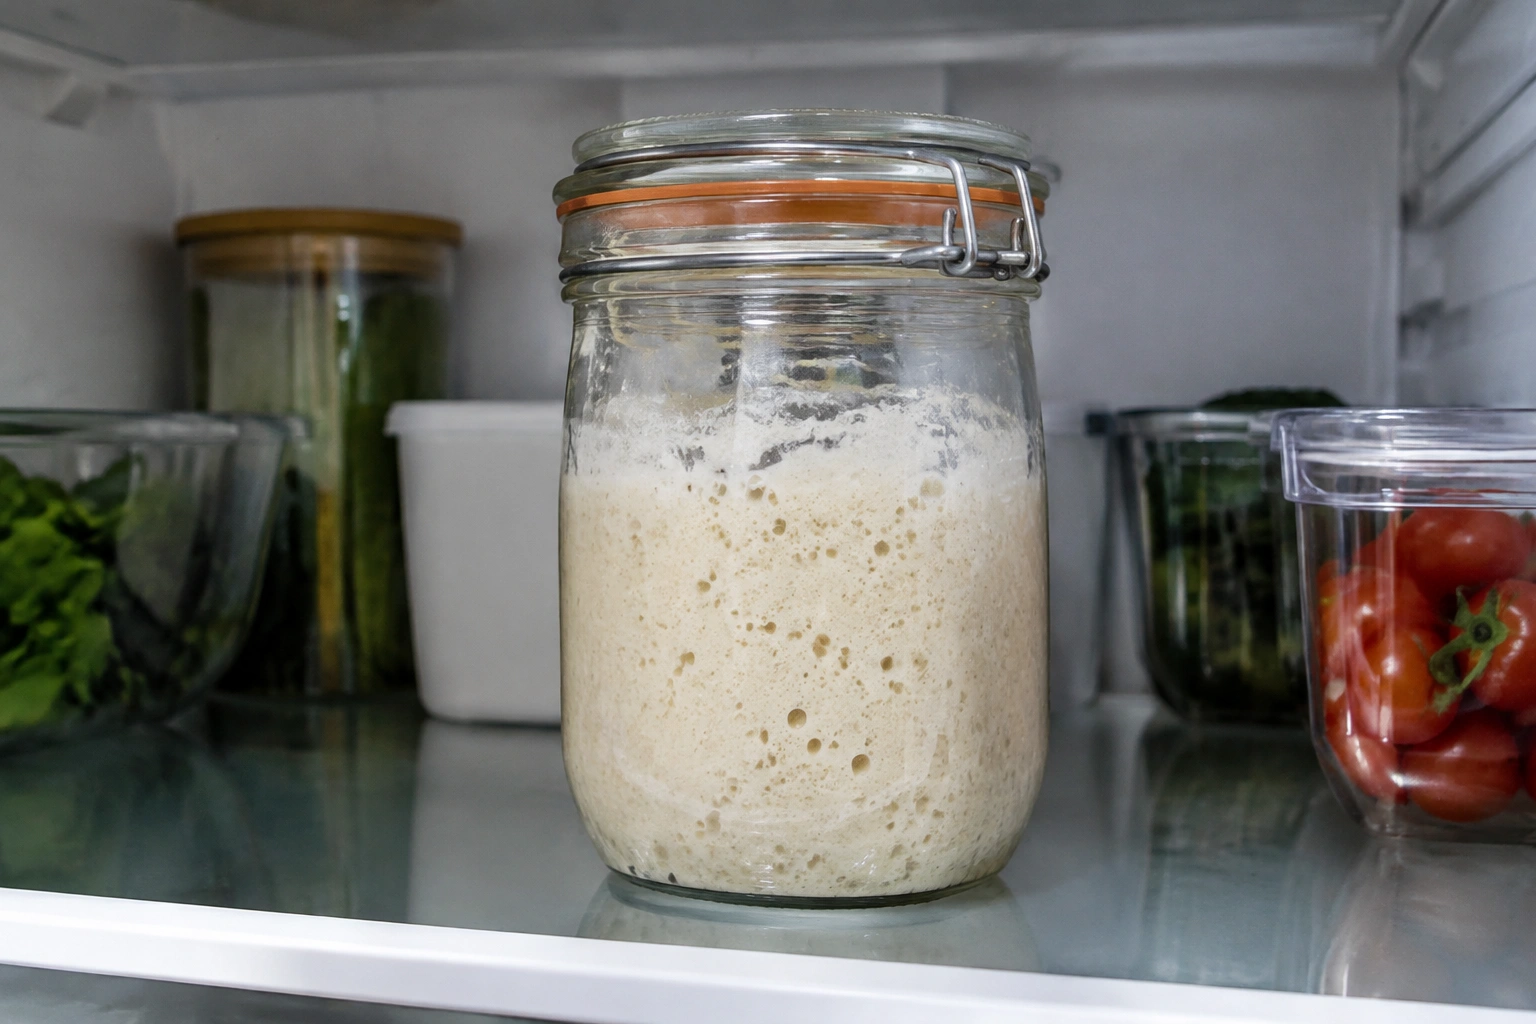
Yes, you can put sourdough starter straight into the fridge right after feeding, but feeding first is the preferred method for longer storage.
Here’s the simple rule I use in the bakery and at home: feed the starter, let it begin fermenting for a few hours, then refrigerate it. That gives the yeast and bacteria a fresh meal before the cold slows everything down. If your plans change, many bakers also put the starter back in the fridge untouched rather than wasting a feeding.
For most home bakers, a refrigerated starter works well for weekly baking. If you bake less often, you can still use the fridge as a holding pattern, but you’ll need a little more attention before baking again.
Quick Answer: The Best Way to Store Sourdough Starter in the Fridge
The most reliable method is:
- Keep a small amount of starter in a clean jar.
- Feed it before chilling if you want the best recovery.
- Let it sit at room temperature for a few hours so fermentation gets underway.
- Cover it and place it in the fridge, ideally on a shelf rather than the door.
- Refresh it about once a week if it stays refrigerated.
That routine lines up with guidance from King Arthur Baking, which recommends weekly feeding for refrigerated starter and a few hours of room-temperature fermentation before it goes back into the fridge. King Arthur Baking’s starter storage guide is a useful reference if you want a second opinion from a trusted baking source.
[IMAGE 1]
What You Need Before Refrigerating Starter
You do not need special equipment, but a few details matter.
Basic tools
- A clean glass jar
- A lid or cover
- Flour and water for feeding
- A spoon or spatula for mixing
- A marker or rubber band if you like tracking rise
Starter condition
Your starter should look active enough to ferment again after chilling. It does not need to be at peak rise, but it should not be neglected, bone-dry, or visibly contaminated.
Fridge setup
Choose a spot with stable cold air. The middle or lower shelf is usually better than the door, which warms up each time it opens. King Arthur Baking specifically recommends avoiding warmer spots like the top shelf or door.
Should You Feed Starter Before Putting It in the Fridge?
This is the decision that confuses most bakers, and the answer depends on how long the starter will sit.
Feed before refrigerating if:
- You want the starter to stay strong
- You plan to bake within about a week or two
- You want the easiest revival later
Feeding first gives the microbes fresh food before the cold slows them down. That usually means less stress on the starter and a better chance of a quick rebound.
Refrigerate unfed starter if:
- You are delaying baking by a short time
- You already fed it recently
- You need a practical “pause button” and will return to it soon
A number of bakers use this approach when plans change. If the starter is still fine and you simply won’t bake today, putting it back in the fridge untouched is a reasonable move.
My practical rule
If the starter is going to sit for more than a couple of days, I prefer to feed it first. If I only need to delay the bake briefly, I may refrigerate it as-is.
Step-by-Step: How to Store Sourdough Starter in the Fridge
Here’s the process I recommend for home bakers and students who want a dependable routine.
1) Keep only the amount you need
You do not need a large jar full of starter. Smaller amounts are easier to manage and create less discard later.
2) Feed it according to your usual ratio
Use the feeding method your starter already knows. If your culture is healthy, there is no need to reinvent the process just because you are refrigerating it.
3) Let it sit at room temperature for a few hours
This is the part many bakers skip. A short room-temperature rest helps fermentation restart before the cold slows it down. King Arthur Baking recommends a few hours on the counter after feeding.
4) Transfer it to a clean jar if needed
A clean jar gives you a better view of bubbles, rise, and separation. It also helps if you want to reduce old residue on the sides of the container.
5) Cover it safely
Use a lid or cover that protects the starter but still allows for a little expansion. If the jar is very full, avoid sealing it so tightly that pressure becomes a problem.
6) Label the jar
Write the date on the jar or a piece of tape. This makes weekly or monthly maintenance much easier, especially if you keep more than one starter.
7) Place it in the fridge
Set it on a stable shelf, not the door. That keeps the temperature steadier.
How Much Starter to Keep and What Container to Use
A small amount is usually enough. In fact, keeping less starter often makes storage easier because you feed less flour, discard less, and have a simpler refresh routine.
Small starter vs larger starter
- Small starter: less waste, easier to refresh, better for occasional baking
- Larger starter: more convenient if you bake often or need larger levains
For most home bakers, keeping roughly a few tablespoons to about 1 cup of starter is enough for storage, depending on how much you need for your usual bake. You can always build it up before a bake.
Best container choice
A glass jar is the most practical option because you can see what is happening inside. That matters in the fridge, where changes happen slowly and it is easy to forget the starter is there.
Lid choice: sealed or loose?
This is one of those trade-offs that deserves a clear answer.
- Tighter lid: better protection from odors and drying out, but only sensible if there is room for expansion
- Looser cover: safer if the jar is fuller or you want a little gas release
A snug lid is usually fine for a modest amount of starter, but if the jar is crowded, use a looser cover or move the starter to a larger container.
How Long Sourdough Starter Can Stay in the Fridge
There is no single magic number that fits every starter, but a few practical ranges help.
| Baking schedule | Fridge routine | How long between feedings | How many feedings before baking? |
|---|---|---|---|
| Weekly baker | Feed, rest a few hours, refrigerate | About 1 week | Usually 1 feeding, sometimes 2 if sluggish |
| Biweekly baker | Feed before chilling, keep cold between bakes | About 1–2 weeks | Often 1–2 feedings |
| Monthly baker | Keep in fridge and refresh before use | About 3–4 weeks | Usually 2 feedings, sometimes more if weak |
The safest way to think about it is this: the longer the starter sits, the more likely it is to become sluggish or overly acidic. That does not automatically mean it is ruined, but it may need more than one feeding to regain strength.
Some bakers keep starter refrigerated for extended periods and successfully revive it, though the process can take longer and depends on starter health, temperature stability, and cleanliness. The farther you go beyond a monthly rhythm, the more likely you are to see hooch, a stronger sour smell, or a slower rise.
How to Maintain Refrigerated Starter Between Bakes
If you bake occasionally, aim for a low-effort maintenance cycle.
For weekly bakers
Feed the starter once a week while it stays in the fridge. After feeding, let it sit out for a few hours, then return it to cold storage.
For biweekly bakers
If your starter is only used every couple of weeks, check it before baking and expect to refresh it once or twice before it is strong enough to use.
For monthly bakers
At this point, think of the fridge as a pause, not a permanent hands-off storage method. Check the starter about every 3 to 4 weeks if it is sitting unused, then feed it before it becomes overly acidic or weak. Before baking, inspect the starter carefully and plan on more than one feeding if it looks flat or tired.
A no-waste habit
Keep only the starter amount you actually need. A smaller reserve means less discard during maintenance, which is helpful for home bakers who do not want to feed a huge jar just to keep it alive.
How to Tell If Refrigerated Starter Is Still Healthy
A refrigerated starter can look a little dull and still be perfectly usable. Cold storage changes the appearance, so do not expect the same lively bubble show you see at room temperature.
Healthy signs
- Creamy, beige, or off-white color
- A sour but normal fermentation smell
- Some bubbles
- A layer of liquid on top, sometimes called hooch
- A flat or slightly deflated look after chilling
Warning signs
- Pink, orange, or unusual colored growth
- Visible mold
- Fuzzy spots
- A rotten smell that does not improve after feeding
If you see mold or unusual discoloration, discard the starter. Smell alone is not enough to make that call; visible contamination matters more.
What to Do About Hooch, Separation, and Sour Smell
These are the most common fridge-stored starter surprises, and most of them are normal.
Hooch on top
Hooch is the liquid that can collect when the starter has gone a while without fresh food. It usually means the starter is hungry, not dead.
You can:
– Stir it back in for a more sour flavor
– Pour it off if you want a milder starter
Separation
A watery layer or split texture can happen in the fridge. If the starter still looks otherwise normal, feed it and watch for recovery.
Strong sour smell
Cold starter often smells more acidic. That is not automatically a problem. If the starter has been sitting a long time, the acidity can build up, which is one reason some bakers prefer a refresh before baking rather than using it straight from the fridge.
How to Revive Starter After Refrigeration
This is where patience pays off.
1) Remove the starter from the fridge
Take it out and inspect it for mold, unusual color, or bad odors.
2) Let it warm up before feeding
Yes, it should warm up before you feed it after refrigeration. Let it sit on the counter until it is no longer ice-cold, which usually takes about 30 minutes to 1 hour for a small jar and longer if the jar is large or the kitchen is cool.
3) Feed it
Give it a normal feeding once it has warmed slightly. If the starter has been refrigerated only briefly and still looks active, one feeding may be enough.
4) Wait for signs of activity
Leave it at room temperature until you see bubbles and some rise. This often takes several hours, depending on temperature and starter strength.
5) Decide whether to repeat
If the starter rises predictably and smells pleasantly fermented, it is usually ready for baking after one feeding. If it rises slowly, looks flat, or smells overly sharp, feed it again and wait another cycle.
If you are baking in a day or two
King Arthur Baking recommends giving refrigerated starter a couple of room-temperature feedings, roughly every 12 hours, before baking. That is a practical standard when you want reliable rise and better dough strength.
Can you bake with starter straight from the fridge?
Sometimes, yes — but only if it is still active enough. Cold starter is often slower and less predictable. If you need dependable fermentation, especially for a student bake or an important loaf, give it a feeding or two first.
How to judge readiness
Use the same cues you would use for any starter:
– It rises predictably
– It shows bubbles throughout
– It smells pleasantly fermented
– It reaches peak activity in a reasonable time
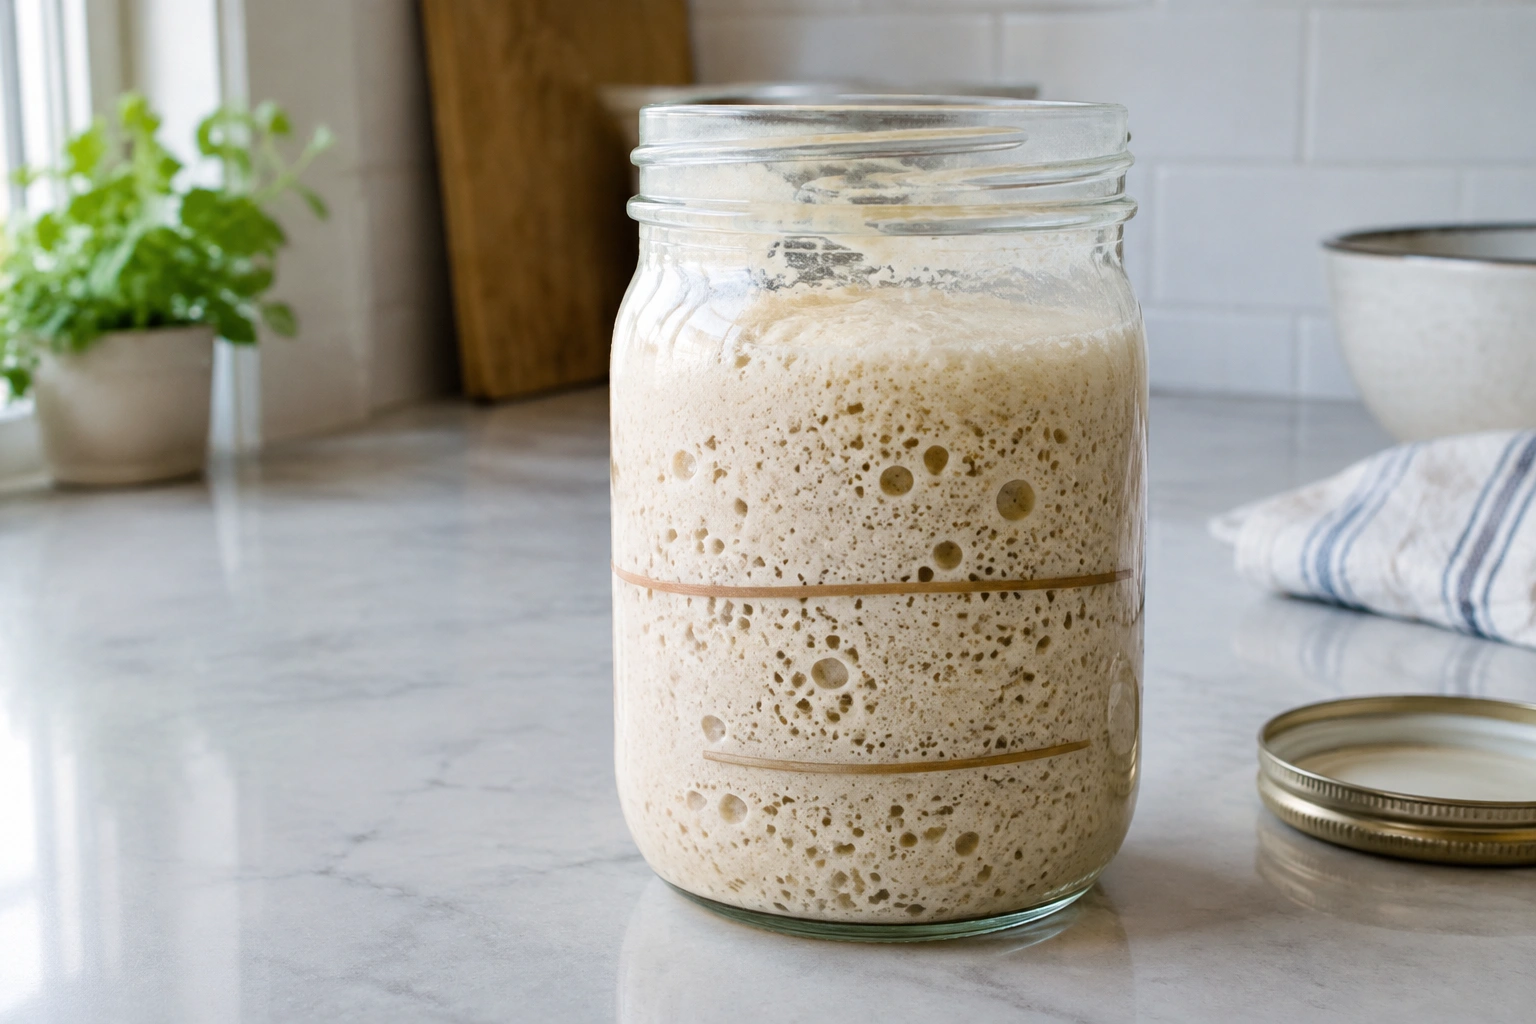
If you want a deeper checklist for that stage, see our guide on how to tell when sourdough starter is ready to bake.
[IMAGE 2]
Practical Examples for Weekly, Biweekly, and Monthly Bakers
Weekly baker
You feed the starter on Sunday evening, leave it out for a few hours, then refrigerate it. The next weekend, you take it out, feed it once or twice, and bake.
Biweekly baker
You keep a small jar in the fridge and refresh it before each bake. If it looks tired, you give it an extra feeding at room temperature before mixing dough.
Monthly baker
You pull the starter from the fridge, inspect it for mold or discoloration, discard if needed, then let it warm up and feed it. If it rises slowly, you feed it again before baking.
Common Mistakes to Avoid When Storing Starter in the Fridge
A few small errors cause most storage problems.
Overfilling the jar
Starter can still produce gas in the fridge. Leave enough headspace for expansion.
Sealing it too tightly in a full jar
A fully sealed container is not a problem only if there is room for expansion. If the jar is crowded, loosen the lid.
Ignoring the shelf life
Even in the fridge, starter is not “set and forget forever.” Check it on a weekly, biweekly, or monthly schedule depending on how often you bake.
Using it too soon
A starter that looks cold and flat may not have enough strength for a good bake. Give it time to recover if needed.
Assuming all smell changes are dangerous
A sour smell or hooch is often normal. Mold and odd colors are the real red flags.
Troubleshooting: When Your Fridge-Stored Starter Won’t Bounce Back
If your starter seems weak after refrigeration, try this sequence.
Problem: It rises slowly
Feed it at room temperature and give it more time. Cold storage can slow the culture down, especially if it has been neglected.
Problem: It tastes or smells overly acidic
Refresh it more than once. A fresh feeding can help rebalance acidity and improve performance.
Problem: It still looks flat after feeding
That can happen after a long fridge stay. Keep it warm and watch for bubbles and rise before deciding it is unusable.
Problem: You see mold or colored growth
Do not try to rescue it. Discard the starter and begin again with a clean jar and fresh culture.
When to Consult a Master Baker
If your starter repeatedly fails to recover, or if you are working toward professional-level bread and need more predictable fermentation, it can help to consult an experienced baker or instructor. Persistent weakness sometimes points to a maintenance issue rather than a one-time fridge problem.
For most home bakers, though, the fix is straightforward: feed before chilling when you can, keep the jar small and clean, store it in a stable cold spot, and give it time to wake up before baking. That simple rhythm keeps sourdough starter healthy without making it a daily obligation.