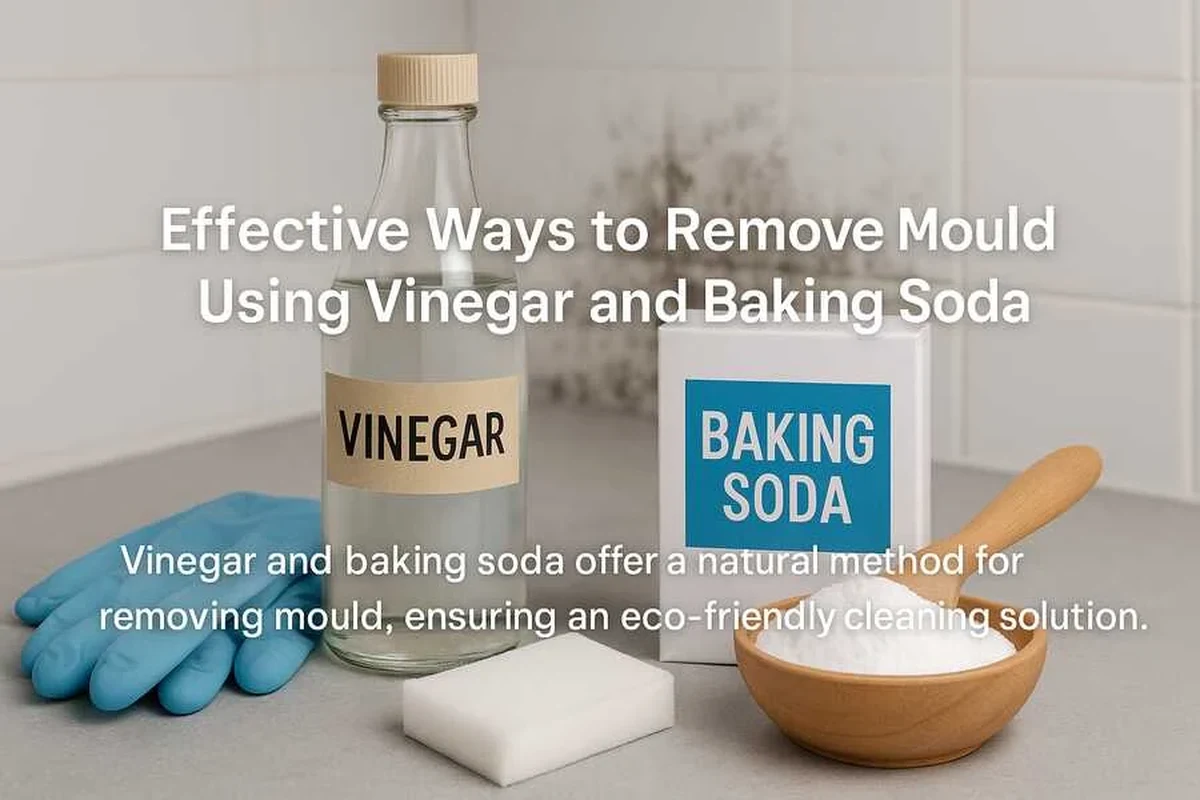
Cleaning mould with vinegar and baking soda is a useful DIY option for small, surface-level mould on hard materials like tile and glass. It works best when you clean, rinse, dry thoroughly, and fix the moisture problem so the mould does not return.
Cleaning mould with vinegar and baking soda is a simple, low-cost method many people try first for bathroom tiles, kitchen corners, and laundry-area surfaces. It can help remove visible surface growth, but it works best when the mould is light, the surface is non-porous, and the moisture problem is also fixed.
- Best surfaces: Use it on non-porous areas like tile, grout, and sealed counters.
- Method matters: Apply vinegar first, then use baking soda for scrubbing and deodorizing.
- Know the limit: Drywall, fabric, and hidden mould often need professional help.
- Dry completely: Leftover moisture is the main reason mould comes back.
- Safety first: Ventilate the room, wear gloves, and never mix cleaners blindly.
Why “Cleaning Mould with Vinegar and Baking Soda” Is a Popular At-Home Fix in 2026
People keep searching for this method because it feels practical: the ingredients are cheap, easy to find, and already in many homes. For small jobs, it offers a straightforward way to freshen a damp area without reaching for harsh products right away.
This approach also fits the way many home cleaners think about stubborn messes in kitchens and laundry rooms. If you already use baking soda for odors or vinegar for hard-water buildup, the idea of combining them for mould cleanup seems like a natural next step. For related cleaning methods, see our guide on baking soda vinegar cleaning ovens and our article on clean drains with vinegar baking soda.
What searchers usually want: fast, low-cost mould cleanup for bathrooms, kitchens, and laundry areas
Most people want a fast answer that does not require special tools. They are usually dealing with black spots on grout, a musty smell near a sink, or mildew on a shower wall, not a major building problem.
That is why this topic stays popular. It promises a quick cleanup routine that can be done with a spray bottle, a brush, and a cloth, often in less than an afternoon depending on the size of the area.
Where this method fits best and where it is not enough
This method is best for light mould on surfaces you can wipe and dry fully. Think tile, sealed counters, glass, and shower walls where the growth is on top of the surface rather than deep inside it.
It is not enough for hidden mould, water-damaged drywall, or anything that has spread behind a wall, under flooring, or into insulation. In those cases, surface cleaning may only hide the problem for a short time.
How Vinegar and Baking Soda Work on Mouldy Surfaces
These two ingredients do different jobs. Vinegar is acidic, while baking soda is mildly abrasive and useful for odor control and moisture management after cleaning.
What vinegar can do to mould stains and surface growth
Vinegar can help loosen grime and may reduce visible mould on hard, non-porous surfaces. It is often useful when the stain is sitting on top of tile, glass, or sealed finishes and has not penetrated deeply.
In practical terms, vinegar can make the spot easier to wipe away after it has had time to sit on the surface. That dwell time matters more than aggressive scrubbing, especially on smooth materials where you want to avoid scratches.
What baking soda adds: deodorizing, mild abrasion, and moisture control
Baking soda helps in three simple ways. First, it can reduce musty odor. Second, it gives a gentle scrubbing action that helps lift residue without being as rough as stronger abrasives. Third, it can help dry out damp areas after the visible mess is removed.
That last part matters because mould likes moisture. If a corner keeps staying damp, the cleanup may look good for a day or two and then the spots can return.
Why the combination is often better used step-by-step rather than mixed into a single paste
One common mistake is mixing vinegar and baking soda too early and expecting a stronger cleaner. In reality, the fizzing reaction is mostly the acid and base neutralizing each other, which reduces the cleaning strength of each ingredient.
A better approach is to use them one after the other. Vinegar does the first job of loosening and treating the surface, then baking soda helps with scrubbing and deodorizing after the area has been addressed. For a simple explanation of that reaction, our baking soda and vinegar reaction explained simply article is a helpful companion read.
For many cleaning jobs, the order of use matters more than the “magic” of mixing ingredients. Vinegar and baking soda are often more useful when applied separately.
Best Surfaces for Cleaning Mould with Vinegar and Baking Soda
Surface type makes a big difference. The same method that works on glazed tile may fail on drywall or upholstery, because porous materials can trap moisture and spores deeper inside.
Non-porous materials: tile, grout, glass, sealed counters, and shower walls
These are the best candidates for a DIY cleanup. The surface does not soak up much liquid, so you can spray, wait, scrub, rinse, and dry without leaving much behind.
Grout is a little trickier because it is more textured than tile, but it can still respond well if the mould is only on the surface. Use a soft or medium brush so you clean the line without wearing it down too quickly.
Problem surfaces: drywall, ceiling panels, wood, fabric, and upholstery
Drywall and ceiling panels can absorb moisture, which means mould may be growing inside the material as well as on top of it. Wood can also hold moisture in its grain, and fabric or upholstery can trap spores and odors deep in the fibers.
These materials are harder to clean safely with a simple vinegar-and-baking-soda routine. Too much liquid can spread the problem, and scrubbing can damage the finish or push moisture deeper.
Examples of when a DIY method is reasonable versus when replacement or professional remediation is safer
DIY is reasonable when you have a small patch on a shower wall, a ring of mildew around tile grout, or a light smell near a laundry sink. If the area is small, visible, and stays structurally sound, a careful surface cleanup may be enough.
Replacement or professional help is safer when the mould keeps returning, the material feels soft or swollen, or the affected area is large. If you suspect hidden water damage, it is better to address the source than to keep cleaning the surface.
If mould covers a large area, keeps coming back quickly, or appears after flooding or a leak, surface cleaning may not solve the problem. Consider professional assessment and fix the moisture source first.
Step-by-Step Method for Fast and Easy Mould Cleanup
The goal is not just to make the spot look better. The goal is to remove visible growth, dry the area fully, and reduce the chance of regrowth.
Preparation: ventilation, gloves, masking, and protecting nearby surfaces
Start by opening a window or turning on the exhaust fan if the room has one. Good airflow helps reduce dampness and keeps cleaning odors from building up.
Wear gloves, and if the area is dusty or the mould is dry and flaky, consider a mask to reduce inhalation of particles. Move towels, bath mats, and food items away from the area, and protect nearby surfaces that could be stained by overspray.
- Open a window or turn on ventilation.
- Put on gloves and, if needed, a mask.
- Remove nearby fabric, food, or personal items.
- Test the cleaner on a hidden spot first.
Applying vinegar correctly and allowing enough dwell time
Spray plain white vinegar directly onto the mouldy surface so it is evenly damp, not dripping. Let it sit long enough to loosen the residue; the exact dwell time depends on the surface and how stubborn the growth is, so follow a cautious, surface-safe approach and reapply if needed.
After the dwell time, wipe the area with a clean cloth. If the mould is still visible, repeat the vinegar step before you move to scrubbing.
Using baking soda to scrub stubborn spots without damaging the finish
Make a small paste with baking soda and a little water, or sprinkle baking soda on a damp sponge for gentle abrasion. Use a brush with soft bristles on grout or a non-scratch sponge on smooth surfaces.
Scrub in small circles and check your progress often. If the finish starts to dull or scratch, switch to a softer tool and use less pressure.
Rinsing, drying, and preventing leftover moisture from feeding regrowth
Once the visible mould is gone, wipe the surface with a clean damp cloth to remove residue, then dry it completely. On shower walls or sinks, a dry microfiber cloth works well because it picks up moisture instead of just moving it around.
Do not leave the area wet and walk away. Moisture is what invites the problem back, especially in bathrooms and laundry spaces where humidity already runs high.
Think of mould cleanup like finishing a pastry: the final drying step matters just as much as the main mixing step. If the surface stays damp, the problem can return quickly.
Tools, Ratios, and Surface-Safe Handling Tips
You do not need a complicated kit for this job, but the right tools make it cleaner and safer. A small amount of preparation can prevent scratches, spills, and wasted effort.
Spray bottle, scrub brush, microfiber cloth, sponge, and bucket: what each tool is for
A spray bottle helps you apply vinegar evenly. A scrub brush is useful for grout lines and textured areas, while a microfiber cloth is best for wiping and drying because it grabs residue and moisture efficiently.
A sponge can help on smoother surfaces, and a bucket is useful if you need to rinse tools or mix a baking soda paste. Keep separate cloths for cleaning and drying so you do not spread the mouldy residue around.
Practical ratios for vinegar solution and baking soda paste
For most small jobs, plain white vinegar is the simplest option. If you prefer a diluted solution for a delicate surface, use a cautious mix and test first, because the right strength depends on the material and finish.
For baking soda paste, add just enough water to make a spreadable texture. It should cling to the spot without running, but it should not be so thick that it becomes hard to wipe away.
Exact ratios can vary by surface, brand, and how much mould is present. When in doubt, start mild, test a hidden area, and increase strength only if the material handles it well.
How to test a small hidden area before treating visible mould
Apply a little vinegar or baking soda paste to a hidden corner first. Wait, wipe, and check for color change, dullness, or surface damage before treating the visible area.
This is especially important on painted walls, sealed wood, natural stone, and older finishes. A few minutes of testing can save you from permanent damage.
Common Mistakes That Make Mould Come Back Faster
Most repeat mould problems do not come from the cleaner itself. They come from moisture, hidden damage, or a rushed cleanup that only treats the visible spot.
Mixing vinegar and baking soda too early and losing cleaning strength
If you mix them right away, you may see satisfying fizz, but the reaction can cancel out much of the cleaning power. That leaves you with a weaker solution than using each ingredient in the right order.
Use vinegar first for the main treatment, then baking soda for scrubbing and odor control. That sequence is usually more effective than making one all-purpose paste.
Scrubbing without fixing the moisture source
If a pipe leaks, a shower curtain stays wet, or a room has poor airflow, mould will often return. Cleaning the stain without fixing the cause is like wiping flour off a counter while the bag keeps spilling.
Check for condensation, leaks, and poor ventilation. In bathrooms, run the fan longer after showers; in laundry areas, make sure the space is not trapping damp air.
Using too much water on porous materials
Porous materials can soak up moisture, which can push the problem deeper. That is why drywall, wood, and fabric are poor candidates for soaking wet cleaning methods.
Use the smallest amount of liquid needed and dry the area quickly. If the item cannot be dried fully, the safer choice may be replacement rather than repeated wet cleaning.
Ignoring hidden mould behind caulk, under sinks, or around window seals
Visible mould is often only part of the issue. Caulk seams, sink edges, and window seals can hide dampness and allow growth to keep spreading out of sight.
If the same spot keeps returning after cleaning, inspect the edges and nearby materials. Sometimes the real fix is replacing caulk, resealing a joint, or repairing a leak.
Do not mix cleaning products unless the label says it is safe. Never combine vinegar with bleach or other chemicals, and keep the room ventilated while you clean.
Safety, Limitations, and When to Escalate Beyond DIY
Home cleaning methods are useful, but they are not a cure-all. The safest choice is the one that removes the problem without spreading it or exposing people to unnecessary risk.
Signs the mould problem is larger than a surface cleanup
Watch for peeling paint, soft drywall, warped wood, strong persistent odor, or repeated regrowth in the same area. These signs often point to moisture inside the structure rather than just a dirty surface.
If mould appears after a flood, leak, or long-term condensation problem, a deeper inspection is usually smarter than repeated surface scrubbing.
When to avoid DIY cleaning because of health risks, spread, or structural damage
Avoid DIY if the mould covers a large area, if the room has poor ventilation, or if you suspect contamination inside walls or ceilings. Disturbing a bigger problem can spread spores and make cleanup more difficult.
For households with serious health concerns, or if you are unsure about the extent of the damage, follow guidance from recognized public health or building safety sources and consider professional help.
Protective steps for households with allergies, asthma, children, or pets
People with allergies or asthma may be more sensitive to mould and cleaning fumes, so extra ventilation matters. Keep children and pets out of the area until the surface is dry and the room is aired out.
If anyone in the home has breathing concerns, be conservative about how much dust or residue you disturb. When in doubt, stop and get advice from a qualified professional.
Final Verdict: When Cleaning Mould with Vinegar and Baking Soda Is the Right Choice
For small, visible mould on hard surfaces, cleaning mould with vinegar and baking soda is a sensible first step. It is affordable, easy to try, and usually simple enough for beginners to handle carefully.
Best use cases for a quick, affordable cleanup
This method is best for bathroom tile, shower walls, sink edges, sealed counters, and other non-porous surfaces with light growth. It is also useful when you want a low-cost cleanup before deciding whether a larger repair is needed.
If you are already comfortable with basic home cleaning, this is a practical routine that fits into normal maintenance. It works especially well when you can ventilate the room and dry the area completely afterward.
What results to expect after one treatment and when repeat cleaning is reasonable
After one treatment, you should expect visible improvement, less odor, and a cleaner-looking surface. Stubborn staining may take more than one round, especially on grout or textured finishes.
Repeat cleaning is reasonable if the area is small and the material is holding up well. If the mould keeps returning after a few attempts, the problem is probably moisture-related and needs a deeper fix.
How to keep mould from returning through ventilation, drying habits, and routine maintenance
Keep moisture down by running fans, wiping shower walls, fixing leaks, and drying sinks and counters after use. Small daily habits often do more than any single cleaner.
Check caulk, seals, and corners during routine cleaning so you catch damp spots early. If you stay ahead of moisture, mould is much less likely to settle in again.
Cleaning mould with vinegar and baking soda is a good first choice for small, surface-level mould on non-porous materials. It is fast, affordable, and useful when paired with ventilation, thorough drying, and a fix for the moisture source.
Frequently Asked Questions
It is usually better to use them step by step, not mixed together right away. Mixing them early can reduce the cleaning strength of both ingredients.
For light surface mould on hard materials, vinegar may help loosen and reduce visible growth. Stubborn spots often need a follow-up scrub and careful drying.
Use extra caution on drywall and painted walls because they can absorb moisture and damage easily. If the mould is more than a small surface spot, replacement or professional help may be safer.
Dry the area fully, improve ventilation, and fix any leak or condensation problem. Mould often returns when moisture is still present.
Gloves are a good idea, and a mask can help if the mould is dusty or you are sensitive to it. Keep the area ventilated and avoid disturbing more material than needed.
Call a professional if the mould is large, keeps returning, follows water damage, or seems to be behind walls or ceilings. Those signs usually mean the problem is deeper than a simple surface cleanup.
