
How to Clean Garbage Disposal with Baking Soda and Vinegar Easily
Baking soda and vinegar can freshen a garbage disposal by reducing odor and loosening light residue. It works best when you finish with a hot-water flush and use it for cleaning, not for fixing clogs or jams.
If your garbage disposal smells sour, musty, or like old food, baking soda and vinegar can be a simple first fix. Used correctly, this method helps loosen residue, reduce odors, and freshen the splash guard and drain opening without harsh chemicals.
- Best use: Great for odor, slime, and light buildup in a working disposal.
- Right order matters: Add baking soda first, then pour vinegar slowly.
- Finish step: Always flush with hot water and run the disposal with water flowing.
- Know the limit: It will not fix a jam, clog, leak, or electrical problem.
- Prevention helps: Regular flushing and careful food scraps keep smells from returning fast.
Why Baking Soda and Vinegar Work for Garbage Disposal Cleaning
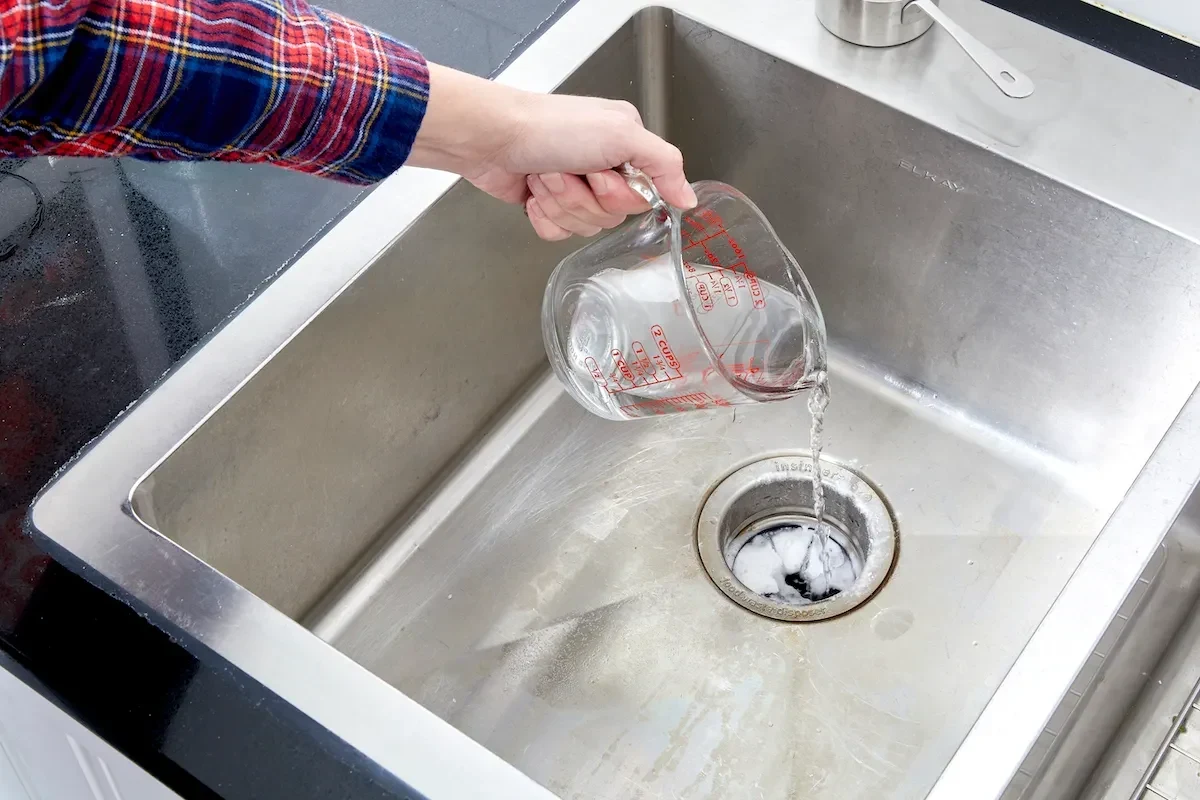
Baking soda and vinegar are popular because they tackle the two most common disposal problems at once: odor and light buildup. Baking soda helps neutralize smells and gives the sink area a mild scrubbing action, while vinegar helps break up some residue and creates fizz that can lift loose debris from small surfaces.
This is not magic, and it is not a deep mechanical repair. It is a practical cleaning method for the parts you can reach, especially the top opening, splash guard, and nearby drain area.
The cleaning action: deodorizing, loosening residue, and fizz-based agitation
The fizz happens when the acid in vinegar reacts with the alkaline baking soda. That reaction creates carbon dioxide bubbles, which can help nudge grime away from the surface and move loose particles toward the drain.
For odors, baking soda is often the bigger help. It can absorb and reduce some of the stale smell that builds up when tiny bits of food sit in the disposal or around the rubber splash guard.
For a simple explanation of the reaction itself, see our guide to baking soda and vinegar reaction explained simply.
What this method can and cannot remove from a disposal
This method can help with fresh odor, light slime, and small bits of food residue. It may also improve the smell of a disposal that has been used frequently but is not clogged.
It cannot dissolve hard clogs, remove a jammed impeller, or fix worn parts. If the disposal hums, trips the breaker, leaks, or drains very slowly, you may be dealing with a mechanical or plumbing issue instead of a cleaning problem.
- Simple ingredients most kitchens already have
- Helps with odor and light residue
- Safe for routine cleaning when used with water
- Not strong enough for clogs or jams
- Too much vinegar can make a mess without improving results
- Does not replace proper disposal maintenance
What You Need Before You Start
Before cleaning, gather everything first so you do not leave the disposal half-treated while searching for supplies. A calm setup matters, especially in a busy kitchen where wet sinks and sharp tools can create avoidable accidents.
White vinegar
Hot water
Soft brush or old toothbrush
Flashlight
Mild dish soap
Measuring the right amount of baking soda and vinegar
A common home-kitchen starting point is about 1/2 cup of baking soda followed by about 1 cup of vinegar. That amount is usually enough to coat the opening and create visible fizz without overflowing the sink.
If your sink is small or the disposal opening is narrow, you can use less. The goal is coverage and contact, not a dramatic eruption.
Helpful tools: soft brush, flashlight, dish soap, and hot water
A soft brush helps clean the rubber splash guard and the rim where food splash often sticks. A flashlight makes it easier to spot slime, trapped bits of onion skin, or greasy residue near the opening.
Mild dish soap and hot water are useful for the final rinse and for washing the area around the sink. If your drain area is already messy, a quick soap wipe before or after the treatment can make the whole job more effective.
Most disposal odors come from residue stuck above the grinding chamber, especially on the splash guard and sink opening, not only from inside the unit.
Safety basics: power off, splash control, and avoiding harsh chemical mixes
Turn off the disposal before you start. If you plan to reach near the opening, it is smart to switch off power at the wall if your setup allows it and follow the manufacturer’s instructions.
Never mix vinegar or baking soda with bleach, drain cleaner, or other chemicals. The safest approach is to use one gentle method at a time and flush thoroughly with water afterward.
If you already used a commercial drain cleaner, do not add vinegar, baking soda, or any other cleaner until you are sure the system has been fully flushed and the product label says it is safe to do so.
Step-by-Step: How to Clean Garbage Disposal with Baking Soda and Vinegar
This is the basic routine for a freshening clean. It works best when the disposal is still draining normally and the problem is mainly odor or light buildup.
Clear the sink of dishes and food scraps, then check that the disposal is off. If there is standing water, remove it first so the baking soda can contact the surfaces instead of floating around.
Pour the baking soda directly into the disposal opening and around the splash guard. Let it sit briefly so it can cling to damp surfaces and help reduce odor where residue tends to collect.
Pour vinegar in a slow stream over the baking soda. Slow pouring helps the mixture foam in the opening instead of bubbling up too fast and spilling back into the sink.
Allow the mixture to fizz for several minutes, then flush the sink with hot water. Turn the disposal on with running water for a short period so loosened residue can wash through the system.
Preparing the sink and disposal safely
Start with a clean workspace. Wipe away visible scraps from the sink rim and check the drain opening with a flashlight if needed.
If you see a lot of food packed into the top opening, remove what you can with tongs or a brush handle rather than your fingers. This is especially important in a shared kitchen where you do not know what was recently put into the drain.
Adding baking soda first for odor control and surface contact
Baking soda should go in first because it can sit on damp surfaces and reach the spots that smell the worst. If you add vinegar first, much of the reaction can happen before the baking soda reaches the residue.
Tap the powder gently into the opening and let some of it settle around the rubber flaps. That area often holds the strongest odor.
Pouring vinegar slowly for controlled fizzing
Pouring vinegar slowly keeps the reaction controlled. A slow pour also gives the foam time to work around the splash guard and drain opening instead of rushing straight down the pipe.
Do not expect bigger fizz to mean better cleaning. More foam mostly means a stronger reaction, not necessarily a cleaner disposal.
If the disposal is very dry, you can add a small splash of warm water before the baking soda so the powder clings better. Keep the amount light so you do not wash the cleaner away too quickly.
Flushing with hot water and running the disposal correctly
After the fizz settles, run hot water through the sink to carry away loosened residue. Then turn on the disposal while the water is running, not before it.
Running water with the disposal helps move loosened particles through the system and reduces the chance that debris settles right back into the chamber. For a related basic sink-cleaning routine, our guide on clean drains with vinegar and baking soda fast and easy covers the same simple chemistry in a broader drain context.
How to Clean Stubborn Odors, Slime, and Food Buildup
If the disposal still smells after one round, the issue may be stuck residue on the splash guard or inside the chamber. In that case, a second treatment and a little manual cleaning usually work better than adding stronger chemicals.
When one treatment is enough and when to repeat it
One treatment is often enough for a disposal that smells lightly stale but still drains well. If the odor remains after flushing, repeat the process once more and focus on the visible surfaces around the opening.
If the smell returns quickly every time you use the sink, the problem may be trapped grease, old food in the trap, or a drainage issue farther down the line.
Using a brush to clean the splash guard and drain opening
The rubber splash guard is one of the most overlooked parts of a disposal. Lift the flaps gently and scrub both sides with a soft brush and a little dish soap, then rinse well.
This step matters because slimy buildup often sits where water splashes but does not fully wash. A brush can remove that film better than fizz alone.
Use only a soft brush or non-sharp cleaning tool near the disposal opening. Never put your hand past the splash guard unless the unit is turned off and you are following the manufacturer’s safety guidance.
Dealing with grease, coffee grounds, and fibrous food residue
Grease can coat the inside of a disposal and make odors linger. Baking soda and vinegar may help with the smell, but warm water, dish soap, and regular flushing are usually more useful for grease buildup.
Coffee grounds can trap odors and settle in the drain if they are sent down in large amounts. Fibrous scraps like celery strings, onion skins, and corn husks can also cling to the chamber and should be minimized in the first place.
The disposal smells clean for a few hours, then the odor comes back.
Scrub the splash guard, run hot water longer, and check whether grease or food scraps are collecting in the drain trap rather than only in the disposal itself.
Common Mistakes That Make Disposal Cleaning Less Effective
Most failed DIY disposal cleanings are not caused by the ingredients themselves. They happen because of how the method is used.
Using too much vinegar or expecting stronger fizz to mean better cleaning
It is easy to think more fizz means more cleaning power. In reality, too much vinegar can just create a mess and dilute the contact time on the surfaces that need cleaning.
A moderate amount works better because it stays in the opening long enough to loosen residue. The goal is contact, not spectacle.
Skipping the hot water flush after treatment
If you do not flush afterward, the loosened residue can remain in the disposal or drain. That can leave behind the same odor you were trying to remove.
Hot water helps carry away softened buildup and is an important final step, not an optional one.
Pouring in bleach, drain cleaner, or abrasive powders
Bleach and drain cleaners can damage finishes, create harmful fumes if mixed with leftover products, and may be too harsh for routine disposal care. Abrasive powders can also scratch surfaces or leave residue behind.
For regular cleaning, gentle methods are usually enough. If a disposal needs stronger treatment, check the manufacturer’s instructions before using anything more aggressive.
- Use the cleaner in the right order: baking soda first, vinegar second
- Flush with hot water after the fizzing stops
- Brush the splash guard and drain opening
- Do not mix with bleach or drain cleaner
- Do not rely on fizz alone to fix clogs
- Do not run the disposal with your hand near the opening
Safety, Compatibility, and When This Method Is Not Enough
Baking soda and vinegar are generally compatible with routine cleaning of common sink and disposal materials, but the real safety question is how the method is used. The bigger risk usually comes from poor handling, mixing chemicals, or trying to force a fix on a damaged unit.
Disposal materials and finishes that tolerate baking soda and vinegar well
Most standard kitchen sink and disposal finishes can handle a mild baking soda and vinegar cleaning followed by water flushing. That said, manufacturer instructions always come first because some finishes, seals, or connected plumbing parts may have special care needs.
If your sink has unusual materials, decorative coatings, or older plumbing, verify compatibility before using any routine cleaner repeatedly.
Signs of a jam, clog, or mechanical problem versus a simple odor issue
A simple odor issue usually means the disposal still runs and drains normally. A jam or clog often brings humming, slow draining, standing water, repeated resets, or a breaker trip.
If you hear a motor hum but the blades do not move, stop using the unit and inspect it according to the manufacturer’s directions. Cleaning will not solve a mechanical blockage.
When to call a plumber or service technician instead of repeating DIY cleaning
Call a plumber or appliance service technician if the disposal leaks, overheats, trips the breaker, or smells burnt. Those signs point beyond routine cleaning and may involve electrical or plumbing repair.
If you have repeated odor problems even after cleaning the splash guard and flushing properly, there may be buildup deeper in the drain line. At that point, repeated baking soda and vinegar treatments are unlikely to solve the root cause.
Best Maintenance Routine for a Fresh-Smelling Garbage Disposal
The easiest way to keep a disposal fresh is to clean lightly before the smell becomes strong. Small, regular habits work better than occasional heavy cleaning.
Weekly and monthly cleaning frequency for busy kitchens
For many busy kitchens, a light weekly rinse and a monthly baking soda and vinegar cleaning is a practical routine. If your kitchen gets heavy use, especially with lots of meal prep, you may need to clean more often.
There is no single schedule that fits every home. Frequency depends on how much food waste the disposal handles and how often the sink is flushed after use.
- Confirm the disposal is off
- Remove visible food scraps from the sink
- Have hot water and a soft brush ready
- Check the manufacturer instructions if your unit is older or unusual
Simple prevention habits: cold water use, proper food scraps, and regular flushing
Use cold water when grinding food scraps, since cold water helps keep some greasy residue firmer so it moves through the system more cleanly. After use, let the water run briefly to help flush particles away.
Avoid sending large amounts of grease, fibrous peels, or hard scraps into the disposal. Those are common sources of odor and buildup, especially in kitchens where the sink gets used throughout the day.
Practical examples for households, home bakers, and shared kitchens
In a family kitchen, a disposal may need more frequent flushing after dinner cleanup. In a home baking setup, flour paste, frosting residue, and sticky batter scraps can cling to the sink area and should be wiped out before they reach the drain.
In shared kitchens, the problem is often inconsistent use. One person may rinse well, while another sends scraps down without enough water, so a simple posted routine can help keep the disposal fresher for everyone.
Final Recap: The Easiest Way to Decide If Baking Soda and Vinegar Is the Right Fix
For odor, light slime, and small amounts of residue, how to clean garbage disposal with baking soda and vinegar is a good first step. It is affordable, simple, and gentle when you use the right order and finish with a hot-water flush.
If the disposal still smells after proper cleaning, or if it shows signs of a clog, jam, leak, or electrical issue, move beyond DIY freshening and inspect the unit more closely. In those cases, the problem is probably deeper than surface residue.
Use baking soda and vinegar first when the disposal smells bad but still works normally. If the smell keeps coming back or the unit acts up, stop repeating the treatment and look for a plumbing or mechanical cause.
For any disposal, the best long-term result comes from routine flushing, careful food handling, and following the manufacturer’s care instructions. Gentle cleaning works best when it is part of a regular maintenance habit, not a rescue step used only after odors build up.
Frequently Asked Questions
A common starting point is about 1/2 cup of baking soda followed by about 1 cup of vinegar. You can adjust slightly based on sink size, but the goal is coverage, not a huge reaction.
Yes. Hot water helps flush away loosened residue and keeps debris from settling back in the chamber or drain.
Not usually. This method is best for odors and light buildup, but a clog or jam may need manual clearing or professional help.
No. Do not mix baking soda, vinegar, bleach, or drain cleaner together, because unsafe reactions or harmful fumes can happen.
Many households do well with a light weekly rinse and a monthly baking soda and vinegar cleaning. Heavy-use kitchens may need more frequent maintenance.
Scrub the splash guard and check for grease or food buildup in the drain area. If the smell returns quickly, the problem may be deeper in the drain line or disposal.
