
Flatbread Without Yeast: A Reliable Guide to Soft, Quick Homemade Bread

If you want bread on the table fast, flatbread without yeast is one of the most useful skills a home baker can learn. It skips the long fermentation process, uses pantry-friendly ingredients, and still gives you something warm, flexible, and satisfying enough for wraps, dips, soups, or a simple side.
The key thing to understand is this: yeast-free flatbread is not trying to behave like a risen loaf. It is a quick bread. That means texture comes from the dough itself, the way you rest it, and how you cook it. When those three pieces are handled well, the result can be soft and tender, with enough structure to fold without cracking.
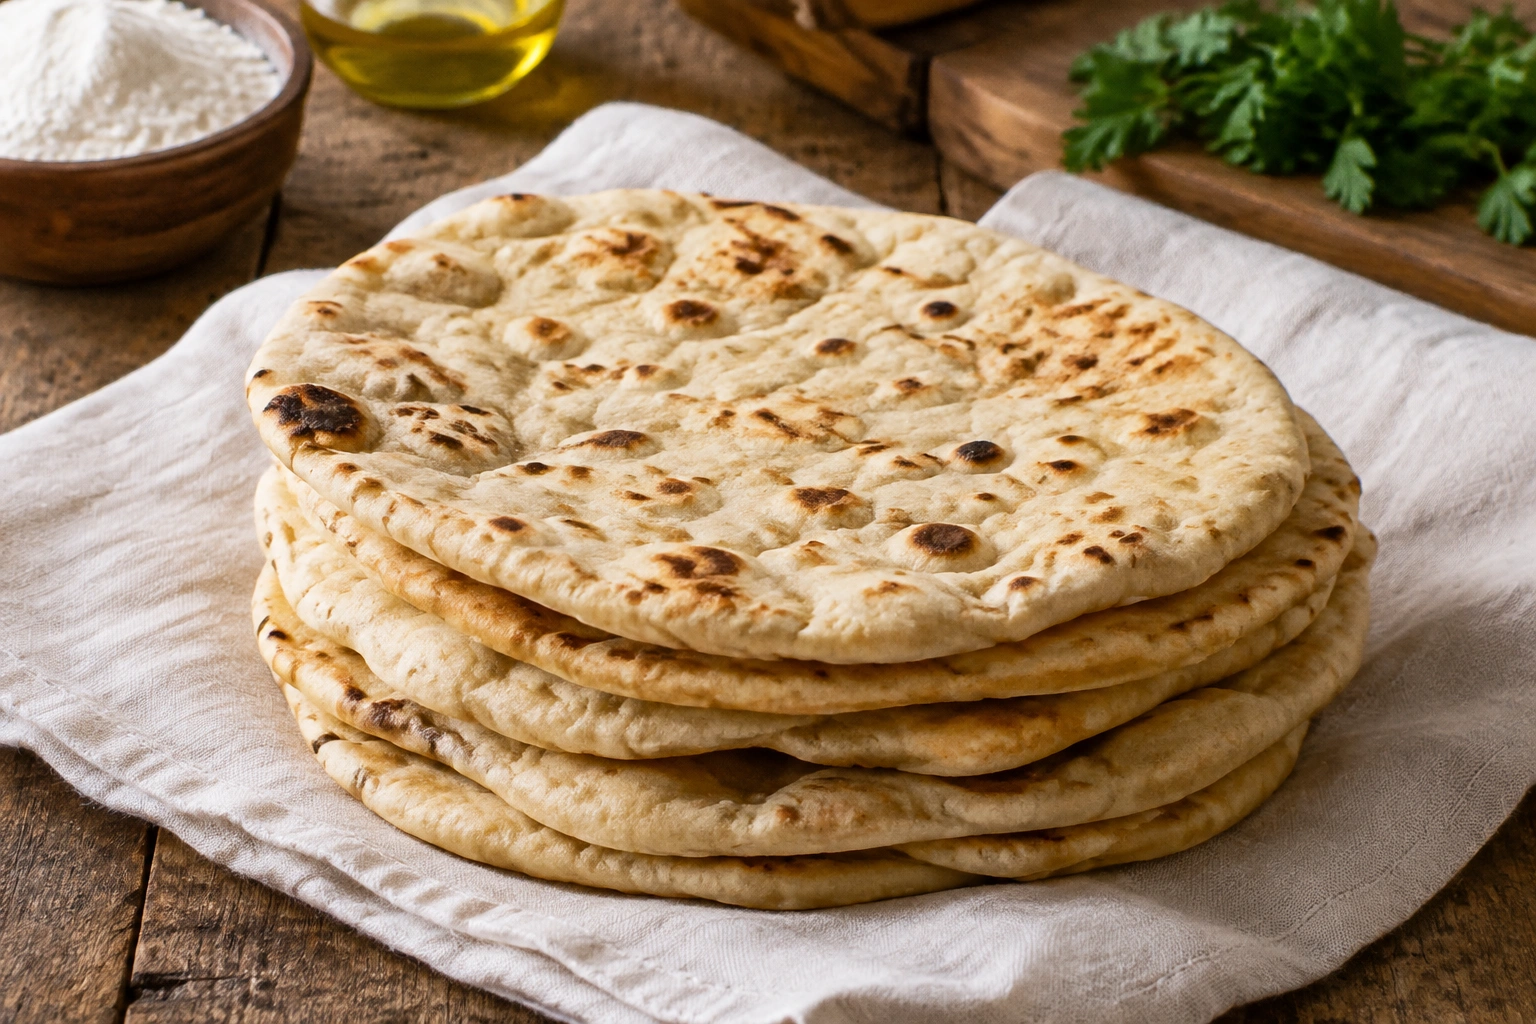
A good no-yeast flatbread usually comes together in one bowl, needs a short rest, and cooks in minutes. Some versions use baking powder for lift; others stay more rustic and rely on heat, flour, and moisture alone. Both can work. The best version depends on the texture you want.
Quick Recipe Card
Yield: 6 flatbreads
Prep time: 10 minutes
Rest time: 15 minutes
Cook time: 12 minutes
Total time: 37 minutes
Ingredients
- 2 cups all-purpose flour, plus more for dusting
- 1 teaspoon salt
- 2 teaspoons baking powder
- 2 tablespoons olive oil
- 3/4 cup warm water, plus 1 to 2 tablespoons more if needed
Instructions
- In a bowl, whisk together the flour, salt, and baking powder.
- Add the olive oil and warm water. Stir until a shaggy dough forms.
- Knead briefly until smooth, then cover and rest for 15 minutes.
- Divide into 6 equal pieces and roll each into a thin round.
- Cook in a hot skillet over medium-high heat for about 1 to 2 minutes per side, until browned in spots and cooked through.
- Stack and cover with a clean towel to keep the flatbreads soft.
What Yeast-Free Flatbread Is and What to Expect
Yeast-free flatbread is a broad category, but the common thread is simple: no proofing, no waiting for dough to double, and no fermentation flavor from yeast. Instead, the dough is mixed, rested briefly, shaped, and cooked.
That short rest still matters. Even without yeast, flour absorbs liquid and gluten relaxes. If you try to roll the dough immediately, it often springs back and tears. A rest of 10 to 30 minutes is common in many flatbread methods, and that pause usually makes the dough much easier to handle.
Texture-wise, here’s the practical expectation:
- Soft: the bread bends without cracking, feels tender when you bite into it, and stays pliable enough for wraps
- Chewy: the bread has a little resistance when you bite it, with a slightly firmer, more elastic feel
- Rustic: the bread is less uniform, a bit thicker or denser, and feels more bread-like than wrap-like
If you’re aiming for wraps, soft skillet bread is usually the best target. If you want a sturdier side for stews or a more rustic feel, a simpler dough can be enough.
Ingredients and Tools You’ll Need
A basic flatbread without yeast usually starts with a short list of ingredients:
- All-purpose flour for the softest, most predictable result
- Salt for flavor
- Water to bring the dough together
- Oil or melted butter for tenderness
- Baking powder if you want extra lift
- Yogurt if you want softness and plan to use baking soda
Some recipes use only flour, salt, oil, and water. Others add baking powder for a softer, fluffier finish.
Basic tools
You do not need special equipment, but these make the process smoother:
- Mixing bowl
- Spoon or dough whisk
- Bench scraper or knife
- Rolling pin
- Skillet or griddle
- Tongs or spatula
- Clean towel for covering cooked breads
If you want to cook several pieces at once, an oven can be practical. If you want the softest result with the quickest turnaround, a skillet is usually the better choice.
Choosing the Right Version: Soft, Chewy, Rustic, or Crisp
Before you mix anything, decide what kind of flatbread you want. That decision controls the ingredient choices more than any single technique.
| Goal | Best leavener choice | Best flour choice | Best cooking method | Result |
|---|---|---|---|---|
| Soft and lightly puffed | Baking powder | All-purpose | Skillet | Tender, flexible, beginner-friendly |
| Extra tender with slight tang | Baking soda + yogurt | All-purpose or a mix | Skillet | Softer bite, subtle flavor |
| Rustic and simple | No leavener | All-purpose or whole wheat | Skillet or oven | Denser, more bread-like |
| Heartier and more substantial | Baking powder or none | Whole wheat | Skillet or oven | More flavor, less tenderness |
| Slightly crisp edges | Baking powder or none | All-purpose | Oven or hot skillet | Less pliable, more structure |
Baking powder vs. baking soda
Use baking powder when you want straightforward, reliable lift without needing to balance acidity. It is the most forgiving option.
Use baking soda only when the dough includes an acidic ingredient such as yogurt or buttermilk. Baking soda needs that acid to react properly. Without it, you can end up with a flat flavor and an odd aftertaste. When the acid is present, though, the dough can become very tender.
If you want the easiest path, baking powder is the safer choice.
All-purpose flour vs. whole wheat flour
All-purpose flour gives you a softer dough and a more flexible flatbread. Whole wheat adds a nuttier flavor and more chew, but it also absorbs more liquid and tends to make the bread denser.
If you’re new to yeast-free flatbread, begin with all-purpose flour. Once you know how the dough should feel, you can replace part of it with whole wheat and adjust the water as needed.
Step-by-Step: How to Make Flatbread Without Yeast
Here is a dependable method that works well for a home kitchen.
1) Mix the dry ingredients
Combine flour, salt, and baking powder if you’re using it. If you’re making a yogurt-based dough, keep the baking soda in the dry mix so it distributes evenly.
A well-mixed dry base prevents pockets of salt or leavener, which can lead to uneven browning or patchy texture.
2) Add the liquid and fat
Pour in water, oil, or melted butter, depending on the version you’re making. Stir until a shaggy dough forms.
At this stage, the dough should look rough, not polished. If it seems dry and crumbly, add water a teaspoon at a time. If it looks sticky, hold back a little flour until you knead it.
3) Knead briefly
Knead just until the dough becomes smoother and more cohesive. With flatbread, you usually do not need long kneading. You are not trying to build a highly developed dough like a sandwich loaf.
A short knead helps the dough hold together and makes it easier to roll. Too much kneading can make the bread tougher than you want.
4) Rest the dough
Cover the dough and let it rest. Ten minutes can be enough for a quick version, while 20 to 30 minutes gives the gluten more time to relax.
This is one of the most important steps in yeast-free flatbread. The rest is not for rising; it is for elasticity. If you skip it, the dough often resists rolling and shrinks back on the counter.
5) Divide and shape
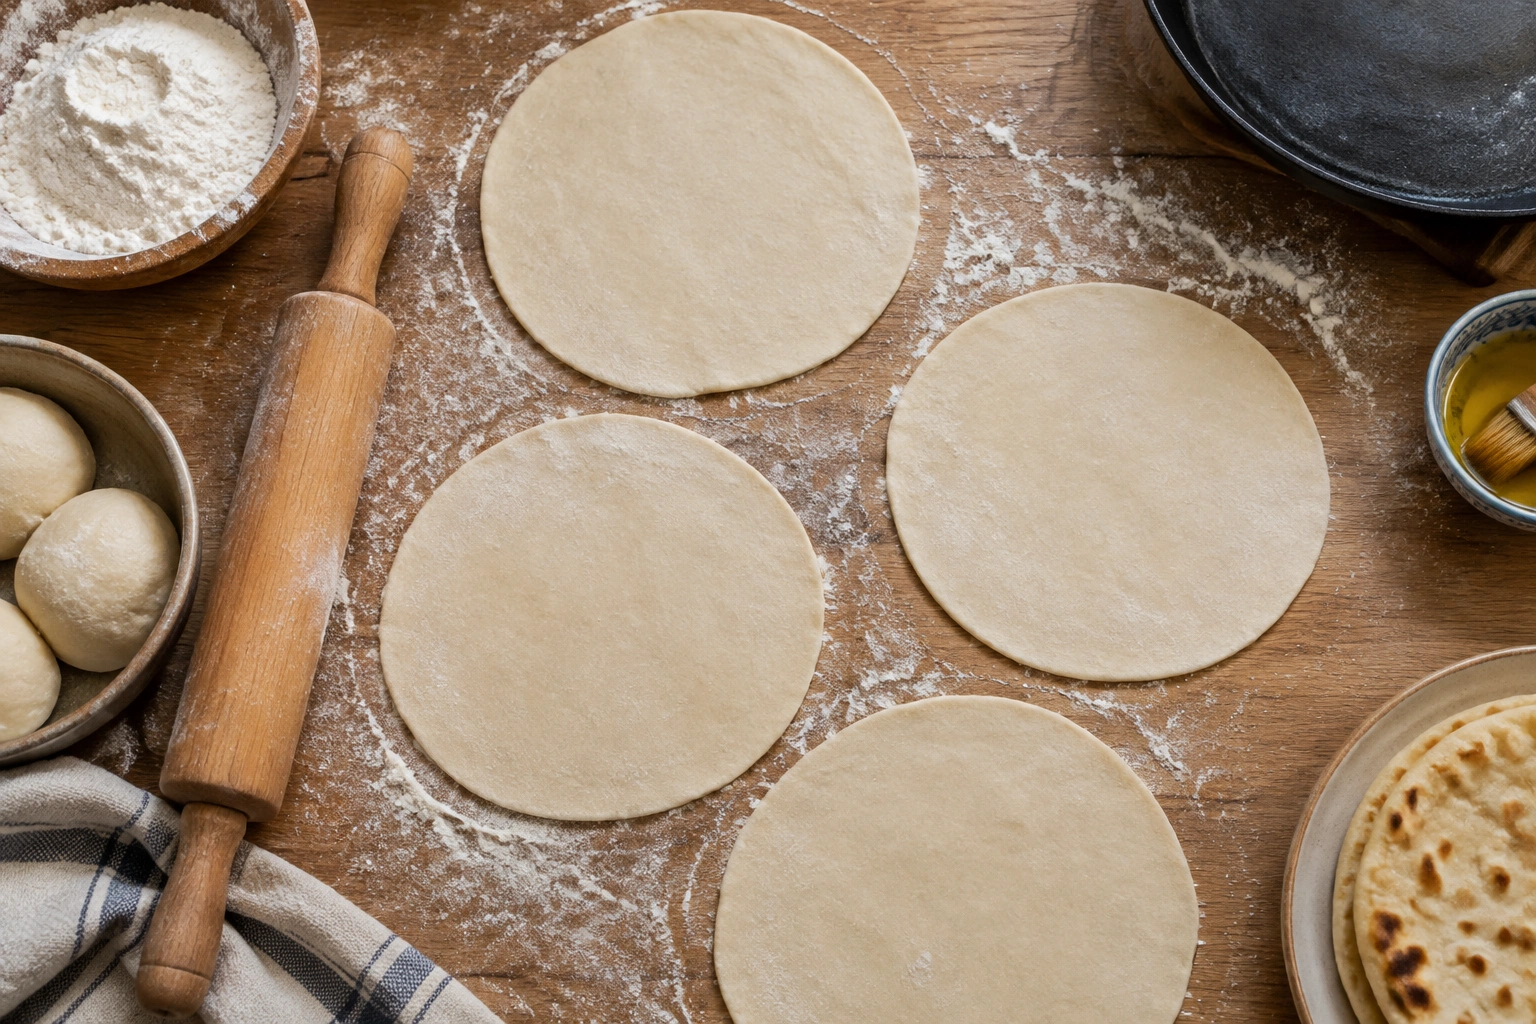
Cut the dough into equal pieces. Smaller pieces cook more evenly and are easier to handle. Roll each piece into a round or oval, depending on how you plan to serve it.
Roll thin for wraps and dipping bread. Roll slightly thicker if you want a softer, more substantial side bread. If the dough keeps sticking, dust lightly with flour, but do not overdo it. Too much bench flour can dry out the surface and make the cooked bread less supple.
6) Cook immediately
Place the shaped dough onto a hot skillet or griddle, or onto a prepared oven tray if you’re baking. Cook until bubbles form and the underside develops light brown spots, then flip and finish the second side.
The bread should look cooked through but still soft. If it turns dry and brittle, the heat was likely too low for too long, or the dough was rolled too thin and overcooked.
How to Cook It: Skillet, Griddle, or Oven
The cooking method changes the final texture more than many bakers expect.
Skillet or griddle
A skillet gives you the most control over browning and timing, and it is usually the best choice when softness is the priority. It also suits small batches, which is helpful if you want fresh flatbread for dinner without heating the whole oven.
Use medium-high heat and preheat the pan before cooking. If the pan is too cool, the bread dries out before it browns. If it is too hot, the outside can scorch before the inside cooks properly.
For many home bakers, the skillet is the best first choice because it teaches you how the dough behaves.
Oven
An oven is useful when you want to bake several flatbreads at once. It can be practical for family meals or meal prep, especially if you are making a larger batch.
The trade-off is texture. Oven-baked flatbread often comes out a little drier or firmer than skillet-cooked bread, especially if it is rolled thin. That may be exactly what you want for a sturdier wrap or a crispier side, but it is not the softest route.
Griddle
A griddle sits somewhere between skillet and oven in convenience. It works well when you want to cook multiple pieces in sequence without crowding a pan.
If your griddle heats evenly, it can produce very consistent browning. Just keep the heat moderate and watch the first piece closely, because griddle surfaces can run hotter than expected.
How to Keep Yeast-Free Flatbread Soft and Flexible
Soft flatbread is mostly about moisture management and timing.
Use enough fat
Oil, butter, or yogurt can all improve tenderness. Fat coats some of the flour proteins and helps slow moisture loss during cooking. That is one reason enriched doughs feel softer than very lean doughs.
You do not need a heavy hand. Too much fat can make the dough greasy or difficult to roll. Use enough to support softness, not so much that the dough loses structure.
Do not over-flour the bench
Extra flour is useful when the dough sticks, but a thick dusting can dry the outside of the dough and make the finished flatbread feel tough. Add flour sparingly and only where needed.
Cover the cooked breads
This step is easy to skip and easy to regret. As soon as a flatbread comes off the pan, stack it and cover it with a clean towel. The trapped steam keeps the breads pliable.
If you leave them exposed, the surface dries quickly and the bread becomes less flexible, especially once it cools.
Watch the thickness
Thin dough cooks quickly and stays more flexible, which is ideal for wraps. Thicker dough can be soft too, but it needs more time on the heat and is more likely to turn bready rather than pliable.
If you want a wrap-style flatbread, think thin and even. If you want a side bread for dipping, a little more thickness is fine.
Flavor Variations and Easy Add-Ins
Once you have the base method down, small additions can change the bread’s personality without complicating the process.
For a savory version
Try adding:
- Garlic powder
- Dried herbs such as oregano or thyme
- Black pepper
- A little grated cheese, if you want a richer bread
These work well in the dough itself or brushed on after cooking with a little oil.
For a tangier, softer version
Use yogurt in place of part of the water and pair it with baking soda. This usually gives the bread a more tender bite and a subtle tang that works especially well with curries, roasted vegetables, or grilled meat.
For a heartier version
Replace part of the all-purpose flour with whole wheat flour. Expect a denser texture and a slightly stronger flavor. If the dough feels stiff, add a bit more water and allow a slightly longer rest.
For a richer finish
Brush the cooked bread with melted butter or olive oil while it is still warm. This adds flavor and helps keep the surface soft.
Common Mistakes and How to Fix Them
Even a simple flatbread can go wrong in predictable ways. Here is how to correct the most common issues.
The dough is too dry
If the dough cracks while mixing or refuses to come together, it needs more liquid. Add water a teaspoon at a time until it becomes smooth enough to knead.
The dough is too sticky
If the dough clings to your hands and the board, add flour in small amounts. Avoid dumping in a lot at once. You want a soft dough, not a stiff one.
The flatbread is tough
This usually comes from one of three things: too much kneading, too much flour during shaping, or overcooking. Resting the dough and rolling it gently can help a lot.
It does not puff much
Flatbread without yeast will not always puff dramatically, and that is normal. If you want more lift, use baking powder, keep the dough thickness even, and cook on a properly heated skillet.
It burns before it cooks through
The heat is too high. Lower the burner slightly and give the pan a minute to stabilize. Dark spots are good; blackened spots are not.
It stays pale and stiff
The pan is probably too cool. Flatbread needs enough heat to set the dough quickly and create steam inside. A properly preheated skillet usually solves this.
Storage, Reheating, and Make-Ahead Tips
Flatbread without yeast is best fresh, but it stores well enough for meal prep if you handle it correctly.
Let the breads cool, then store them in an airtight container or sealed bag. If you stack them with a sheet of parchment between pieces, they are easier to separate later.
For refrigeration, store cooked flatbread for up to 3 days. For freezing, wrap the breads well and freeze for up to 2 months. Thaw at room temperature or in the refrigerator before reheating.
For reheating, a dry skillet works well because it brings back flexibility without making the bread soggy. A few seconds per side is often enough. If the bread feels a little stiff, wrap it in a clean towel after reheating so the residual steam softens it again.
If you want to make the dough ahead, refrigerate it overnight if needed, then let it sit at room temperature briefly before rolling if it feels too firm. You can also freeze the dough for up to 1 month; thaw it in the refrigerator overnight before using. If you prefer same-day bread, a short room-temperature rest is usually enough.
Serving Ideas and Practical Uses
The nicest thing about yeast-free flatbread is how many jobs it can do.
Use it as:
- A wrap for grilled chicken, falafel, or roasted vegetables
- A side for hummus, baba ganoush, or yogurt-based dips
- Bread alongside soups and stews
- A quick base for open-faced toppings
- A simple accompaniment for curries and saucy dishes
If you are teaching or learning bread skills, this is also a useful dough because it shows several foundational ideas in a compact format: hydration, gluten relaxation, shaping, heat management, and timing. Those lessons transfer directly to more advanced breads later.
For readers who want to understand yeast-based doughs too, it can help to compare this method with a yeast-leavened bread process. You can read more in our guide to making bread without yeast and, if you are curious about yeast choices, our breakdown of active dry yeast vs instant yeast.
FAQs
Can flatbread without yeast still be soft?
Yes. Softness usually comes from the dough formula and cooking method, not yeast alone. Oil, yogurt, a short rest, and careful skillet cooking can all help.
Do I need baking powder?
No, not always. Baking powder gives more lift and a lighter texture, but you can make flatbread with just flour, water, salt, and oil. Expect a more rustic result.
Can I use baking soda instead?
Yes, but only if the dough includes an acidic ingredient like yogurt or buttermilk. Baking soda works best when it has acid to react with.
How long should I rest the dough?
A short rest of 10 to 30 minutes is common and useful. The rest helps the gluten relax so the dough rolls out more easily.
Can I make it without an oven?
Absolutely. A skillet or griddle is often the best method for soft, flexible flatbread.
Can I use whole wheat flour?
Yes, but the bread will usually be denser and may need a bit more liquid. If you are new to flatbread, start with all-purpose flour first.
Why is my flatbread dry?
It may have been rolled too thin, cooked too long, or dusted with too much flour during shaping. Covering the cooked breads also helps keep them soft.
Is this recipe vegan?
It can be, depending on the ingredients you choose. A dough made with flour, water, salt, oil, and baking powder is naturally dairy-free and vegan-friendly. If you use yogurt or butter, that changes.
Yeast-free flatbread is one of those deceptively simple bakes that teaches a lot. Once you learn how the dough should feel, how long it needs to rest, and how hot the pan should be, you can make it confidently on a weeknight or use it as a practical bread exercise in the kitchen.