
How to Convert a Bread Recipe for a Bread Machine Without Ruining the Loaf

If you’ve ever looked at a favorite hand-kneaded bread recipe and wondered whether it can survive a bread machine cycle, the answer is often yes — but rarely unchanged. Bread machines mix, knead, proof, and bake on a fixed schedule, so the dough has to fit the machine’s rhythm instead of the other way around. That means the most successful conversions usually come down to three things: matching the machine’s capacity, adjusting hydration, and choosing the right cycle.
I’m Ethan Baker, and when I convert a recipe for a bread machine, I think less about “translating” and more about “rebalancing.” The goal is not to force every loaf into the machine. The goal is to help the dough behave well in that smaller, enclosed environment so you get a loaf that rises properly, bakes through, and slices cleanly.
[IMAGE 1]
Quick Decision Tree: Should You Convert It?
Before you change anything, use this simple rule:
- Bake in the machine if the recipe is a standard loaf, fits the machine’s capacity, and does not depend on a long artisan-style rise.
- Use the dough cycle only if you want a better shape, firmer crust, or more control over shaping and oven baking.
- Avoid direct conversion if the dough is very wet, heavily enriched, or packed with add-ins that could overload the machine.
A good shortcut: if the recipe is a basic sandwich loaf or similar everyday bread, it is usually worth converting. If it is a ciabatta-style dough, a very soft artisan dough, or a formula that needs special handling, the dough cycle is usually the safer route.
What Changes When You Move a Recipe Into a Bread Machine
A conventional bread recipe assumes you’ll control the kneading, the rise, and the bake separately. A bread machine compresses all of that into a programmed sequence. That changes how the dough develops.
Here’s the practical difference:
- Mixing is more intense and more contained. The machine’s paddle works the dough differently than hand kneading.
- Proofing happens in a warm, enclosed pan. That can speed fermentation and make overproofing more likely if the recipe is too yeast-heavy.
- The loaf bakes in the same pan it rises in. Shape is more limited than an oven-baked loaf, so dough strength matters.
- Timing is fixed. A recipe that relies on a long, slow rise may not fit neatly into a standard cycle.
That’s why a recipe that works beautifully by hand can turn out dense, collapsed, or oddly shaped in a bread machine. The dough may simply be too wet, too weak, too rich, or too slow for the machine’s schedule.
Before You Start: Check Whether the Recipe Is a Good Candidate
Not every bread recipe deserves a direct conversion. Before you adjust a single ingredient, ask four questions.
1. Does the flour amount fit the machine’s capacity?
This is non-negotiable. A recipe can only be converted if the flour amount stays within the machine’s recommended limit. Check your manual for the loaf-size setting and stay within that range.
If your recipe makes more dough than the machine can safely handle, scale it down or use the dough cycle only and finish in the oven.
2. Is it a standard loaf or something more specialized?
The easiest recipes to convert are sandwich-style loaves, basic white bread, and many whole wheat breads. Recipes that rely on very long rises or unusual shaping are much less forgiving in a bread machine.
3. Is the dough lean, enriched, or highly hydrated?
- Lean doughs: flour, water, yeast, salt — usually easiest to convert.
- Enriched doughs: milk, eggs, butter, sugar — often need more care because they ferment differently.
- High-hydration artisan doughs: often too loose for a bread machine’s bake cycle.
4. Do you want the machine to bake the loaf, or only knead it?
This is a useful decision point. If you want convenience, use the full cycle. If you want better shape, crust, or more control, use the dough cycle and finish in the oven.
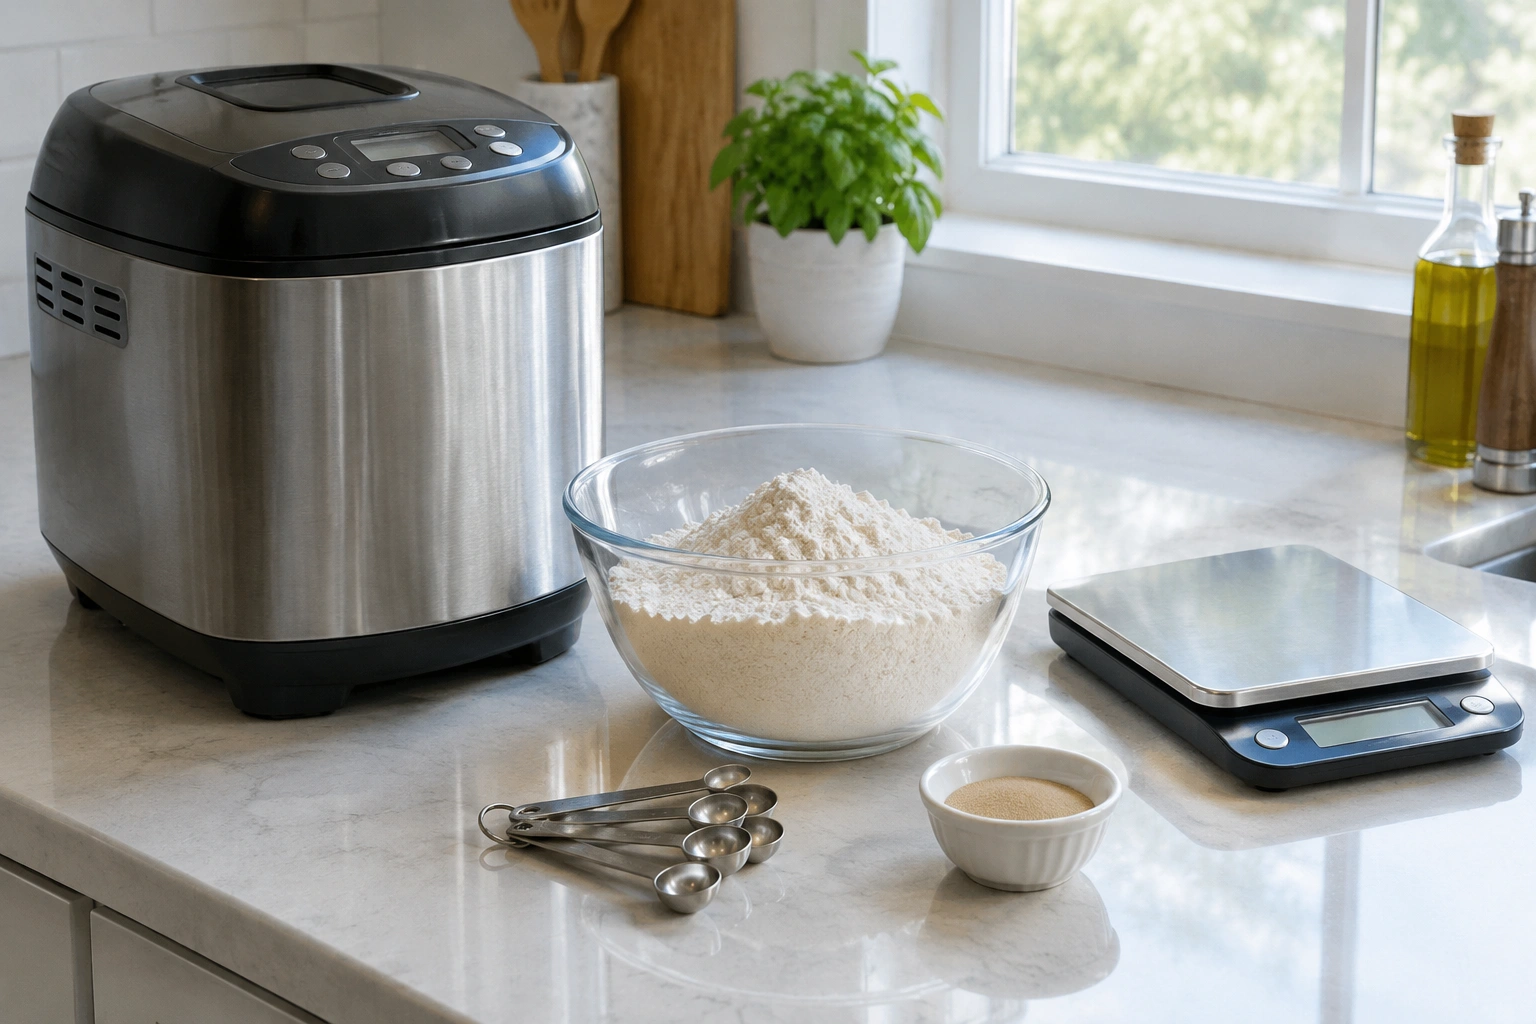
Tools, Ingredients, and Information You Need
A little preparation saves a lot of guesswork.
You’ll want:
- Your original recipe
- The bread machine manual
- A kitchen scale, if possible
- Measuring cups and spoons
- A way to note the dough’s texture during the first knead
- The machine’s loaf-size settings and capacity limits
A scale is especially useful when converting recipes because flour, liquid, and eggs are easier to adjust accurately by weight than by volume. If you want a deeper dive into why that matters, see kitchen scale vs measuring cups for baking.
Ingredients that deserve extra attention
- Flour: bread flour usually gives better structure than all-purpose flour in a machine loaf.
- Yeast: bread machine yeast and instant yeast are often handled similarly in bread formulas.
- Salt: too little can make the dough rise too fast; too much can slow fermentation.
- Sugar and fat: these soften the crumb but can also change rise speed and browning.
- Eggs and milk: these count toward the liquid balance, not just the “wet ingredients” list.
How to Convert a Regular Bread Recipe Step by Step
Here’s the conversion method I use when I’m adapting a standard loaf for a bread machine.
1. Decide whether to bake in the machine or use dough only
If the recipe is a basic sandwich loaf, a full machine bake is usually worth trying first. If it is enriched, very wet, or meant for a dramatic oven spring, use the dough cycle and finish in the oven.
That trade-off matters: the machine bake is simpler, but the oven finish often gives a better crust and a more familiar loaf shape.
2. Match the recipe to the machine’s loaf size
Choose the machine setting that best matches the amount of dough you’re making: 1 lb, 1.5 lb, or 2 lb. A loaf setting that is too small can cause overflow; one that is too large can leave the loaf underfilled and flat-looking.
3. Scale the recipe before changing anything else
If your original recipe is too large for the machine, scale it first. A practical rule of thumb is to use the loaf size as your guide:
- 1 lb setting: use a smaller batch or roughly half of a standard 2-pound formula
- 1.5 lb setting: use about three-quarters of a standard 2-pound formula
- 2 lb setting: use the full recipe only if it stays within the machine’s capacity
If your recipe is already written for a different loaf weight, scale the ingredients proportionally rather than changing only the flour or only the liquid.
4. Rebalance the liquid
Bread machine dough usually needs slightly less liquid than hand-kneaded dough because the machine keeps the dough in a closed environment and kneads efficiently. The best rule is not to guess blindly — watch the dough during the first knead and adjust from there.
5. Choose the yeast and reduce the risk of overproofing
Bread machine yeast or instant yeast usually works well in a bread machine. Active dry yeast can also be used in many recipes, and you can often use the same amount as instant yeast in the machine, but check the recipe and your machine manual first. Some recipes and manuals call for proofing active dry yeast before use, while others are fine with a direct add-in approach.
If you want a full yeast comparison, our guide to fresh yeast vs dry yeast covers the practical differences.
6. Load ingredients in the order your machine expects
Some machines want liquids first, then dry ingredients, with yeast added last. Others use a different order, especially if a delayed start is involved. Always follow the manual for your model.
For a delayed start, the ingredient order matters even more. If your machine sits for several hours before mixing, keep yeast away from liquid until the cycle begins. That usually means placing liquids in the pan first, then dry ingredients on top, and making a small well for the yeast so it stays dry until mixing starts.
7. Select the correct cycle
Use the cycle that matches the dough type:
– basic/white for standard sandwich bread
– whole wheat for heavier grain doughs
– sweet for enriched doughs with more sugar or fat
– dough cycle if you plan to shape and bake later
8. Check the dough during the first knead
This is where most successful conversions are won or lost.
How to Judge Dough During the First Knead
A bread machine gives you a rare advantage: you can see the dough while it’s being developed. Use that moment.
What you want to see
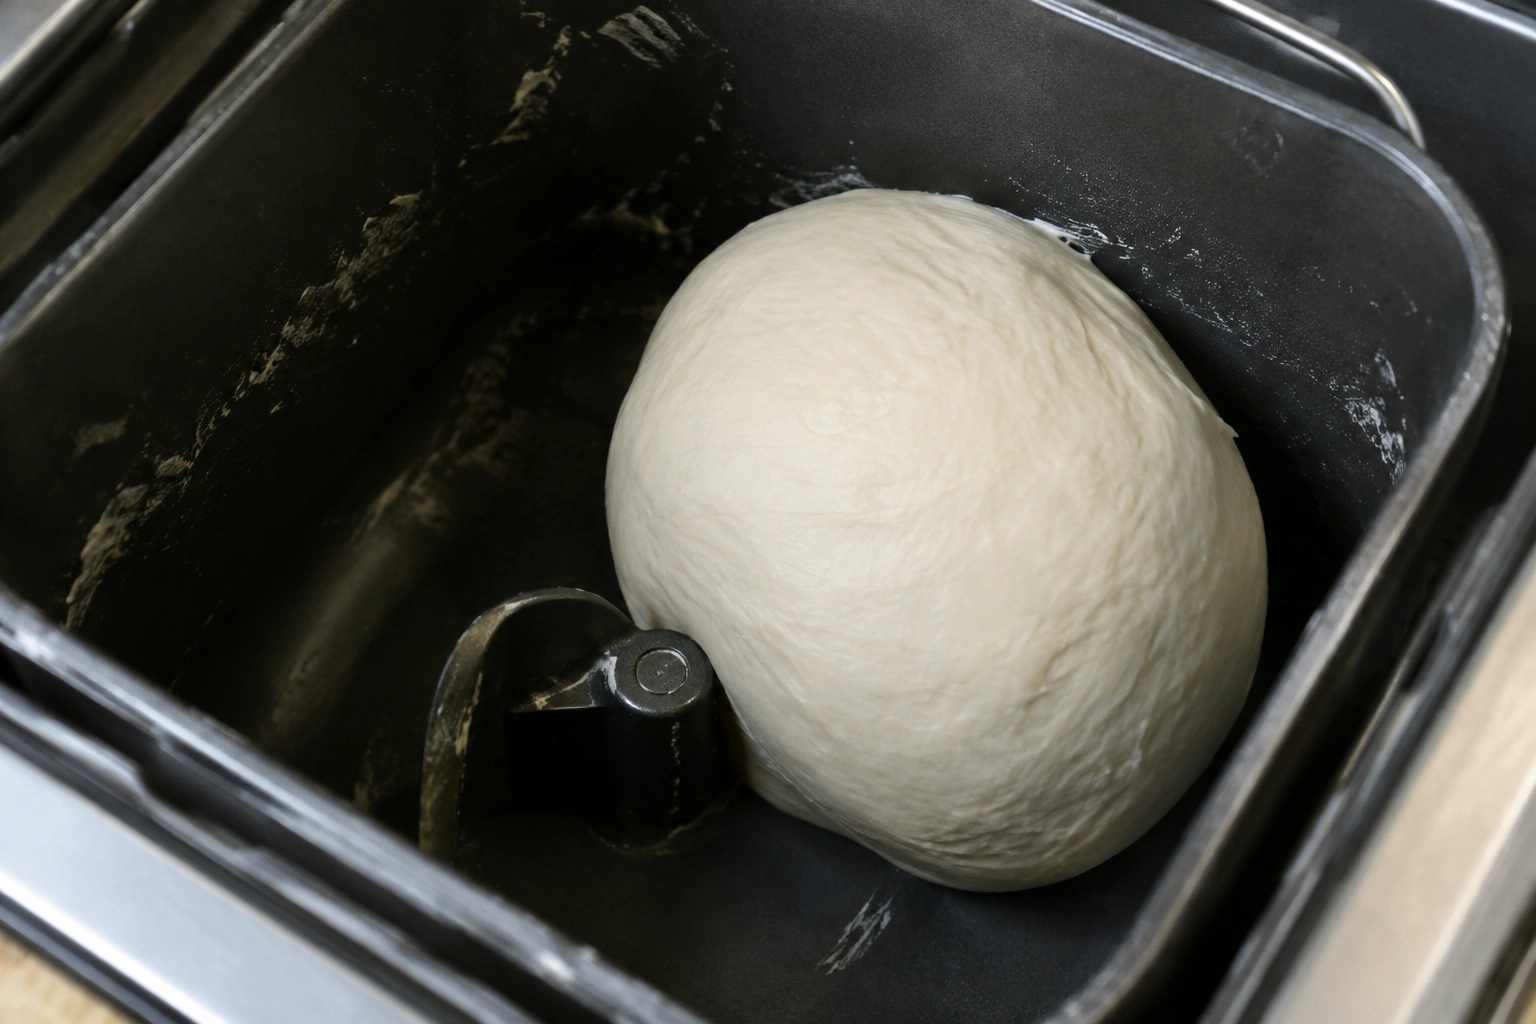
The dough should gather into a soft, smooth ball that clears the sides of the pan and moves with the paddle. It should not look like batter, and it should not sit in dry crumbs.
If the dough is too dry
If the dough is rough, stiff, or the machine struggles to pull it together, add liquid a teaspoon at a time. Wait a minute or two after each addition so the dough can absorb it before adding more.
If the dough is too wet
If the dough smears around the pan or looks more like paste than dough, add flour a tablespoon at a time. Again, give it a minute to incorporate before deciding whether it needs more.
What “just right” looks like
A properly mixed dough in a bread machine should be tacky, not soupy. It should feel elastic and cohesive, with enough strength to hold shape as it kneads.
Choosing the Right Yeast, Flour, and Hydration
These three choices determine most of your conversion success.
Yeast: bread machine yeast vs active dry yeast
Bread machine yeast is formulated for machine cycles and is commonly used in bread makers. Instant yeast often performs similarly. Active dry yeast can still work, and many recipes will tolerate it at the same amount as instant yeast in the machine, but whether you should proof it first depends on the recipe and your machine manual.
The practical decision is simple: if you want the least friction, use bread machine yeast or instant yeast. If active dry yeast is what you have, use it thoughtfully and follow the recipe or manual instructions for proofing.
Flour: bread flour vs all-purpose flour
Bread flour usually gives better structure in a bread machine because its higher protein content supports kneading and rise. That extra strength can help the loaf hold its shape during the machine’s proofing cycle.
All-purpose flour can still work, and some bakers prefer it for a softer crumb. But if your first conversion comes out weak or squat, switching to bread flour is one of the most reliable fixes.
Hydration: why the liquid often changes
A recipe written for hand kneading may feel a little wetter than a bread machine wants. In a machine, that extra liquid can lead to a slack dough that spreads or collapses. On the other hand, too little liquid creates a tight, dense loaf.
Think of hydration as a tuning knob, not a fixed number. Adjust only enough to get the dough ball you want during kneading.
How to Scale for 1 lb, 1.5 lb, and 2 lb Bread Machine Settings
Scaling is less about exact loaf weight and more about matching dough volume to the pan.
A simple rule of thumb:
- 1 lb setting: use a smaller batch, usually around half of a standard 2-pound recipe
- 1.5 lb setting: use about three-quarters of a standard 2-pound recipe
- 2 lb setting: use the full formula only if it stays within the machine’s flour and pan limits
| Machine setting | Best use | What to watch |
|---|---|---|
| 1 lb | Small households, smaller pans, lighter doughs | Underfilling if the recipe is too small |
| 1.5 lb | A common middle ground for many home machines | Good balance of pan size and loaf height |
| 2 lb | Larger family loaves or fuller pans | Overflow if the dough is too active or too large |
If you’re scaling down, keep the ingredient ratios consistent. If you’re scaling up, don’t just increase everything blindly. The loaf can overfill the pan before the center is fully baked.
A useful practical rule: if your machine manual gives a flour limit for each loaf size, stay under that limit even if the recipe seems “close enough.” The machine’s safe capacity matters more than convenience.
Which Bread Machine Cycle to Use
The cycle matters almost as much as the recipe.
Basic cycle
Best for standard white or sandwich bread recipes. It’s the default choice when the dough is fairly lean and not overloaded with sugar or fat.
Whole wheat cycle
Use this for recipes with a significant amount of whole wheat flour. Whole grains absorb more water and often need a different kneading and rise profile.
Sweet cycle
Choose this for enriched doughs with more sugar, milk, butter, or eggs. Those ingredients can slow fermentation and brown faster, so the cycle is usually adjusted to handle that.
Dough cycle
Use the dough cycle when you want the machine to do the mixing and kneading, but you plan to shape and bake elsewhere. This is the safest fallback for recipes that are awkward in a full machine bake.
That’s often the best compromise: you keep the convenience of machine mixing while avoiding a loaf that is too cramped, too pale, or too soft on top.
How to Add Mix-Ins Without Ruining the Dough
Nuts, seeds, dried fruit, and cheese can all work in a bread machine — if you add them at the right time.
Most machines have an add-in signal. That’s the moment to add mix-ins, not at the beginning. If you add them too early, they can get chopped up, interfere with gluten development, or absorb liquid before the dough is ready.
A few practical examples:
– Raisins or dried cranberries: add after the first knead
– Sunflower seeds or chopped nuts: add at the signal so they stay intact
– Cheese: use sparingly in machine-baked loaves because it can brown quickly and affect structure
Common Mistakes When Converting a Bread Recipe
The most frequent errors are predictable:
- Using the original liquid amount without checking the dough
- Choosing the wrong cycle for the flour type
- Overfilling the pan
- Adding all mix-ins at the start
- Using too much yeast and causing a fast rise that collapses
- Assuming every recipe should be baked all the way in the machine
- Ignoring the difference between all-purpose flour and bread flour
Most of these problems show up as texture issues, not dramatic failures. That’s why the first knead is so valuable: it gives you a chance to correct the formula before the bake is locked in.
Troubleshooting Dense, Collapsed, or Overproofed Loaves
When a bread machine loaf misses the mark, the symptom tells you what to change next time.
If the loaf is dense
Likely causes:
– too little liquid
– not enough yeast
– flour too strong for the recipe without hydration adjustment
– cycle too short for the dough type
What to change:
– slightly increase hydration
– confirm the yeast is fresh
– use the whole wheat or dough cycle if the formula is heavier
If the loaf collapses
Likely causes:
– too much yeast
– too much liquid
– overproofing
– dough too weak to support the rise
What to change:
– reduce yeast modestly
– tighten hydration
– use bread flour
– avoid a cycle that proves too long for the dough
If the loaf is pale or soft on top
Likely causes:
– the dough was too wet
– the cycle was not suited to the recipe
– the loaf was too large for the pan
What to change:
– scale down
– choose a better cycle
– consider the dough cycle plus oven bake for a firmer crust
Recipes That Convert Poorly and Safer Alternatives
Some recipes are simply poor candidates for a full bread machine bake.
Harder to convert directly
- very wet artisan doughs
- sourdough-style recipes with long fermentation
- heavily enriched doughs with lots of butter, eggs, or sugar
- specialty loaves that depend on shaping or steam
Safer alternatives
- use the dough cycle only
- scale the recipe down
- switch to bread flour
- reduce hydration slightly
- finish in the oven for better structure and crust
That’s the practical trade-off: the machine gives convenience, but the oven gives you more control over shape and finish.
Practical Conversion Examples
Example 1: Basic white sandwich bread
If you have a standard white loaf recipe, first check that the flour amount fits your machine’s loaf size. Then:
1. Keep the flour mostly the same if the recipe already fits the pan.
2. Reduce liquid slightly if the dough seems loose.
3. Use bread flour if the loaf lacks structure.
4. Choose the basic cycle.
5. Check the dough during the first knead and adjust by teaspoon or tablespoon as needed.
This is the most forgiving type of conversion.
Example 2: A simple hand recipe adapted step by step
Here’s a typical example of how I’d adapt a hand recipe for a bread machine.
Original hand recipe
– 3 cups bread flour
– 1 cup warm water
– 2 teaspoons instant yeast
– 1 1/2 teaspoons salt
– 1 tablespoon sugar
– 1 tablespoon oil
Step 1: Check the loaf size
This amount is usually closer to a 1.5 lb loaf than a 1 lb loaf, so I’d start with the 1.5 lb setting if the machine manual allows it.
Step 2: Choose the cycle
Because this is a straightforward sandwich-style loaf, I’d use the basic cycle.
Step 3: Load ingredients in machine order
If the manual calls for liquids first, I’d add the water and oil, then the flour, sugar, and salt, and place the yeast where the manual recommends.
Step 4: Watch the first knead
If the dough looks a little loose and smears around the pan, I’d add 1 tablespoon of flour and wait to see if it firms up. If it still looks slack, I’d add a little more in small amounts.
Step 5: Confirm the final dough texture
The goal is a soft dough ball that clears the sides of the pan. If it reaches that point, I’d let the cycle continue.
This kind of recipe is a good first test because it is simple, fits a common loaf size, and usually responds well to small hydration adjustments.
Example 3: Dough cycle for rolls or pizza dough
If the recipe is better shaped by hand, use the dough cycle only. Once the dough is fully risen, remove it, shape it, and bake it in the oven. This approach often gives you better texture and a more attractive finish than forcing the loaf through a full machine bake.
When to Consult a Master Baker
If you’re working with a formula that has very high hydration, unusual grains, or a rich dough that keeps collapsing even after careful adjustments, it may be worth consulting a master baker or experienced recipe developer. Some formulas simply need deeper reformulation than a home conversion can provide.
For most home bakers and culinary students, though, the process is manageable: match the recipe to the machine, watch the dough during kneading, and be willing to use the dough cycle when the full bake isn’t the best fit.
FAQs
Can any bread recipe be converted for a bread machine?
Not every recipe should be baked in the machine, but many standard loaf recipes can be adapted if the flour amount fits the machine’s capacity and the dough type suits the cycle.
What is the biggest adjustment when converting a recipe?
Usually the liquid. Bread machine dough often needs a little less or slightly different hydration than hand-kneaded dough, and the first knead is the best time to correct it.
Can I use active dry yeast instead of bread machine yeast?
Often yes. In many machine recipes, active dry yeast can be used at the same amount as instant yeast, but whether it should be proofed first depends on the recipe and your machine manual.
Should I use bread flour or all-purpose flour?
Bread flour usually gives better structure in a bread machine. All-purpose flour can work, but it may need more careful hydration control.
What if my loaf keeps collapsing?
Check yeast amount, hydration, and cycle choice. Collapsing often means the dough rose too fast or lacked enough strength to support the rise.
Is the dough cycle better than the full bake cycle?
For some recipes, yes. If the loaf shape, crust, or texture is better in the oven, the dough cycle gives you more control while still saving time on mixing and kneading.
How do I know if my machine is too small for the recipe?
If the recipe exceeds the flour limit in the manual or the dough visibly rises too high in the pan, the machine is probably too small for that formula. Scale down or use the dough cycle.
Can I add nuts or raisins?
Yes, but add them after the initial knead or at the machine’s add-in signal so they don’t interfere with gluten development.
What recipes convert poorly?
Very wet artisan doughs, long-fermented sourdough-style recipes, and heavily enriched doughs often need more than a simple direct conversion.
Do I need to change kneading or rising times?
Usually no — the machine controls those. What you do need to change is the formula so the dough behaves well within the machine’s fixed timing.
Can I convert a recipe without a scale?
Yes, but a scale improves consistency a lot, especially when scaling down or adjusting liquid. That’s why many bakers rely on weighing rather than cups for conversion work.
What’s the safest first recipe to try?
A basic sandwich loaf is the best starting point. It gives you a clean test of your machine, your flour, and your hydration without too many variables.