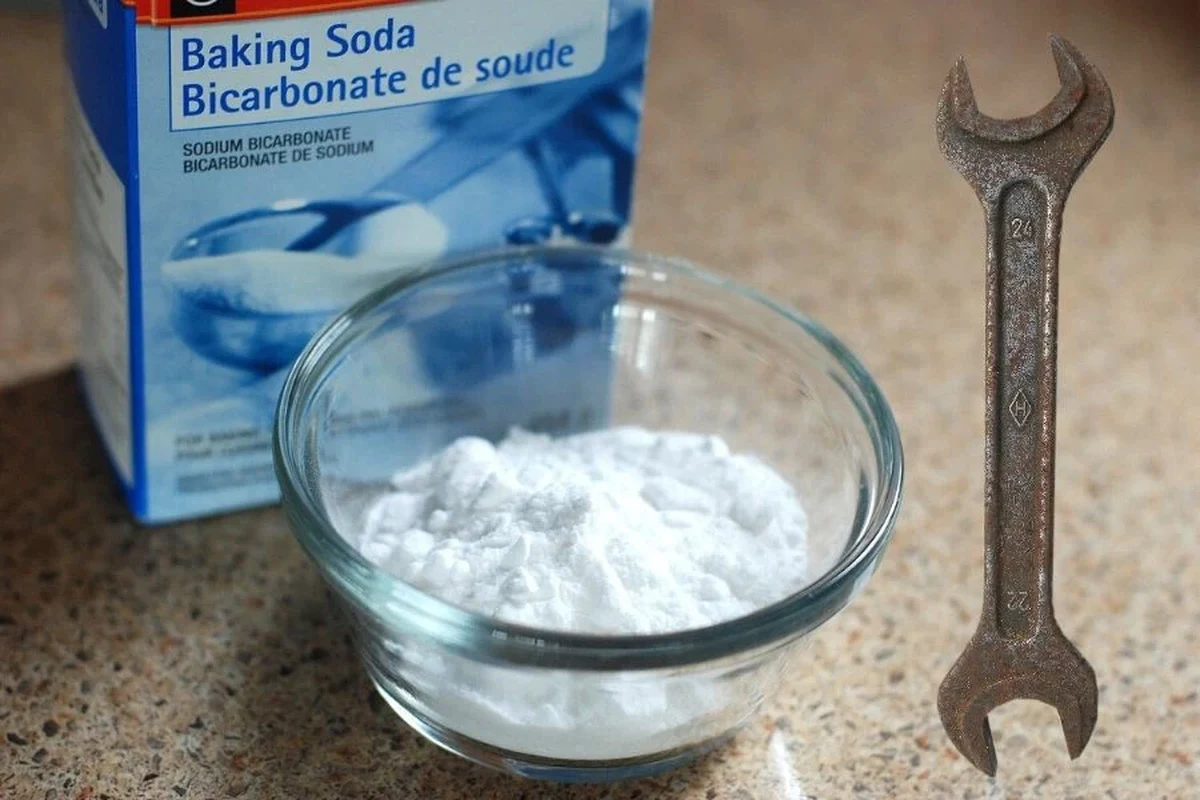
Baking soda can remove light rust from many kitchen metal items when used as a paste or gentle scrub. It is best for surface rust, not deep corrosion or damaged finishes.
Rust on baking pans, tools, and kitchen hardware can look stubborn, but baking soda is often a practical first step for light surface rust. It is inexpensive, easy to mix, and gentle enough for many kitchen items when used with the right amount of water and the right scrubbing tool.
- Best use: Light surface rust on sturdy kitchen metal is the sweet spot for baking soda.
- Method choice: A thick paste usually works better than a quick scrub for stubborn spots.
- Surface care: Test first on coated, polished, or valuable items to avoid dulling or scratches.
- Aftercare: Rinse and dry fully to prevent flash rust from returning.
- Limit: Deep pitting and heavy corrosion usually need a stronger solution.
Why Baking Soda Works for Rust Removal in 2026
Baking soda helps with rust removal mainly because it acts as a mild abrasive and a simple alkaline cleaner. That means it can loosen surface oxidation without the harshness of stronger chemical strippers, which makes it appealing for everyday kitchen cleanup.
The science behind mild abrasion and alkalinity
Rust is iron oxide, and it forms when iron or steel reacts with moisture and oxygen. Baking soda does not dissolve heavy rust the way a specialty rust remover might, but it can help lift loose oxidation and break up grime that holds rust in place.
Its fine texture gives you a little scrubbing action, while its alkaline nature helps neutralize some acidic residue and reduce greasy buildup. In a kitchen setting, that combination is useful because rust often appears alongside baked-on food, water spots, or old oil film.
Baking soda is most effective on rust that is still near the surface. Once metal is deeply pitted, the goal shifts from “remove the rust” to “stabilize the damage.”
What kinds of rust stains baking soda can realistically handle
Baking soda works best on light orange-brown spotting, thin rust film, and early corrosion on sturdy metal surfaces. It can also help clean rust stains around seams, corners, and edges where moisture tends to sit.
It is less effective on deep flaking rust, heavy pitting, or rust that has spread under a coating. If the metal feels rough, looks blistered, or sheds powdery flakes, baking soda alone is usually not enough.
Best Surfaces and Items for Removing Rust with Baking Soda
Before you start, think about the material. Some kitchen items can handle a paste and scrub, while others need a much lighter touch or a different cleaner entirely.
Kitchen tools, baking pans, and stainless-steel items
Baking soda is often a reasonable choice for carbon steel tools, some baking pans, stainless-steel utensils, and uncoated metal items with light rust. It can also be useful on grates, racks, and pan edges where rust is still early and shallow.
For cookware, the safest approach is to start small and work gradually. That is especially important for pans with mixed materials, rivets, nonstick finishes, or decorative coatings.
When baking soda is a safe choice for metal, enamel, and coated surfaces
Plain metal usually tolerates baking soda better than delicate coatings. Enamel may handle a soft paste and gentle wiping, but you should avoid aggressive scrubbing that could dull the finish.
On coated surfaces, the issue is not just rust removal. It is also whether the scrub will scratch, haze, or weaken the protective layer that keeps moisture out.
If a surface has a nonstick coating, painted finish, or visible decorative plating, test in a hidden spot first. Baking soda is mild, but a rough sponge or heavy pressure can still leave marks.
Materials to avoid or test first before scrubbing
Avoid using baking soda on soft metals, fragile antiques, or anything where the finish is already failing. If you are unsure, patch-test a small corner and watch for dulling, scratching, or color change.
When in doubt, check the manufacturer’s care instructions for the item. That is especially important for specialty bakeware, imported tools, and coated pans that may have specific cleaning limits.
Simple Baking Soda Methods That Actually Work
There is no single best method for every rusty item. The right approach depends on how much rust you see, how delicate the surface is, and how long you can let the mixture sit.
Dry paste method for light rust spots
For very light rust, dampen the spot slightly and sprinkle on baking soda, then rub with a soft cloth or sponge. This method works when you need only a small amount of abrasion and do not want a wet paste sitting on the surface for long.
It is a good choice for quick cleanup on utensils, small pan marks, and light rust around handles or seams. If the stain is stubborn, move to a thicker paste instead of scrubbing harder.
Thick paste and dwell-time method for stubborn rust
Mix baking soda with just enough water to make a thick paste, similar to soft toothpaste. Spread it over the rust and let it sit so the paste can loosen grime and soften the oxidation layer.
This method is usually better for rust that has had time to settle in. The extra contact time often matters more than force, because the paste needs a chance to work before you scrub.
Combining baking soda with water, lemon, or vinegar: when each approach makes sense
Water is the safest and most common mixing liquid because it keeps the paste simple and predictable. Lemon juice or vinegar can help with some rust because they add acid, but they also make the mixture more reactive and can be too aggressive for certain finishes.
If you use an acid, keep the contact time short and rinse thoroughly. Never mix vinegar and baking soda in a closed container, and do not assume that more fizz means better cleaning; the bubbling mostly shows that the ingredients are reacting, not that rust is disappearing.
For many kitchen items, a plain baking soda paste is the safest starting point. If that does not work, try a different method rather than immediately increasing pressure or soaking time.
Step-by-Step Process for Removing Rust Baking Soda
The best results come from a calm, measured process. Rushing usually leads to scratches, uneven cleaning, or moisture left behind where rust can return.
Use a small dab for pinhead rust spots and a thicker layer for larger patches. The paste should cover the rust without running all over the item.
Give the paste time to work before scrubbing. Light spots may need only a short wait, while tougher areas benefit from a longer dwell time, as long as the surface is safe to keep damp.
Use a soft sponge for delicate surfaces and a nylon scrub pad for sturdier metal. Avoid steel wool unless the item can clearly handle a more abrasive tool and you do not mind a brushed finish.
Wash away all residue, then dry the item completely with a towel. Any leftover moisture can trigger flash rust, especially on bare steel and cast iron.
Measuring the paste for small stains versus larger rusty areas
A small rust dot usually needs only enough paste to cover it in a thin layer. Larger rusty patches need more paste, but not a watery slurry that slides off before it can work.
Think coverage, not volume. The goal is to keep the active area damp and in contact with the rust.
How long to let the mixture sit before scrubbing
There is no universal soak time because surface type, rust depth, and room humidity all matter. Start with a short wait for delicate surfaces, then check whether the stain has softened before you scrub.
If the rust is still firmly attached, reapply the paste instead of forcing it off in one pass. That approach usually protects the finish better.
Best scrubbing tools for different surfaces
Soft cloths are best for polished or coated surfaces, while nylon pads suit many pots, pans, and hand tools. A toothbrush can help reach seams, rivets, and textured areas where rust hides.
Use the least aggressive tool that still lifts the stain. On kitchen items, preserving the surface matters as much as removing the rust.
Rinsing, drying, and preventing flash rust after cleaning
Rinse until the surface feels free of grit, then dry immediately. If the item is bare steel or cast iron, do not leave it sitting in a sink or on a wet rack.
For cookware that can be seasoned, apply a thin protective oil layer after drying if the manufacturer recommends it. That small step can help block moisture and slow future rust.
Keep rust-cleaning tools away from food prep until the item is fully rinsed and dry. If you are cleaning a pan or utensil, make sure no gritty residue remains before it touches food again.
Common Mistakes That Make Rust Harder to Remove
Most rust-cleaning problems come from impatience or using the wrong amount of force. Baking soda is simple, but it still works best when you give it time and use careful technique.
Using too little contact time or too much pressure
If you scrub immediately, the paste may not have time to loosen the rust. On the other hand, pressing too hard can scratch the finish before the stain lifts.
Start with moderate contact time and gentle pressure. If the rust remains, repeat the process rather than escalating aggressively.
Scrubbing the wrong direction on polished or coated finishes
Polished metal can show swirl marks if you scrub in random circles with a rough pad. Coated surfaces can also look patchy if you work unevenly.
When appearance matters, follow the grain of the metal if you can see it. That usually leaves a cleaner-looking finish.
Leaving moisture behind and causing rust to return
Rust often comes back because the item was cleaned but not fully dried. Even a few drops near seams, hinges, or rivets can restart the process.
This is one reason drying matters as much as scrubbing. A clean towel and a few extra minutes of air drying can save you from repeating the job.
Expecting baking soda to fix deep corrosion or pitted metal
When rust has eaten into the surface, baking soda can only do so much. It may improve the appearance, but it will not rebuild missing metal or restore a badly damaged finish.
For severe rust, you may need a stronger rust remover, sanding, re-seasoning, or professional restoration depending on the item’s value and construction.
The rust lightened, but the surface still looks rough or stained.
That usually means the rust has moved beyond the surface layer. Repeat a gentle treatment once, then consider a stronger product or a restoration method suited to the material.
Safety, Surface Care, and When to Stop
Rust removal should never damage the item more than the rust itself. If the surface is valuable, decorative, or food-contact related, caution matters more than speed.
Protecting hands, finishes, and nearby food-contact areas
Baking soda is mild, but repeated scrubbing can dry your skin and roughen finishes. Wearing gloves can help if you are cleaning several items or using a longer dwell time.
Keep cleaning products away from open food, cutting boards, and prep counters. If you are working in a kitchen, clean the surrounding area afterward so residue does not transfer back onto cookware.
How to patch-test before treating valuable cookware or tools
Apply a small amount of paste to an inconspicuous spot and wait briefly. Check for dulling, discoloration, or scratching before you continue.
This is especially important for heirloom pans, specialty knives, plated tools, and coated bakeware. A small test area can prevent a much larger problem.
Signs the item needs a different rust remover or professional restoration
Stop using baking soda alone if the rust is flaking heavily, the metal is pitted, or the surface keeps rusting immediately after drying. Those signs usually point to a deeper corrosion issue.
For cookware that must stay food-safe, follow the manufacturer’s care guidance or consult a qualified restoration professional when the damage is significant. If the item is a specialty appliance or accessory, check official instructions before using any stronger cleaner.
Preventing Rust After Cleaning
Rust prevention is easier than rust removal. Once the item is clean, your next job is to keep moisture, humidity, and poor storage from undoing the work.
Drying, seasoning, and storage habits for baking pans and metal tools
Dry items completely before putting them away. For bare steel or cast iron, a thin seasoning layer can help create a barrier against moisture if the item is meant to be seasoned.
Store pans and tools in a dry place, not stacked while damp. If you live in a humid area, even a clean kitchen can be hard on unprotected metal.
Humidity control and routine maintenance for long-term protection
Small maintenance habits make a big difference. Wiping down metal tools after washing, checking hidden seams, and keeping storage areas dry can reduce the chance of rust returning.
If cabinets or drawers trap moisture, consider improving airflow or moving the item to a drier spot. The less time metal spends damp, the better.
Practical examples for keeping frequently used kitchen items rust-free
Baking pans often stay in better shape when they are washed, dried, and stored separately from wet dish racks. Hand tools like whisks, cutters, and spatulas with metal parts also benefit from quick drying after each wash.
For cast iron or carbon steel items, a light protective oiling routine after cleaning can help, as long as it matches the care instructions for that item. If you also use appliances with removable metal parts, such as countertop ovens or air fryers, follow the manufacturer’s cleaning guidance; similar care principles apply, and our guides on air fryer basket dishwasher safety and air fryer liners can help you think through material care.
Final Verdict: When Baking Soda Is the Right Rust-Removal Method
For light, surface-level rust on kitchen tools and sturdy metal items, baking soda is one of the easiest low-cost methods to try first. It is especially useful when you want a gentle cleanup that fits normal kitchen maintenance.
Best use cases for quick, low-cost rust cleanup
Use baking soda when the rust is small, the item is not heavily damaged, and you want a simple method that does not rely on harsh chemicals. It is a sensible first pass for pans, utensils, racks, and other everyday metal items.
It also makes sense when you want more control over the cleaning process. You can adjust the paste thickness, contact time, and scrub tool to match the surface.
When to choose a stronger product or alternative method instead
If rust is deep, the metal is pitted, or the finish is delicate and already compromised, baking soda may not be enough. In those cases, a dedicated rust remover, restoration step, or replacement may be the safer choice.
For most beginners, the best rule is simple: start gentle, test first, dry thoroughly, and stop before you damage the item. That approach gives baking soda its best chance to work while protecting the cookware or tool you are trying to save.
Baking soda is a smart first choice for removing light rust from many kitchen items because it is cheap, mild, and easy to control. For deep corrosion or fragile finishes, switch to a more suitable rust remover or professional restoration instead of scrubbing harder.
Frequently Asked Questions
Yes, it can remove light surface rust from many metal kitchen items. It works best on early rust, not deep pitting or heavy corrosion.
A dry scrub can work for very light spots, while a thick paste is better for stubborn rust. The paste gives the cleaner more contact time on the stain.
You can, but it is not always the safest or most effective choice for every surface. Vinegar adds acid, so test carefully and rinse well after cleaning.
Use a soft sponge for delicate surfaces and a nylon scrub pad for sturdier metal. Avoid overly abrasive tools unless the item can handle them.
Dry the item completely, store it in a low-moisture place, and season bare steel or cast iron if appropriate. Moisture left behind is the most common reason rust returns.
Stop if the rust is deep, pitted, or flaking heavily, or if the finish starts to dull or scratch. Those signs usually mean you need a stronger rust remover or a different restoration method.
