
Cinnamon Roll Dough Made Simple: A Baker’s Guide to Soft, Fluffy Results

If you want cinnamon rolls that bake up tender, airy, and easy to shape, the dough is where the real work happens. Filling and frosting get the glory, but the dough determines whether your rolls unwind into soft spirals or bake into something dense and dry.
Cinnamon roll dough is an enriched dough, which means it contains ingredients like milk, butter, sugar, and often eggs. Those ingredients make the crumb softer and richer than lean bread dough, but they also slow fermentation and make the dough a little more delicate to handle. That’s why cinnamon roll dough rewards patience, good ingredient choices, and a light touch.
In this guide, I’ll walk you through what the dough should feel like, how to mix and knead it, how to judge proofing, and how to avoid the mistakes that cause tough, sticky, or flat rolls. If you’re a home baker or culinary student, think of this as the method behind the method: not just what to do, but why it works.
What Makes Cinnamon Roll Dough Different
A basic bread dough can get by with flour, water, yeast, and salt. Cinnamon roll dough usually asks for more. Sugar tenderizes, butter coats gluten strands, milk adds richness, and eggs bring structure and softness. That combination creates the plush texture people expect from a good cinnamon roll.
The trade-off is that enriched dough is less forgiving than lean dough. Sugar and fat both slow down gluten development and yeast activity a bit, so the dough may take longer to rise and feel softer during shaping. That softness is exactly what you want in the finished roll, but it also means the dough can seem sticky or slack before it is fully developed.
A useful mental picture: lean dough wants to be elastic and sturdy; cinnamon roll dough wants to be supple and stretchy, but still able to hold a neat spiral.
Ingredients and Tools You’ll Need
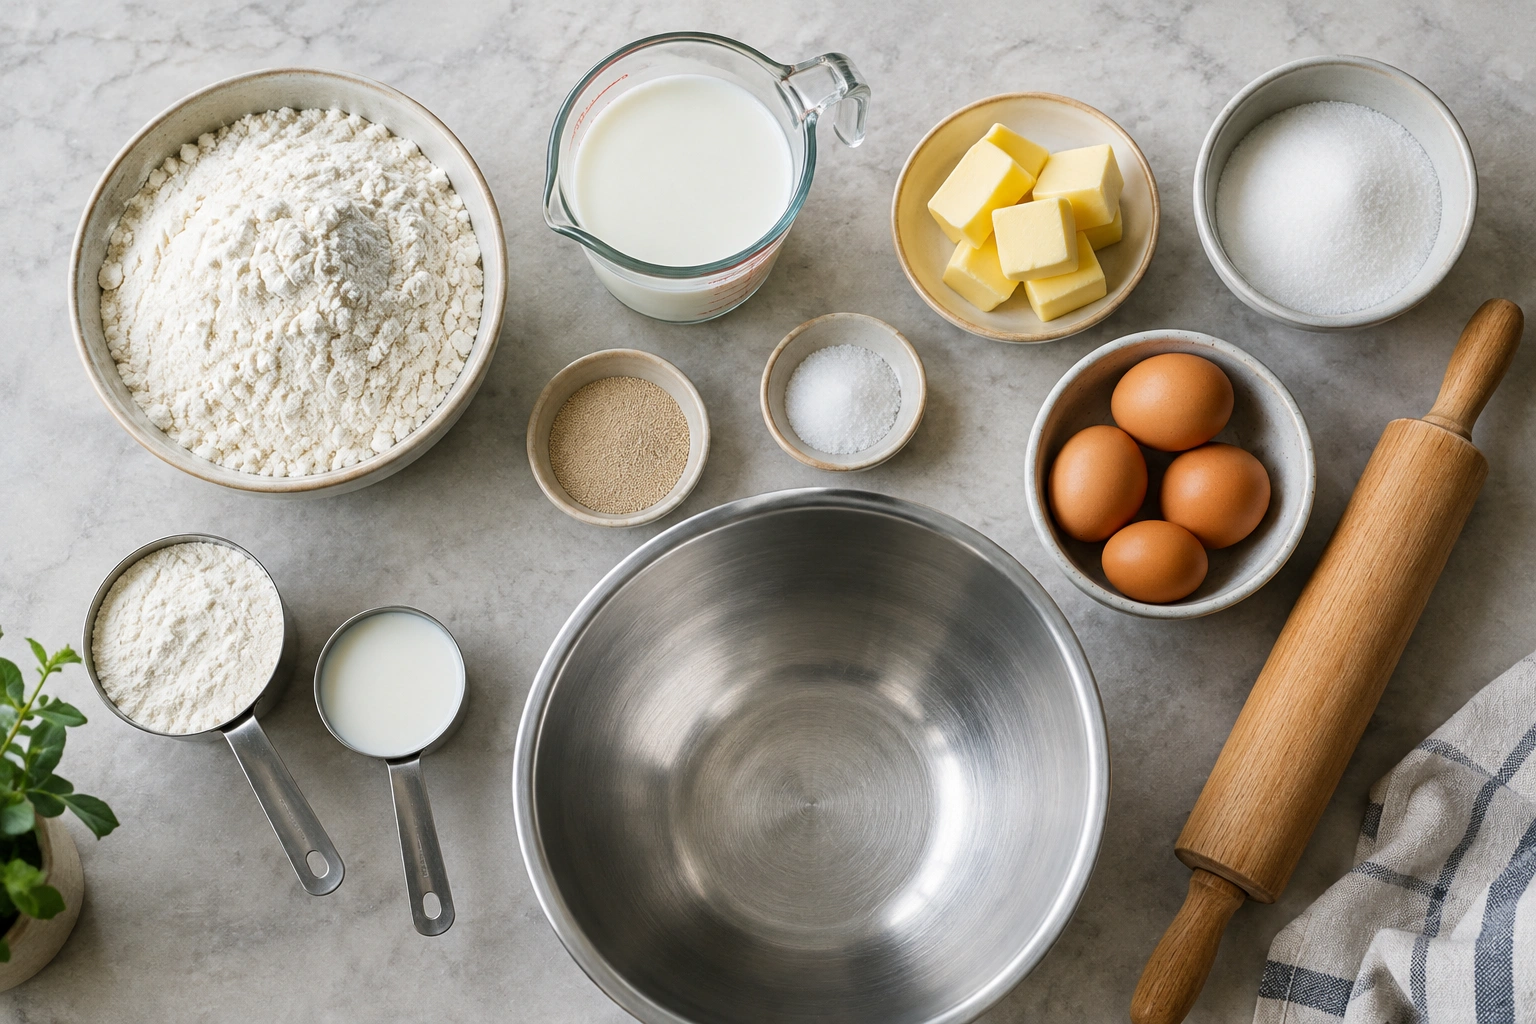
Here’s the practical core of cinnamon roll dough:
- Flour
- Yeast
- Milk
- Sugar
- Salt
- Butter
- Eggs, if your formula uses them
Each one has a job. Flour builds structure. Yeast creates lift. Milk contributes tenderness and browning. Sugar adds flavor and helps feed the yeast. Salt keeps the flavor balanced and strengthens the dough. Butter softens the crumb. Eggs enrich the dough and help with a rich, cohesive texture.
For tools, you’ll want a mixing bowl, measuring cups or a scale, a spoon or spatula, a rolling pin, and a baking pan. A stand mixer with a dough hook can make mixing easier, but hand kneading works well too if you are willing to pay attention to texture.
Choosing the Right Flour, Yeast, and Dairy
This is where many bakers make their first big decision. The ingredient list may look simple, but small choices change the final texture.
| Choice | Best for | Trade-off |
|---|---|---|
| All-purpose flour | Softer, more tender rolls; easier shaping | Slightly less chew and structure |
| Bread flour | More structure and a bit more chew | Can make rolls feel firmer if overmixed or overfloured |
| Active dry yeast | Familiar, reliable, good for traditional two-rise workflows | Usually slower to get going |
| Instant yeast | Convenience and a simpler mixing process | Less of a “proofing” ritual, so timing can feel less familiar |
| Whole milk | Richer flavor and softer crumb | Slightly heavier feel than water-based dough |
| Lower-fat milk | Lighter dough with a still-tender crumb | Less richness |
For flour, all-purpose is usually the best starting point if you want a softer, more tender roll and easier handling. Bread flour is worth using when you want a little more structure, a stronger spiral, or a slightly chewier bite. It is not the default choice for the softest result; it simply gives the dough more strength.
For yeast, either active dry or instant yeast can work well. A practical rule: choose instant yeast if you want a simpler, faster workflow and less waiting around for the yeast to wake up; choose active dry yeast if you are following a more traditional two-rise schedule and don’t mind a slightly slower start. Both can make excellent cinnamon roll dough.
If you want a simple rule: choose all-purpose flour and instant yeast for the most straightforward soft-roll path; choose bread flour and active dry yeast when you want a bit more structure and a more classic rise schedule.
Before You Start: Temperature and Prep Matter
Ingredient temperature affects how smoothly the dough comes together. Milk that is too hot can damage yeast. Very cold butter or eggs can make the dough feel lumpy and slow to develop. Room-temperature ingredients blend more evenly, which helps the dough reach its target texture faster.
If you’re using active dry yeast, warm liquid is often used to wake it up, but “warm” should never mean hot. If the liquid feels uncomfortable to the touch, it is too hot for yeast. Aim for pleasantly warm, not steaming. That simple check prevents one of the most frustrating failures: dough that never rises because the yeast was damaged at the start.
A second prep tip: measure your flour carefully. Too much flour is one of the fastest ways to turn cinnamon roll dough stiff and dry. If you can, use a scale. If not, fluff the flour first, spoon it into the cup, and level it off.
How to Make Cinnamon Roll Dough Step by Step
A good cinnamon roll dough usually follows the same basic path, even when recipes vary.
1. Mix the wet ingredients and yeast
Combine the milk, sugar, yeast, and any softened or melted fat your recipe calls for. If the recipe includes eggs, add them at this stage or shortly after, depending on the formula. The goal here is even dispersion, not full dough development.
2. Add the flour and salt
Once the wet mixture is ready, add the flour and salt. Salt belongs in the dough, not as an afterthought. It improves flavor and helps tighten the gluten network so the dough behaves more predictably.
3. Stir until a shaggy dough forms
At this stage, the dough may look rough, sticky, and uneven. That’s normal. You are just bringing the ingredients together so kneading can do the real work.
4. Knead until the dough smooths out
You can knead by hand or with a mixer. A stand mixer is faster, but hand kneading gives you more direct feedback.
If you knead by hand, expect roughly 8 to 10 minutes of steady kneading for many home recipes, though some doughs need a little more or less time. The dough should become smoother, more elastic, and less ragged. It should still feel soft and slightly tacky, not dry.
If you use a stand mixer with a dough hook, kneading often takes about 5 to 7 minutes on low to medium speed. Stop and check the dough rather than relying only on the clock. It should pull away from the sides of the bowl, gather around the hook, and feel stretchy when you pinch or tug a small piece.
Scientifically Sweet describes a useful visual target: continue mixing until the dough is smooth, pulls away from the sides, and stops “webbing” around the bottom of the bowl. That’s a helpful sign that the gluten has developed enough to hold shape.
5. Rest the dough for the first rise
Place the dough in a lightly greased bowl, cover it, and let it rise until visibly expanded and airy. In many home kitchens, that means the dough should roughly double in size, or at least expand by about 50 to 100 percent. The clock matters less than the look and feel. A cool kitchen can slow things down; a warm kitchen can speed them up.
How to Tell When the Dough Is Kneaded Enough
This is one of the most valuable skills in bread work. Cinnamon roll dough should not feel stiff like pasta dough, and it should not feel soupy or torn apart when stretched. It should be soft, smooth, and slightly tacky.
Here are the cues I trust:
- The dough looks more uniform and less ragged
- It pulls away from the bowl or counter more cleanly
- It feels elastic when you press and stretch it
- It can stretch thin without tearing immediately
That last cue is the windowpane test. Take a small piece of dough and stretch it gently between your fingers. If it stretches into a thin sheet before tearing, gluten development is on the right track. If it tears quickly, knead a little longer and rest it briefly before testing again.
Be careful not to chase a perfectly dry dough. For cinnamon rolls, a slightly tacky dough is often better than a firm one. Once you add too much flour, the finished rolls can turn bready instead of soft.
First Rise: What Proofed Dough Should Look and Feel Like
Proofing is about fermentation and volume, not just waiting. During the first rise, the yeast produces gas and the dough becomes lighter and more extensible. You’ll know it’s ready when it has clearly expanded, feels airy, and springs back slowly when gently pressed.
A practical target is for the dough to increase by about 50 to 100 percent in volume, often close to doubling. It should look puffy and feel softer than when you first mixed it, but it should still hold together when handled.
If the dough is underproofed, it will feel tight and resist rolling. If it is overproofed, it may look fragile, overly puffy, or collapse when handled. A good first rise gives you a dough that is easier to roll out without tearing.
This is where room temperature versus refrigeration becomes a real scheduling decision. Room-temperature proofing is faster. Refrigerated proofing is slower, but it can make the dough easier to handle later. If your dough is very soft or your kitchen is warm, chilling can be a useful tool rather than a problem.
Rolling, Filling, and Shaping Without Tearing
Once the dough has risen, press it down gently to release excess gas. Then roll it into an even rectangle. Sally’s Baking Addiction recommends a 14×8-inch rectangle for one cinnamon roll dough method, which is a practical size for a manageable sheet of dough.
The key here is even thickness. If one side is much thinner than the other, the rolls bake unevenly and the spirals won’t look as clean. Use light pressure and keep the dough moving so it doesn’t stick.
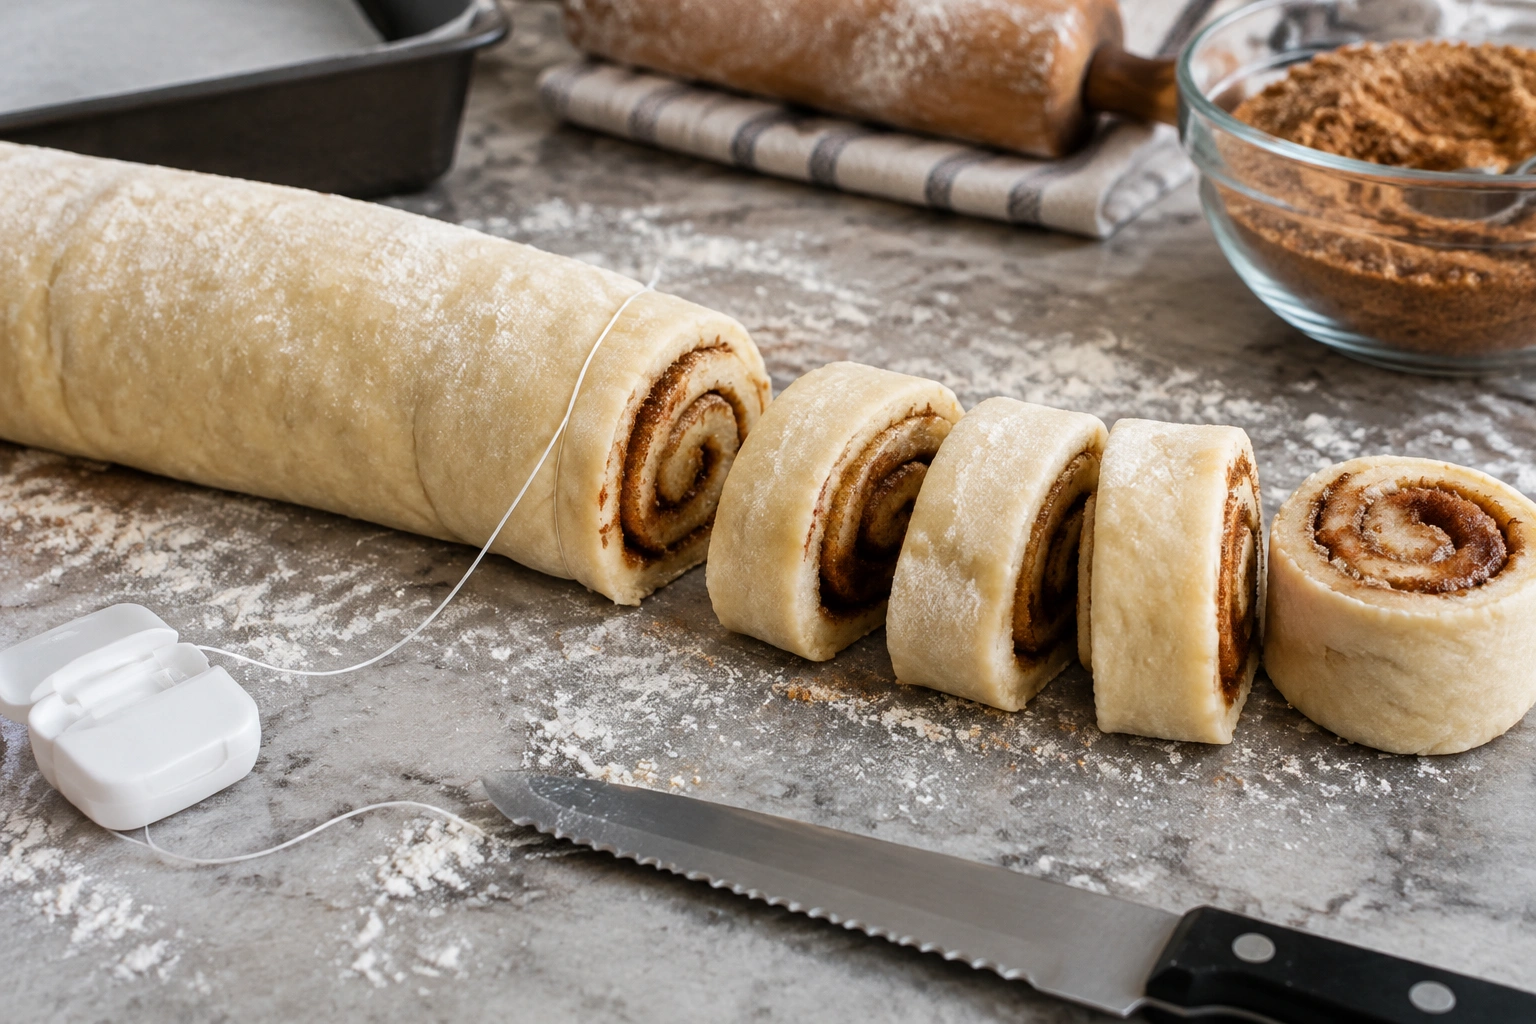
When you add filling, leave a small clean edge on one side so the log seals properly. Then roll the dough from the long side or wide end, depending on the shape you’re aiming for. Anne of All Trades recommends rolling from the wide end and cutting about 2-inch pieces, which is a useful benchmark for evenly sized rolls.
For cutting, a serrated knife or dental floss works well. Ambitious Kitchen specifically recommends either one. Floss is especially helpful if you want clean slices without compressing the log. If you use a knife, saw gently instead of pressing straight down.
Second Rise and When the Rolls Are Ready to Bake
After slicing, place the rolls in the pan with enough space to expand. Anne of All Trades notes that spacing matters so the rolls can double in size during the second rise. If you like a softer, more pull-apart finish, place them slightly closer together. If you want a little more definition around each spiral, leave a bit more room.
For the second proof, look for a noticeable increase in puffiness and a clear expansion in the pan, usually close to doubling from the shaped size. The rolls should look fuller and should fill in some of the gaps between them, but they should not look cramped or collapsed.
The second rise is done when the rolls look puffy and have filled in some of the gaps in the pan. They should not look dense or tight. If you poke one lightly, the dough should feel airy and spring back slowly.
This step is easy to rush, especially when the kitchen smells like butter and cinnamon. But underproofed rolls often bake up with a tighter crumb and less tenderness. A little patience here pays off in the oven.
Baking Cues for Soft, Tender Rolls
The dough’s job is not finished until it bakes properly. A soft cinnamon roll should come out tender, not dry around the edges. Because enriched dough contains sugar and fat, it can brown faster than lean bread. That means visual cues matter as much as time.
Look for rolls that are set in the center, lightly golden on top, and puffed. If the tops are browning too quickly, adjust the pan position or tent lightly if your recipe allows it. The goal is to bake until the dough is done through without pushing it into dryness.
Pan choice matters too. A pan that fits the rolls snugly helps them rise upward instead of spreading too much. Ambitious Kitchen recommends a 9×9-inch pan for a batch that fits well and bakes properly, while other recipes use larger pans when making more rolls. The right pan is the one that gives your batch enough room without leaving the rolls too far apart.
Common Cinnamon Roll Dough Problems and How to Fix Them
Dough is too sticky
A sticky dough is not automatically a bad dough. Enriched dough often starts out tacky. If it is impossible to handle, add flour sparingly during kneading, a little at a time. The mistake to avoid is dumping in flour until the dough feels dry. That usually fixes the stickiness but creates a tougher roll.
Dough is too dry
Dry dough usually comes from too much flour or not enough liquid. It may crack when rolled and resist stretching. If you catch it early, knead in a small splash of milk or water. If the dough is already very stiff, it may be better to accept a slightly less ambitious shape than to keep adding flour and make the final rolls dense.
Dough is not rising
First, check the yeast. Old or inactive yeast is a common culprit. Next, check temperature. A cold kitchen slows fermentation, and an overly hot environment can damage yeast or make the dough behave erratically. If the dough is simply slow, give it more time before assuming it failed.
Dough tears while rolling
This usually means the dough is under-rested, under-kneaded, or rolled too aggressively. Let it rest for a few minutes so the gluten relaxes, then try again. If it still tears, the dough may need a bit more kneading before the next step.
Rolls bake dense
Dense rolls often come from underproofing, too much flour, or weak gluten development. The fix is usually upstream: better kneading, a proper first rise, and a full second rise before baking.
Make-Ahead, Overnight, and Freezer Options
Cinnamon roll dough is friendly to planning ahead, which is one reason it works so well for brunch or holiday mornings.
Same-day refrigeration
If you want to pause the process for a few hours, refrigerate the dough after the first rise or refrigerate the shaped rolls before the second rise. This is useful when you need a flexible schedule but still want to bake the same day. Keep the dough covered so it does not dry out, then let it warm slightly before continuing if it feels too firm to roll or shape.
Overnight refrigeration
For an overnight workflow, the most common approach is to shape the rolls, place them in the pan, cover tightly, and refrigerate them before the final rise. In the morning, let them sit at room temperature until they look puffy and ready to bake. This is the best option if you want fresh-baked rolls with less morning work.
You can also refrigerate the dough after the first rise and shape it the next day, but that usually works best if the dough is already well developed and easy to handle. In either case, the key is to let the dough finish proofing after it comes out of the fridge.
Freezing shaped rolls before the final rise
If you want to freeze cinnamon rolls, freeze the shaped rolls before the final rise. Arrange them in the pan or on a tray until firm, then wrap them well for longer storage. When you are ready to bake, thaw the rolls, let them finish proofing, and bake once they look puffy and expanded.
Freezing after the final rise is less convenient because the rolls are more fragile and may lose some of their structure during thawing. For the most reliable result, freeze before that last proof.
Practical Examples: What Success and Failure Look Like
Imagine two bakers making the same dough.
The first baker adds flour until the dough stops sticking to the bowl completely. It rolls out without resistance, but the finished rolls bake up a little firm and dry. That baker solved the handling problem but created a texture problem.
The second baker keeps the dough slightly tacky, kneads until it smooths out, and uses only a light dusting of flour while rolling. The dough is easier to shape after a short rest, the spirals hold, and the baked rolls stay softer.
Or picture a dough that rises slowly in a cool kitchen. A beginner might think it failed and add more yeast next time. A better response is simply to give it more time and judge by volume, not the clock.
That’s the heart of cinnamon roll dough: read the dough, not just the recipe. When it feels supple, rises visibly, rolls without tearing, and proofs into a puffy pan of spirals, you’re on the right track.
When to Consult a Master Baker
If your dough keeps failing in the same way despite careful measuring, or if you’re adapting a formula for a bakery setting with different flour, mixer, or room conditions, it can help to get an experienced baker’s eyes on the process. Repeated problems with gluten development, proofing behavior, or scaling often have a fix that’s easier to spot in person than from a recipe alone.
For most home bakers, though, the path to better cinnamon rolls is straightforward: choose the flour and yeast that fit your goals, keep the dough soft but manageable, and let proofing guide you more than the clock.
FAQ
Can I refrigerate cinnamon roll dough before shaping?
Yes. After the first rise, you can chill the dough, then bring it back to a workable temperature before rolling and shaping. This is helpful if you want to split the process across two days.
Can I refrigerate shaped cinnamon rolls before baking?
Yes. Shaped rolls can be refrigerated before the final rise. Let them warm up and finish proofing until they look puffy and expanded before baking.
Should I freeze cinnamon rolls before or after the second rise?
For the most reliable make-ahead workflow, freeze shaped rolls before the final rise. Thaw them later, let them proof, and bake when they look airy and ready.
How do I know cinnamon roll dough is kneaded enough?
It should look smooth, feel elastic, and pull away from the bowl or counter more cleanly. A small piece should stretch thin without tearing right away.
What is the best flour for soft cinnamon rolls?
All-purpose flour is usually the best choice for a softer, more tender roll. Bread flour adds more structure and chew, which can be useful if you want a firmer spiral.
What yeast is best for cinnamon rolls?
Instant yeast is convenient and easy for many home bakers. Active dry yeast also works well, especially if you prefer a more traditional two-rise process.
How much should cinnamon roll dough rise?
For the first rise, aim for about a doubling in size, or at least a 50 to 100 percent increase. For the second rise, look for rolls that are visibly puffy and close to doubled from their shaped size.
How long should I knead cinnamon roll dough?
By hand, many doughs need about 8 to 10 minutes. With a stand mixer, about 5 to 7 minutes is a common range, but the best test is the dough’s feel and appearance.