
High Altitude Bread Baking: How to Adapt Recipes for Better Rise, Crust, and Crumb

If you’ve ever pulled a loaf from the oven at elevation and wondered why it spread, dried out, or collapsed just a little in the middle, you’re not alone. High-altitude bread baking asks you to think more like a dough detective than a recipe follower.
The good news: you do not need to reinvent every bread formula. You just need to understand what altitude changes, then adjust the recipe and process in a smart order. Once you know what to tweak first, your bread gets much more predictable.
Why High Altitude Changes Bread Baking
At higher elevations, air pressure is lower. That matters because dough gases expand more easily, so yeast dough can rise faster than it would at sea level. That sounds helpful until the loaf overproofs before the gluten network is ready to hold it. Then you get weak structure, uneven oven spring, and sometimes a loaf that rises beautifully in the bowl and then settles in the oven.
Altitude also affects moisture. Water evaporates more quickly, and the boiling point drops as elevation climbs. The University of Wyoming Extension gives 7,500 feet as an example where water boils at about 198°F instead of 212°F. That lower boiling point can subtly change how bread sets in the oven, especially if the loaf already expanded too fast before baking. University of Wyoming Extension
That’s why altitude problems often show up as a cluster: fast fermentation, dry dough, overexpanded proofing, and a crust that browns before the center has fully set. The fix is usually not one giant change. It is a few smaller ones working together.
Before You Start: Tools, Ingredients, and What to Measure
Before changing a recipe, gather the basics that help you judge dough accurately:
- A kitchen scale
- A thermometer for dough and oven checks
- A clear bowl or container for tracking rise
- A bench scraper for handling sticky dough
- Your exact elevation
- The recipe’s flour type, hydration, yeast amount, and sugar level
A scale matters more than ever at altitude because small errors get magnified when fermentation moves faster. If you’re still measuring flour by cups, the dough can swing from too dry to too wet before you even start adjusting. If you want consistency, weighing ingredients is the cleaner path. Kitchen scale vs measuring cups for baking
Also note your kitchen conditions. Dry air, a warm room, and a strong oven all push dough in different directions. Two bakers at the same elevation may need different adjustments because one has a cool, humid kitchen and the other is baking in a dry, sunlit space.
High-Altitude Adjustment Framework by Elevation Range
There is no single magic conversion, but elevation bands give you a sensible starting point.
| Elevation band | Yeast | Liquid | Proofing time | Oven temperature |
|---|---|---|---|---|
| 3,500–6,500 ft | Reduce yeast by about 10% to 20% | Add 1 to 2 tablespoons per cup of liquid if dough feels tight | Expect proofing to run about 10% to 25% faster than the recipe says | Keep the original temp first; if loaves spread, raise by 10°F to 15°F next time |
| 6,500–8,500 ft | Reduce yeast by about 20% to 30% | Add 1 to 3 tablespoons per cup as needed | Expect proofing to run about 20% to 40% faster | If the crust sets too slowly, try a 15°F to 25°F increase or a stronger initial bake |
| 8,500–10,000 ft | Reduce yeast by about 25% to 35% | Add 2 to 4 tablespoons per cup if the dough is stiff | Expect proofing to run about 30% to 50% faster | Start with a 15°F to 25°F increase only if the loaf is pale or spreading |
Colorado State University Extension gives elevation-based yeast-bread guidance that includes increasing liquid and reducing sugar at higher elevations, which is a useful reminder that ingredient balance matters as much as timing. Their guide also shows that adjustments scale with elevation rather than staying fixed. CSU Extension high-elevation food guide
Use the table as a starting point, not a commandment. A lean artisan loaf and a sweet sandwich dough will not need the same correction.
How to Adjust Bread Recipes at High Altitude
Here’s the order I recommend when adapting a recipe.
Quick adjustment checklist: what to change first
If you want a simple order of operations, use this:
- Yeast: reduce it first, usually by 10% to 30% depending on elevation and dough type.
- Liquid: add only enough to fix a dough that feels tight, dry, or tears easily; start with 1 to 2 tablespoons per cup of liquid and increase only if needed.
- Proofing: shorten bulk and final proof, often by 10% to 40% depending on elevation.
- Oven temperature: keep it unchanged for the first test bake unless the loaf spreads or browns too slowly; then adjust by 10°F to 25°F.
If you only make one change on the first attempt, reduce yeast first. If the dough already feels dry or stiff, liquid may be the better first adjustment.
Yeast reduction versus proofing time: which lever to use first
These are related, but they are not the same fix.
- Reduce yeast first when the dough is fermenting too fast from the start, especially if the recipe uses a lot of yeast for a short-rise dough.
- Shorten proofing time first when the dough tastes fine but simply reaches readiness too quickly in your kitchen.
- Do both when the loaf is collapsing, spreading, or overproofing before it reaches the oven.
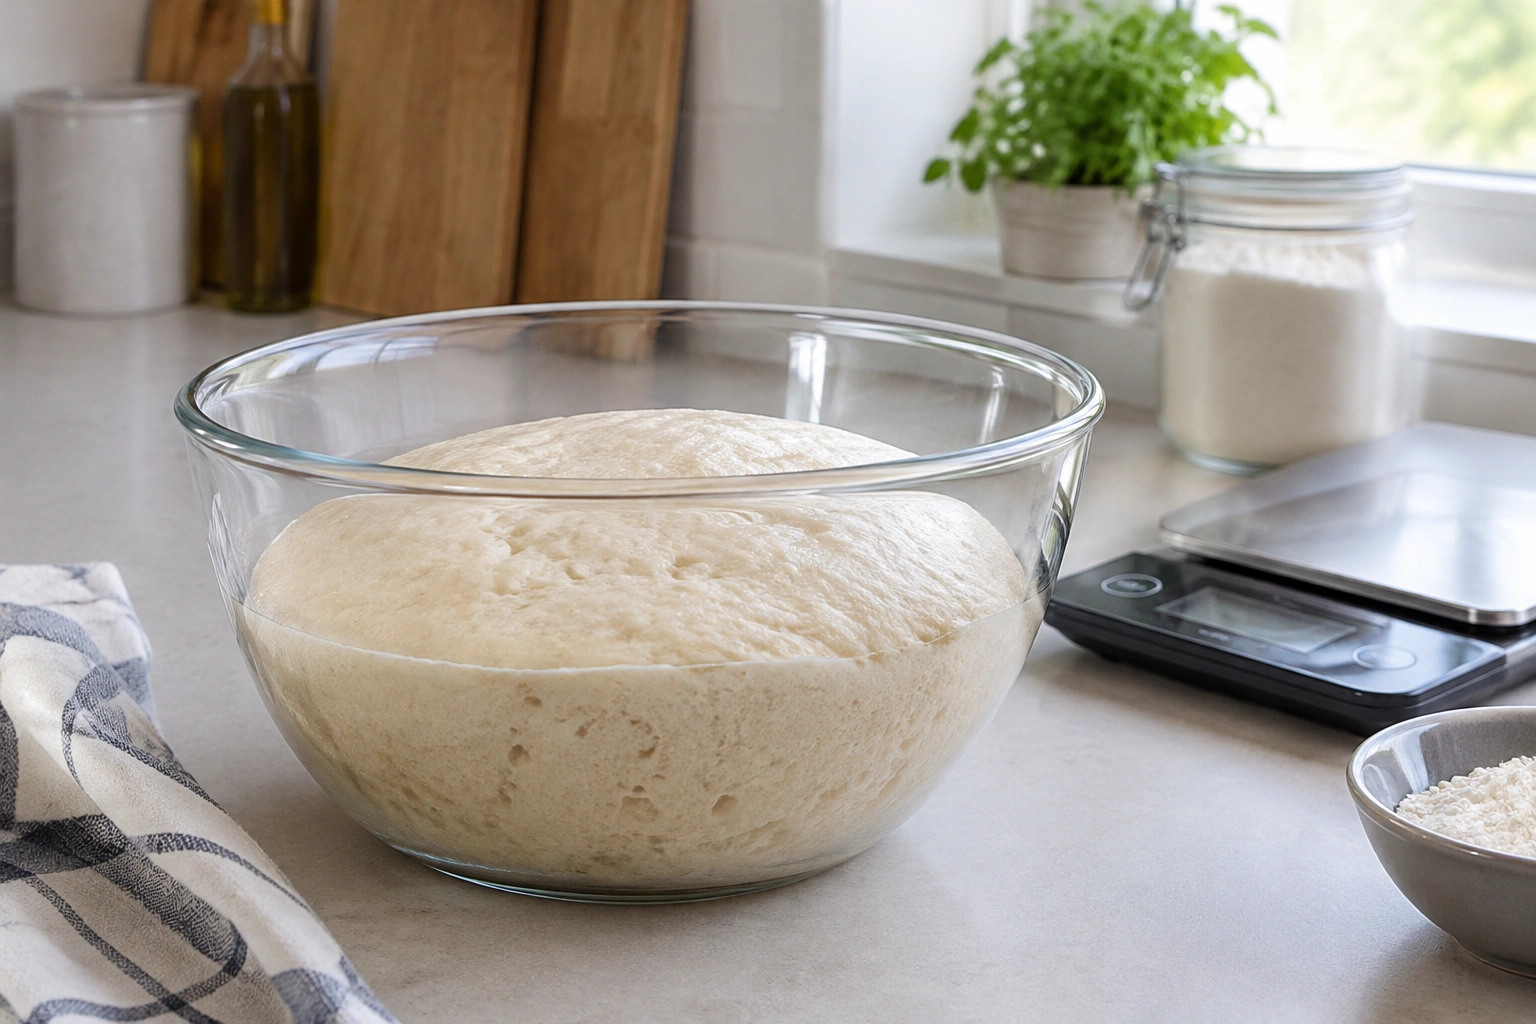
A practical first pass is often a 25% yeast reduction plus closer observation of proofing. If the dough still races, shorten the proof window on the next bake.
1) Reduce yeast if the dough is racing
King Arthur Baking recommends decreasing yeast by 25% for high-altitude yeast breads to slow proofing. That’s a strong, practical starting point because faster rise is one of the main altitude effects. King Arthur Baking high-altitude guide
If a recipe uses 2 teaspoons of yeast, a 25% reduction brings it to 1 1/2 teaspoons. If it uses 1 tablespoon, start at 2 1/4 teaspoons. Those are concrete first-pass changes that can buy you enough time for flavor development and better dough strength.
Trade-off: less yeast slows the schedule, which is usually good at altitude. But if your kitchen is cool, reducing yeast too aggressively can make the dough sluggish. That’s why I prefer a moderate reduction first, then adjusting proofing time and dough temperature if needed.
2) Add liquid if the dough feels tight or dry
The Exploratorium recommends adding 1 to 2 tablespoons extra liquid per cup of liquid, and up to 4 tablespoons for elevations above 4,921 feet as needed. That is a helpful range, not a rule for every formula. Exploratorium science of cooking
A practical starting point:
– 3,500–6,500 ft: add 1 tablespoon per cup of liquid if needed
– 6,500–8,500 ft: add 1 to 2 tablespoons per cup if the dough feels tight
– 8,500 ft and above: add 2 to 4 tablespoons per cup only if the dough is stiff, tears, or resists shaping
Don’t add liquid just because you live at altitude. Add it when the dough tells you it needs it. If the dough tears during kneading, feels stiff after resting, or refuses to relax, it may need more hydration. If it already feels slack and sticky, adding water will likely make shaping harder.
3) Be careful with flour increases
Some high-altitude guides suggest increasing flour, but this is the adjustment I’d treat with the most caution. More flour can help a weak dough hold shape, yet too much flour creates a dry crumb and reduced oven spring.
If you need structure, I would usually improve the dough’s strength through better mixing, folds, or a slightly stronger flour before simply adding more flour by the handful.
4) Reduce sugar in sweet doughs if they overbrown or collapse
Sugar can speed browning and soften structure. CSU Extension includes sugar reductions in its high-elevation guidance for yeast breads, especially at higher elevations. That matters most in enriched doughs and sweeter sandwich loaves.
If your loaf browns too fast before the center sets, a small sugar reduction can help. If the bread is already only lightly sweet, don’t cut sugar just to follow a rule. Sugar also supports tenderness and flavor.
5) Salt usually stays steady
Salt is not the first lever I’d pull. It strengthens gluten and helps regulate fermentation. If you reduce it too much, the dough can become even more unruly. In most cases, keep salt where the formula intended unless the recipe is unusually salty or you are making a broader formula adjustment.
Step-by-Step: Mix, Knead, and Ferment the Dough
Step 1: Mix until the dough is cohesive, not perfect
At altitude, the dough benefits from enough strength to hold gas, but not so much mixing that it becomes tight and overworked. Mix until the ingredients are evenly combined and the dough starts to look smoother.
Step 2: Rest before judging hydration
A 15 to 20 minute rest can reveal whether the dough is actually too dry or just not fully hydrated yet. Flour needs time to absorb water. This is especially useful if your kitchen is dry.
Step 3: Knead to moderate development
You want the dough to pass from shaggy to elastic, but not turn stiff. A dough that feels too firm early on may need rest more than more kneading. If you keep pounding in flour, you may end up with a dense loaf that never opens up.
Step 4: Watch the dough, not the clock
Because fermentation moves faster at elevation, bulk fermentation can end sooner than the recipe says. King Arthur Baking notes that rising times are often shorter at higher elevations, and the bowl should have plenty of room for expansion. King Arthur Baking high-altitude guide
A good high-altitude bulk rise is usually about dough readiness, not a fixed number of minutes. That said, timing still helps as a starting point. If a recipe says 60 to 90 minutes at sea level, you may need to check it at 45 to 60 minutes at moderate altitude and sooner at higher elevations. Look for a dough that has expanded, feels aerated, and shows bubbles along the sides or surface. If it doubles too quickly and starts to lose tension, move on sooner.
Proofing and Shaping: How to Avoid Overproofing or Collapse
One of the best high-altitude habits is to shape slightly earlier than you would at sea level. A dough that is fully doubled in the bowl may already be close to overproofed by the time it reaches the oven.
The Exploratorium advises letting yeast dough rise only until doubled in bulk and then allowing the dough to rise twice before shaping. That wording is easy to misread. A clearer takeaway is this: use rise volume as a guide, but at altitude do not wait for dough to become fragile or overly puffy before shaping. Exploratorium science of cooking
Signs your dough is ready to shape
- It has grown noticeably but still feels elastic
- A gentle poke springs back slowly
- The surface looks smooth, not fragile or wrinkled
- The dough jiggles slightly but does not look collapsed
- For shaped loaves, the dough holds its form instead of slumping immediately
Signs it has gone too far
- It looks puffy but weak
- It deflates easily when handled
- It spreads instead of standing tall
- The surface wrinkles or tears during shaping
- A shaped loaf loses height quickly on the bench
If you’re unsure, shape a little earlier. You can always give the shaped loaf a bit more time, but you cannot easily recover a dough that has lost structure.
Baking Adjustments: Oven Temperature, Time, and Steam
At altitude, the bake needs to set the loaf before the dough overexpands. That often means a hotter oven or a stronger initial bake, but the best choice depends on the loaf style and formula.
A practical starting point is to keep the original oven temperature for the first test bake unless the loaf is spreading or browning too slowly. If the loaf opens too much before setting, raise the temperature by 10°F to 25°F on the next bake or make the initial blast of heat more assertive. The trade-off is that the exterior can brown too fast. If that happens, tent the loaf with foil during the last part of baking rather than lowering the oven so much that the crumb stays underbaked.
Steam can help in the opening stage of baking, especially for lean loaves. It keeps the crust flexible while the loaf gets its final oven spring. For a hearth loaf baked on a preheated stone, steam and strong bottom heat work together to support rise and crust. How to bake bread on a baking stone

Doneness cue
Don’t rely only on color. Check the internal temperature if you can, and use the recipe’s target as a guide. Some bakers at altitude prefer to pull loaves slightly earlier than they would at sea level if the crumb is already set and the crust is deep enough, but the loaf still needs to be fully baked through.
Lean Doughs vs. Enriched Doughs at High Altitude
Lean doughs
Lean doughs, like country loaves and baguette-style breads, usually show altitude effects quickly because they rely heavily on fermentation and gluten structure. These doughs tend to benefit most from:
– A 20% to 30% yeast reduction at moderate to higher altitude
– Shorter bulk and final proof
– A hotter, well-preheated oven
– Steam at the start of baking
Their advantage is that they often tolerate process changes well. Their challenge is that they can overproof fast.
Enriched doughs
Enriched doughs, like milk bread, brioche, and soft sandwich loaves, are more delicate because fat, sugar, and dairy soften gluten. At altitude, they often need different adjustments than lean doughs:
– Keep yeast reduction moderate so the dough does not stall; 10% to 25% is often a better first pass than a large cut
– Add liquid only if the dough feels tight, because enriched doughs can already be soft
– Watch browning closely and lower sugar only if the crust is setting too fast
– Shape with more tension, because the softer structure can spread
These doughs can dry out or brown too quickly, so the oven needs watching. They are also more likely to collapse if overproofed because the structure is already softer.
Common Mistakes and What They Look Like
Dense crumb
Usually means the dough was underproofed, overworked, or too dry. If the loaf feels heavy and tight, check hydration first, then fermentation.
Dry loaf
Often caused by too much flour, too long a bake, or not enough liquid. Altitude can make this worse because moisture escapes more easily.
Spread-out loaf
Usually a sign of weak gluten, overproofing, or shaping that didn’t build enough tension.
Overbrowned crust
Often caused by too much sugar, too high oven heat, or baking too long without protection.
Gummy center
Usually means the loaf was removed before the crumb fully set, even if the crust looked done.
Collapse after baking
This is the classic overproofing problem: the dough rose too far before the oven had a chance to stabilize it.
Troubleshooting Decision Tree
If you want a fast fix, start with the symptom you see most clearly.
- Overproofing or collapse: shorten proofing time by 10% to 25% and shape earlier next time.
- Spreading loaf: increase shaping tension and, if needed, reduce hydration by 1 tablespoon per cup.
- Dry crumb or dry crust: add 1 tablespoon per cup of liquid on the next bake.
- Dense crumb: let the dough proof longer before baking, unless it was already overproofed.
- Overbrowning: lower oven temperature by 10°F to 15°F or shield the loaf with foil.
One symptom, one first fix. That keeps troubleshooting simple and repeatable.
Practical Examples: Adapting Common Bread Recipes
Basic sandwich loaf
For a standard sandwich loaf at around 5,000 feet, start with a 20% to 25% yeast reduction, add 1 tablespoon of liquid per cup if the dough feels stiff, and shorten the final proof so the dough reaches the pan rim rather than towering far above it. If the recipe uses 2 teaspoons of yeast, start at 1 1/2 teaspoons. If the dough usually proofs for 75 minutes at sea level, begin checking at 50 to 60 minutes. Keep the oven temperature the same on the first test bake, then raise it by 10°F next time only if the loaf spreads.
Artisan hearth loaf
For a lean boule or batard, focus on dough strength and timing. A 25% yeast reduction, a slightly shorter bulk rise, and steam in the oven usually help more than major ingredient changes. If the dough feels slack, add only 1 tablespoon of liquid per cup on the next bake rather than making a big hydration jump. Shape a little earlier than usual and bake on a well-preheated stone or Dutch oven for a stronger initial set.
Enriched dough
For milk bread or brioche-style dough, keep the yeast reduction smaller at first, around 10% to 20%, because these doughs can already rise more slowly due to fat and sugar. If the dough feels tight, add 1 tablespoon of liquid per cup; if it already feels soft, do not add more just because you are at altitude. Shorten the final proof so the loaf rises visibly but does not become fragile. If the crust browns too quickly, lower the sugar slightly or tent the loaf during the last part of baking.
No-knead bread
No-knead dough behaves differently at altitude because it depends on long fermentation and a wet, slack structure. At higher elevations, that long rise can move too far before the gluten has enough strength, so no-knead bread often needs a shorter fermentation window and closer proofing control.
A practical starting adaptation:
– Reduce yeast by 25% to 33%
– Keep the dough slightly firmer by adding 1 tablespoon of liquid per cup only if the original dough is very stiff
– Shorten the room-temperature rise so the dough looks airy but not collapsed
– Check the final proof earlier than the recipe says, because no-knead dough can go from ready to overproofed quickly at altitude
– Bake in a preheated Dutch oven or covered vessel so the loaf sets before it spreads
If a no-knead loaf keeps flattening, the first fix is usually less proofing time, not more flour. The dough should still look puffy and alive, but it should not be so expanded that it slumps when moved.
How to Test and Refine Your Own Recipe
Treat each bake as a small experiment.
- Write down your elevation.
- Record the original formula by weight.
- Change only one or two variables at a time.
- Note bulk rise time, proofing time, oven temp, and final texture.
- Compare the loaf after cooling, not just when it comes out of the oven.
If you change yeast, liquid, and oven temperature all at once, you won’t know which adjustment helped. A better approach is to make one clear change, then observe the result over two or three bakes.
A simple reusable formula is:
Start with less yeast, then add liquid only if needed, then shorten proofing, then adjust oven heat last.
That is how high-altitude baking becomes repeatable. Not by guessing harder, but by learning what your dough is telling you.
FAQ
Can I use the same bread recipe at 5,000 feet without adjustments?
Usually not if you want the most reliable result. Around 5,000 feet, many recipes still work, but they often need at least one change: a 10% to 25% yeast reduction, a small liquid increase if the dough feels dry, or a shorter proof. Some formulas are forgiving enough to work with minimal changes, but “same recipe, no adjustments” is not the best default at that elevation.
Should I reduce yeast or proofing time first?
Reduce yeast first if the dough is clearly fermenting too fast. Shorten proofing time first if the dough behaves normally but reaches readiness sooner than the recipe expects. If the loaf is collapsing or spreading, do both.
How do I know when dough is fully proofed at altitude?
Look for a dough that has expanded, feels light and aerated, and still holds shape. It should spring back slowly when poked, not instantly and not remain fully indented. In a shaped loaf, it should look puffy but still strong, not fragile, wrinkled, or slumped.
Does no-knead bread need special treatment at altitude?
Yes. No-knead bread often needs less fermentation time and closer proofing checks because the long rise can overshoot quickly at elevation. A modest yeast reduction and a preheated Dutch oven usually help.
When should I raise oven temperature?
Only after you see a pattern. If the loaf spreads before setting or bakes too slowly, a 10°F to 25°F increase can help on the next test bake. If the crust is already browning too fast, keep the temperature where it is and use foil or a shorter bake instead.
When to Consult a Master Baker
If your bread keeps failing even after careful adjustments, the issue may be the formula itself rather than altitude alone. Very lean doughs, very wet doughs, and highly enriched breads can all need deeper recipe redesign at elevation. That is when a master baker’s eye is useful: not to replace your judgment, but to help you see whether the problem is hydration, fermentation, shaping, or oven management.
With a few smart changes, high-altitude bread baking becomes much less mysterious. Once you learn to read the dough, elevation stops feeling like an obstacle and starts acting like one more variable you can manage.