
How to Bake Bread on a Baking Stone for a Crisp, Well-Risen Loaf

If you want bread with a lively rise and a crust that actually crackles, a baking stone is one of the simplest upgrades you can make in a home oven. It gives the loaf a blast of bottom heat right at the start of baking, which helps drive oven spring before the crust sets. In plain terms: the dough gets a better chance to expand, and the crust develops with more character.
I like to think of a baking stone as a bridge between a standard home oven and the floor of an artisan oven. You are not just “putting bread in the oven.” You are managing heat transfer, timing, and moisture so the loaf can do its best work in those first crucial minutes.
What a Baking Stone Does for Bread
A baking stone stores heat and releases it steadily when the dough lands on it. That matters because bread needs strong heat from below early in the bake. The bottom heat helps the loaf rise quickly before the exterior firms up, which is part of what bakers call oven spring.
In practice, the method is simple: preheat the stone fully, shape the dough well, transfer it carefully, and give the loaf enough initial heat to expand before the crust sets. That usually leads to better lift, better bottom browning, and a more artisan-style crust.
That does not mean a stone fixes every bread problem. If the dough is overproofed, underdeveloped, or too wet to handle well, the stone cannot rescue it. But when the dough is ready, the stone gives it a better baking environment than a thin sheet pan.
Best Bread Types for a Baking Stone
A baking stone shines with lean, crusty breads:
- sourdough boules
- country loaves
- baguettes
- batards
- ciabatta-style doughs
- freeform artisan loaves
These breads benefit most from strong heat and steam in the early bake. Their doughs usually have enough structure to hold shape, but not so much fat or sugar that the crust browns too quickly.
Enriched doughs can still be baked on a stone, but they often need more attention. Sandwich loaves, brioche-style doughs, and soft dinner rolls may brown faster because of butter, milk, or sugar. For those, a stone can still help with bottom heat, but you may need to lower the oven temperature a little or shield the top if it colors too fast.
A simple decision rule:
- Choose a stone for freeform artisan loaves and crusty breads.
- Choose another method if your dough is very soft, heavily enriched, or baked in a pan where even top-and-bottom heat matters more than bottom heat alone.
Baking Stone, Pizza Stone, Sheet Pan, or Dutch Oven?
Here is the practical comparison most home bakers need.
| Baking surface | Best for | Main advantage | Main trade-off | Typical setup |
|---|---|---|---|---|
| Baking stone | Artisan loaves, baguettes, boules | Strong bottom heat and good oven spring | Needs preheating and careful loading | Preheat in oven; use peel or parchment |
| Pizza stone | Bread and pizza | Often works just like a baking stone if oven-safe and large enough | Quality varies by thickness and material | Same as a baking stone |
| Baking sheet | Quick, easy baking | Convenient and familiar | Less bottom heat; usually less oven spring | Minimal setup; no special preheat |
| Dutch oven | Boules and bâtards | Traps steam very effectively | Limited shape/size flexibility; usually one loaf at a time | Preheat pot, bake covered then uncovered |
Can I use a pizza stone instead of a baking stone? Usually yes, as long as it is oven-safe, large enough for the loaf, and thick enough to hold heat without warping or cooling too quickly. The main practical differences are material and thickness: some pizza stones are thinner and may lose heat faster, while sturdier baking stones are often made to handle repeated bread baking. If the stone fits your oven and can store enough heat for your loaf, it will usually work well.
A Dutch oven is often easier for beginners because it creates its own steam environment. A stone is more flexible if you want to bake multiple loaves, different shapes, or a loaf that is too large or awkward for a pot.
If you want a deeper comparison with a no-Dutch-oven approach, this guide pairs well with our internal article on how to bake bread without a Dutch oven.
Tools and Materials You’ll Need
You do not need a long list, but a few tools make the process smoother:

- baking stone or pizza stone
- oven mitts
- baking peel or a rimless sheet pan
- parchment paper
- a little flour, semolina, or cornmeal for dusting
- a razor or lame for scoring
- a spray bottle or steam setup, if your recipe benefits from steam
- a rack for cooling
Parchment is the easiest transfer aid for beginners. A peel gives you more control once your hands are comfortable with the motion. Cornmeal or semolina can help prevent sticking, but use a light hand; too much can create a gritty base or scorch on the stone.
How to Set Up and Preheat the Stone
Placement matters. For most conventional home ovens, set the stone on the middle or lower-middle rack. That position usually balances bottom heat with enough space above for the loaf to brown without burning on the bottom too quickly. If your oven runs hot from below or has a very strong lower element, move the stone slightly higher so the base does not overbrown. If your loaves come out pale on the bottom, move it lower.
If you use convection, remember that the fan can brown the crust faster and may make the oven feel hotter than the set temperature. In that case, many bakers place the stone in the middle rack area and watch the loaf more closely, lowering the temperature if needed.
Preheat the oven with the stone inside. Do not slide the dough onto a stone that has only warmed for a few minutes. A fully preheated stone is what gives you that initial burst of bottom heat.
A practical preheat framework:
- Thin stone or small loaf: about 45 minutes may be enough in some ovens
- Standard stone and artisan loaf: about 60 minutes is a safer target
- Thicker stone or very full oven: give it extra time
Prepare and Shape the Dough for Stone Baking
Stone baking rewards dough that is well shaped and properly proofed. If the dough is too slack, it may spread before it sets. If it is overproofed, it may collapse or bake up flat.
Look for these signs before loading:
- the loaf holds its shape when moved
- the surface looks slightly airy, not dense and tight
- a gentle finger press springs back slowly, not instantly and not not at all
For freeform loaves, shape with enough tension to create a smooth outer skin. That outer tension helps the loaf stand tall on the stone and improves the chance of a clean score opening.
If you are baking a wetter dough, parchment becomes more useful. High-hydration doughs can be wonderful on a stone, but they are less forgiving during transfer.
How to Transfer Dough Safely onto the Hot Stone
You have two good beginner-friendly choices: parchment or a peel.
Option 1: Parchment-assisted transfer
This is the easiest route.
- Shape the loaf on parchment paper.
- Let it proof on the parchment so you can move it easily.
- Slide the parchment and loaf together onto the hot stone.
- Bake until the loaf has set, then remove the parchment if it is still underneath and the recipe calls for it.
This method is forgiving, especially for soft doughs. The trade-off is that parchment can slightly reduce direct contact with the stone, so the bottom crust may be a touch less crisp than with a direct peel transfer.
Option 2: Peel transfer
This is the more traditional artisan method.
- Dust the peel lightly with flour, semolina, or a mix.
- Place the proofed loaf on the peel.
- Score the loaf quickly and confidently.
- Open the oven, aim the peel at the stone, and use one smooth forward-back motion to release the dough.
The peel method gives a cleaner bottom crust and feels more precise once you get used to it. The risk is user error: if the loaf sticks to the peel, it can deform or tear during the launch.
A useful compromise for many home bakers is to proof the loaf on parchment, then slide the parchment onto the peel for the transfer. That gives you a safety net without giving up the peel entirely.
Step-by-Step: Bake Bread on a Baking Stone
Here is the full process in a simple sequence.
-
Preheat the oven with the stone inside.
Give the stone enough time to fully heat through. -
Prepare your loaf for baking.
Shape it well, proof it properly, and score the top just before loading. -
Set up your transfer method.
Use parchment for ease or a peel for a more direct bake. -
Create steam if your bread benefits from it.
More on that below, but have your steam setup ready before the loaf goes in.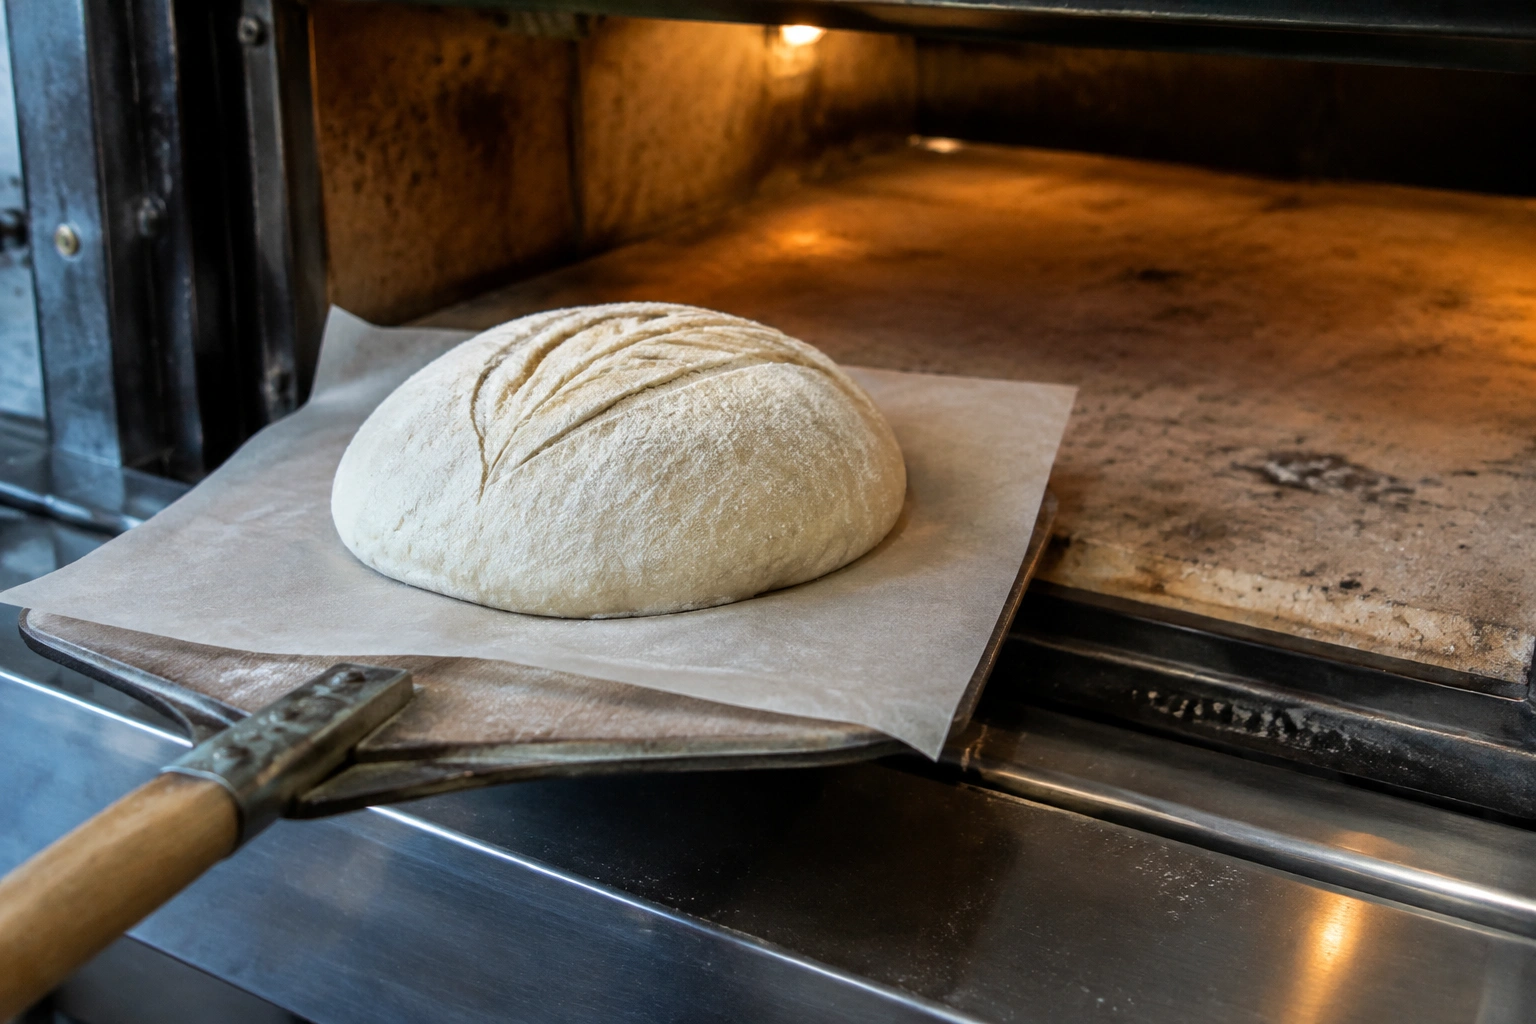
Parchment makes the transfer much easier -
Load the loaf onto the stone.
Move decisively. Hesitation is what causes awkward sticking or misshapen loaves. -
Bake with the oven door closed as much as possible.
Early heat retention matters. Open the door only when you need to. -
Remove steam after the initial phase, if used.
Steam is most useful early in the bake, not throughout the whole process. -
Finish baking until the crust is well colored and the loaf is done.
Use visual cues and internal temperature, not the clock alone. -
Cool on a rack.
This is where the crumb finishes setting.
Should You Use Steam?
For many lean breads, yes. Steam keeps the crust flexible early in the bake, which helps the loaf expand before the surface hardens. That usually means better oven spring and a glossier, thinner crust.
You do not need a complicated steam system. A few home-oven methods work:
- preheated cast iron pan with boiling water added at loading
- a tray of hot water placed below the stone
- a few quick sprays inside the oven at the beginning of the bake
That last option is common, but use caution. Spraying directly toward hot oven surfaces can create a burst of steam and can be uncomfortable if you are too close. If you use it, do it quickly and keep your face and hands clear.
A practical rule: steam matters most for crusty lean breads. It is usually less important for enriched breads, which already brown and soften differently because of fat, sugar, or dairy.
Temperature, Timing, and Doneness Cues
The right temperature depends on the dough style, but the stone method often pairs well with a hot start. King Arthur Baking recommends 450°F for sourdough baked on a stone. That is a useful baseline for many artisan loaves.
For lean loaves, a hot oven gives the best start. For enriched breads, you may need to reduce heat a little if the crust is browning too quickly before the center is done.
A quick timing guide for common loaf sizes and styles:
- Baguettes: about 18 to 25 minutes
- Small rolls or dinner rolls: about 12 to 18 minutes
- Small boules or batards: about 25 to 35 minutes
- Standard artisan loaves: about 35 to 45 minutes
- Large or very wet loaves: about 45 to 55 minutes
These are only approximate ranges. Internal temperature and crust color still determine doneness.
Use these doneness cues:
- deep golden to brown crust
- loaf feels lighter when lifted
- bottom sounds hollow when tapped
- internal temperature matches the target for the bread style
If you want a more detailed temperature reference for different bread types, our internal guide on what temperature to bake bread is a helpful companion piece.
One caution: a dark crust is not always a fully baked loaf. A bread can look done on the outside and still be underbaked in the center, especially with larger or wetter doughs.
Common Mistakes to Avoid
The most common errors are surprisingly simple.
-
Not preheating long enough
The stone needs time to store heat, not just warm up. -
Loading the loaf too roughly
A rough transfer can deflate the dough and flatten the final loaf. -
Using too much dusting flour or cornmeal
Excess can burn or create a gritty bottom. -
Skipping steam for a bread that needs it
Without moisture early on, the crust can set too soon. -
Opening the oven repeatedly
Every peek dumps heat and can reduce oven spring. -
Baking by time alone
Ovens vary. The loaf decides when it is done.
Troubleshooting Bread on a Baking Stone
If the loaf sticks
Use parchment next time, or dust the peel more lightly and check that the dough is not overproofed and sticky beyond handling.
If the bottom burns
Move the stone higher in the oven, reduce the temperature slightly, or shorten the steam phase if your oven has a very aggressive bottom element.
If the crust is pale
The stone may not have been fully preheated, or the oven may need a little more time at the end. Some loaves simply need a longer finish to color properly.
If oven spring is weak
Look first at proofing. Underproofed dough can burst oddly; overproofed dough can spread instead of rising. Also check whether the oven and stone were fully preheated.
If the loaf spreads too much
Strengthen shaping, reduce hydration slightly for your next attempt, or proof in a support structure such as a banneton or lined bowl.
How to Cool and Store the Bread
Once the loaf leaves the oven, put it on a rack. Air should circulate underneath so the bottom crust does not soften from trapped steam. Cutting too soon can make the crumb gummy, even if the crust looks finished.
Let the bread cool completely before slicing if you want the best texture. I know that is the hardest part, but it matters. The interior is still setting as it cools.
Cleaning and Maintaining Your Baking Stone
Treat the stone like a serious baking tool, not a pan you scrub after every use.
- let it cool fully before moving it
- brush off dry debris once it is cool
- avoid soaking it in water
- do not use soap unless the manufacturer specifically allows it
- avoid thermal shock, such as putting a cold, wet stone into a hot oven
A stone that is cared for well will usually darken over time. That seasoning is normal. What you want to avoid is cracking from sudden temperature changes or damage from aggressive cleaning.
When to Consult a Master Baker
If your bread keeps failing even after you adjust preheat, steam, and transfer method, the issue may be in shaping, fermentation, or dough strength rather than the stone itself. That is when a master baker or experienced instructor can help you diagnose the whole process instead of guessing at one symptom.
A baking stone is not magic, but it is one of the most useful tools for turning good home bread into something that feels closer to an artisan loaf. Once you understand heat, timing, and transfer, the method becomes repeatable—and that is where the real confidence comes from.