
How to Make Pizza Dough at Home: A Clear, Reliable Method for Better Crust

If you’ve ever wanted a pizza crust with real character—soft enough to stretch, strong enough to hold toppings, and flavorful enough to stand on its own—learning how to make pizza dough is the place to begin. Dough is where pizza becomes personal. A little more water changes the texture. A longer rest changes the flavor. A different flour changes the chew.
I’m Ethan Baker, and I’ve spent years watching dough teach bakers patience. The good news? You do not need a pizzeria setup to make excellent pizza dough at home. You do need a simple formula, a few judgment cues, and a willingness to let the dough tell you when it’s ready.
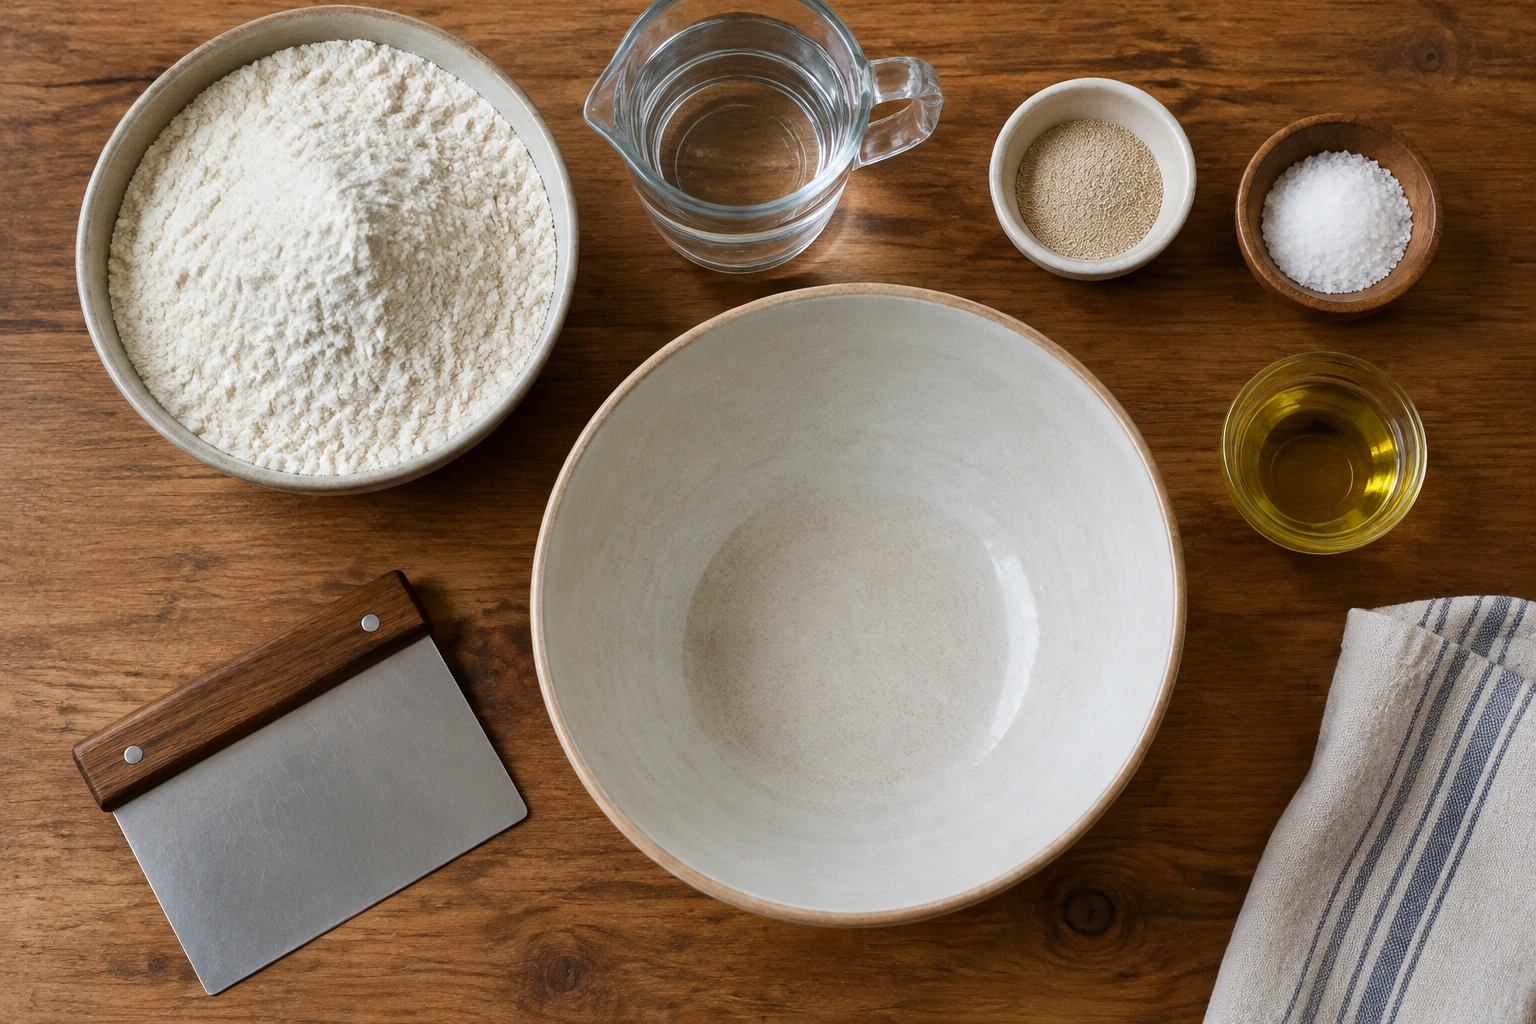
What You Need Before You Start
Gather everything first so you’re not scrambling while the dough is half-mixed.
Tools
- Large mixing bowl
- Spoon or dough whisk
- Kitchen scale if you have one
- Bench scraper or spatula
- Clean work surface
- Plastic wrap, lid, or lightly oiled container for rising
- Optional: stand mixer with dough hook
Ingredients
- Flour
- Water
- Yeast
- Salt
- Olive oil
That’s the backbone. Some formulas also include a little sugar, which can help with browning and gives yeast an easy first meal, but it is optional in many home recipes.
If you want a broader dough-sizing reference later, you may also find our guide on how to make dough rise faster without ruining the texture useful when you’re planning your timeline.
Choose the Right Dough Style for Your Pizza
Before you mix anything, decide what kind of crust you want. This choice affects flour, hydration, and fermentation time.
| Decision | Best For | Trade-Off |
|---|---|---|
| Bread flour | Chewier crust, stronger stretch | Slightly firmer bite |
| All-purpose flour | Softer, easier beginner dough | Less chew and structure |
| Instant yeast | Fast, simple mixing | Less step-by-step control |
| Active dry yeast | If that’s what you already have | Usually needs a brief activation step |
| Same-day dough | Quick dinner plans | Less flavor development |
| Overnight cold fermentation | Better flavor and easier shaping | Requires planning ahead |
| Lower hydration | Easier handling, less stickiness | Slightly denser crumb |
| Higher hydration | Lighter, airier texture | Sticky and harder to shape |
My practical rule
If you’re new, use all-purpose flour and instant yeast. That combination is forgiving. If you already know your way around dough and want more chew, bread flour is the better move.
For hydration, a moderate dough is the easiest place to start. Lower hydration doughs are simpler to handle, while higher hydration doughs can give a lighter texture but take more confidence to shape cleanly. If you’re unsure, start on the lower-to-moderate side and adjust later once you know how your flour behaves.
For fermentation, same-day dough is the fastest path to pizza night. Overnight dough gives you more flavor and usually more extensibility, which means it stretches with less resistance. That’s one reason many bakers prefer the fridge when schedule allows.
Ingredients and Exact Ratios
Here is a reliable base formula you can repeat and adjust:
- 500 g flour
- 325 g water
- 7 g instant yeast
- 10 g salt
- 15 g olive oil
Approximate cup/spoon measurements for readers who do not weigh ingredients:
– 4 cups flour, spooned and leveled
– 1 1/3 cups water
– 2 1/4 teaspoons instant yeast
– 1 3/4 teaspoons fine salt
– 1 tablespoon olive oil
That gives you a moderately hydrated dough that is soft but still manageable for home bakers. If you prefer cups, keep in mind that flour can vary depending on how it’s packed, so the gram measurements are still the most reliable.
A few ingredient notes matter:
Flour
Bread flour gives more strength and chew because it generally develops a sturdier gluten network. All-purpose flour makes a softer dough and is easier to handle. If you’re aiming for a thin, crispier home-style pizza, all-purpose flour is perfectly workable. If you want more stretch and a little more bite, bread flour has the edge.
Water
Use lukewarm water for most quick home methods. A warm-but-not-hot temperature helps yeast get moving without stressing it. A useful home reference point is about 100 to 110 degrees Fahrenheit for a warmer dough method. For cold-fermented dough, cooler water is fine because time does more of the work.
Yeast
Instant yeast is the simplest choice because it can be mixed directly into the dry ingredients. Active dry yeast can also work, but many bakers prefer to dissolve it first in water, especially if they want to check that it’s active. If your yeast has been sitting in the pantry for a long time, freshness matters more than the label.
Salt
Salt does more than flavor the dough. It tightens and strengthens gluten and helps keep fermentation from racing ahead too quickly. Leaving it out makes the dough bland and harder to manage.
Olive oil
Oil softens the crumb and helps the dough feel more supple during shaping. It also makes the finished crust a little more tender.
Step 1: Mix the Dough
You can mix pizza dough by hand or in a stand mixer. Both work. The best method is the one you can do consistently.
By hand
- Combine the flour, yeast, and salt in a large bowl.
- Add the water and olive oil.
- Stir until a shaggy dough forms and most of the dry flour is hydrated.
At this stage, don’t chase perfection. A few dry bits are fine. The goal is to bring everything together without overworking it too soon.
With a stand mixer
- Add the water, oil, yeast, salt, and any sugar to the bowl.
- Add the flour.
- Mix on low speed until the dough comes together.
A mixer saves effort and can develop gluten efficiently, but it can also make bakers overmix if they’re not paying attention. Stop when the dough starts to pull into a cohesive mass and the bowl is mostly clean.
Why the first mix matters
The first mix is about hydration. Flour needs time to absorb water evenly. If you add too much extra flour right away because the dough looks sticky, you can accidentally create a dry, tough crust later. A sticky dough often improves after a short rest.
Step 2: Knead Until the Dough Develops Strength
Kneading aligns proteins in the flour so the dough can trap gas and stretch without tearing.
Hand kneading
Turn the dough onto a lightly floured counter and knead with the heel of your hand, folding and pressing it over itself. If the dough sticks badly, use a very small amount of flour; too much will stiffen it.
For most home doughs, knead by hand for about 8 to 10 minutes. If the dough still feels rough after that, let it rest for 5 minutes, then knead again for another 1 to 2 minutes. That short rest often helps the flour finish absorbing water and makes the dough easier to smooth out.
A useful visual cue: the dough should move from rough and uneven to smoother and more elastic. It does not need to feel like a polished ball immediately.
Mixer kneading
If using a stand mixer, knead on low to medium-low speed and watch the dough rather than the clock alone. For most home recipes, 5 to 7 minutes is usually enough in a stand mixer. The bowl should start to look cleaner, and the dough should become smoother and more cohesive.
If the dough still looks shaggy after that, let it rest for 5 minutes, then mix briefly again. Sometimes the dough just needs time, not more force.
What “ready” feels like
A properly kneaded dough should feel:
– Smooth
– Elastic
– Slightly tacky, not gluey
– Able to stretch without tearing immediately
King Arthur Baking’s pizza dough guidance calls for kneading until the dough is smooth and elastic, which is exactly the texture target home bakers should keep in mind.
The windowpane test
Take a small piece of dough and gently stretch it between your fingers. If it stretches thin enough to let light through without tearing right away, gluten development is on track. If it tears quickly, keep kneading and resting a little longer.
A useful caution
Over-kneading is less common by hand than under-kneading, but it can happen in a mixer if the dough gets hot and tight. If the dough feels warm and resistant, let it rest for a few minutes before continuing.
Step 3: Let the Dough Rise
This is where flavor and structure begin to develop.
Place the dough in a lightly oiled bowl, cover it, and let it rise until it looks puffy and expanded. The exact time depends on yeast strength, room temperature, flour choice, and hydration, so watch the dough more than the clock.
What to look for
- The dough should roughly double in size, though not every batch doubles exactly.
- It should look softer and airier.
- If you press a floured finger into it, the indentation should spring back slowly, not instantly.
Room temperature versus cold fermentation
Room-temperature rising is the fastest route. It works well when you want pizza the same day.
Cold fermentation in the refrigerator slows yeast activity and gives the dough more time to develop flavor. It also tends to make shaping easier because the dough is less sticky and more relaxed. If you have the time, this is often the better choice.
Timing logic
For same-day dough, expect the first rise at room temperature to take about 1 to 2 hours in a typical warm kitchen. After shaping, let the dough rest for about 15 to 30 minutes before stretching, depending on how elastic it feels.
For overnight dough, let it start at room temperature for about 30 to 60 minutes, then refrigerate it for 8 to 24 hours. Before shaping, let the cold dough sit at room temperature for about 30 to 60 minutes so it becomes easier to stretch.
A dough that rises too fast can taste flat and behave loosely. A dough that rises too slowly may seem stubborn and dense. If your kitchen is cool, expect the process to take longer. If it’s warm, the dough may move quickly. The dough’s appearance and feel matter more than a rigid timer.
If you want to understand the mechanics of quicker rising without sacrificing texture, the article on how to make dough rise faster without ruining the texture gives a useful companion perspective.
Step 4: Divide, Rest, and Shape the Dough
Once the dough has risen, gently deflate it. Don’t punch it hard. You want to preserve some gas while redistributing the yeast and temperature.
Divide
For individual pizzas, cut the dough into equal portions. A kitchen scale helps here if you want consistent crust thickness.
Rest
Shape each portion into a tight ball and let it rest, covered, for a short while before stretching. This rest matters more than many beginners realize. If the dough keeps snapping back, it usually needs more time to relax.
Shape
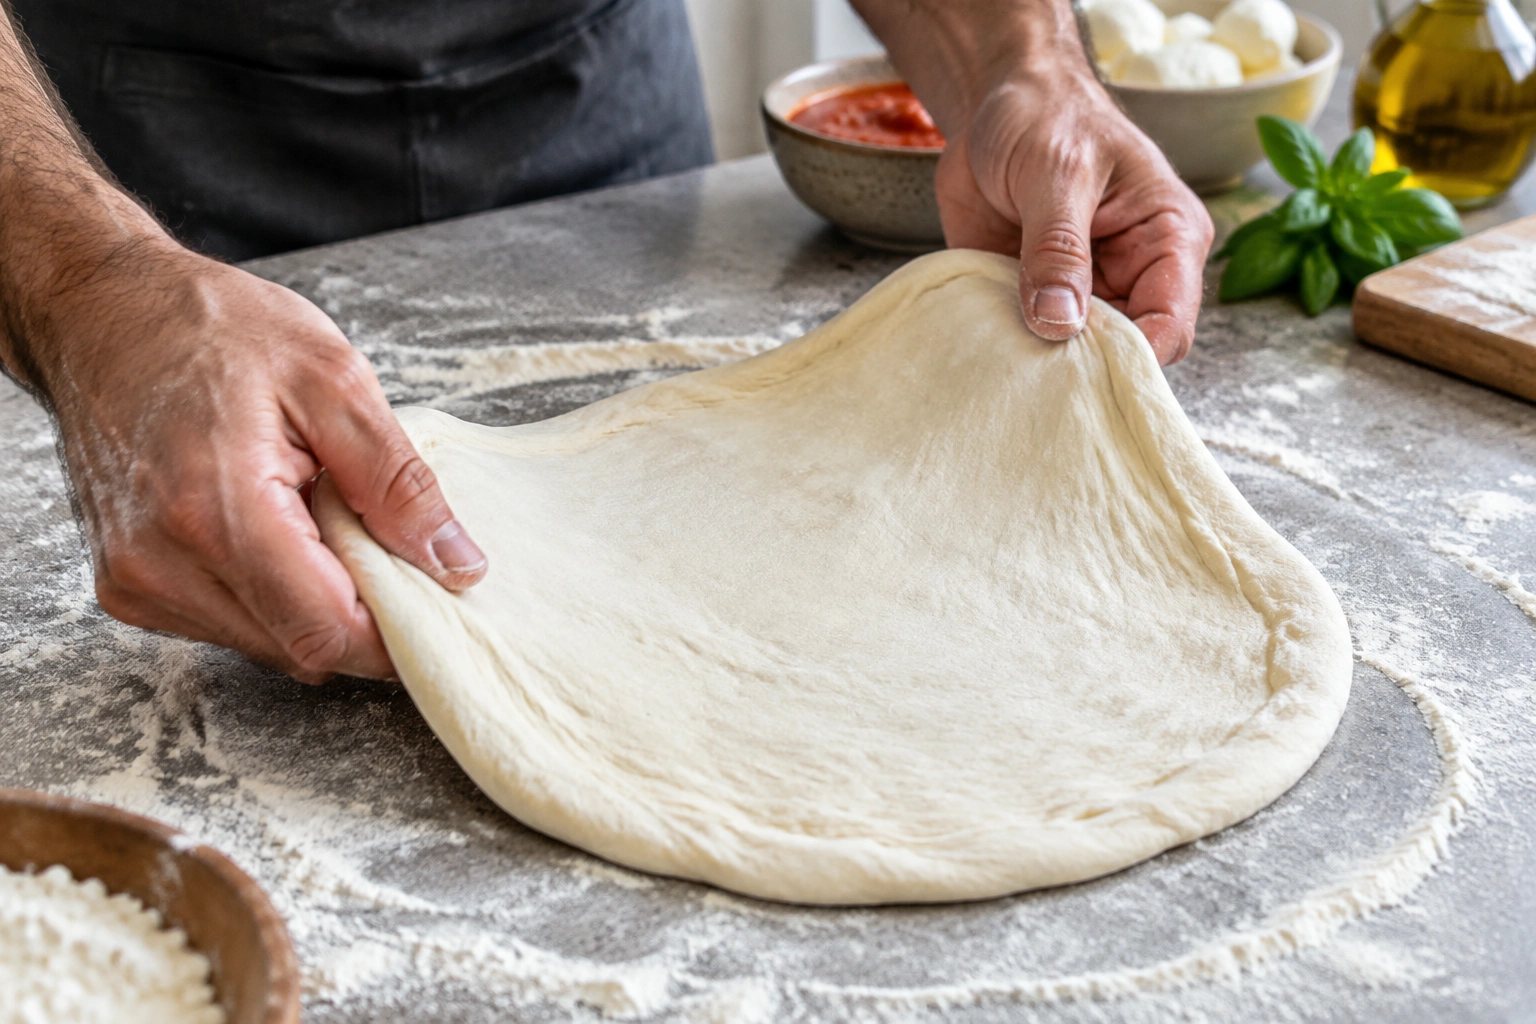
Use your fingertips to press the dough outward from the center, leaving a slightly thicker rim if you want a cornicione-style edge. Then stretch the dough over your knuckles or on the counter, letting gravity help.
Thin versus thicker crust
- For a thin crust, stretch further and keep the dough more evenly flattened.
- For a medium crust, stop a little earlier and keep some thickness in the center.
- For a rustic look, let the edges stay irregular and don’t overwork the round.
If you prefer rolling over stretching, our guide on how to roll dough evenly for better cookies, pie crust, and pizza can help you avoid uneven thickness and torn spots.
How to Tell When Pizza Dough Is Ready
This is the moment that separates a confident baker from a guessing baker.
Your dough is ready when:
– It has visibly expanded
– It feels airy but still strong
– It stretches without immediate tearing
– The surface looks smooth, not tight and dry
– It springs back slowly when pressed
A properly fermented dough should feel alive in your hands. If it shrinks aggressively when you stretch it, it likely needs more rest. If it feels lifeless and dense, it may be underproofed or the yeast may not have been active enough.
Common Mistakes and How to Fix Them
Sticky dough
Cause: Too much water, humid conditions, or not enough time for the flour to absorb moisture.
Fix: Let it rest 10 to 15 minutes before adding more flour. Often the dough firms up on its own.
Dry, stiff dough
Cause: Too much flour during mixing or kneading.
Fix: Add water a teaspoon or tablespoon at a time and knead gently until the dough softens.
Dense crust
Cause: Underproofing, underkneading, or both.
Fix: Give the dough more fermentation time and make sure it passes the stretch and elasticity checks.
Dough tears when shaping
Cause: Gluten is tight or the dough has not rested long enough.
Fix: Cover it and let it relax for another 10 to 20 minutes, then try again.
Poor rise
Cause: Weak or expired yeast, cold kitchen, or too much salt added directly to yeast.
Fix: Check yeast freshness and give the dough a warmer, draft-free place to rise.
Troubleshooting by Dough Problem
If humidity is high
Expect the dough to feel tackier. Resist the urge to bury it in flour. Humid conditions often call for patience, not panic.
If your flour absorbs water differently
Not all flour behaves the same. Some brands drink more water than others. If the dough seems tight and rough after mixing, add a little more water during kneading rather than forcing it.
If the yeast seems inactive
If the dough barely moves after a reasonable rise period, the yeast may be the issue. In future batches, use fresher yeast and consider a small test batch if you’re unsure.
If you overflour the bench
Too much bench flour can make the dough slide around and dry out the surface. Dust lightly, then brush off excess before shaping.
If the dough is underproofed
Underproofed dough tends to fight back when stretched and bakes into a tighter crumb. Give it more time before shaping. A dough that looks merely “a little puffy” is often not ready yet.
Make-Ahead, Refrigerating, and Freezing Pizza Dough
Pizza dough is one of the best make-ahead doughs you can keep in your home kitchen.
Refrigerating overnight
After mixing and a short room-temperature start, cover the dough and refrigerate it. The next day, let it warm slightly before shaping. This slower schedule usually improves flavor and makes the dough easier to handle.
If you want to keep it in the refrigerator for a few days, store it well covered and use it within about 2 to 3 days for best handling and flavor. After that, the dough may still be usable, but its texture and rise can become less predictable.
Freezing
Portion the dough first, wrap each piece well, and freeze it. Thaw in the refrigerator overnight, or until fully thawed and soft enough to handle. Then let it sit at room temperature for about 30 to 60 minutes before shaping so it relaxes and stretches more easily.
Freezing works best when the dough is already well mixed and portioned. If you know you won’t use it within a few days, freezing is the better storage option.
Storage caution
Keep raw dough covered and refrigerated safely. If it has been sitting out too long and shows signs of overfermentation or off smells, don’t try to rescue it.
Practical Examples: Three Ways to Use the Same Dough
Beginner same-day dough
Use all-purpose flour, instant yeast, and a room-temperature rise. This is the most straightforward version for a weeknight pizza.
Overnight dough
Use the same base formula, but refrigerate after the first rise. This gives you a more flexible schedule and often better flavor.
Stand mixer version
Mix the dough in a mixer, knead until smooth and elastic, then transfer it to a lightly oiled bowl. This is a smart choice when you want less physical effort and more consistency.
Final Thoughts
Pizza dough gets easier when you stop treating it like a mystery and start reading it like a baker. Flour choice changes the bite. Hydration changes the feel. Fermentation changes the flavor. Once you learn those levers, you can make the dough work for your schedule and your style.
If you keep one thing in mind, make it this: don’t judge pizza dough by the clock alone. Judge it by how it looks, feels, and stretches. That’s the real craft.
FAQ
Can I make pizza dough without a stand mixer?
Yes. Hand mixing and hand kneading both work well. Many excellent home doughs are made entirely by hand.
Should I use bread flour or all-purpose flour?
Bread flour gives more chew and strength. All-purpose flour is softer and easier for beginners. Either can work well.
Do I need to proof the yeast first?
Not always. Instant yeast can usually go straight into the dry ingredients. Active dry yeast is often dissolved first, depending on the method you’re using.
How long should pizza dough rise?
Long enough to look puffy and expanded, not just by the clock. Room temperature is faster; the refrigerator is slower but often better for flavor.
Why does my dough keep shrinking when I stretch it?
The gluten is tight and needs more rest. Let the dough relax, covered, before trying again.
Can I freeze pizza dough?
Yes. Portion it first, wrap it well, thaw it in the refrigerator, and let it rest at room temperature before shaping.
What should ready pizza dough feel like?
Smooth, elastic, slightly tacky, and easy to stretch without tearing immediately.