
How to Refresh Stale Bread So It Tastes Warm, Soft, and Crusty Again

Stale bread is one of those kitchen frustrations that feels worse than it is. The loaf may be dry and a little tough, but that does not always mean it’s ruined. In many cases, stale bread can be improved with the right mix of moisture and heat so the crumb softens again and the crust regains some life.
The key is understanding what kind of bread you’re working with and what result you want. A baguette needs a different touch than soft sandwich bread. A loaf that’s merely a day or two old is much easier to revive than one that has gone bone-dry on the counter.
If you want the quickest answer, use this guide:
- Best overall texture: oven
- Fastest fix for 1 to 2 slices: microwave
- Best for crusty loaves and baguettes: oven with light moisture
- Best for soft rolls: oven, usually wrapped loosely in foil
- Best for a very quick toasted result: skillet or air fryer
Quick Decision Guide
Use this before you start:
- Crusty loaf or baguette: use the oven if you have 10 to 20 minutes.
- Soft sandwich bread or a single slice: use the microwave if you need it in under 1 minute.
- Dinner rolls: use the oven with foil if you want them soft and warm.
- Multiple slices of sandwich bread: use the oven if you want better texture; use the microwave only if speed matters most.
- Very dry, rock-hard, or crumbly bread: try one gentle refresh, but if it barely improves, repurpose it instead.
A simple rule on moisture: lightly dampen crusty bread before oven reheating, use a damp paper towel for the microwave, and usually skip added water for air fryer or skillet methods unless the bread is very dry and you’re using the oven-style approach.
In this guide, I’ll walk you through how to refresh stale bread using the oven, microwave, steam, air fryer, or skillet—plus how to choose the best method without turning good bread soggy or leathery.
What Stale Bread Really Means
Bread usually goes stale for two main reasons: it loses moisture, and its starches change structure as they cool and sit. That second part is called starch retrogradation. In simple terms, the bread’s crumb becomes firmer and less pleasant even if it hasn’t gone bad.
That’s why stale bread is not always the same as spoiled bread. A loaf can be stale and still perfectly usable. But if it smells off, shows mold, or has been stored badly, it belongs in the bin—not the oven.
A useful rule of thumb:
– Slightly stale bread is often refreshable.
– Very dry bread may improve, but not return to its original texture.
– Bread with mold or a sour, unpleasant smell should be discarded.
If you want to understand why homemade loaves stale faster than many store-bought breads, this guide on why homemade bread goes stale fast is a helpful companion piece.
What You’ll Need
You don’t need fancy equipment to bring bread back to life. For most methods, a few basic tools are enough:
- Oven or toaster oven
- Baking sheet or oven-safe tray
- Clean kitchen towel or paper towel
- Water mister, pastry brush, or clean hands for dampening
- Foil, if you’re refreshing a whole loaf
- Optional: microwave-safe glass or bowl
- Optional: steamer basket or pot with a lid
- Optional: air fryer or skillet
The most reliable setup for a whole loaf is simple: a little water, a hot oven, and a short finish uncovered to restore the crust.
Choose the Best Method for Your Bread
Before you heat anything, decide what you want to save: softness, crust, or speed. That choice matters more than the exact tool.
| Bread type | Best method | Texture goal | Speed | Main risk |
|---|---|---|---|---|
| Crusty loaf | Oven with light moisture | Soft crumb, crisp crust | Medium | Over-drying if left too long |
| Baguette | Hot oven or steam method | Crackly crust, revived center | Medium | Tough crust if overbaked |
| Dinner rolls | Oven wrapped loosely in foil | Soft, warm interior | Medium | Sogginess if over-wet |
| Sandwich bread | Microwave or brief oven heat | Soft slices | Fast | Rubberiness in microwave |
| Very dry bread | Oven with steam, then finish uncovered | Best possible recovery | Medium | Still may stay firm inside |
If your bread is only slightly stale and you want the best texture, the oven usually wins. If you need lunch in two minutes, the microwave can help—but it trades texture for speed.
Oven vs. microwave, at a glance: the oven takes longer but gives you a better chance at restoring both softness and crust; the microwave is much faster but usually leaves bread softer without much crust and can make it rubbery if overheated. For one or two slices, the microwave is fine in a pinch. For a loaf, rolls, or anything crusty, the oven is usually the better choice.
Method 1: Refresh Stale Bread in the Oven
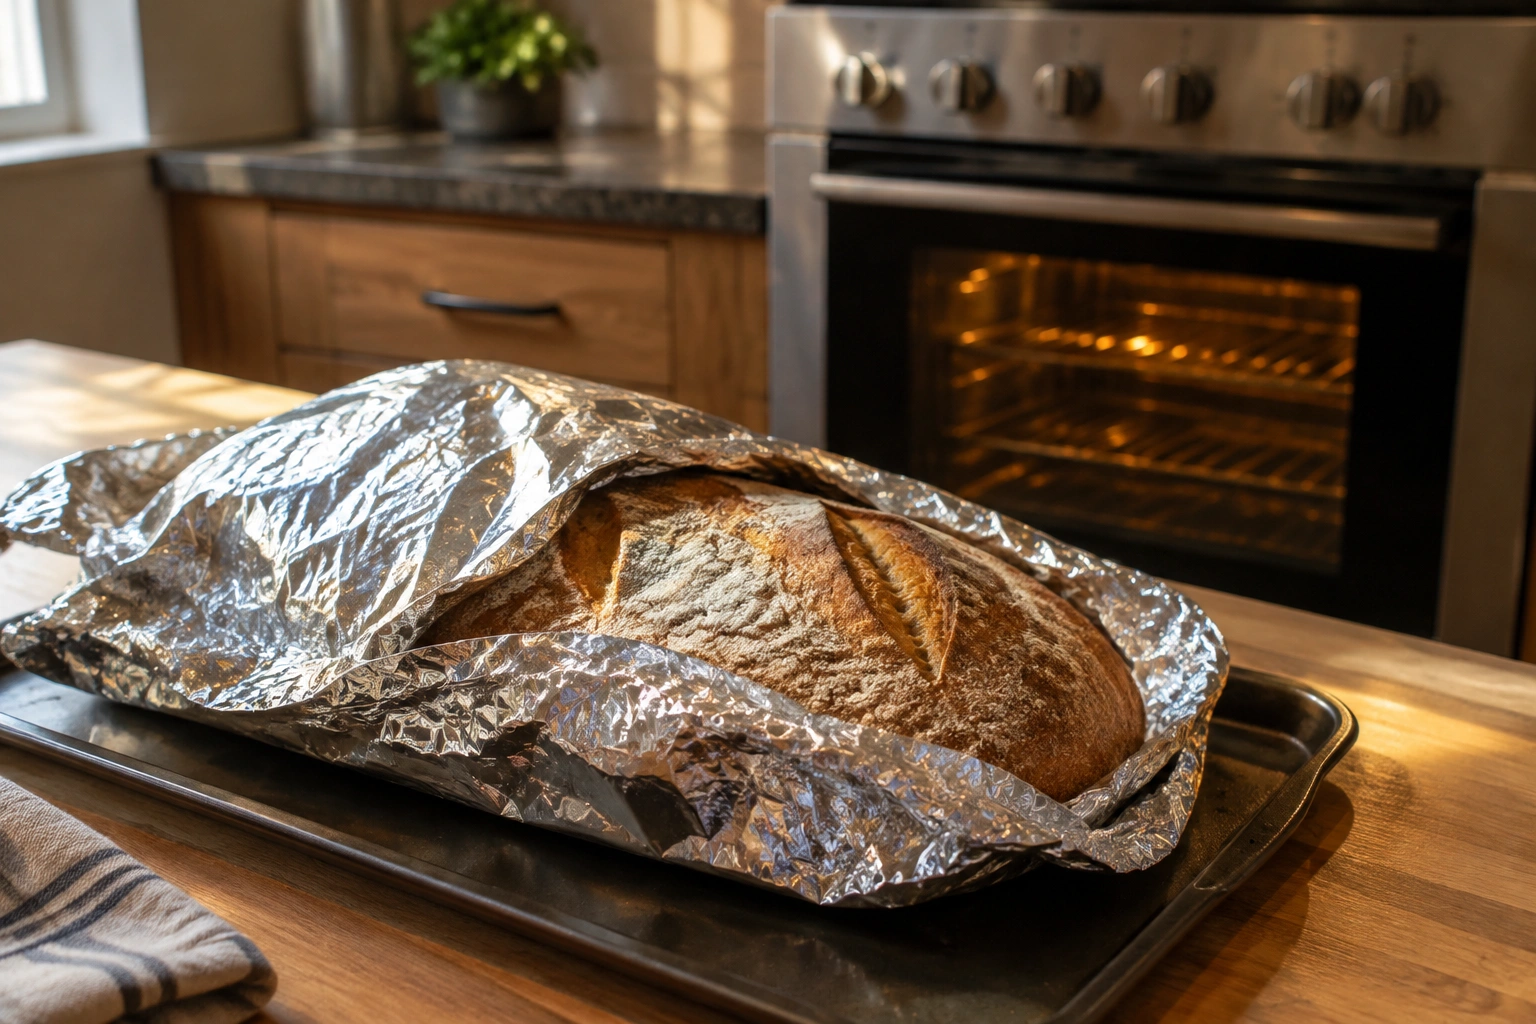
This is the most dependable all-around method for a whole loaf or crusty bread. It works because the added moisture softens the crumb during heating, while the final uncovered bake helps the crust dry back out and crisp up.
A practical starting point is to lightly dampen the loaf, wrap it in foil, and reheat it at 300°F for about 15 minutes, then unwrap it and bake for another 5 minutes to restore the crust. That timing works well for many loaves, but smaller or larger pieces need adjustments.
Step-by-step
-
Preheat the oven to 300°F.
This is hot enough to warm the bread through without blasting it dry too quickly. -
Lightly dampen the bread.
For a whole loaf, run it quickly under the faucet or mist it all over. You want the surface damp, not soaked. If you can squeeze water from the bread, that’s too much. -
Wrap the loaf in foil.
Foil traps steam around the bread so the inside softens as it heats. -
Bake for the right amount of time.
Use these rough timing ranges: - Small rolls: about 8 to 10 minutes wrapped
- Sliced bread or a small loaf: about 10 to 12 minutes wrapped
- Standard loaf: about 15 minutes wrapped
-
Very large loaf: about 18 to 22 minutes wrapped
-
Unwrap and bake 3 to 5 minutes more if you want a crustier finish.
This final step helps the crust dry out again, which is especially useful for baguettes and artisan loaves. -
Serve soon after reheating.
Refreshed bread is at its best shortly after warming. It will start staling again once it cools.
When this method shines
Use this for:
– crusty boules
– baguettes
– rustic sandwich loaves
– rolls that have gone firm but not rock-hard
When to be careful
If the bread is already very dry, don’t drown it in water. Excess moisture can make the crust leathery or the bottom soggy. Light dampening is enough.
For a whole loaf, this method often gives the best balance of a soft interior and a crisp shell. A little water and a few minutes in the oven can often bring stale bread back with a crisp exterior and softer interior, which is exactly the texture most people want.
Moisture guidance for the oven
- Use moisture for crusty loaves, baguettes, and rolls that have gone firm.
- Mist or lightly dampen the outside before baking.
- Skip heavy soaking; the bread should feel damp, not wet.
- Use foil when you want the interior to soften before the crust firms back up.
- Skip added water altogether only if the bread is just barely stale and you want a very light warm-up rather than a true refresh.
Method 2: Refresh Bread in the Microwave for a Fast Fix
The microwave is the speed option, not the texture champion. It can soften bread quickly, but if you overdo it, the bread can turn rubbery or oddly chewy.
This method makes the most sense for:
– a slice or two of sandwich bread
– a roll you need right now
– a situation where you care more about softness than crust
It is usually not the best choice for:
– a full loaf
– several slices at once
– dense artisan bread
– bread where crust matters
How to do it
-
Wrap the bread in a slightly damp paper towel.
The towel should be moist, not dripping. -
Microwave in short bursts.
Try 10 to 15 seconds for a slice, then check it. For two slices, start with 15 to 20 seconds. For a roll or thicker piece, you may need a little longer, but keep the intervals short. -
Stop as soon as the bread feels pliable.
Microwaved bread firms up quickly if left too long.
Why this method is limited
Microwaves heat water molecules very fast. That helps soften the bread, but the texture can go from tender to gummy in a blink. If you’re serving bread with butter or jam and don’t care about crust, this can be perfectly acceptable. If you want a crisp exterior, the microwave is the wrong tool.
For multiple slices, the oven usually gives a better result because it heats more evenly and avoids the rubbery texture that can happen in the microwave.
Moisture guidance for the microwave
- Use a damp paper towel for most slices and rolls.
- Do not soak the towel; excess water can make the bread soggy.
- Skip added water for very thin slices if you only need a brief warm-up, but expect a drier result.
- Do not use the microwave as the best option for crusty bread if you want to preserve texture.
Method 3: Use Steam, a Damp Towel, or a Steamer
Steam is useful when you want to soften bread gently without flooding it with water. It’s especially helpful for crusty bread that has lost its spring.
Good options
- Steamer basket: Place the bread above simmering water for a very short time.
- Damp towel method: Wrap the bread in a lightly damp towel, then warm it briefly in the oven.
- Steam-assisted oven refresh: Add moisture first, then use dry heat to finish.
Best use cases
Steam works well for:
– baguettes
– rustic loaves
– dinner rolls
– bread that is stale but not extremely dry
Trade-off
Steam softens the crumb nicely, but too much steam can make the crust limp. That’s why many bakers prefer steam first, then a dry finish. If you skip the dry finish, the bread may feel soft but lose that pleasant crust bite.
Moisture guidance for steam
- Use steam when the bread is crusty and you want to soften it without soaking it.
- Mist lightly if you’re using the oven as part of the process.
- Skip extra water if the bread already feels only slightly stale and you just want a brief warm-through.
- Avoid prolonged steaming unless you’re planning to finish with dry heat afterward.
If you’re trying to improve crust quality in general, this article on bread crust too hard explains why steam and bake time matter so much in the first place.
Method 4: Refresh Bread in an Air Fryer or Skillet
These are backup methods, but they can be useful when you don’t want to heat a full oven.
Air fryer
An air fryer can revive small pieces of bread quickly, especially rolls or thick slices. Use a low-to-moderate setting and keep the time short. The airflow is strong, which means it can dry bread out fast.
How to use it:
– Set the air fryer to 300°F to 350°F.
– Heat rolls or thick slices for about 2 to 4 minutes.
– Check early, especially if the bread is thin or already fairly dry.
– If the bread is very crusty, consider a light mist first; if it’s soft bread, skip added water and focus on a short warm-up.
Best for:
– rolls
– thick slices
– small artisan pieces
Main risk:
– the outside dries before the inside has a chance to soften
Skillet
A skillet works well for sliced bread when you want a toasted result rather than a soft, freshly baked texture. A covered skillet can trap a little steam and warm the bread through.
How to use it:
– Warm a skillet over medium-low heat.
– Add the bread and cover it for 30 seconds to 1 minute if you want a little softness.
– Uncover and toast for another 30 to 60 seconds per side if you want more color and crispness.
– For very dry bread, you can lightly mist the bread first, but use only a small amount of water.
Best for:
– sandwich slices
– flat breads
– small portions
Main trade-off:
– you’re moving closer to toast than true bread refreshment
If your goal is a warm slice with a little crispness, skillet reheating can be a practical middle ground. If you want the original loaf character back, the oven still does a better job.
Moisture guidance for air fryer and skillet
- Air fryer: usually skip added water; use only a very light mist if the bread is quite dry and you want a slightly softer center.
- Skillet: usually skip added water for toast-like results; use a light mist only if you want more softness and are covering the pan briefly.
- Do not add much moisture in either method, or you can end up with steaming on the outside and uneven texture inside.
How to Refresh Different Types of Bread
Different breads respond differently because their crusts and crumb structures are not the same.
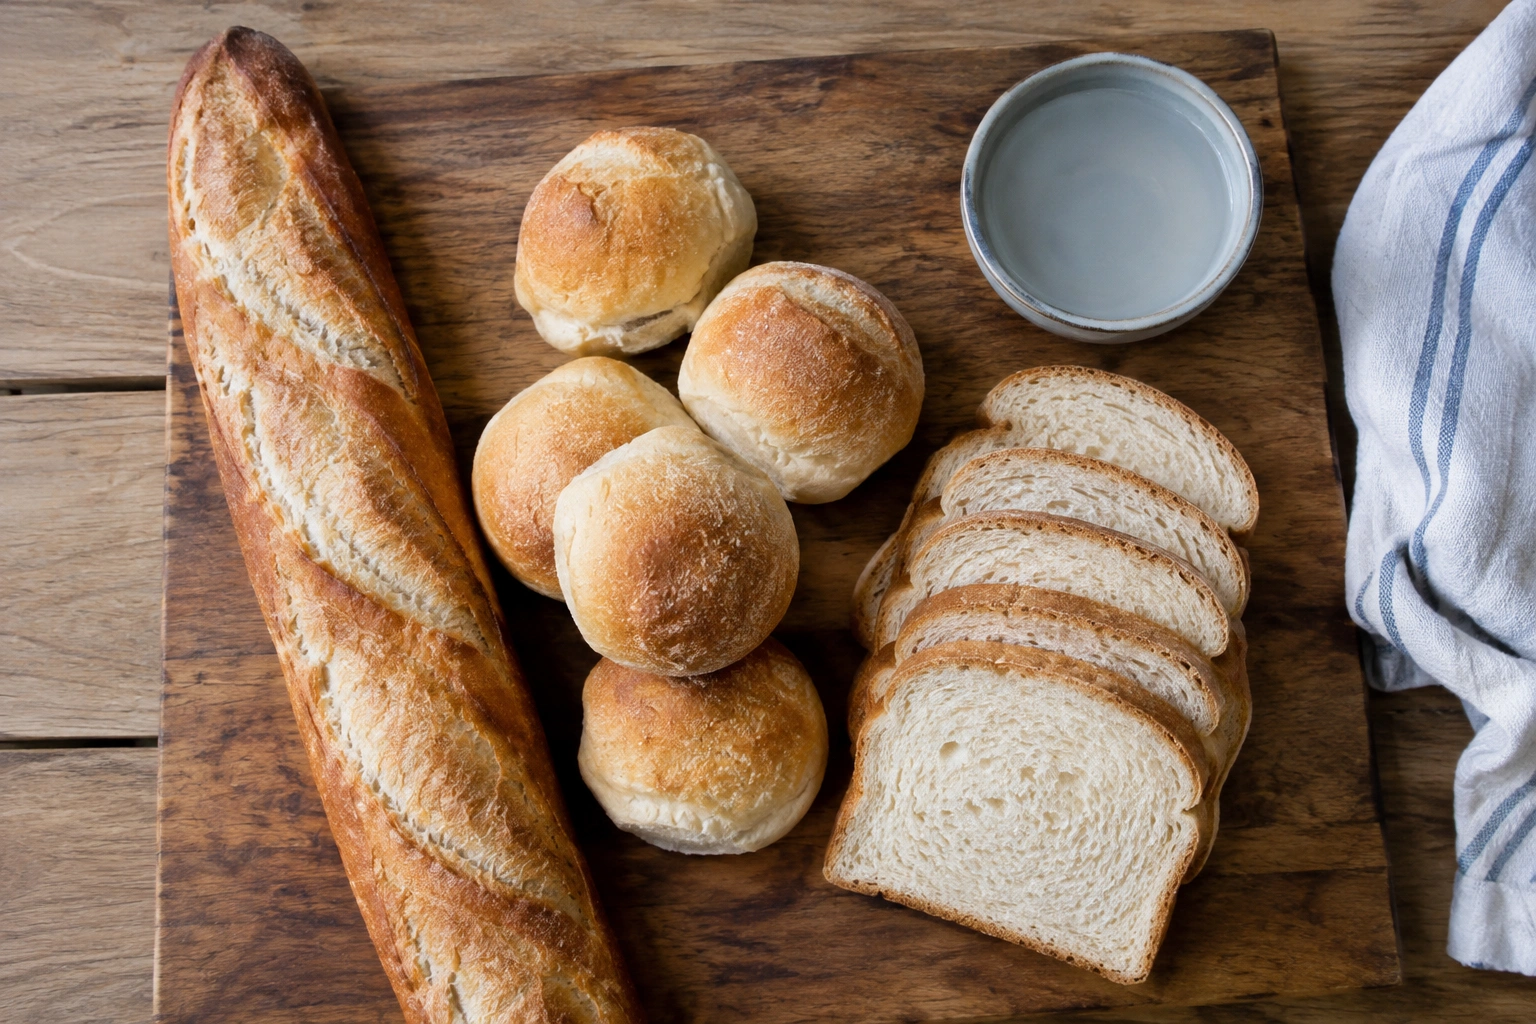
Baguettes
Baguettes usually benefit from moisture plus a hot oven. They’re built for a crisp crust, so don’t over-wet them. A light mist and a short bake often works better than soaking.
If the baguette is just a day or two old, it may need only a brief hot refresh. For a very stale baguette, a moderate oven with a moisture step is usually easier to control than trying to blast it with the highest heat possible.
Sandwich bread
Soft bread is easiest to overdo. If you microwave it, keep the timing short and use a damp paper towel. If you use the oven, wrap it lightly so it doesn’t dry out before it softens.
For lunch sandwiches, the goal is usually softness, not crust. That means the microwave can be acceptable if speed matters more than texture. For several slices, the oven is usually the better choice.
Dinner rolls
Rolls are often best refreshed in foil in the oven. The foil protects their soft exterior and keeps them from drying out before the center warms through.
If the rolls are very dry, mist them lightly before wrapping. Don’t soak them; rolls absorb moisture quickly. Small rolls usually need only 8 to 10 minutes in the oven, while larger rolls may need a little longer.
Artisan loaves
A rustic loaf with a thick crust usually benefits from the full oven method: dampen, foil, heat, then uncover briefly. This gives you the best chance of reviving both the open crumb and the crust.
Common Mistakes That Make Bread Worse
A few small errors can undo the whole effort.
Over-wetting the bread
Too much water makes the crust soggy and can leave the bottom gummy. Damp is enough. Soaked is too much.
Heating too long
Bread that spends too long in the oven can dry out again fast, especially if it started out only slightly stale. If you’re unsure, check early.
Microwaving without restraint
The microwave is not forgiving. A few extra seconds can push soft bread into rubbery territory.
Treating every loaf the same
A baguette, a sandwich loaf, and a brioche roll do not want the same treatment. Crusty bread needs a different finish than soft bread.
Troubleshooting: If the Bread Is Still Hard, Soggy, or Dry
If it’s still hard in the center
The bread probably needed more time under moisture, not more dry heat. Wrap it again and give it a few more minutes, especially if it’s a thick loaf.
If it’s soggy
You used too much water or left it wrapped too long. Unwrap it and return it to the oven briefly so excess moisture can escape.
If it’s dry again
It likely sat too long after reheating, or it was already too stale to recover fully. Next time, shorten the bake and serve it right away.
If the crust is soft but the bread tastes flat
That usually means the bread was refreshed successfully but is past its peak flavor. Texture can improve more easily than flavor.
How to Keep Bread Fresh Longer After Refreshing It
Refreshing bread buys you time, but it doesn’t stop staling forever. Once it’s warm and soft again, serve it promptly.
To slow staling in the first place:
– store bread in a breathable bag or wrapped cloth for short-term keeping
– freeze extra bread if you won’t use it soon
– avoid leaving fresh bread exposed on the counter for long periods
If you want a deeper look at storage choices, the article on how to keep homemade bread soft longer covers the storage side in more detail.
When to Stop Trying and Repurpose the Bread Instead
There’s a point where refreshing stops being useful. If the bread is extremely dry, crumbly, or old enough that the structure has collapsed, it may never feel pleasant again. That doesn’t mean it has to be wasted, but it may be better suited to toasting or another fallback use.
A simple cutoff: if a light moisture-and-heat treatment barely changes the texture, don’t keep pushing it. At that stage, the bread is better treated as a base for something else rather than a loaf you’re trying to restore.
A Practical Final Rule
If you remember nothing else, remember this: slightly stale bread wants a little moisture and gentle heat; very dry bread usually wants a fallback plan.
That one idea will save you from most bad outcomes. Use the oven for the best all-around result, the microwave for speed, and steam when you want to soften without overbaking. Match the method to the bread, and you’ll get much better results than treating every stale loaf the same.
FAQ
Do I need to add water before reheating bread?
Not always. For the oven, a light mist or quick dampening usually helps crusty bread and loaves. For the microwave, a damp paper towel is helpful. For the air fryer and skillet, skip water in most cases unless the bread is very dry and you want a softer result. For steam-based methods, moisture is the point.
Is the oven or microwave better for stale bread?
The oven is better for texture and crust. The microwave is better for speed. If you want bread that tastes more like freshly baked bread, use the oven. If you need a slice softened immediately, use the microwave.
How long should I reheat rolls or sliced bread?
Small rolls often need about 8 to 10 minutes in the oven. Sliced bread usually needs less, around 10 to 12 minutes if you’re using the oven with foil, or about 10 to 15 seconds per slice in the microwave. Check early so you don’t overdo it.
When is bread too far gone to refresh?
If it is rock-hard, extremely crumbly, or barely changes after one gentle moisture-and-heat treatment, it’s usually better to repurpose it instead of trying to restore it further. Moldy or spoiled bread should always be discarded.